Time to start The kearsarge

Docbritofmf

Active Member
Joined
Jun 10, 2021
Messages
266
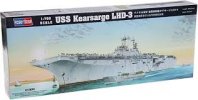
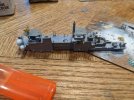
Hey everyone, I finally pulled the trigger and purchased my Hobby Boss 1/700 USS Kearsarge LHD3 kit, unfortunately I bought it from ebay unaware it's coming from china and will have to wait ... Which is truely annoying I tried to save a few bucks and bought a few weeks or maybe not we will see.

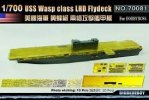
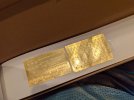
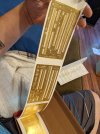
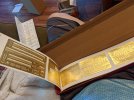
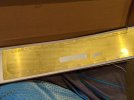
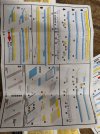
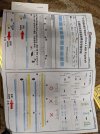
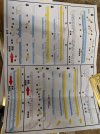
Along with the hobby boss kit I bought an upgrade kit for the flight deck and hull surfaces this kit was pricey but I found it cheaper on ebay and luckily it'll be here by the end of the week. I think this kit along with the photo etch already included in the hobby boss kit should cover most of what I want though I'm still not sure if I need the aircraft photo etch and the deck vehicles including the LCAC and LCD I guess I'll see what's in the kits when they come though I was hoping to have a complete kit of everything at the same time..

Question would you recommend any other upgrade kits if so which ones?

And since in working with photo etch for the first time what tools and things should I get. To work with it?
 

Attachments

  • images.jpeg
    images.jpeg
    8.4 KB · Views: 6
  • download.jpeg
    download.jpeg
    11.2 KB · Views: 6
I remove the PE parts from the fret using a 1 mm chisel atop a rigid piece of plastic .
 
Hey everyone, wanted to post an update. Today after some back and forth with Ebay I decided that I was gonna give up on the kit I bought coming some time this year from china and go out to my local hobby shop an buy the Kearsarge kit they had in stock.

I now have the kit in hand and am begging work on the super structure, the kit does come with some.photo etch parts included which is a nice change of pace but these parts are mostly railing and things of that nature so really only a small taste of upgrade luckily the photo etch flight deck upgrade kit I purchased is scheduled to arrive tomorrow but I'm still a bit away from that part of the build.

Tomorrow I'll post some pictures of the unboxing and first stages of the build .

Currently looking for the aircraft upgrades and flight deck equipment upgrades that aren't included in either of the two kits I have purchased.
 
Hey guys a few pictures of the hull prep and super structure build as promised
 

Attachments

  • PXL_20210629_160130538.jpg
    PXL_20210629_160130538.jpg
    2 MB · Views: 6
  • PXL_20210629_160059578.jpg
    PXL_20210629_160059578.jpg
    1.8 MB · Views: 6
  • PXL_20210629_160051157.jpg
    PXL_20210629_160051157.jpg
    1.5 MB · Views: 6
So I got a problem... I have no clue how to read the instructions of the Photo etch kit...

I am at the point of the build were I'm prepping the hull to add the flight deck and misc side parts such as catwalks and port hulls ect.. the kit as I said comes with some photo etch and I bought an additional photo etch upgrade kit by bigblueboy the issue is while the main kits instructions includes detailed instruction for the few photo etch parts included the bigblue kits instructions might as well be written in sand script cause they are extremely hard to understand and cause the issue for me of what to leave off from the base kit and add from the after market kit. Idk where to look for clarification and I don't want to keep moving forward with the base build only to have to tare pieces off later.

Any help is greatly appreciated I added photos of the kit and instructions
 

Attachments

  • PXL_20210629_155738099.jpg
    PXL_20210629_155738099.jpg
    1.8 MB · Views: 8
  • PXL_20210629_155753484.jpg
    PXL_20210629_155753484.jpg
    1.6 MB · Views: 9
  • PXL_20210629_155707838.jpg
    PXL_20210629_155707838.jpg
    1.5 MB · Views: 9
  • PXL_20210629_155658253.jpg
    PXL_20210629_155658253.jpg
    1.8 MB · Views: 8
  • PXL_20210629_155656410.jpg
    PXL_20210629_155656410.jpg
    1.6 MB · Views: 7
  • PXL_20210629_155650405.jpg
    PXL_20210629_155650405.jpg
    1.6 MB · Views: 8
  • PXL_20210629_230316520.jpg
    PXL_20210629_230316520.jpg
    1.8 MB · Views: 9
  • PXL_20210629_230309726.jpg
    PXL_20210629_230309726.jpg
    1.8 MB · Views: 9
  • PXL_20210629_230300038.jpg
    PXL_20210629_230300038.jpg
    1.9 MB · Views: 8
  • PXL_20210629_230251972.jpg
    PXL_20210629_230251972.jpg
    1.8 MB · Views: 8
It's showing the kit parts in blue that are to be removed or otherwise not installed and the PE parts that are to replace them .
:D 
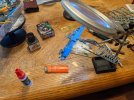
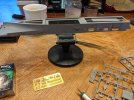
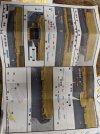
Why I made the comment about jumping into full-on PE with a 1/700 ship , LOL - a little baptism by fire .

You'll get the hang of it once you get rolling . or die trying .
Start with that first little sponson .
You're gonna have to just study the pix and see how the PE needs to be bent .
 
I looking at what parts of PE that were original kit included that are not to be put on cause the after market kit includes those as well
 
Starting on page 1where it shows the hull diagram there's blue and gold marked cat walks. The blue ones are removed? Or in other words of included in the kit not used? Cause above it there's a little color legend that says blue photo etch and gold metal pieces what's the difference lol
 
Sorry , I thought the kit parts were blue , I hadn't zoomed in - that's all PE .
This is one of those kits you'll need to study the photos of the completed PE and the kit and pix of the real ship .
Like I said , baptism by fire .
I've had enough just looking at your pix . Gotta go smoke one now ...
 
Lol last one is the PE in this picture folded around the resin elevator from the kit or just folded into a PE elevator platform hollow

16250121808651829557413602937895.jpg
 
That's all brass .
It's from that fret that's down in the fold in your top right photo
 
Fun fact the PE in this kit folds extremely easily making the folds precise with out trying ... Not so fun fact fold slightly more then once and the whole piece falls apart at the folds... Making assembly the more challenging then the damn instructions
 
You can anneal it and make it less brittle before bending -- much more forgiving .
Most succinct video I could find :


Latest posts

Back
Top