Tamiya 1:35 Cromwell

Real nice your doing a great job with three kits in one you doing a better job than I would do I'm all fingers and thumbs..

Keep up the good work...

Oh no way jury service I've got that the end of this month the only thing that sucks about it Ove got to go back to work on the Saturday..bummer

Geegad
 
HI Matt,


looking very good, the turret looks top notch


keep it up


shane
 
Not got much done tonight.......it's been a looooong day. ::)

But i do have a couple of PE questions?

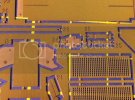
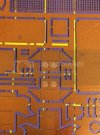
Firstly why are certain PE parts a sort of matt grey colour? Is there a special reason for this?
54a6fbb3.jpg
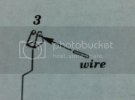
Secondly i noticed several steps on the PE instructions that mention 'wire'! What type and gauge wire would this be? I'm guessing it's either TCW or brass rod.
7789c9bc.jpg
Thirdly i have a crappy set of tweezers but i'm pretty sure their not up to the task of handling parts this small, what do you guys use and also how do you cut the parts from the sprues without either damaging them or them flying off into the great unknown. :p

TTFN Matt
 
hehe fun fun fun. i use a twesers to sold the small parts, put masking tape at the back of teh photo etch to stip it vanishing, and lastly use a sanding stick to clean any excess if possible.

The wire can be any thing once it holds the par, Ive no idea why some are difernt colors tough
 
Hi Matt!!!

1 - I believe the matt grey areas are there for texture. Gives some depth to the piece so it's not a complete shinny piece of metal.

2 - Usually the mis-directions will have a legand somewhere on there telling you the size of the wire to use. Personally, I use whatever fits!! ;D Lamp chord wire works well. It's stranded and the individual strands are really tiny most times. a lot of time the PE kit comes with a couple small lengths of brass rod ??? But then again, sometimes not :p

3 - Spud has it right....TAPE!. Cut the PE from the fret with a real sharp #11 on a hard surface, like glass or a piece of tile. I Use a clear protective shield that was for a bench grinder....take a piece of masking tape and fold over to make double sided. Lay the fret on and cut the piece out. You can bend the same way but sometimes it get sticky. Sand with a sanding stick, needle file or really fine sand paper.


Free-bee.....if a piece takes off into the wild-blue-yonder...Hard surfaces; Lay a flashlight on it's side on the floor and slowly spin it like you are a lighthouse. PE is reflective and you should pick up on the shine. Best with the lights off though.
Carpet and/or hardwood...Steel a old pair of nylons and wrap it tightly around the end of your vacuum wand. Turn on the Vac and go to town. The Nylon prevent the vac from swallowing the PE ;D

Good luck!! ;)
 
@TRM. I can just imagine my family hearing me swear in my hobby room.....coming in to see whats up just to find the lights out and me on the floor spinning a torch!!! They'd think it's finally time for the men in white coats to come get me. Hahaha

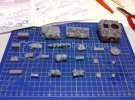
Quick update, finally finished picking out the small bits of rubber from the hessian tape......man that was giving me nightmares. :p

Spent the last two nights removing the resin parts from thier casting blocks and sanding them all down using wet & dry....certainly makes a mess but keeps the dust to zero. The parts are all washed and ready for use.

5f7a9cd1.jpg

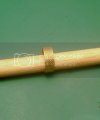
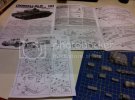
I also started to work my way slowly through both kit and PE instructions crossing out whats not needed and trying to work out just where all the PE is going.....it seems i have several pieces that need to be formed into tubes, i have no idea how to do that....maybe form them round a 1mm drill or something?!?!?!

a08ca8d9.jpg

Thanks for looking.

TTFN Matt
 
FUBAR ,

Ah .. Impressive .. most Impressive ! Don't let th volume overwhelm ya. Take it all step by step !

Tweezers .... check th Beauty supply House. Small pointy tips !!

Beware of th Carpet Monster .... He's always hungry for P.E. !!

Rolling P.E. :
1) Anneal th brass over a flame & let it cool. DO NOT dunk it in Cold Water. That'll make it rigid again & perhaps a lil brittle.

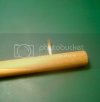
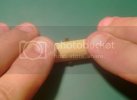
2) Take some thing - like a Dowel, that will be bigger that th size you want it in the end. Roll th dowel over th P.E. a few times , you'll wanna use a surface that it stiff, but not too stiff ( No Glass, Tie etc)( Hobby Mat) You should see th piece starting to roll/curl.

3) Move to a smaller size of Dowel ... working your way down to th size that you want. Eventually you'll see it start to curl into th shape that you want.

or You could take a look at this - http://thesmallshop.com/index.php?main_page=index&cPath=3 They have a couple of different ones. At th time I got mine I opted for th 1st. one that came with a forming Block ( Aluminium). Another great tool to have in th Arsenal .
DSC07302.jpg
DSC07303.jpg
Making sure you have even pressure start rolling with a Dowel bigger than you need
DSC07304.jpg
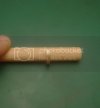
After a few times you should see it curl
DSC07307.jpg

DSC07308.jpg
DSC07309.jpg

I'm lookin forward to seein th Cromie get kickin' !!
 
Matt:
Great project, looks good all that many pieces, seeing the assemblage. Looking for more.

Regards

Richard
 
@panzerace007 Many thanks mate, that makes so much sense now i think about it, does annealing really make a difference when forming PE? I just foresee me setting my eyebrows alight!!! lmao ;D

Quick update, started assembling the rear plate and already i need to start fitting PE! :p
So far i've removed the detail from the model parts that the PE is replacing.....

00e66233.jpg

Question to you pro's......

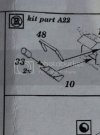
I've got to turn this part...
7ead9d6b.jpg

into this part 10....
a003fdf2.jpg

My question is should the grey lines along the folds, which are only on one side of the PE, be inside or outside the shape once it's formed? I'm guessing inside, you can also see the 'tube' shape (part 33) and as i read these instructions thats inside the box and i guess they are glued into those circular shapes on the PE?!?!?!?

Also i see that this PE set has a couple of nice stowage boxes which are meant for the sides of the turret, trouble is the AM turret has hessian tape there.......so i'm thinking i may remove the hessian tape from the resin turret, fit the stowage boxes and extend the hessian tape over the stowage boxes!!! ;D

What do you guys think, is it 'doable'? How hard is it to make your own hessian tape camo net?

TTFN Matt
 
bend in fubar, as for the net ild leave it because making yer own to look like whats on it could be a chore but it up to you :)
 
Hey Matt!!

I would say you were right on the bending with the circular sections on the inside so the rod is attached to them.

As for the boxes, that sounds like your call! ::) I think it would be kind of neat that the boxes and the netting were on the turret if doable! I would then say that your best bet for making the Camo stips might be Milput or even Aves?

Good luck!! ;)
 
FUBAR ,

It sounds like you are on th right track with th P.E.

Whew ! Tackling that Hessian Tape .... is not gonna be a walk in th park. Removing it from th turret is goin to be another chore .... Good Luck Brotha' !!

You will find that at certain times annealing is a great benefit. Sometimes th thicker th P.E. th better it is to work with after a lil Heat ! It makes it more pliable & kills th tension ! As it cools it gets it's tensile strength back.

You could use a lil' Tea Light candle, that'll do th trick ! You won't need to heat it for long. Just when you notice it changing color. Now ..... You can over heat it. If it turns red ... Not Good ;D

Save th Eyebrows !
demotivational-posters-eyebrows.jpg
 
@panzerace007 LMFAO.....no fair dude, i was having a drink when i read your post....one glance at that pic and i spat coffee all over my keyboard ;D

Another thought for the stowage boxes is to save them for another time, i found some pics of a Cromwell OP that i may try at a later date.
 
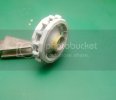
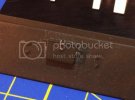
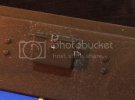
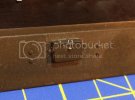
OK here is my first foray into the world of PE......no laughing. :p

c1a43b8d.jpg
5fdc6e1a.jpg
219805e3.jpg
0c8c198b.jpg

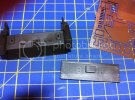
Just in case you cant tell what it is, thats the lock and rivited mountings for a box on the tanks ass. :p

Thats the sum total of 2 hours sat at my bench, i've stopped for a bit as i've gone cross-eyed and my eyes are out of focus now lol
I estimate at this rate i should have this kit built in about 4 years.....kidding but i do hope i can get quicker.
As you can see from the pics (just) i have some overspill of CA around the PE parts, i did use a fine tipped cocktail stick yet it still seemed to put down too much glue even though to the naked eye the cocktail stick had no glue on it what so ever.....hopefully the primer will hide the glue marks. ::)

TTFN Matt
 
lol them is tiny, have you an opti visor
Thick_Glasses.jpg
if not you should get one, it will make the small pe easier to work with.

but your pe work is fine ya can harldy see teh mass ammount of ca ;D
 
Well Now the first one is the hardest,it's all gravy from here on out. ;D

You can do it Matt
Tony lee
 

Latest posts

Back
Top