Slave-1 Scratch build

Jamaicanmodels69

New Member
Joined
Apr 17, 2011
Messages
604
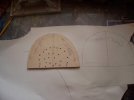
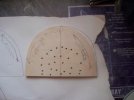
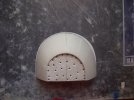
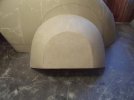
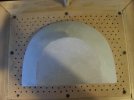
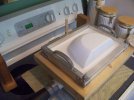
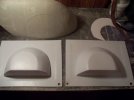
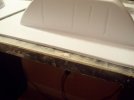
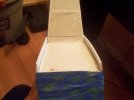
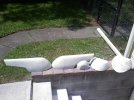
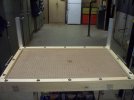
Hey Guys been working on this the parts are pretty much
finished. I just made the forming table it's huge.....there
are about 8 pages of progression. I will post a few pics of
the parts and the former I just made. Once i have the parts
formed I can keep up steady progress .....I hope these formed
parts are going to work......cuz it's been a lot of work! ;D
Click the link below for the building progression
http://s8.photobucket.com/user/3dimensionalmanagement/library/SS%20Slave-1?sort=3&page=1
0709131444.jpg

002-16.jpg

It's all in there from the building of the patterns to the vacuum forming table....
I just ordered my heaters .....should have them on Thur i hope!
 
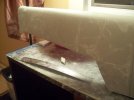
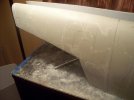
Well I pulled the fenders in a thicker styrene today 3mm
and I was looking at the riser stuck in the bottom. It was
way off I never noticed it before, maybe because it was
embedded in the white styrene it really showed for the
first time. But i figured if the shape of the riser is off
than so is the part I traced it from.......sure enough!
002-17.jpg

Wrong by that much thats like 10mi wrong!!! LOL
003-18.jpg

So i took that paper template and cut it out
in styrene, then I glued it to the back of the
fender.
004-15.jpg
005-10.jpg

Then I added in the clay, it will just
have to cure up then I can make it
pretty again. I filled the center as
well, that way the cut out shape
can be tweaked more with a template
I will make.
006-6.jpg
 
Next bit of reality....I made the front skirt taller and wider than it
had to be....which is good but I didn't realize how much wider
until I stacked the parts today. That skirt has to match the profile
of the front of the fuselage, you can see how much it has to come
in on the sides. However I am not going to do that now, I am going
to form the two fuselage halves and then get them fitting clean, after
that I will place the formed fuselage up on the skirt buck. This will give
me the final profile shape to adjust via sanding. I have to take 3mm at
least off each formed half of the fuselage because they were built up on
3mm stock, then whatever after that to get them joining clean. Like I said
when they are together clean I will take that profile and pencil on the skirt
buck and adjust it then.
007-11.jpg
 
Sweet mother! Tiny...

Great too see this thread. Looking forward to the madness.

Ps: did you ever get the amt snow speeder done?
 
Scott Girvan said:
Sweet mother! Tiny...

Great too see this thread. Looking forward to the madness.

Ps: did you ever get the amt snow speeder done?

Hi Scott no I didn't finish her....yet! ;D
Funny you asked I was thinking about
that model today....LOL

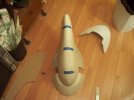
Some shots .....i will probably have to adjust the
rear skirt a bit after dialing in the front skirt, to
match the profile of the fuselage nose.
014-2.jpg
011-1.jpg
010-5.jpg
 
That's wicked Mike. Just wicked. Man...to get to paint that beast!

++ Yeah if you ever return to that Speeder please don't forget your thread here. Such an excellent resource. On my list someday.
 
Thanks guys much appreciated! ;D ;D
Scott I will def finish that little speeder
here!

Some work on the fender...... and forming it
in 3mm. I didn't like it in 2mm once the opening
was cut out it was kind of flimsy to me.

Ref mark for sanding...
001-17.jpg
002-18.jpg
003-19.jpg
005-11.jpg

Ready for forming......
010-6.jpg
016-4.jpg
018-4.jpg
019-1.jpg

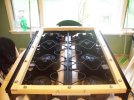
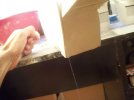
This showed up today they were supposed to be here
on Thursday....of course I don't have the plastic yet. I
went to light it and the propane bottle from the grill
was empty! LOL I have to also pick up another bottle
for the other burner.The frame fits well inside the I
think it's going to heat fine, not sure if I am going to
make a box or not for it .....will see.
008-7.jpg
 
;DThanks guys small set back......

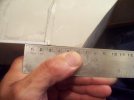
I needed 74mm here and i only had around 61mm or 62mm
I had checked this a few times......measuring from the wrong
point every time most likely!
001-19.jpg

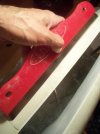
I just formed up what i needed and added some clay...
002-19.jpg

Using some wet sewing thread to cut the plastic form
away before it set up.
003-21.jpg

Adding a bit more clay to be able to blend it
in. I also had to add to the end of the tail, as
this was effected also.
006-8.jpg

Gonnna need some sanding then i can get her formed!
 
Grendels said:
Love watching your clay work. It is always so nice and precise.

Thanks G......Thanks Guys ;D

Ok i got those areas sanded out from the last post
you can see them with the arrows pointing to them.
002-20.jpg

I found a low spot......so that will nee some attention
003-22.jpg
004-18.jpg
005-13.jpg
006-9.jpg

I have all the plastic sheet cut and ready to go......
this is all thats left of a 3mm 4x8 sheet of HIPS
but it will cover all of he main parts, with some
left over in the front.
001-20.jpg
 
You are a mad man!
I am not sure if I have seen your Y-Wing or A-Wing completed... I will have to see if I can find those again!
I am guessing with all the complex curves and shapes, the Slave-1 will be difficult.
I am sure you will knock it outta the park!
 

Latest posts

Back
Top