SABI's Scratch Build WIPs. Newbie here and looking for feedback.

SABI

New Member
Joined
May 12, 2015
Messages
22
Hello everyone!! I'm new here, but I've been a long time looker and admirer of all the awesome work.

I've been working on a few projects of my own using the tips and tricks I've picked up here.
I'm currently in build mode and don't have anything completed yet. Painting will start soon!!

I look forward to any feedback (both positive and negative) that will help me improve and keep going.

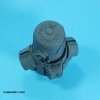
BOT HEAD
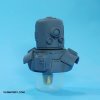
This little guy was made using bottle caps, a plastic Easter egg and a key from an old keyboard.
It will be a bust. I need to finish the base and I'm working on a back pack for him now.
Most likely this will be the thing I paint first.
DSC_00011.jpg DSC_00051.jpg

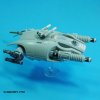
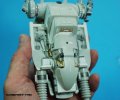
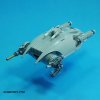
GUNSHIP
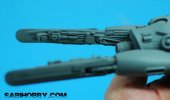
This is a kitbash using an AMT/ERTL STAP with Battle Droid and Anakin's podracer kits.
DSC_00331.jpg DSC_00341.jpg
DSC_00381.jpg

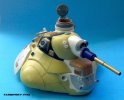
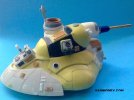
MEDIUM HOVER TANK
This tank is roughly 1/35 scale. It is made from Styrofoam eggs covered with milliput. The turret is an old XM radio receiver.
IMG_02961.jpg IMG_02941.jpg
IMG_05771.jpg

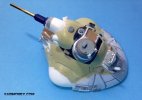
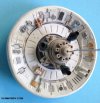
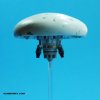
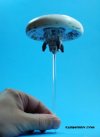
MECHANICAL JELLYFISH
I know it doesn't look like much like a jellyfish yet. But it does in my head. ^_^
I will add tentacles that will hang from the core. I also need to add details to the dome.
DSC_00241.jpg DSC_00291.jpg
IMG_02351.jpg IMG_02371.jpg
 
:eek: No way!!!

The Nylon Gag!

Your work has inspired me more than you will ever know. It's an honor that you are the first to comment on my stuff.

You made my day.
 
One cool thing about kit bashing and scratch building is things taken for granted become something else in a new context.

You've hatched quite a few new concepts for eggs with these. ;D

I really like the potential in your mechanical jellyfish. You have some cool concepts going on here.
 
Thank you Quaralane and Hagoth. I appreciate the feedback.

Hagoth, I guess I do use egg shapes a lot. I didn't think about it.
I actually have another ship made from a plastic Easter egg and plastic spoons. :)
I'll post pictures of it soon.
 
I love this! Your work is very clean and neat and that says a lot. I cant wait to see these when you start painting them. My only suggestion would be go a little bigger in scale. but that's just my personal opinion and goal now. Fantastic start!!! ;D
 
Thank you so much Jake! That is a real compliment. My work may be clean and neat...my workbench? That's a different story altogether.

John, Thank you as well. It means a lot to me. You are an amazing painter. I would love to see some of my builds painted and weathered with your skill.

I have so more builds I need to take photos of. More coming soon!
 
Some nice looking models there! I'm really looking fwd to see what you do with the Jellyfish. Great idea. ;D
 
Brilliant use of the STAP model,....it turned out much more interesting that what it was originally

Cool,.....it will be brilliant to see these painted & weathered down,....very 'Industria Mechanika' and organic looking

J
 
Thank you so much for the comments. Much appreciated.
I'm really getting motivated to build more.

Constantine: Adding greebles and details is the best part right!

Go Flight: Seeing photos of the jellyfish is like seeing it again for the first time for me. I can see the direction I want to go with it now. I really can't wait to paint and weather her now. I have an idea in mind for a little diorama.

Mikey_W_1980: So am I! I'm still intimidated by painting but need to practice.

Jaitea: Haha! I totally agree. The STAP model has some cool parts, but as a whole is rather boring and plain. I bought my kit on sale and never had any intention of building it. I'm looking for more now! Thanks for the compliment...I like organic designs and am a huge fan of Industria Mechanika style stuff.
 
Nice work. I want to see what you do with the jelly fish. As soon as I saw it I couldn't help thinking of the what I might use.
 
Thanks Shark!

I'd love to hear your ideas. I have some ideas myself, but I'm always changing.
 
Hello Everyone!

I'm back with some more WIP's. More builds made out of things laying around.

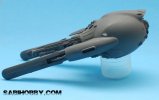
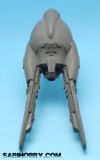
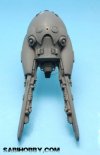
Here’s yet another design that uses a plastic Easter egg. I must admit I really like the shape.

I cut the top of the egg off and added some details into the opening. I think I used a disc from some Warhammer bits…a Tau drone maybe?
At the bottom of the egg I put the top from a room air-freshener (the kind that plug into the wall) as a thruster. I thought it looked cool and fit the egg perfectly.

I then glued two plastic spoons to the side, you know just because. To provide a transition between the egg and the spoon “wings” I glued the halves of a bomb from an airplane kit.The spoons were too obvious as they were so I tried to disguise them with the engine fins from an Anakin Skywalker’s podracer kit. (I’ve gotten a lot of use out of that kit!)

Next, I used putty to tie all these together. Details were added and here it is.

I imagine this being fast, maybe a racer, or interceptor or something. I like the low and sleek profile. I want to show it in motion…racing low over the surface.

DSC_0003.jpg
DSC_00012.jpg
DSC_00052.jpg
DSC_00171.jpg
 
WarBot!

Inspired on the designs of Ashley Wood’s World War Robot series. I am a big fan of those rusty bots.

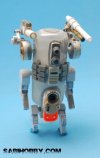
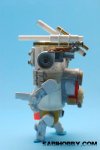
This is my version in roughly 1/35 scale. I combined the Bertie and Martin designs.

The body is built from the bottom half of two capsules I had in my parts box. The back pack is the top from a candy container. Details were added from the parts box.

The legs and arms were built from sheet styrene. I worked out the design in Sketchup and printed it out. Each pattern was cut out and sprayed glued onto plastic sheets. I colored the portion of the pattern that I was working on so I could see it easier. I layered several sheets of styrene for each part to build up the thickness. I cut each layer as close to the pattern as I could. After I had the desired thickness I sanded and filed the plastic to the edge of the design. Both the arms and legs bend at the joint. After looking at these photos, I am thinking the legs are too small. The WWR Bertie design has smaller legs as well. I just don’t like the large gap between the body and the legs. I may beef them up a little.

I need to add details to the arms and legs, add hands and feet, add the bags and rolls (typical in the WWR design). I really look forward to painting this guy.

DSC_00242.jpg
DSC_0014.jpg
DSC_0020.jpg
DSC_0017-2.jpg
DSC_0022.jpg
 
As for your egg-celent :D work on that pod thing I would guess that it flies bulbous end first? Could work either way. Flying the other way paddles first reminds me of some kind of hover teaser or shock pod. Just don't get caught between those paddles. Looks pretty cool.

As for Warbot I hope you are not planning to paint him yellow. Might be mistaken for a Minion. ;D

Nice work.
 
Hagoth said:
As for your egg-celent :D work on that pod thing I would guess that it flies bulbous end first? Could work either way. Flying the other way paddles first reminds me of some kind of hover teaser or shock pod. Just don't get caught between those paddles. Looks pretty cool.

As for Warbot I hope you are not planning to paint him yellow. Might be mistaken for a Minion. ;D

Nice work.

Thanks Hagoth. The Egg Ship does fly bulbous end first. But there are many times I've looked at it and thought it looked just as cool flying the other way. I actually thought of building one that would fly that way. :)

Haha! My daughter mentioned it looked like a minion too. I won't be painting it yellow.

Thanks again for the feedback.
 
Back
Top