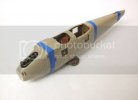
Roland C.II (No ,its not a keyboard !! )

Chris S

Its a bit like being handcuffed to a lunatic !
Joined
Feb 14, 2011
Messages
4,573
Hi chaps :)

I have been hoping to get into the spraybooth with the Lanc this week ,but its been so bloody WET !! ,Hasnt stopped raining for three days now . I just havent attempted to put any paint on because of the damp air :(
Sooooo ...I thought I'd get another blog on the go :) This kit I've had knocking around for a few years now ...well 12yrs actually ! and every now and again it jumps out at me ...you know the feeling ;) But this time I thought ...why not :)

The Roland C.II was a German recon plane from the First world war ,and was actually ahead of its time being one of the first truely aerodynamic aircraft .You'll notice how streamline the fuselage & wings are ,also the outerplane wing struts were shaped for strength and efficiency .It was also quite a strong construction with both upper & lower wings built into the fuselage , the fuselage being built the same as the Albatross D.V , plywood sheeting over formers .

Anyhoo ....The kit
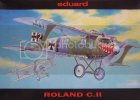
DSCF5051.jpg

This one was originally released in 2000 ...I think ,about then anyway ,but was released again a few years back as the 'Walfisch' with new decal options and etch parts .

So ,I hope you'll join me for this one :)

Thanks for looking.

Chris.
 
A Bi Wing! Oh' now this will be fun. You know these are so different from what we're used to seeing. Can't wait to see what your going to do with it.
 
Ah! What a great subject! Now of course you will have to model that Nieuport as well ;)
 
Thanks fellas ,nice to have you all along :)

Made a little start tonight .Not much ,but still a start !
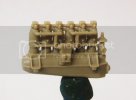
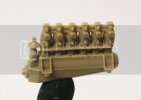
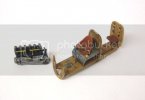
I assembled the Mercedes engine ,still some parts to go on ,but they go on a bit later .The plastic seems very hard in this kit ,which made getting the finer parts off the sprues interesting ! Got there in the end tho ....

DSCF5054.jpg

DSCF5055.jpg

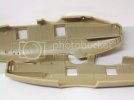
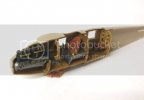
Then a quick look at the fuselage interior walls ,there is some nice molded detail and there are more parts to add to the walls ,but there are some EPM's that will need sorting out ,not all of them but there is a few which may be visible once the fuselage is closed up ...

DSCF5056.jpg

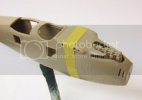
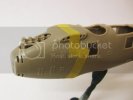
Then a quick dry fit of the fuselage & engine together ,the fit isnt too bad ,but if you look at the pics some of the openings dont quite line up so they will need sorted too .

DSCF5058.jpg

DSCF5057.jpg

Next up will be the cockpit parts :)

Thanks for looking.

Chris.
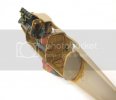
 
Sweet engine!

I'm intrigued by how you'll be tackling the wooden grain on the inside of the fuselage!
 
Thanks Fruit . The wood will be done with an acrylic basecoat followed by oils ;)

Chris.
 
Hi folks :)

Got a little done on the interior of this one :)

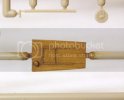
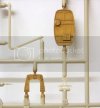
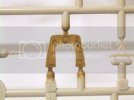
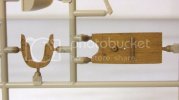
I had to do all the wood effect first ,before I can start putting it all together ,There are a couple of floor sections and several bulkheads .Some of them need painting on both sides ,so I opted this time to leave the parts on the sprues to make it easier to handle the parts while painting .

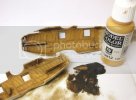
Speaking of painting :) ,This is a simple quick and effective way of creating a wood grain effect ,Its basically just the same as most modellers do it ,but there are some variations on the same theme .Im just going with a slighly grubby varnished wood here .
So ,What I used was ....A basecoat of Model Colour Tan Yellow ,Tamiya Dark Yellow or anything Tan/ Buff will do the same job depending on how dark or light you want the wood .The only other paint used was a drop of Raw Umber oil paint .

DSCF5059.jpg

Once the acrylic basecoat is dry ,Simply brush on a thin coat of the Raw Umber ,just a thin coat but make sure to get into all the corners /edges .Then take an old splayed out brush (dry) and start pulling the brush over the oil paint in the direction you want the grain .You will gradually see the grain appear ,The more oil paint you remove ,the lighter the wood will look ,but try not to take it all of or you lose the grain ,you can take your time with this as the oils will stay wet for a day or so ,and wipe of excess paint from the brush after every couple of strokes .

DSCF5064.jpg

DSCF5062.jpg

DSCF5063.jpg

DSCF5061.jpg

I mentioned that there are different variations on this effect . Well For a more orange(new) look to the wood you can use Burnt Umber . You can also change the basecoat colour for different types of wood .Another effect can be acheived by spraying clear Yellow or Orange over the top of the oils to create different varnish effects .
But this time Im happy with the colour and the only thing to be added is some pin washes once the assemblies are together .

Right ....Im off to make some curtains ???

Thanks for looking

Chris.
 
Nice work Chris.

I really like the wood effect, I used the same technique on a build I had started for the BSC (I don't think I'll finish it in time however). How are you enjoying the Eduard kit? I've only put one of their 1:72 kits together, but it was nice.

Jason
 
Wow that looks great!

I'll definitely be keeping this technique in my big book...of techniques... ;D

Say Chris, where do you get your Vallejo paints? I've been wanting to switch to vallejo paints for a while now, but I'm not sure where I should buy them from (?)
 
Hey Chris, this is one of my favorite WW1 planes. I'm envious, looks like a great kit.
Have fun with this one. Bill
 
Thanks guys :)

Jason , Eduard kits are really nice ,great detail and with the profipack kits there is extra etch parts & decal options ,the only thing with this one is the plastic is very hard ,making it a bit of a nightmare to remove small parts from the sprue .But that could just be this one and it is about 12yrs old now !

Fruit ,I actually get my Vallejo paints from our shop in Belfast ,but they should be easy to get on the internet ?

Chris.
 
Ah, so you get yours locally, I was anticipating that response :)

Yes, I can get them easy on the internet, but I'd like to transition to Vallejo with the least amount of money lost (I love their products, I know that they're quality, but I don't want to pay through the nose for a few bottles). I would have checked google first, but you know, modelers are more reliable and have all the cool secrets !
 
Hi folks :)

I got a little further on with this one :) ....I Decided to leave out the curtains :( , I did make all of them and paint them But ....then I thought ,how could I attach them to the windows without making a mess of the glass ??? ....So ,I left them out ,No biggy tho ,as not all of the had curtains fitted ,besides without the more of the interior can be seen (not sure if thats a good thing or bad thing ..lol )
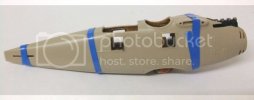
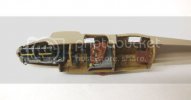
Anyhoo , I went ahead and assembled / painted the whole interior & engine ,then got the fuselage closed up :)

DSCF5068.jpg

DSCF5070.jpg

DSCF5071.jpg

DSCF5072.jpg

DSCF5075.jpg

DSCF5073.jpg

Got some sanding and filling to do next ,the fit is'nt that great and also the fairing for the rear gunners ring will need blended in once fitted .

Thanks for looking.

Chris.
 
Thanks John :) Im looking forward to cracking on with it now :)

Chris.
 

Latest posts

Back
Top