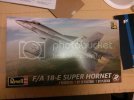
So, I'm new at this hobby, just started about two weeks ago, and I thought I'd show you guys my first build. It's a Revell F/A-18E in 1/48 scale. I got it for $12 at the local hobby lobby. The kit at first seems nice, lots of detail and nice riveting and panel lines in the fuselage, and it comes in 11 sprues, 1 with the clear parts. I decided to do this whole plane using only enamel paints,as I think they're easier to work with because I read that acrylics are harder to thin and basically harder to spray, please if you would give me any advice regarding acrylic paints I'd really appreciate it. I got some model masters light ghost gray and dark ghost gray for the fuselage, and the rest are the normal little enamel bottles from testors.
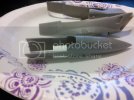
I started this about 10 days ago, but I didn't take pictures of the first building stages, which only were assembling the cockpit and the intakes and nose of the plane. The intakes and the nose came together just ok, I had lots of seam lines which I had to fill with putty, for which I used testors modeling putty, which is terrible to work with (learned the hard way). Here's how the intakes and nose turned out.
After assembling the cockpit and painting, I did the decals. I'm proud how the whole cockpit turned out since it's the first time ever I've put on waterslide decales on anything. I used micro set and micro sol to make the decals shrink right in to the control panel/dashboard. As I write this, I noticed I used too much yellow on the side controls of the cockpit, so I'll be repainting it with silver.
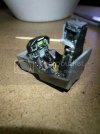
Next, I put together the back of the cockpit and painted it flat black. Also, I just got my first airbrush and I'm still learning how to use it, so don't go too hard on me.
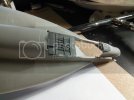
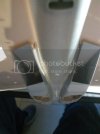
Next part was to fit the intakes into the fuselage, and thats where all the trouble started. I had a massive gap between the left intake and the fuselage, and after sanding some parts for about an hour, finally reduced the gap down to about 2 milimiters
Before:
Massive gap
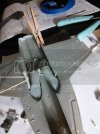
After: (Had to make a lever with a sprue to close the gap)
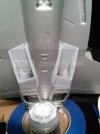
Notice how terribly bad the inside of the intakes came out? Well that's thanks to testors putty, I spent like 3 hours sanding down very carefully the inside but still could notice the seam lines. Huge dissapointment for me I think this is the worst part of the plane so far.
Next, I had to marry the upper and under sides of the fuselage. The fit is not very good, I ended up with lots of seam lines and gaps that I needed to fill.
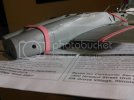
End result
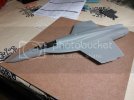
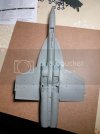
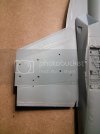
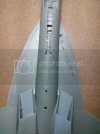
After the testors putty lesson, I went to hobby lobby and bought tamiya putty, which I used yesterday to fill the seams and gaps left in the fuselage. This stuff seems nice, it was easier to work with and today I checked how it was doing and it is rock solid, much harder than the testors. I figured I will leave it another day just to make sure it is well dry, and tomorrow I'll start sanding and rescribing the lost panel lines.
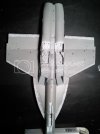
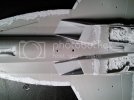
So that's the work so far on my F/A-18E, I still have a long way to go but I wan't to do this as best I can without rushing it or anything, and as I said, this is my first model ever so any advice is Greatly appreciated. I'll keep updating this topic as I progress, tomorrow I have a TON of sanding work to do, as the tamiya putty is way harder than I thought, but I'll try to finish it all tomorrow and update the topic with some pictures.
Thanks for watching, have a good day.

I started this about 10 days ago, but I didn't take pictures of the first building stages, which only were assembling the cockpit and the intakes and nose of the plane. The intakes and the nose came together just ok, I had lots of seam lines which I had to fill with putty, for which I used testors modeling putty, which is terrible to work with (learned the hard way). Here's how the intakes and nose turned out.

After assembling the cockpit and painting, I did the decals. I'm proud how the whole cockpit turned out since it's the first time ever I've put on waterslide decales on anything. I used micro set and micro sol to make the decals shrink right in to the control panel/dashboard. As I write this, I noticed I used too much yellow on the side controls of the cockpit, so I'll be repainting it with silver.

Next, I put together the back of the cockpit and painted it flat black. Also, I just got my first airbrush and I'm still learning how to use it, so don't go too hard on me.

Next part was to fit the intakes into the fuselage, and thats where all the trouble started. I had a massive gap between the left intake and the fuselage, and after sanding some parts for about an hour, finally reduced the gap down to about 2 milimiters
Before:
Massive gap


After: (Had to make a lever with a sprue to close the gap)

Notice how terribly bad the inside of the intakes came out? Well that's thanks to testors putty, I spent like 3 hours sanding down very carefully the inside but still could notice the seam lines. Huge dissapointment for me
Next, I had to marry the upper and under sides of the fuselage. The fit is not very good, I ended up with lots of seam lines and gaps that I needed to fill.

End result


After the testors putty lesson, I went to hobby lobby and bought tamiya putty, which I used yesterday to fill the seams and gaps left in the fuselage. This stuff seems nice, it was easier to work with and today I checked how it was doing and it is rock solid, much harder than the testors. I figured I will leave it another day just to make sure it is well dry, and tomorrow I'll start sanding and rescribing the lost panel lines.


So that's the work so far on my F/A-18E, I still have a long way to go but I wan't to do this as best I can without rushing it or anything, and as I said, this is my first model ever so any advice is Greatly appreciated. I'll keep updating this topic as I progress, tomorrow I have a TON of sanding work to do, as the tamiya putty is way harder than I thought, but I'll try to finish it all tomorrow and update the topic with some pictures.
Thanks for watching, have a good day.
