Revell 1/48 Lunar Module
- Thread starter Jim2001
- Start date
Jim2001
Member
- Joined
- Jun 11, 2009
- Messages
- 58
Thanks for the encouragement guys. Another update. I have a small box of parts that I've finished which all will be added to the LM as the thing gets closer to the finishing line.
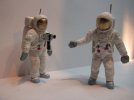
Here are the two astronauts Armstrong and Aldrin. I scratch-built the antennas and the camera. These guys are tiny at only 1.25 inches tall at best and were a lot of fun to detail. The visors are just Testors gold paint but I put glossy black down first. I'm surprised how well they came out. I was going to use gold leaf but that stuff comes in 50-100 sheets at a time and would break the budget for this project.
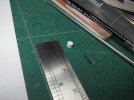
This very tiny spool is a small vent on the back of the ascent stage. I'll photograph it again once I mount it in place. My camera has a limited macro feature and this is more-or-less as close as I can get to it. there is a hole drilled through the middle of the core that you can't see (no one will see), but I put it there for accuracy and because I'll know it's there at least.
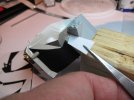
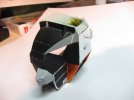
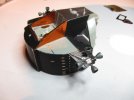
This is how I apply the black painted foil to the model. I first cut a piece of paper to the exact measurements. This is easier than it may first appear since I press the paper over the model and that makes the paper crease at the correct point for me to cut along. Snip, snip and I have a perfect fit.
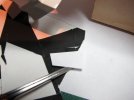
I then put the paper template on the foil and cut it out with a #11 knife.
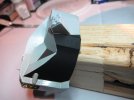
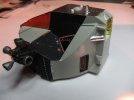
I then press it onto the model. As it goes down it wrinkles a bit which is just perfect for the look of these panels. I'll later come back and put in the rivet detail with a pin. (I'll shoot that when I get to it)
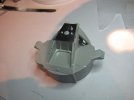
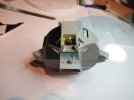
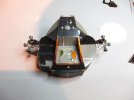
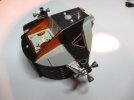
I've applied bare metal foil to the front of the ascent stage and added docking lights (the little white dots) which are actually pin heads painted glossy white. I'll later add red and greed dots to these.
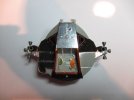
In the upper part I added a small area of gold foil. This will be "just" visible between the forks of the docking radar dish so it's another of those "only I will ever know unless you look really hard" details. More later.

Here are the two astronauts Armstrong and Aldrin. I scratch-built the antennas and the camera. These guys are tiny at only 1.25 inches tall at best and were a lot of fun to detail. The visors are just Testors gold paint but I put glossy black down first. I'm surprised how well they came out. I was going to use gold leaf but that stuff comes in 50-100 sheets at a time and would break the budget for this project.

This very tiny spool is a small vent on the back of the ascent stage. I'll photograph it again once I mount it in place. My camera has a limited macro feature and this is more-or-less as close as I can get to it. there is a hole drilled through the middle of the core that you can't see (no one will see), but I put it there for accuracy and because I'll know it's there at least.

This is how I apply the black painted foil to the model. I first cut a piece of paper to the exact measurements. This is easier than it may first appear since I press the paper over the model and that makes the paper crease at the correct point for me to cut along. Snip, snip and I have a perfect fit.

I then put the paper template on the foil and cut it out with a #11 knife.

I then press it onto the model. As it goes down it wrinkles a bit which is just perfect for the look of these panels. I'll later come back and put in the rivet detail with a pin. (I'll shoot that when I get to it)


I've applied bare metal foil to the front of the ascent stage and added docking lights (the little white dots) which are actually pin heads painted glossy white. I'll later add red and greed dots to these.
In the upper part I added a small area of gold foil. This will be "just" visible between the forks of the docking radar dish so it's another of those "only I will ever know unless you look really hard" details. More later.
Jim2001
Member
- Joined
- Jun 11, 2009
- Messages
- 58
Thanks for all the encouragement and complements guys. It's appreciated.
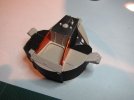
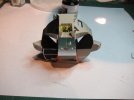
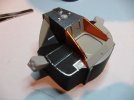
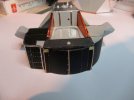
A bit more progress tonight. I've put most of the black panels in place and applied amber foil to both sides of the hatchway. Still have to do the threshold in black and amber and the silver on the RCS pods (as well as the thrusters themselves). Then comes the details such as a handle on the right side of the doorway, the door itself, several small vents, and of course a lot of rivets and tapes.
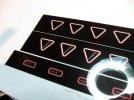
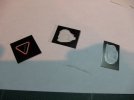
Here are the windows. I drew them in Adobe Illustrator and printed them on to transparency film. Then the back is painted with white paint then cut down to a better size for mounting. They will be glued first to thin sheet styrene, then glued into place from the inside. I discovered that I printed the art wrong on this sample as the markings on the windows are backwards. Oh well. :
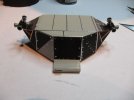
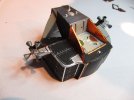
Here's the back of the ascent stage (top view) with the rivets and tapes in place. I used two sizes of sewing pins dipped in silver paint to make the rivets. I still have more to do here but it's taking shape.


A bit more progress tonight. I've put most of the black panels in place and applied amber foil to both sides of the hatchway. Still have to do the threshold in black and amber and the silver on the RCS pods (as well as the thrusters themselves). Then comes the details such as a handle on the right side of the doorway, the door itself, several small vents, and of course a lot of rivets and tapes.


Here are the windows. I drew them in Adobe Illustrator and printed them on to transparency film. Then the back is painted with white paint then cut down to a better size for mounting. They will be glued first to thin sheet styrene, then glued into place from the inside. I discovered that I printed the art wrong on this sample as the markings on the windows are backwards. Oh well. :

Here's the back of the ascent stage (top view) with the rivets and tapes in place. I used two sizes of sewing pins dipped in silver paint to make the rivets. I still have more to do here but it's taking shape.
MilitaryAircraft101
New Member
- Joined
- Apr 4, 2011
- Messages
- 454
Cool stuff Jim, looks really good!
Jim2001
Member
- Joined
- Jun 11, 2009
- Messages
- 58
Jim2001
Member
- Joined
- Jun 11, 2009
- Messages
- 58
My eyes are not what they were in my early modeling days. I bought a pair of +3.0 drugstore reading glasses to go with my desk magnifier, and even then I sometimes can't get close enough. My Dad has a pair of little scopes that clip onto his glasses (kind of like what micro-surgeons wear). I am thinking of asking to borrow them to complete this little beast.
Jim2001
Member
- Joined
- Jun 11, 2009
- Messages
- 58
Similar threads
- Replies
- 11
- Views
- 916

