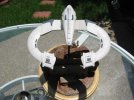
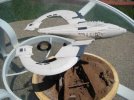
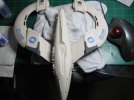
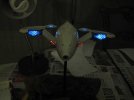
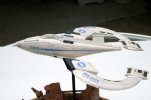
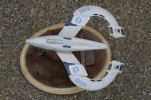
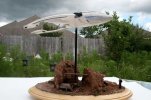
N.S.E.A Protector

java said:
Looking very nice indeed,needs more pig lizard though. :D

LOL!! The normal kind or the exploded kind? Where the eye is kind of poking up and wiggling around.....

I have thought about making one of those, but I just don't have time.

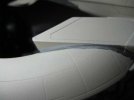
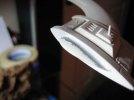
I had a set back tonight. I thought I was done with the primary paint on the Protector, and on a whim, I did a light check. Found lots of light leak. So I spent three hours patching things up, and now have to start over with the paint job. I am a bit concerned about this, because the paint is starting to get a bit thick. If the dead line wasn't in a few days, I would strip it and start over.

I really shouldn't have watched the movie again, because of it, I started on a miner camp. But the light leak stopped me cold. The miner camp, or is that minor camp, won't take much time though. I only have a few parts of it left, and then just painting. This kind of painting goes pretty fast. I am not worried about getting the base done, just the Protector and the command ship.

I still have to paint that Tim Allen too.

On the plus side, everything lights up like it should.
 
A short update:

lb2.jpg
light-block-1.jpg

I have the light leak done, and the protector is painted up. A few tips to cure light leak. Tamiya silver works great. And so does squadron white putty. I know some of you don't like that stuff, but with finger nail polish remover to thin it down, it works very well. I had trouble filling the seams on this model because I was trying out a technique I had never used before, and I should have just stuck with the squadron white/nail polish remover combo.

I still have detail painting to do, and I am trying to decide if I should paint the panel lines or use a really fine tip pen. I have never used a pen for this purpose before and it does scare me a bit.

Either way, the Protector should be done either tomorrow or Sunday.

I still have the Command ship to work on, but I have all day tomorrow set aside for it.

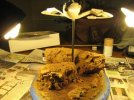
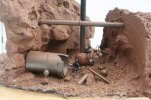
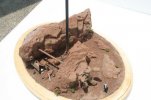
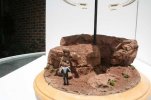
The base is almost done, here it is with some added paint:

done-paint.jpg

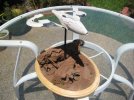
And a photo of the protector sitting in its support:

protector-on-stand.jpg

I still have a little bit of scratch building to do on the miner camp. And to paint up the berillium spheres, the miners, Tim Allen, and the camp itself. All of this should be done tonight. I will post an update when done.
 
Well I tried the pens on the panel lines. It was a big FAIL. Just shot some white paint on the Protector once again.....

I will just re-score them and do an oil wash.
 
I had the opposite on mine. An oil wash came out too dirty so I had to repaint it and use Micron pens. Worked well when I figured out I could clean them up with enamel thinner.
 
That is why I didn't want to use an oil wash. It will make it too dirty. I do have the micron pens. So maybe I will give it another try. But I used enamel paint, so I will have to do an acrylic wash first. (I was going to do that for decals anyway.)

Thanks AKE for the comment, it might come in handy. :D
 
I got this idea from Lincoln Wright/lin.k,a real simple way to draw panel lines is to get a sharp pencil and draw them in and if you mess up just rub it out. :)
And the lead wont run if you spray a clear coat over it.

This is how it looks on my falke.

http://img34.imageshack.us/img34/4944/dscf1251q.jpg
http://img823.imageshack.us/img823/6576/dscf1237j.jpg
 
Java: Wonderful suggestion!!! I thought about using pens but not a pencil. I wonder why? I am going to give it a try. ;D I didn't like how the pen was turning out. Too dark. This is a clean ship.

Painting is not my strong point. It is getting better, much better. My main issue is I live in a small town, and in order to get good paints I have to either mail order them, or drive 5 hours round trip. In addition, this is my second model in 15 years. So I have either had to relearn a lot or pick up new techniques along the way.

My lack of experience is showing on the protectors paint. I am going to try and fix a lot of it today, we will see what I can do. Instead of using the air brush, I used rattle can on her, and I think that was the big mistake. The base coat was testors flat black, and it was still soft 2 weeks later. That is also contributing to part of the problem with the protector. After this build, I am throwing out all Testors paints and going with something else. Their acrylics are not too bad, but I won't use their rattle can or enamel again.

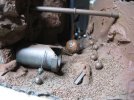
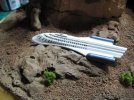
Here is a photo of the competed miner camp. It needs a tiny bit of touch up, but that build is done, and with this, the base is also done. I will post photos of that later today.

miner-camp.jpg
 
almost there!

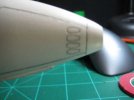
Java: That pencil trick worked great!!! Thank you! Here is a photo of the nose:

nose.jpg

It is not a very clear photo, sorry about that. I would go take another one, but she is masked up at the moment, and I don't want to disturb her.

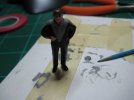
I did paint up the figures, here is Tim:

tim.jpg

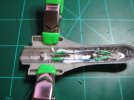
And some work on the command ship. I have her all asymbled now, just a little bit of clean up, clear coat, decals, and one last clear coat.

clamps.jpg
crash.jpg

You can see what I mean by a little bit of clean up in this photo. I am pretty close to done, and will be VERY HAPPY at that time...
 
Glad too help :D
The miner camp and the base is looking really sweet. 8)
 
Thanks Java, and I have been thinking about picking up a Falke. I didn't know how big it was.

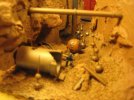
I have had a busy day, the base is 100% done. I got the last coat of varnish on it today, glued down Tim, and added the miners:

miners.jpg

Sorry for the fuzzy photo, I will have better photos on Tuesday when I take them for the contest.

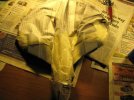
As for the Protector, here is a photo of her being masked up for paint:

tape.jpg

And now a few with the mask removed and outside in good light:

oblique.jpg
rear.jpg
side.jpg

And one with a few of the decals applied:

decals.jpg

I have all of the decals applied, and two coats of Tamiya clear pearl for a seal coat. It doesn't really give a pearlescent look to it, but more of a satin finish, which is exactly what I wanted. (I will get a good look at it tomorrow in bright light.

I have pulled off all of the masking that you can see in the above photos, trimmed off the wiskers of the fiber optics, and cleaned her up a bit. I still have a tiny bit of sanding tomorrow, and a little bit of touching up of the paint. But she is 99.9% done.

I have done some work to the command ship. Decals are applied, as well as most of the photo etch. I did have a problem with one of the magnets shorting out the lights earlier today. That was a pain because I had glued her up with Tamiya cement, and she didn't want to come apart. I have one last piece of photo etch, and clear coats left with the command ship and she is done. All of it will be done tomorrow.

I can not tell yo how happy that will make me. This weekend has been nothing but work on the model. I know now how the Iron Chefs must feel on that show. (Only this was over a two month period instead of one hour.)
 
There is two types of falke released by hasegawa at the moment one is the first and more original design with the railgun.
http://www.plamoplamo.com/images_EX_etc/MaK_Hasegawa_Falke_01.jpg.

And the second release is the excimer laser version.
It comes with a special cg movie of the falke.
http://www.hasegawa-model.co.jp/e-w/NEWDETAIL/1002/64101.html
Once built they are 12 inches in length.
 
Thank you Quaralane :)

The Command ship is giving me headaches. I just wouldn't light up, but I finally got that fixed tonight. No photos as of yet, letting a bit of paint dry, but here is one photo of her lit up:

lights.jpg

I am getting out the tripod and the good camera tomorrow. So I should have some very good photos then.

Java: I think I am going to track down the version with the =rail gun. I found one for $90 with a a four figure kit. That is with free shipping. Thanks for the info on it.
 
final photos (almost)

Here are a few photos of the completed model

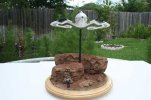
First the base:

miners.jpg
base.jpg
better-base.jpg

And next the ship itself:

front.jpg
oblique-side.jpg
best-top.jpg
side-looking-up.jpg

I will take more photos tonight, showing off her lights.
 
The whole build has really come out nicely,the base looks great and cool work on the ship too.
 

Latest posts

Back
Top