My Another 1/350 TOS Enterprise Build Thread
- Thread starter trekriffic
- Start date
trekriffic
Well-Known Member
- Joined
- Jan 6, 2012
- Messages
- 1,041
Thanks Q!
Stuff to do with the impulse engines...
I'm pretty old school when it comes to the original series Enterprise so at first I thought I'd just leave the impulse engines dark. But then I got to thinking how neat they looked lit up in the remastered episodes so... I came up with an idea for having it both ways.
First thing was to cannibalize the push light. In addition to 3 LEDs the light also had a pushbutton switch inside. A little desoldering freed it from the circuit board:
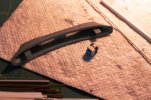
IMG_4630 by trekriffic, on Flickr
The switch was wired up with the "N" wiring harness and connected to an LED for testing with power from the PC board. It worked quite well:
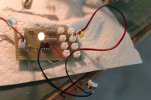
IMG_4633 by trekriffic, on Flickr
A shaft was cut from Evergreen rod with a black tip cut from some scrap kit window smoked plastic to fit in the hole between the vents. It was then glued with epoxy to the switch button:
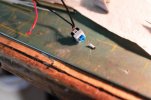
IMG_4637 by trekriffic, on Flickr
The switch was the perfect size to fit inside the back of the impulse deck directly behind the hole in the center between the exhaust vents which I drilled out. I also cut new clear plastic for the exhaust vents as the original kit part had gotten scratched and clouded while I mucked about positioning the switch:
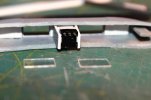
IMG_4642 by trekriffic, on Flickr
The switch was glued in with CA and the new vent covers were glued in with Krystal Klear. The kit impulse vent decals were also applied from the inside:
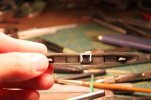
IMG_4644 by trekriffic, on Flickr
A light box was constructed for each vent with an amber LED glued to the back wall. The LEDs were also painted with Tamiya transparent orange acylic. The insides of the boxes were painted black except for the rear wall which was covered in reflective foil:
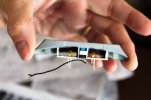
IMG_4645 by trekriffic, on Flickr
Here are the impulse engines in their dark mode more like what we saw in the original episodes:
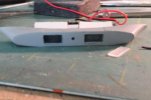
IMG_4652 by trekriffic, on Flickr
And here thay are with the pushbutton switch pushed in and lit up like the remastered episodes:
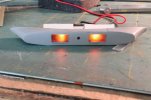
IMG_4650 by trekriffic, on Flickr
I was able to spread out the light using a few layers of .030 styrene sheet pressed in just behind the clear vent covers. The styrene sheet came with a semi-opaque protective film on both sides to prevent scratching; I left the film in place and it did a great job as a diffuser.
The impulse engines were then glued into the lower saucer hull:
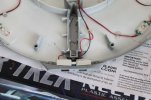
IMG_4653 by trekriffic, on Flickr
The next thing I need to figure out is if I want to do something similar with the nacelle screens or just leave them dark. It might be possible to have a pushbutton in each warp engine, perhaps accessible through a small hole in the recessed ring just in front of the endcaps. I'd need to remove some of the foam tubing to wire up the SMD LEDs though.
Decisions.... decisions...
Anyway, thanks for sticking with me while I was preoccupied with chores.
More to come!
Stuff to do with the impulse engines...
I'm pretty old school when it comes to the original series Enterprise so at first I thought I'd just leave the impulse engines dark. But then I got to thinking how neat they looked lit up in the remastered episodes so... I came up with an idea for having it both ways.
First thing was to cannibalize the push light. In addition to 3 LEDs the light also had a pushbutton switch inside. A little desoldering freed it from the circuit board:

IMG_4630 by trekriffic, on Flickr
The switch was wired up with the "N" wiring harness and connected to an LED for testing with power from the PC board. It worked quite well:

IMG_4633 by trekriffic, on Flickr
A shaft was cut from Evergreen rod with a black tip cut from some scrap kit window smoked plastic to fit in the hole between the vents. It was then glued with epoxy to the switch button:

IMG_4637 by trekriffic, on Flickr
The switch was the perfect size to fit inside the back of the impulse deck directly behind the hole in the center between the exhaust vents which I drilled out. I also cut new clear plastic for the exhaust vents as the original kit part had gotten scratched and clouded while I mucked about positioning the switch:

IMG_4642 by trekriffic, on Flickr
The switch was glued in with CA and the new vent covers were glued in with Krystal Klear. The kit impulse vent decals were also applied from the inside:

IMG_4644 by trekriffic, on Flickr
A light box was constructed for each vent with an amber LED glued to the back wall. The LEDs were also painted with Tamiya transparent orange acylic. The insides of the boxes were painted black except for the rear wall which was covered in reflective foil:

IMG_4645 by trekriffic, on Flickr
Here are the impulse engines in their dark mode more like what we saw in the original episodes:

IMG_4652 by trekriffic, on Flickr
And here thay are with the pushbutton switch pushed in and lit up like the remastered episodes:

IMG_4650 by trekriffic, on Flickr
I was able to spread out the light using a few layers of .030 styrene sheet pressed in just behind the clear vent covers. The styrene sheet came with a semi-opaque protective film on both sides to prevent scratching; I left the film in place and it did a great job as a diffuser.
The impulse engines were then glued into the lower saucer hull:

IMG_4653 by trekriffic, on Flickr
The next thing I need to figure out is if I want to do something similar with the nacelle screens or just leave them dark. It might be possible to have a pushbutton in each warp engine, perhaps accessible through a small hole in the recessed ring just in front of the endcaps. I'd need to remove some of the foam tubing to wire up the SMD LEDs though.
Decisions.... decisions...
Anyway, thanks for sticking with me while I was preoccupied with chores.
More to come!
trekriffic
Well-Known Member
- Joined
- Jan 6, 2012
- Messages
- 1,041
Update for this morning...
Last night I glued the lower saucer to the neck. Will need to fill the joint gap with AVES next:
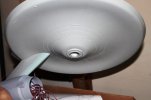
IMG_4673 by trekriffic, on Flickr
I also sprayed the upper saucer with another shot of the custom hull color. This morning I wet sanded with sanding films before giving it the third and last coat of paint:
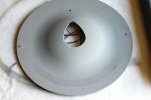
IMG_4665 by trekriffic, on Flickr
The rust ring is sufficiently muted now I think. If I had to I could go back and rub in some Tamiya rust pastel chalks which I might do when I add the weathering streaks using the gunmetal chalk. Oh, and the gridlines are veeeery subtle too.
Last night I glued the lower saucer to the neck. Will need to fill the joint gap with AVES next:

IMG_4673 by trekriffic, on Flickr
I also sprayed the upper saucer with another shot of the custom hull color. This morning I wet sanded with sanding films before giving it the third and last coat of paint:

IMG_4665 by trekriffic, on Flickr
The rust ring is sufficiently muted now I think. If I had to I could go back and rub in some Tamiya rust pastel chalks which I might do when I add the weathering streaks using the gunmetal chalk. Oh, and the gridlines are veeeery subtle too.
trekriffic
Well-Known Member
- Joined
- Jan 6, 2012
- Messages
- 1,041
Update for today...
Today was airbrush Saturday with temops around 80 degrees and low humidity.
Nacelles...
These were actually airbrushed yesterday. They are about 95% dry but still just a little bit sticky. I almost had a heart attack Friday evening when one of them took a header off my workbench. I'd stood them straight up on end to dry and after about a half hour I closed the garage door. That caused enough vibration to cause one nacelle to take a swan dive headfirst making a half rotation before bouncing off the cement floor. All I could do was stand transfixed from about 10 feet away with my mouth agape.
I imagined it landing on the bussard dome and cracking. Fortunately it landed on the open end where I will eventually attach the endcap; then it bounced up at an angle and hit the side of my workbench before landing flat on the floor. Heart in my throat I picked it up by the masked over bussard and the pylon wiring and inspected the damage. Thankfully I had just swept the floor so there wasn't any dust or debris to stick to the paint.
There was a tiny smudge on one flux constrictor at the front and one on the rear. It was dry enough that I was able to smooth over the divots with a moistened fingertip; I'll still need to touch it up with a little more hull color but it could have been so much worse.
Removing the tape from the dome showed no damage. I hooked up the power and the motor and lights operated fine.
Maybe it was dumb luck or maybe the modelling gods took pity on me; whatever it was, I had just escaped disaster.
After that I got smart and leaned them against my hanging drawer cabinet to finish drying:
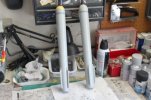
IMG_4679 by trekriffic, on Flickr
Nacelle trench screens were sprayed with Tamiya Bare Metal Silver:
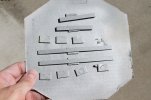
IMG_4684 by trekriffic, on Flickr
End caps, Impulse engine accelerator, Trench insert, and Pylon screens were sprayed with MM Medium Gray mixed with a little Voodoo Gray to lighten it up a little. I'd already gone with a lighter hull color than the kit recommends so I needed to lighten up the acccent color too or the contrast would be too much for my taste:
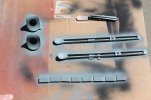
IMG_4685 by trekriffic, on Flickr
The Bridge/B-C deck module was sprayed hull color:
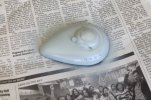
IMG_4682 by trekriffic, on Flickr
The reactor control loops were sprayed hull color followed by a brushing of Voodoo Gray at the ends of the loops. I'll probably go back with the airbrush and recoat the Voodoo Gray. I also need to mask the intercoolers on top of the nacelles and paint the ends with the same color.
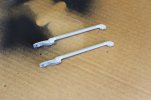
IMG_4686 by trekriffic, on Flickr
The secondary hull was sprayed with hull color. I also sprayed the joints between the secondary hull and neck and between the neck and the lower saucer. I masked the leading edge with it's Hellblau color first though:
IMG_4681 by trekriffic, on Flickr
That's it for now. It will probably take a few days to finish drying enough for me to do the next thing which is to attach the upper saucer and bridge module to the lower saucer. Then I'll be ready to attach the nacelles.
Tomorrow I plan to spend some time working on the base wiring and paint.
Thanks for reading.
Today was airbrush Saturday with temops around 80 degrees and low humidity.
Nacelles...
These were actually airbrushed yesterday. They are about 95% dry but still just a little bit sticky. I almost had a heart attack Friday evening when one of them took a header off my workbench. I'd stood them straight up on end to dry and after about a half hour I closed the garage door. That caused enough vibration to cause one nacelle to take a swan dive headfirst making a half rotation before bouncing off the cement floor. All I could do was stand transfixed from about 10 feet away with my mouth agape.
I imagined it landing on the bussard dome and cracking. Fortunately it landed on the open end where I will eventually attach the endcap; then it bounced up at an angle and hit the side of my workbench before landing flat on the floor. Heart in my throat I picked it up by the masked over bussard and the pylon wiring and inspected the damage. Thankfully I had just swept the floor so there wasn't any dust or debris to stick to the paint.
There was a tiny smudge on one flux constrictor at the front and one on the rear. It was dry enough that I was able to smooth over the divots with a moistened fingertip; I'll still need to touch it up with a little more hull color but it could have been so much worse.
Removing the tape from the dome showed no damage. I hooked up the power and the motor and lights operated fine.
Maybe it was dumb luck or maybe the modelling gods took pity on me; whatever it was, I had just escaped disaster.
After that I got smart and leaned them against my hanging drawer cabinet to finish drying:

IMG_4679 by trekriffic, on Flickr
Nacelle trench screens were sprayed with Tamiya Bare Metal Silver:

IMG_4684 by trekriffic, on Flickr
End caps, Impulse engine accelerator, Trench insert, and Pylon screens were sprayed with MM Medium Gray mixed with a little Voodoo Gray to lighten it up a little. I'd already gone with a lighter hull color than the kit recommends so I needed to lighten up the acccent color too or the contrast would be too much for my taste:

IMG_4685 by trekriffic, on Flickr
The Bridge/B-C deck module was sprayed hull color:

IMG_4682 by trekriffic, on Flickr
The reactor control loops were sprayed hull color followed by a brushing of Voodoo Gray at the ends of the loops. I'll probably go back with the airbrush and recoat the Voodoo Gray. I also need to mask the intercoolers on top of the nacelles and paint the ends with the same color.

IMG_4686 by trekriffic, on Flickr
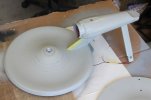
The secondary hull was sprayed with hull color. I also sprayed the joints between the secondary hull and neck and between the neck and the lower saucer. I masked the leading edge with it's Hellblau color first though:

IMG_4681 by trekriffic, on Flickr
That's it for now. It will probably take a few days to finish drying enough for me to do the next thing which is to attach the upper saucer and bridge module to the lower saucer. Then I'll be ready to attach the nacelles.
Tomorrow I plan to spend some time working on the base wiring and paint.
Thanks for reading.
trekriffic
Well-Known Member
- Joined
- Jan 6, 2012
- Messages
- 1,041
Thanks Q!
Sunday update...
Not a lot accomplished I'm afraid. Got involved in another project at my neighbor's-this time with her car.
Anyway, today was dome day...
I took some thin adhesive-backed foil strips and laid them on the inside of the lower saucer dome lined up where the external engraved lines are.
I also laid a disc in the center to block light from hitting the "ion pod" or whatever they called that little nipple in the center of the dome:
IMG_4696 by trekriffic, on Flickr
Holding the dome under my worklight made for a nice subtle pie slice effect:
IMG_4706 by trekriffic, on Flickr
Speaking of the "ion pod" I took some thin brass rod and drilled a small hole into some Evergreen plastic rod to make the sensor shaft:
IMG_4689 by trekriffic, on Flickr
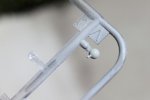
The finished pod. A hole was drilled into the clear kit part then the sensor shaft was glued in with CA.
Being made of brass the shaft is quite strong and should never snap off:
IMG_4695 by trekriffic, on Flickr
The pod has gotten a coat of hull color. After it dries, the shaft will be painted silver with a red tip.
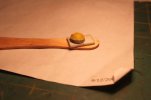
The other dome I worked on was the one over the shuttle bay. I taped off off most of the dome leaving a narrow band around the bottom rim.
I brushed on some Mr Surfacer 500 followed by the hull color:
IMG_4709 by trekriffic, on Flickr
Nothing was done on the stand but my neighbor's car is running fine now! Oh and I got some yardwork done in the backyard.
Thanks again for any comments!
Sunday update...
Not a lot accomplished I'm afraid. Got involved in another project at my neighbor's-this time with her car.
Anyway, today was dome day...
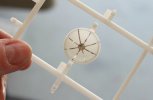
I took some thin adhesive-backed foil strips and laid them on the inside of the lower saucer dome lined up where the external engraved lines are.
I also laid a disc in the center to block light from hitting the "ion pod" or whatever they called that little nipple in the center of the dome:

IMG_4696 by trekriffic, on Flickr
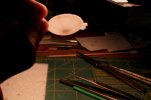
Holding the dome under my worklight made for a nice subtle pie slice effect:

IMG_4706 by trekriffic, on Flickr
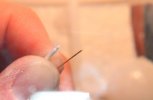
Speaking of the "ion pod" I took some thin brass rod and drilled a small hole into some Evergreen plastic rod to make the sensor shaft:

IMG_4689 by trekriffic, on Flickr
The finished pod. A hole was drilled into the clear kit part then the sensor shaft was glued in with CA.
Being made of brass the shaft is quite strong and should never snap off:

IMG_4695 by trekriffic, on Flickr
The pod has gotten a coat of hull color. After it dries, the shaft will be painted silver with a red tip.
The other dome I worked on was the one over the shuttle bay. I taped off off most of the dome leaving a narrow band around the bottom rim.
I brushed on some Mr Surfacer 500 followed by the hull color:

IMG_4709 by trekriffic, on Flickr
Nothing was done on the stand but my neighbor's car is running fine now! Oh and I got some yardwork done in the backyard.
Thanks again for any comments!
trekriffic
Well-Known Member
- Joined
- Jan 6, 2012
- Messages
- 1,041
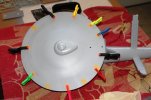
Glued the upper saucer to the lower today at lunch using Testors cement. Clamped up to dry:
IMG_4710 by trekriffic, on Flickr
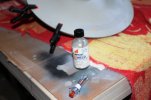
After an hour clamps were removed and I found some areas on the rim where the Testors cement didn't hold. I was afraid of this as by the time I finished coating the mating surfaces some of the glue had partially dried. I used Ambroid ProWeld liquid cement to seal the breaches injecting it between the saucer halves using a disposable hypodermic syringe my father-in-law had given me. It did the trick. Then I clamped it up and left to dry again:
IMG_4713 by trekriffic, on Flickr

IMG_4710 by trekriffic, on Flickr
After an hour clamps were removed and I found some areas on the rim where the Testors cement didn't hold. I was afraid of this as by the time I finished coating the mating surfaces some of the glue had partially dried. I used Ambroid ProWeld liquid cement to seal the breaches injecting it between the saucer halves using a disposable hypodermic syringe my father-in-law had given me. It did the trick. Then I clamped it up and left to dry again:

IMG_4713 by trekriffic, on Flickr
trekriffic
Well-Known Member
- Joined
- Jan 6, 2012
- Messages
- 1,041
Lunchtime progress...
The wires to the nacelles were trimmed, soldered, and sealed with heatshrink. Then I glued the nacelles to the pylons and set upside on a selection of mostly Star Trek (original series) books and TV Guides to dry per the kit instructions:
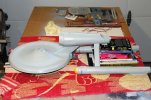
IMG_4718 by trekriffic, on Flickr
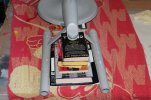
IMG_4719 by trekriffic, on Flickr
The wires to the nacelles were trimmed, soldered, and sealed with heatshrink. Then I glued the nacelles to the pylons and set upside on a selection of mostly Star Trek (original series) books and TV Guides to dry per the kit instructions:

IMG_4718 by trekriffic, on Flickr

IMG_4719 by trekriffic, on Flickr
trekriffic
Well-Known Member
- Joined
- Jan 6, 2012
- Messages
- 1,041
Playing around with the base some more...
In an homage to the original filming stand...
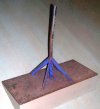
Original Filming Stand by trekriffic, on Flickr
... and in an effort to increase strength and rigidity I cut some aluminum tubes and epoxied them to the base of the stand for some additional bracing:
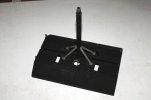
IMG_4723 by trekriffic, on Flickr
Test with the model mounted to the stand. Ah yes, the perfect balance point just like the original:
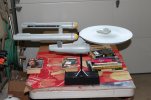
IMG_4724 by trekriffic, on Flickr
Now I have to decide if I should paint the support tube with it's new bracing black like I had originally intended or a shade of blue like the filming stand. I've already decided to paint the base of the stand and it's framing silver. There will be some black showing thru inside the frames on the front and back sides and the top to simulate open space around the light panel decals from the refit kit.
In an homage to the original filming stand...

Original Filming Stand by trekriffic, on Flickr
... and in an effort to increase strength and rigidity I cut some aluminum tubes and epoxied them to the base of the stand for some additional bracing:

IMG_4723 by trekriffic, on Flickr
Test with the model mounted to the stand. Ah yes, the perfect balance point just like the original:

IMG_4724 by trekriffic, on Flickr
Now I have to decide if I should paint the support tube with it's new bracing black like I had originally intended or a shade of blue like the filming stand. I've already decided to paint the base of the stand and it's framing silver. There will be some black showing thru inside the frames on the front and back sides and the top to simulate open space around the light panel decals from the refit kit.
trekriffic
Well-Known Member
- Joined
- Jan 6, 2012
- Messages
- 1,041
Thanks for the positive comments fellow addicts!
Weekend update...
Saturday I plugged all the remaining wire harneses into the main PC board and hooked it up to the wires from the power jack in the underbelly.
Then I poked the wires back inside the secondary hul so the the board coudl slide into the new brackets I had made earlier. It slid in just fine.
Then for the moment of truth; I tested the light and motor circuits using my just acquired 12V X 2A power adapter from Modeman Tom's store and...
OMG! Horrors!
The board started to smoke!
Yikes!
Just kidding...
Everything worked perfectly as planned.
Sunday I'll finish painting the sanded saucer rim with "concrete".
Saturday I finished touching up the nacelles where I had filled in the small sinkholes next to the inboard trench-two on top and two on the bottom side of each trench. They were so minor I had considered just living with them but "they tasked me" so I filled them with PPP before sanding smooth; or what I thought was smooth. The hull color went on nice but you could still see the border of the putty just barely on two of the sinkholes so I had to sand again and respray at about 9 PM last night after getting home from a family BBQ. Call me anal but I wanted to finish the nacelle paint touch ups yesterday so they would be dry by this morning. I also hit a few spots on the secondary hull where the paint had gotten marred by my efforts to remove some dried stray bits of AVES putty.
All sinkoles are now gone and the nacelles and secondary hull are nice and smooth.
Oh... and I also sprayed the deflector dish and rings with Alclad copper, painted the base with Krylon Stainless Steel, glued the "warp balls" into the rear endcaps, glued the screens into the nacelle trench covers. and finished painting the "ion pod" for the lower saucer dome.
Sunday I finished painting the saucer rim and worked some more on the stand. Stainless Steel areas were masked off (took me about 5 hours to finish the masking) and areas inside the floodlight frames were sprayed with Testors Gloss Black enamel.
Here are some pics of Saturday's progress...
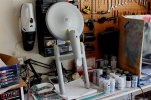
IMG_4732 by trekriffic, on Flickr
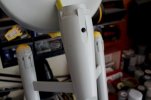
IMG_4731 by trekriffic, on Flickr
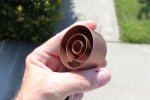
IMG_4736 by trekriffic, on Flickr
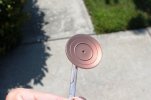
IMG_4737 by trekriffic, on Flickr
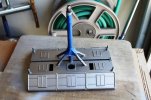
IMG_4733 by trekriffic, on Flickr
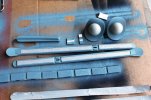
IMG_4739 by trekriffic, on Flickr
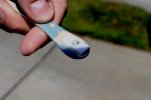
IMG_4740 by trekriffic, on Flickr
Please note the accent color of the parts in the second to last photo are not as bluish as they appear in the photo. I adjusted the pic for brightness to darken it a little which accentuated the bluish nature of Model Master Medium Gray. In person, they are much more gray than blue.
Thanks for reading!
Weekend update...
Saturday I plugged all the remaining wire harneses into the main PC board and hooked it up to the wires from the power jack in the underbelly.
Then I poked the wires back inside the secondary hul so the the board coudl slide into the new brackets I had made earlier. It slid in just fine.
Then for the moment of truth; I tested the light and motor circuits using my just acquired 12V X 2A power adapter from Modeman Tom's store and...
OMG! Horrors!
The board started to smoke!
Yikes!
Just kidding...
Everything worked perfectly as planned.
Sunday I'll finish painting the sanded saucer rim with "concrete".
Saturday I finished touching up the nacelles where I had filled in the small sinkholes next to the inboard trench-two on top and two on the bottom side of each trench. They were so minor I had considered just living with them but "they tasked me" so I filled them with PPP before sanding smooth; or what I thought was smooth. The hull color went on nice but you could still see the border of the putty just barely on two of the sinkholes so I had to sand again and respray at about 9 PM last night after getting home from a family BBQ. Call me anal but I wanted to finish the nacelle paint touch ups yesterday so they would be dry by this morning. I also hit a few spots on the secondary hull where the paint had gotten marred by my efforts to remove some dried stray bits of AVES putty.
All sinkoles are now gone and the nacelles and secondary hull are nice and smooth.
Oh... and I also sprayed the deflector dish and rings with Alclad copper, painted the base with Krylon Stainless Steel, glued the "warp balls" into the rear endcaps, glued the screens into the nacelle trench covers. and finished painting the "ion pod" for the lower saucer dome.
Sunday I finished painting the saucer rim and worked some more on the stand. Stainless Steel areas were masked off (took me about 5 hours to finish the masking) and areas inside the floodlight frames were sprayed with Testors Gloss Black enamel.
Here are some pics of Saturday's progress...

IMG_4732 by trekriffic, on Flickr

IMG_4731 by trekriffic, on Flickr

IMG_4736 by trekriffic, on Flickr

IMG_4737 by trekriffic, on Flickr

IMG_4733 by trekriffic, on Flickr

IMG_4739 by trekriffic, on Flickr

IMG_4740 by trekriffic, on Flickr
Please note the accent color of the parts in the second to last photo are not as bluish as they appear in the photo. I adjusted the pic for brightness to darken it a little which accentuated the bluish nature of Model Master Medium Gray. In person, they are much more gray than blue.
Thanks for reading!
trekriffic
Well-Known Member
- Joined
- Jan 6, 2012
- Messages
- 1,041
Slow progress..
I modified the stand by adding a thick rubber washer with a thinner nylon washer underneath it to top of the neck right up against the bottom of the hull. I glued them in place using Devcon 5-minute epoxy and they are sure on there for good. The model doesn't rock back and forth so much now on the narrow neck:
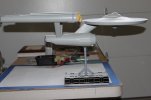
IMG_4741 by trekriffic, on Flickr
The base after I removed the masking tape and retouched some of the
black areas with a brush. I sprayed with Testors Gloss Black and for brushing I decanted it from the spray can. I had no significant bleed under the tape
onto the stainless steel areas luckily.
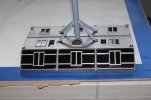
IMG_4742 by trekriffic, on Flickr
Finally finished touching up the saucer rim:
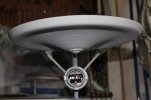
IMG_4744 by trekriffic, on Flickr
Look Spock! No seams!
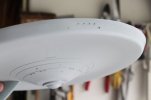
IMG_4745 by trekriffic, on Flickr
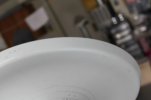
IMG_4746 by trekriffic, on Flickr
The stand was re-masked and the display tube and legs were airbrushed with Testors Dark Blue enamel:
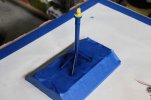
IMG_4748 by trekriffic, on Flickr
I layed it on pretty thick so it will take a few days to dry.
More later!
I modified the stand by adding a thick rubber washer with a thinner nylon washer underneath it to top of the neck right up against the bottom of the hull. I glued them in place using Devcon 5-minute epoxy and they are sure on there for good. The model doesn't rock back and forth so much now on the narrow neck:

IMG_4741 by trekriffic, on Flickr
The base after I removed the masking tape and retouched some of the
black areas with a brush. I sprayed with Testors Gloss Black and for brushing I decanted it from the spray can. I had no significant bleed under the tape
onto the stainless steel areas luckily.

IMG_4742 by trekriffic, on Flickr
Finally finished touching up the saucer rim:

IMG_4744 by trekriffic, on Flickr
Look Spock! No seams!

IMG_4745 by trekriffic, on Flickr

IMG_4746 by trekriffic, on Flickr
The stand was re-masked and the display tube and legs were airbrushed with Testors Dark Blue enamel:

IMG_4748 by trekriffic, on Flickr
I layed it on pretty thick so it will take a few days to dry.
More later!
trekriffic
Well-Known Member
- Joined
- Jan 6, 2012
- Messages
- 1,041
So with the stand having dried overnight I spent my lunch hour soldering the wires leading up the neck to the Enterprise's lights and motors. I still need to finish wiring up the spotlights on each corner of the stand but couldn't resist posting a few pics of the ship on the stand with lights on.
The stand has two lit rocker switches and one other non-lit switch in the center for the spots. The switch on the left is for lights, the one on the right is for the motors. Everything runs off a 2 amp power adapter so there's plenty of juice.
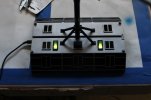
IMG_4771 by trekriffic, on Flickr
The impulse engines in their original series mode:
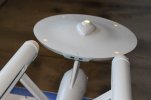
IMG_4758 by trekriffic, on Flickr
And lit up like the remastered version:
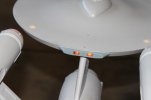
IMG_4757 by trekriffic, on Flickr
The Enterprise with lights on. Still have a lot to do of course:
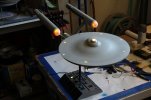
IMG_4752 by trekriffic, on Flickr
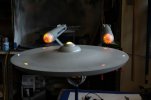
IMG_4764 by trekriffic, on Flickr
Thanks for any comments!
The stand has two lit rocker switches and one other non-lit switch in the center for the spots. The switch on the left is for lights, the one on the right is for the motors. Everything runs off a 2 amp power adapter so there's plenty of juice.

IMG_4771 by trekriffic, on Flickr
The impulse engines in their original series mode:

IMG_4758 by trekriffic, on Flickr
And lit up like the remastered version:

IMG_4757 by trekriffic, on Flickr
The Enterprise with lights on. Still have a lot to do of course:

IMG_4752 by trekriffic, on Flickr

IMG_4764 by trekriffic, on Flickr
Thanks for any comments!
Similar threads
- Replies
- 0
- Views
- 86
- Replies
- 2
- Views
- 194
- Replies
- 0
- Views
- 760
Latest posts
-
-
-
-
-
-
Can you make a tank disappear? The Evolution of Tank Camouflage
- Latest: ambivalentmaybe
-
