My Another 1/350 TOS Enterprise Build Thread

Today's work...

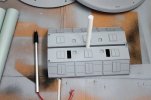
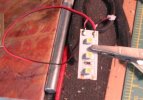
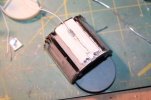
Got started on the base. I'm using the base from the Refit kit; the Refit will get the round base from this kit. I cut out rectangular openings for the two lighted rocker switches on top for my two circuits; drilled out an opening on the side for the "M" sized DC panel jack the power supply plugs into; and carved an opening in the channel down the middle for the support tube to slide into. Then I gave it multiple coats of Dupli-Color primer:
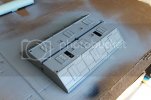
IMG_4357_zps86b3d928.jpg

I plan to spray it with Krylon Black and then give it a coat of Krylon Steel. I even have decals for the lighted panels that were included on the Refit's decal sheet. Too cool! I didn't even know the Refit base had decals until I tuned in to Steve Neill's blog and saw where he was using the same base and his customer asked him to apply them. They will look great I think; especially if I can mount a few LEDs on top and shine them up at the underside of the Enterprise.

Moving along, I also mixed up a batch of paint for the main hull color. I used two bottles of MM Imperial Japanese Navy Sky Grey, most of a bottle of thinned ACE Shady Cove (left over from my 1/1000 build); most of a bottle of MM Flat White; and a dash of MM SAC Bomber Green to taste. It's pretty close to what I want, I might want to add a little more white.

Here are a few pics of the mix against a color sample from ACE...
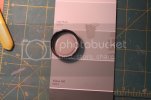
IMG_4355_zps981c7b6b.jpg

and next to the unpainted kit plastic...
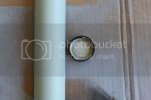
IMG_4356_zpsd334cd31.jpg

It's veeeeery close to the shade I'm looking for think.
 
He's got bandwidth issues right now. Photobucket can be like that some times if you're not paying
 
Well as some of you have noticed PhotoBucket has decreed that I have reached my forum bandwidth limit and have disabled all the links to my photos until such time as I sign up and pay for their Plus package which starts at $29.99 per annum for 20 GB of bandwidth. As I am still undecided as to whether I want to spend the bucks on something I can still get for free on other photo sharing sites I am providing a liink to my 1/350 TOS Enterprise album for those who still want to view them:

http://s146.photobucket.com/user/Trekriffic/library/?postlogin=true#/user/Trekriffic/library/?postlogin=true&page=1&_suid=137027797004103607196274746292.

For now I will be using Flickr, ImageShack, or Picasa for future posts; whichever turns out to be easiest to work with. If any members here have recommendations for free photo sharing sites, other than the ones I've just listed, please tell me about them.
 
Weekend update...

I cut about an 8 inch length of Plastruct tubing and glued it into a hole drilled into the top of the base with styrene cement. The aluminum tubing with power plug will slide inside this sleeve allowing for removal from the base:

8942679860_7c6e8b9230.jpg
IMG_4360 by trekriffic, on Flickr

The tubing was reinforced underneath with AVES and Tamiya epoxy putty:

8942054673_a96dd597c9.jpg
IMG_4376 by trekriffic, on Flickr

The fantail windows had to be cut from their backing and glued in flush with the interior surface of the hull with CA; otherwise, the fit was too tight with the shuttle bay in place to allow the hull to close:

8942679700_33b04d53a2.jpg
IMG_4363 by trekriffic, on Flickr

The windows viewed from outside:

8942679426_13ee96d05b.jpg
IMG_4364 by trekriffic, on Flickr

Work was done on the connecting dorsal...

I wanted a mix of dark and translucent white windows so I had to cut up the kit parts to mix and match. The windows were then glued in using Devcon 5-minute epoxy which doesn't mar the inside layers of light blocking/reflective paint. It does tend to get on your fingers though which is a real PITA.
For the orange window on each side I overcoated it with Tamiya transparent orange acrylic on the backside. For the two windows on each side with screens behind them I carved away the backing plastic with a dremel router bit and thinned the window pane to about 1/32" thickness in order for the photo-etch screen to be barely visible when backlit:

8942679124_b0f688a62d.jpg
IMG_4365 by trekriffic, on Flickr

Once the PE screens were cut to the size of the window frames I laid them into the recesses and filled from behind with CA:

8942678974_e294111ac3.jpg
IMG_4366 by trekriffic, on Flickr

I then laid down adhesive-backed foil strips to frame the opening and lessen the chance of light bleed:

8942678398_f9e1cba7c1.jpg
IMG_4372 by trekriffic, on Flickr

The dorsal halves with windows in place. I made the starboard side match the studio model as far as dark and light window placement; the port side was done with a different pattern since since I do not think it logical to assume that window symmetry would be a requirement on board the Enterprise:

8942056329_d97e36fbf0.jpg
IMG_4361 by trekriffic, on Flickr

I pulled the G and C harnesses from the light kit and followed the instructions to connect the light strip sections using the edge connectors. No matter what I did I just couldn't get them to light using the connectors so I desoldered the wire leads from the connectors and soldered them directly to the strips:

8942678406_a0c14e2e84.jpg
IMG_4373 by trekriffic, on Flickr

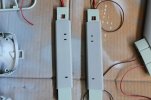
Once that was done I peeled the backing tape off the strips and stuck them to the locatios indicated on the top and bottom inside surfaces of the dorsals facing in opposite directions. The tape didn't appear all that strong to me so I first laid a rectangle of double-sided adhesive foam tape down on the hull mounting points before sticking the LED strips to the foam tape. Then I squeezed a nice glob of hot glue on the wires at each end of the strip to provide strain relief for the solder joints and added insurance in case the tape ever gave way.

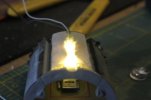
Here's a light test of the finished dorsal with the wire harnesses for the dorsal and saucer power hanging out:

8942054831_af25c27d93.jpg
IMG_4375 by trekriffic, on Flickr

Moving back to the secondary hull, I soldered the wires to the four DC power panel jack contacts and sealed them shrink tubing. Then I packed the jack with Tamiya putty all around makig sure not to get any where the other hull half needed to mate up with it:


IMG_4359 by trekriffic, on Flickr

For the nacelle struts I glued in the black window insert to the outboard halves before laying in two sets of wires and gluing the two halves together for each strut using styrene cement:

8942054511_8ee65e9dd6.jpg
IMG_4377 by trekriffic, on Flickr

One thing I notiiced about the strut halves concerned some slight warpage of the parts when I first removed them from the sprue. I had planned to clamp them tight between two lenghts of 2x4 when gluing them together so when the glue dried they'd be flat but I didn't need to do that after all. I surmise that having lain on my worktable in the garage for some weeks where the sun could warm them thru the garage door windows they gradually flattened out on their own. Nice!


The last thing I did Sunday evening was some work on the bussard lighting parts...

I modified the plastic bussard bulbs to allow insertion of clear and colored LEDs inside the bulbs.
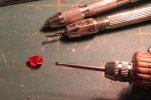
This should hopefully translate to a brighter lightshow once the orange coated inner spinner with mirror button and white frosted outer domes are in place. First I snipped off the shaft at the base of each bulb designed to fit into the bulb tower bulkhead. Then I drilled a small hole using a bit in my pinvise before using a round router bit on my battery operated "dremel" to finish the job. Some of the bulbs had air bubbles inside which greatly speeded up the process:

8942055565_561d8ac87d.jpg
IMG_4370 by trekriffic, on Flickr

After doing about 5 or 6 of these I was able to get an almost perfect fit each time with the Lighthouse LEDs. I'll use a mix of diffuse amber/orange, white, and maybe yellow/gold wide angle and ultrabright LEDs for the 5 always on lights in each bussard and a mix of blue, pink, green, and red lights for the flashers:

8942678496_f0750cfc59.jpg
IMG_4371 by trekriffic, on Flickr

I hollowed out 22 bulbs in all giving me a few extra in each color as I'm still deciding what mix of colors I want to go with for the flashers. This took about 2 hours to finish as I had to take a break now and then due to finger cramps from holding the bulbs as I worked.

Here's one of the amber/orange LEDs inserted into an amber bulb and powered up:

8942055773_4cb2164e51.jpg
IMG_4367 by trekriffic, on Flickr

That's it for this update.

Thanks for sticking with me on this build!
 
Yesterday I started working with the Miniatronics strobe flasher board and while gluing the incandescent bulbs into the clear kit strobe inserts one of the bulbs burned out. Needless to say, I was a bit disappointed with the fragility of the bulbs and after trying to see if I had any more 1.5 V grain-of-rice bulbs in my stash (I didn't) I changed course and decided to go in a different direction. Using the lighting kit port P's on the Polar Lights board wasn't really an option since one of the ports was bad and just didn't work. I probably could have tried wiring 2 LEDs into one "P" port but, even had that worked, it wouldn't have changed the other thing I didn't like which was the flash rate; It was too slow for what I wanted for my strobes so...
I had purchased a flasher controller online from Modeler's Brand Hobby Supplies for 10 bucks:

http://modelersbrand.com/html/item_pages/ctrl_flashers.html

Modelman Tom runs the site and he had told me you could run up to something like 20 LEDs wired in parallel off his controller in a variety of modes, flash rates, and brightnesses. So for 10 bucks I thought it sounded like a good deal and went ahead and ordered one to try out.
I hooked it up to an open 12V port on the secondary hull lighting kit PC board and wired it to two LEDs with 510 ohm resistors.
Then I made a video...

1/350 Enterprise Strobes using Modeller's Brand flasher - YouTube

It worked great and I am so thankful to Modelman Tom for offering this excellent flasher controller at a very affordable price! I'm just sorry I flubbed his online store's name in my video! It's modelersbrand.com damn it!

Anyway, take it easy everyone and I hope you like the vid.
 
Latest progress...

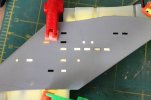
I am soldering the wire leads to the LED strip lights and sticking them down to foam tape before squirting a glob of hot glue for strain relief at each end:

8979844534_8394e135dc_b.jpg
IMG_4387 by trekriffic, on Flickr

Here's the lower saucer with strips installed:

8979844658_b3f2a9a583_b.jpg
IMG_4386 by trekriffic, on Flickr

Last night I soldered 30 AWG Kynar wire to two tiny SMD LEDs and taped them into the trench over the center of the shuttle bay using transparent tape:

8978648855_1d72796427_b.jpg
IMG_4393 by trekriffic, on Flickr

Then I did a light test with just the two SMD LEDs on. I still need to add the 4 LEDs that mount on the perimeter of the back wall to light the sides of the bay and the side gallery windows:

8978649231_f885e12c82_b.jpg
IMG_4390 by trekriffic, on Flickr

The rearmost LED is almost directly beneath the three small spine lights so I'm pretty sure I'll get them to glow too.

8979844272_28d46f954b_b.jpg
IMG_4391 by trekriffic, on Flickr
8978649341_699dca97b9_b.jpg
IMG_4389 by trekriffic, on Flickr

For the gallery windows on the back wall I glued some of the Shadow casters from the ParaGrafix PE set:

8978649101_d536b2ec4b_b.jpg
IMG_4392 by trekriffic, on Flickr

I won't be using the two sternmost LED strip lights as most of the windows in that area are not lit. Instead I'll place one 5MM superbright LED in that area
facing the back wall of the bay. It should provide some additional illumination to the bay and really make the figures in the backwall gallery pop!

Last thing for this report...

I wanted the option of showing the bay doors open or closed so I cut out the middle section of bay doors from the "closed" bay door part to use with the "open" door part. The closed door part was thicker than the open door part so I thinned it with my dremel, a seam scraper, and sandpaper before light blocking with black enamel and primer on the inside facing surface. The outside of both parts was painted with my custom hull color mix:

8979843696_017e4f334e_b.jpg
IMG_4396 by trekriffic, on Flickr

That's it for now.

Have a good one!
 
Got some more work done at lunch last Friday...

I followed RossW's advice and brushed on liquid insulation to the LED strip solder joints:

8982459644_efe23f72ea_b.jpg
IMG_4410 by trekriffic, on Flickr

Then I started working on dry fitting the shuttle bay into the hull. First thing was to carve a trench into the hull directly over the ceiling trench of the bay. I made it deep enough for the spine light insert to sit flush with the inside surface. This would also avoid impinging on the delicate wiring of the SMD LEDs in the trench:

8982460436_3dc2d45c3b_b.jpg
IMG_4400 by trekriffic, on Flickr

After gluing the 4 LED harness to the back wall of the bay I realized that, as is, there was no way on earth to close the hull halves due to the bulbs sticking out too far so I carved trenches about 1/16" deep into the hull at the back of the bay:

8981268243_ff67b3bf7d_b.jpg
IMG_4401 by trekriffic, on Flickr

Then I did another dry fit with much better results:

8982460496_1f0aede49a_b.jpg
IMG_4402 by trekriffic, on Flickr

I was able to get the hull almost completely closed. In fact, even brute force squeezing didn't get it much tighter. Once I apply glue and clamp it tight to dry there should be no gaps to speak of; and if there are, I can easily putty them:

8981267999_31bfca9ee4_b.jpg
IMG_4403 by trekriffic, on Flickr

8982460084_cb892b33dd_b.jpg
IMG_4404 by trekriffic, on Flickr

Light test with just the 4 back/side wall bulbs lit. I'll need to address the light leakage around the edge of the bay doorframe. I might try sticking some rolled AVES onto the hull along the frame line before inserting the bay so when I glue and clamp it will be squeezed in good and tight between the hull and the frame. Then I can trim away the excess before lightblocking the AVES with black enamel.Then I'll give the frame and doors a shot of the hull color. That should do the trick I think:

8982460018_e14fb966cd_b.jpg
IMG_4406 by trekriffic, on Flickr

The outside windows light up pretty well. As you can see, I'll have to light block where I dug the trenches:

8982459844_c015e0eec3_b.jpg
IMG_4407 by trekriffic, on Flickr

I'm really looking forward to getting the hull closed up with the overhead SMD lights on and the superbright LED shining thru the rear gallery windows in addition to the back/sidewall LEDs. I think the bay will be plenty well lit after all the LEDs are operating.
 
Update...

Earlier I related my work to replace the single flashing LED on each side of the saucer with two parallel wired "lighthouse" style LEDs I got from modelersbrand.com. That done it was time to prepare the plastic colored red and green (upper saucer) and clear (bottom saucer) domes for insertion of the LED's. To do this I first had to shorten the neck on the LED for the lower saucer domes as they insert into the clear part from inside the saucer rather than feeding thru the hull first. This picture compares the upper saucer LED on the left with the shortened LED for the lower saucer light to the right:

9010336214_a0816e0546_b.jpg
IMG_4414 by trekriffic, on Flickr

After drilling holes into the plastic kit domes I glued the upper saucer LEDs up and thru the holes in the hull leaving the colored domes off until after I finish painting; it will be much easier to mask cylinders as opposed to domes. Then I glued the lower domes onto the LED and left them free until it's time to glue the saucer halves together. I will need to mask the domes on the bottom though but that's what MicroMask liquid mask is for.

Moving on, I finished soldering the connections between the the secondary hull halves. I even added a white LED mounted between the pylon buttresses to provide extra light into the rear of the shuttle bay. I also afixed the flasher controller from modelersbrand.com (which will power the strobes) to the lower port side of the secondary hull using foam tape:

9009154319_e446f3f62f_b.jpg
IMG_4419 by trekriffic, on Flickr

Even using heavy duty clamps after gluing with Testors cement and CA , the halves still had about a 1/32" wide gap to fill along the spine. I filled it with Tamiya epoxy putty:

9010336440_2b3c6bea17_b.jpg
IMG_4423 by trekriffic, on Flickr

I wanted to see how the shuttle bay looked installed with the lights on. The pic below was taken with the rear/side wall and upper ceiling lights on but not with the rear facing LED that sits between the pylons aimed at the rear gallery windows on:

9009153537_ffe9c5afe4_b.jpg
IMG_4430 by trekriffic, on Flickr

I gotta admit, I''m pretty happy with the bay lighting! It will be even a little bit brighter once I have the rear window facing LED lit up. It's tied into the "E" LED strip light string with a 510 ohm resistor on the negative leg to handle 12 volts.

One thing I wanted to do was light up the 3 lights over the bay on the spine aft of the nacelle pylons. I think I accomplished that pretty well:

9009153775_503bc25842_b.jpg
IMG_4429 by trekriffic, on Flickr

Today I did some sanding of the Tamiya putty then I gave the seams a treatment of the PPP:

9009153781_fb3d1a0b28_b.jpg
IMG_4431 by trekriffic, on Flickr

9009153309_9e96b0414a_b.jpg
IMG_4432 by trekriffic, on Flickr

I'll wait until later to go back and sand the PPP. Then I'll brush some Mr Surfacer on the seams and we'll see where we're at. Once I've got the seams smoothed to my satisfaction I'll start masking the windows. I'm hoping to use Mr Surfacer for light blocking along the seams. She'll then get another coat of primer. I'd rather not have to resort to undercoating the primer with a layer of black paint if I can avoid it.

That's all for now folks! Thanks for reading!
 
Thanks Q!

The latest...

After sealing up the hull I noticed that the LED I had installed to light the rear wall windows of the shuttle bay was cool white with a slight bluish tint. This didn't work well since the other windows in the bay were lit with warm white LEDs with a more yellowish tint. So yesterday I went about replacing the cool white LED with a warm one. Luckily I had a spare warm white LED from the "N" wiring harness since I am not lighting the impulse engines...

Here's the offending cool white LED and it's resistor after I pried it loose from inside the hull with the aid of my newly purchased foot long hemostat. No Novacane was used:

$29 9033550351_21feffc40f_b.jpg
IMG_4434 by trekriffic, on Flickr

I used the same hemostat to glue in the new warm white LED. It's visible near the top middle of this photo inside two sections of Evergreen tubing. The LED and legs slid inside a short piece of 7/32" O.D. tubing which itself slid inside a short length of 9/32: O.D. tubing that was glued to, and between, the pylon buttresses:

9033550005_6cd47e013b_b.jpg
IMG_4438 by trekriffic, on Flickr

The rear wall lit up with the new LED:

9035774974_88903085ff_b.jpg
IMG_4441 by trekriffic, on Flickr

Worked on the dome over the bay. The clear insert that fits inside the dome had clear rods at staggered heights that were painted with clear red, yellow, and amber paint:

9035775422_ae1324855f_b.jpg
IMG_4436 by trekriffic, on Flickr

Here's the dome lit up:

9035774826_6f51d3f34a_b.jpg
IMG_4453 by trekriffic, on Flickr

More to come!
 
Quaralane said:

Thanks again Q!

After posting the photo of my shuttle bay dome I went onto a site with photos taken during the 1991 restoration and found this shot of the disassembled dome:

9036258878_e4b963f3b5_b.jpg
Hangar dome by trekriffic, on Flickr

I noticed something right off and that was the insert was made of what appears to be translucent dark green plastic with three rods of red, amber, and yelow projecting up from it at different heights. Of particular interest to me was the dark green plastic. The Polar Lights kit makes no reference to painting the kit insert dark green on it's face yet I think it's critical to giving the lit dome the greenish tint we saw on the screen. Since I've already jammed the insert in so tight it cannot be pried loose from the dome, I've gone ahead and painted the underside dark green being careful not to paint over the other colors. Once it dries I'll do another light test and we'll see how it looks.
 

Latest posts

Back
Top