MPC Star Wars rebel fleet diorama build

stevethefish

My name's actually not Steve
Joined
Jun 12, 2015
Messages
295
Here I will share a project I've been working on. I've shared this with Blake. I've taken the Hoth Rebel Base diorama set and will create a diorama of the Millennium Falcon and some X-Wings escorting a Rebel Transport. The vacuform base and such will get trashed. The ridiculous Y-Wings won't be used as they were obviously designed without reference material, and the Snowspeeders of course will not be used.

Here I will provide posts I've made to my Tumblr modeling feed.

 
still amazed you got the X-Wings engines lit as well as all the additional details on the Falcon
 
still amazed you got the X-Wings engines lit as well as all the additional details on the Falcon
0402 SMDs from HDAModelworx.com! Actually, since shipping from America is completely ridonk, I've had to buy those from AliExpress instead, which is actually quite a bit cheaper.

The difficult part was drilling holes through the X-Wing's engines, since they come completely solid. I found that it's easier to aim for the middle with a tiny drill bit, then use that hole as a guide to expand to a bigger drill bit.

After posting this, I saw down below in the "similar threads" that a user on here was busy with this same kit as well. Here is the thread. He actually improved the Y-Wings a bit, but still the noses are way too wide.

Right now I haven't progressed with this project because I decided to add one more X-Wing. I'm glad I videoed the process because I can re-watch and remind myself how I did the modifications.
 
You've got some really clever LED work in here. I love the Zip tie use.
I had to zoom in on the original picture an embarrassing amount to realize what Y-Wings you were talking about, lol.
 
You've got some really clever LED work in here. I love the Zip tie use.
I had to zoom in on the original picture an embarrassing amount to realize what Y-Wings you were talking about, lol.
Yeah, the Y-Wings are completely irredeemable. I've seen some people try to hack them up and salvage them, but the shape and contours are just all wrong. I got the idea of using a zip tie from Dorobou Hige. He used a smaller one for lighting the Bandai 1:350 Falcon kit for Model Graphix magazine years ago when it first came out. I'm lucky it was a perfect fit!
 
SAM_5219.JPG


MPC Empire Strikes Back Hoth Rebel Base build updateAugust 4th, 2023

Here I'll post updates on what I have done to incorporate the X-Wings included with this kit into the diorama I'm working on. Unfortunately, the Y-Wings are just too goofy looking, and they were sculpted without proper reference material.

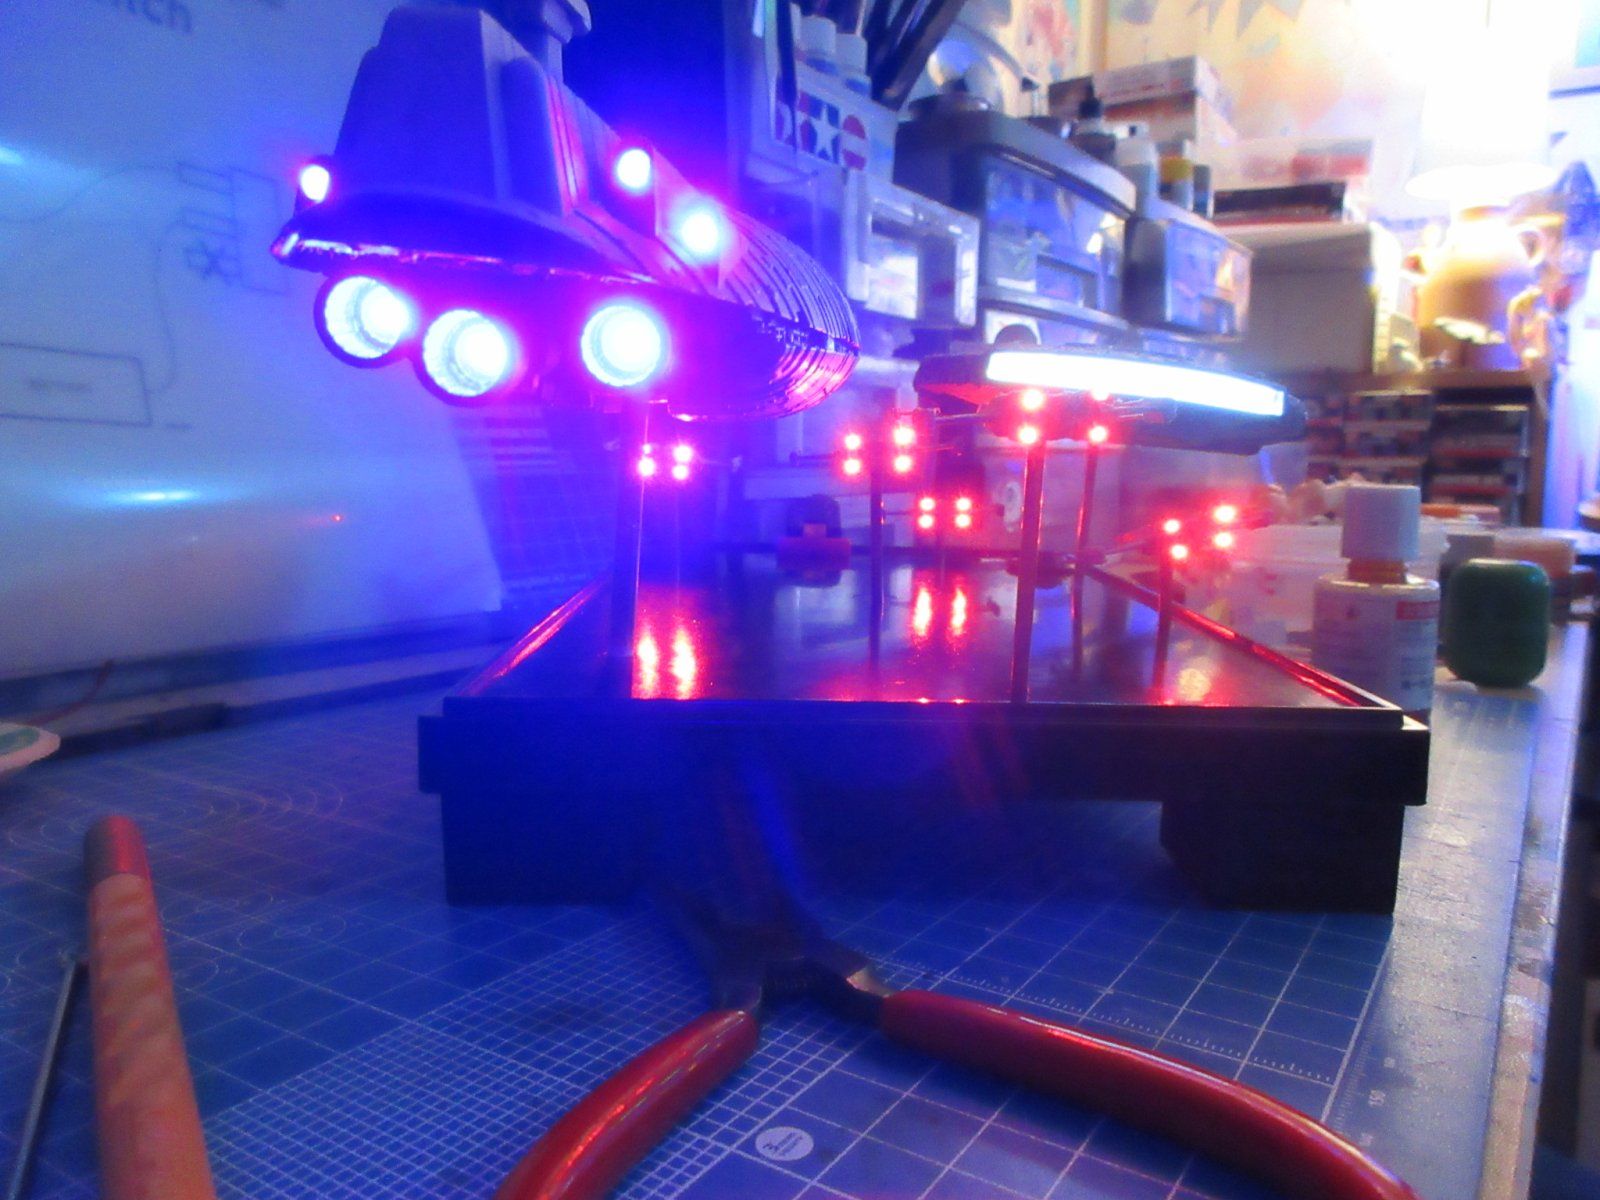
After a discouraging setback with trying to use fiber optics to light the X-Wings' engines, I decided to go all out and use red 0402 SMDs for the engines.

DSCN5820.JPG

Channeling out the engine cans was not too difficult of a task. the X-Wings come sculpted with only one laser cannon per side so in order to give them four laser cannons, I used sewing pins, capped with Wave 2mm semi-circular plastic sticks cut into segments to represent the flash suppressors at the tip of each. I just needed to drill a hole into the center of each of these segments.

SAM_5223.JPG

Once the SMDs were fastened into position using 2 part Wave epoxy glue (which smells really badly). Once the X-wings' top and bottom halves were glued together, I added back plates that I had invented on my own to sort of represent the detail that's supposed to go there. I used masking circles by HiQ Parts to protect the SMDs.
SAM_5224.JPG

The next step was to add detail to the tips of the engine nacelles. The way the kit comes, they look rather featureless. I used Wave plastic pipe cut into segments for the nacelle tips and plastic plate to create the T-sections. They look nice! Check out this comparison before/after picture:

Xwing nacelles before and after.jpg

I airbrushed these X-Wings with Model Master Camouflage Gray acrylic paint.

SAM_5227.JPG

I had scanned the excellent Fine Molds decals for this kit, mathematically sized it down to the proper scale, and printed them out on Fine Molds clear decal paper.

vid15.jpg

I distressed the decals with my hobby knife as I saw fit, in order to create paint chips. That's it for this update. I'm nearly done!
 
Last edited:
Thanks, guys. I need to seal the decals on the X-Wings, put a wash on them to bring out their details, maybe add some chalk, and do a flat coat. After that, I wanna paint up the Astromech droids. I'll have Luke's Red 5 and Wedge's Red 3, and then some of these X-Wings are my own ideas and I've painted them as I saw fit. Just the random way these molds were injected, some of the Astromechs sit higher than others, so for a couple I sanded them flat on top to make them R5 droids. I've had a lot of fun adding so much detail to this old kit to accurize the ships and such. People complain about a lack of detail and accuracy, but I am enjoying adding it to this old kit.

Maybe I'll finally have this and my Fine Molds Falcon completed this summer. Starting next week, I'll be off for 13 days straight. Say, 13 days... Why, that's nearly... TWO WEEKS!
1691112349071.png
 
IMG_0328.JPG
I used Tamiya's dark gray panel liner as well as artist chalk to add detail. Next I shall cover these with a flat clear coat, remove the canopy masking (it should be gloss black underneath), then paint the astromechs.
 
IMG_0334.JPGIMG_0335.JPG
Here I've secured the ships to the base, which is an upside-down sushi tray I bought at the 100 yen shop Daiso. I've installed a rocker switch too. The next part was soldering all of the wires together to the switch and the 9V battery pack.

IMG_0336.JPG
IMG_0337.JPGIMG_0338.JPGIMG_0339.JPG
What I think I'll do next is paint the top surface of the base as well as the support rods with that absolute black paint that absorbs all light. This will prevent the light from reflecting like you see in the picture. I also need to tape up the big mess of wires on to the bottom of the tray to prevent them from hanging down.
 

Attachments

  • IMG_0337.JPG
    IMG_0337.JPG
    227 KB · Views: 1

Latest posts

Back
Top