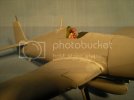
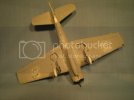
Monogram 1/48 F6F

the Baron

Ich bin ja, Herr, in Deiner Macht
Joined
May 12, 2009
Messages
2,026
Hi, all!

I'd like to share a project I've started for a build over at AgapeModels.com, the Monogram Aircraft Fellowship Build. It's all about nostalgia!

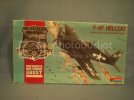
My entry is the F6F Hellcat. I picked up a late 80's boxing on eBay:

1Boxcover.jpg

That was their Confederate Air Force commemorative version, though the kit itself goes back to the early 60s.

I'll try to keep my posts in synch between here and there; this is a catch-up, and with the next post, I'll have everyone here up-to-date with my present status.

Thanks for following along!
Brad
 
I spent some time looking over the parts, to identify potential problem areas, and plan to avoid or correct them.

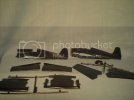
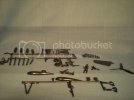
Here are the parts, out of the box:

1parts1.jpg

1parts2.jpg

Don't worry if you don't see all of the parts here in the pictures, they are all present in the box. I've avoided that pitfall of buying second-hand kits!

Then I did some test-fitting. This kit is of the same vintage as the TBF kit, and that one does have some things to watch out for, fit-wise, I do not deny. The F6F, though, is a little better. I think that with careful application of the things I learned in the P-39 build, I can reduce the amount of work it will take to address the seams. The biggest problem will be loss of detail. The kit has a lot of raised rivets-not an accuracy problem, in my opinion, but it means being prepared to deal with replacing lost details.

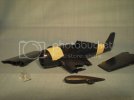
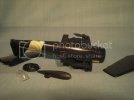
Here are some shots of the main assemblies, fitted and taped together:

2Test-fittingparts1.jpg

2Test-fittingparts2.jpg

I think that once I clean up the mating surfaces of the fuselage halves, they will fit very well. Same goes for the wings. The most likely area where fit will be a concern is in the wing root piece. Just as with the TBF, Monogram engineered this in top and bottom halves, that pass through the fuselage (instead of top and bottom full wings that would have fit into slots in the sides of the fuselage). The potential problem is with the opening in the fuselage for this piece. On the TBF, it's a gapper, all the way around. On this kit, it's not so bad. I'm thinking that once I have completed the interior, and I sandwich this piece (mmmmmmmmm-sandwich! aghlghghlghlghlghlghlghlghlghlghl! Sorry, went Homer there for a minute!) when I sandwich this piece between the fuselage halves, I can hit it with liquid cement from the inside, through the nose, a section at a time, and the resulting weld will fill the seam from the inside out. We'll see.

My plans for the build are:

1. Build it as the first combat version, the F6F-3, which means opening the windows that version had, behind the cockpit, and filling the holes for the rockets and bombs that come with the kit. I'm not worrying about the variations in the shape of the cowling for this.
2. Add some detail to the cockpit, which has none. I will scratch this, though I may get a vacuform canopy, so I can display it open. I'm looking for details about what was behind the pilot's seat. I suspect a radio. Unfortunately, the Squadron "In Action" booklet doesn't say, so I'm researching that.
3. Color scheme will be the tricolor, with the national insignia with the red surround. I'm browsing aftermarket deckles now, and with several shows coming up between now and Christmas, I'll have plenty of opportunity to see them first-hand. The kit deckles are shot, by the way, and they're for an overall gloss sea blue bird, anyway.
4. The pilot stays! Not the mechanic, though, he's dressed more as USAAF, ETO, than as an airedale on an Essex-class flattop in the Pacific. I'll paint him and maybe stand him next to the P-47s, we'll see.

One bit of actual progress-I couldn't wait any longer to put glue to plastic. I assembled the belly tank, and I made a small change, based on almost every picture I've seen of the Hellcat. The tank out-of-the-box has a seam around the side perimeter, like the drop tanks on a P-51, P-40 or P-39. But the most commonly used tank on the Hellcat had a seam around the vertical perimeter, like the drop tanks developed for the P-38. I glued the top and bottom halves of the tank together, and when it had cured, I sanded down the molded seam, first with some 400-grit, then I hit it with the polishing pads. I like the way it came out.

Next step will be to depict the vertical seam with some stretched sprue. Then it's on to the interior!

Thanks for looking, and I hope everyone is having as much fun as I am!

YbiC
Brad
 
Hi, all! Here's a quick progress report on the F6F-3...

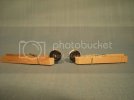
One of the areas I wanted to address is the kit's wheels. Here's a shot of the wheels, out-of-the-box:
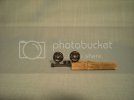
3Kitwheels1.jpg

Not bad, I guess? Maybe not too accurate, but the hub is reasonably detailed. But look what we find when we turn them around:
3Kitwheels2.jpg

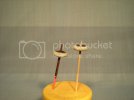
Ants! Sorry, that was an old "Sprockets" reference. No, the wheels are too narrow. Actually, these are the same wheels that Monogram included with the TBF kit. These aren't Grumman wheels! These are some kind of effete Messerschmidt narrow-gauge wheels. Well, here's my idea--I saw the wheels in half, beef them up with some styrene sheet, and make some good ol' corn-fed American wheels out of 'em.

I have an X-Acto miter box and a new razor saw:
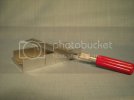
3Kitwheels3.jpg

The problem was, how to hold the pieces fast while sawing. So I thought I'd cut some blocks from some plywood scrap, to wedge into the miter box, and put the wheel between the blocks:
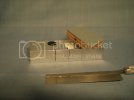
3Kitwheels4.jpg

Well, as it turned out, it was still too fiddly to hold the blocks in place-they were a hair narrower than the box-and hold the wheel in place, and draw the blade across--in short, I wound up holding the wheel with one hand and while I sawed with the other. Yes, I still have all of my fingertips...

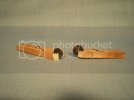
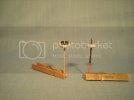
Here is the result-the wheels, sliced in half, with 3 pieces each of .020 sheet styrene sandwiched in between:
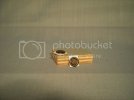
3Kitwheels5.jpg

Mmmmmmmmmmm-sandwich, aghlghlghlghlghlghlghlghlghlghlghlghlghl!

Sorry!

Once the wheels have cured, I'll file, then sand, the excess, and see how they look. With any luck, they'll look like the circumferential tread wheels that some F6F's had. If not, well, there's always Squadron...

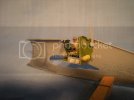
Some other progress, the center wing section assembled, with the landing struts, and the fuselage, with the -3's window cutouts behind the cockpit:
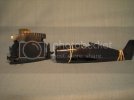
4progress1.jpg

Despite the lessons of my P-39 build, I still don't read the instructions enough. In this case, I missed an important item for this build. I'm keeping the operating features of the kit, basically, the working landing gear, and the folding wings. Now, though this modling dates back to around 1957, this boxing dates to about 1997, and the instructions omit reference to the parts you'd use for the operating wings. They'd have you just glue the outboard sections to the center section. So, I'm following the instructions, I'd carefully assembled the struts so that they operate, and trapped them between the upper and lower center wing sections, when I noticed the struts for the wings. And I thought to myself, "What the heck?! I've been following the instructions..." And I looked again, and that's when I realized--they left that bit out! Fortunately, the glue hadn't cured, so I was able to pry the pieces apart enough to insert the struts for the wings, and then close it up again. Crisis averted...

Here's one more shot of the fuselage, showing the window cutouts:
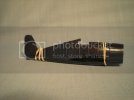
4progress2.jpg

The rubber bands are on just to hold the halves together as I check the fit.

To make the cutouts, I took a piece of Post-It, folded it in half, traced the outline of the window, then cut it out and had 2 templates. I stuck them to the fuselage and scored around them with a Nr. 11 blade. Then I used a fine drill bit and drilled holes along the scored lines, until I could snap off the waste. Unfortunately, the top of the razorback came away, too, because I hadn't drilled enough holes. But I glued it back in place, and a little sanding, and it's good as new. The window openings were filed and sanded to the current shape.

Next efforts will be on adding some cockpit details. And painting the pilot! I love that part!

Hope everyone is doing well, and having fun with the build.

YbiC

Brad
 
Hi, all! I have a quick update on my Hellcat's wheels. I spent some time last night cleaning them up. First, I cut away the excess plastic sheet with a razor saw, so there wouldn't be so much to file/sand:

5-1Kitwheelsandwich.jpg

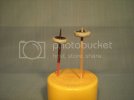
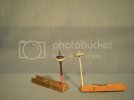
I had considered fixing each wheel in turn to a mandrill and chucking it in the Dremel, to spin the wheel while I held a piece of sandpaper up to it. But I decided to use hand power, for better control. So, with some judicious filing, and some sanding with 400-grit, the wheels look like this:

5-2Kitwheelscleanedup.jpg

and from the edge-on view:

5-3Kitwheelscleanedup.jpg

They're not finished, of course, by any means. The next pass will be a little putty, because there are some voids and seams between the pieces of styrene sheet, and maybe some Mr Surfacer over the whole tread surface, to tie everything together. But on the whole, I'm pleased with the way this little technique came out. Does it preclude using resin wheels in the future? No, of course not-though, not on this particular kit. But it was fun to try it and see how it worked.

I also cut some clear plastic for the cockpit window cutouts, and I installed the one on the port side, but I'll show that with the next batch of pictures.
 
Hi, everybody! It's been a while since I've posted any progress for you, but I have been chipping away at the Hellcat since I last posted. So, here are some updates.

First, the wheels. In my last post, I showed you how my little experiment in modifying the kit wheels was working. If you recall, they were just too thin, so I decided to try slicing them in half and making a sandwich (mmm, sandwich!) with some pieces of styrene glued in between. As we saw, I'd completed the rough work. So, here are some shots to bring us up to the present on the wheels.

First, I've applied putty, thinned with acetone, to fill the seams between the slices:

7-3Kitwheelswithputty1.jpg

This represents a couple of applications, in the sequence: apply putty, apply acetone to smooth it out and remove the excess, then a little sanding. Another view:

7-4kitwheelswithputty2.jpg

After using the putty, I moved to applications of Mr Surfacer:

7-1KitwheelswithMrSurfacer1.jpg

and from a slightly different angle:

7-2KitwheelswithMrSurfacer2.jpg

I may do a little more, because there is still a little seamage to be seen here and there. But I'm generally pleased with this experiment; I wanted to see if it could be done.

More to follow...
 
Next, I made some progress on the cockpit. Monogram's Hellcat is very much of a piece with its sister kits--the exterior detail was pretty good, better than what had been available before, but not much interior detail. In this case, the cockpit consists of a bulkhead to attach to the right fuselage half, and a slot for the tab on the pilot's back. There's an instrument panel decal, and that's it.

Now, in the intervening years, the decal has been improved, so that it actually looks like an F6F's panel. And my choice was to use the decal, though whether I could actually apply it, or use it dry, was a question. I did photocopy it, just in case.

Here are the raw materials, the decal, and a piece of styrene sheet, painted matte black:

8-Interior1IPdecal.jpg

I took the plunge and actually soaked the decal in water. I was encouraged when it didn't disintegrate. I was able to apply it to the styrene, and once it had set, I filed the sheet to shape. Here is a shot of the instrument panel now:

8-Interior2IPandgunsight.jpg

I've also added the support and the base for the gunsight. From another angle:

8-Interior3IPandgunsight.jpg

I'll attach this to the flat tab in the fuselage, where the instructions would have us otherwise apply the decal.

It remained to build a basic cockpit. I've scratched it from sheet styrene:

9-1cockpit.jpg

I attached the floor to the kit builkhead (which I also thickened with a piece of styrene sheet), then added the side panels:

9-2cockpit.jpg

The throttle quadrant is a piece of sprue, filed to shape while still on the tree, then sliced off and applied, with a piece of Evergreen strip for the level, and a little white glue for the knob (I may add a little more to make the knob bigger).

Finally, I added the control column from a piece of aluminum wire, masking tape for the hand grip, and Miliput for the leather boot over the coupling:

9-4cockpit.jpg

A view from a little to the side:

9-5cockpit.jpg

That's all that I plan to add to this piece, because you won't see too much, when the canopy is glued in place. All that remains is to paint it, and to apply some instrument and placard decals by Mike Grant.

There are some small panels to be added off the main instrument panel, but those will be done separately.

More to follow...
 
The last update is....the pilot!

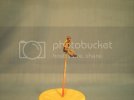
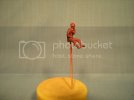
I enjoy the figures that come with kits, as much as I enjoy the machine. I think that comes from building Monogram kits as a kid; they had such well-done figures in their kits, even this old pilot from the early generation. So, while I was mulling over scratchbuilding the cockpit, and deciding what to do about other details, I painted the pilot.

Here he is, with a coat of WalMart's reddish-brown primer:

6-1HellcatoftheNavy.jpg

6-2HellcatoftheNavy.jpg

I bought this color, to see how it would work, and I think I'm going to stick with the grays after this. This doesn't show the detail as well, I think.

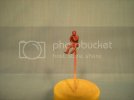
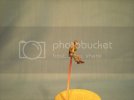
Once primed, I added the main colors:

6-3HellcatoftheNavy.jpg

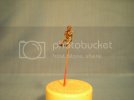
Tamiya colors throughout, with some minor exceptions: khaki for the shirt, trousers and flying helmet; flesh for the face; yellow for the life vest; and red brown for the shoes. Parachute harness and gloves are ancient Pactra colors that I still have in my stash, flesh for the harness and suntan for the gloves.

6-4HellcatoftheNavy.jpg

The khaki looked too dark to me; I'm not sure, but I think the paint in the jar may actually have changed. Or my memory is going :D In any case, I went back and drybrushed the Tamiya flesh over the shirt and trousers, leaving the darker khaki in the low points, and getting a little of a shaded effect:

6-5HellcatoftheNavy.jpg

I sealed with DullCote between passes, just to seal things as I worked. Final touches were some brown acrylic washing, to pick up the molded detail and tie everything together, and some Testor's gloss brown for the goggle lenses. Another view:

6-6HellcatoftheNavy.jpg

And now he's ready and waiting for his finished aircraft.

I've also attached the center wing section to the left fuselage half, and I've attached the outer wings to that. I got impatient and I wanted to see the wing folds in action.

Next step is to paint the cockpit and the interior, and assemble the halves. I promise not to let that go as long as this update has gone!

Thanks for looking, as always, criticisms and tips are welcome!

YbiC
Brad
 
Great problem solving with the wheels, YOU sir are hard core! I would have just ordered some resin replacements and called it a day, great work.
 
lol, thanks, I think I was just curious to see if it could be done ;D I've got improvements in mind, to try it again.
 
"Hmm...Brad was building something--what was it? It was so long ago..."

OK, with the deadline for our fellowship build now only 8 days away, I've broken through my modeler's block with this kit, and here are some progress pics.

What held me up was deciding to get started with those tiny, tiny decals. I got Mike Grant's beautiful instrument decals in 1/48 to add some extra detail to my F6F's cockpit, but then I hesitated over how best to apply them. I've read that people use a tap and die to punch them out, but that seemed like a lot of work to me. After all, they're decals, right? You soak 'em in water and slide 'em onto the piece. Well, sure, they're decals, but they're tiny, and since the whole sheet is one carrier film, you need to cut close to the image. As it was, it still wasn't as much work as lining up the tap and die would have been, though it was some fiddly decal application, I can tell you.

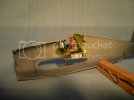
And so, here's a look at the finished cockpit, installed in the fuselage:

10-1completedcockpit.jpg

Get a good look, because pretty soon, only me and the Lord will know what's in there:

10-2completedcockpit.jpg

I hope that the oxygen bottle will be visible through the side windows, but I doubt it. Also, I've read, since I first painted that, that oxygen bottles were painted green, not yellow. Oh well, it was still fun adding the details.

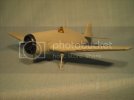
Then, this afternoon, I complete assembling the fuselage. Here are some views around 360 degrees:

11-1Majorassemblycomplete.jpg

11-2Majorassemblycomplete.jpg

11-3Majorassemblycomplete.jpg

11-4Mjaorassemblycomplete.jpg

I was able to use the squeeze technique on the after part of the fuselage, squeezing glue and melted plastic along the seam. But foreward, on the top of the nose, and along the belly, there will be some seam filling, not too bad, but the way the parts are engineered, it wasn't possible to squeeze the parts together. Still, for a kit originally issued around 1960, the seams are not that bad.

Also, I've sacrificed the operating landing gear, and glued the struts in the extended position. I think they would have broken eventually, with repeated use. The wings are still foldable, but I might have to glue them in place, too, for a similar reason, I'm just too afraid that the mechanism will eventually snap.

But at least I'm on the last lap. Next step is seams, and to attach the drop tank, then it's flat white on her belly.

Thanks for looking, and as always, comments/criticisms are welcome!

YbiC
Brad
 
WoW, that baby is way before my time.... LOL !

But not too far off ! I remember buying old models like this for 5$ at my LHS and they were of that type!

Brings back a lot of good memories!

Keep going! Looking forward to your next update !

Norm, out!
 
Thanks, Norm! Yes, when I built this kit my first time around, it was already something like a 10-year-old kit. Back then, I didn't paint it, of course; it was already molded in Gloss Sea Blue, all you had to do was put on the decals, and then it was off to the backyard dogfights ;)
 
Hi, all! Here's another quick update...


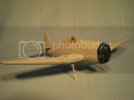
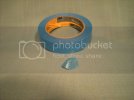
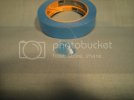
Tonight, I masked the canopy. I decided to try low-tack painter's tape, and it worked really well. Here's the canopy with masking in place, using 3M Blue Tape:

12-1Canopymasked.jpg

Very easy to work with, better than the Parafilm that I tried the last time. Of course, the canopy is rigid, so it was easy to burnish the tape down with a toothpick, and then use a new No. 11 blade to trim away the framework. From the other side:

12-2Canopymasked.jpg

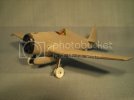
And here is the F6F with the additional bits added--the last piece for the gunsight, the belly tank:

13-1Readyforpaint.jpg

and here's the seam work on the wing root:

13-2readyforpaint.jpg

I used my usual technique of applying Squadron white putty with a toothpick, and then smoothing it out and removing excess with a cotton swab dipped in acetone. Here, the holes for the rockets and bomb racks are filled in:

13-3readyforpaint.jpg

I've glued the canopy in place, after taking these pictures. Now, I'm ready for paint. First will be the white undersides, then the intermediate blue, and the dark blue last. I have to do that last, because I had to order a can of it online from Tamiya, and it hasn't arrived yet :D But all will be well, and I expect to finish by the deadline.

Oh, and I had to give up on the operation wing mechanism--as I thought, the pieces wouldn't hold up to repeated handling. There are little locking tabs that hold the wings in place when deployed, and they broke off the starboard wing. So, I held the wings as tightly to the center section as best I could, and flowed liquid cement into the spots where they touched.

Till the next time, thanks for looking, comments/criticisms are welcome!

YbiC
Brad
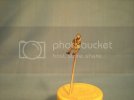
 
Looks like there's still a pretty good seam to work on that drop tank, but this is going really well for you
 
In french, there's an expression for people who like to be accurate, we say they "cut a hair in 4".
You sir are cutting wheels in half ;).

For an old kit, i'm impressed with the details on the hull.
Can't wait to see this weathered.
 
Quaralane said:
Looks like there's still a pretty good seam to work on that drop tank, but this is going really well for you

Wasn't criticising.
I was only pointing out.
And this build is an excellent work

No sweat, don't worry, I don't take it that way, and actually, your post means that I actually achieved what I wanted to do :) The "seam" that you see is a piece of Evergreen strip to represent the seam on the real thing. F6F drop tanks had a crimped seam along the vertical perimeter, like Lockheed's drop tanks for the P-38, rather than a seam along the horizontal, like the other style of tanks the US used. Monogram modeled the tank as top and bottom halves, and they molded that raised seam around the edge. I sanded it down, then used the strip to reproduce the "real" seam.
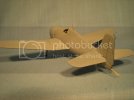
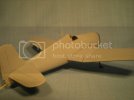
I do think that if I build another Monogram Hellcat, I will just fit the wings together, without bothering with the folding mechanism at all, and eliminate those gaps altogether.

Thank you both! This is why I like building the old Monogram kits, to stretch my scratchbuilding skills and see what can be done with them.

I will still probably get the Eduard kit, too ;D

Painting will commence tonight or tomorrow night with the white underside.

Thanks for looking!
 
Learn something new every day.
Never knew that the seam was side to side on the real thing
 

Latest posts

Back
Top