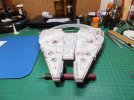
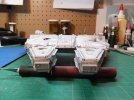
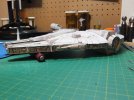
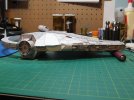
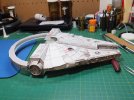
Millennium Falcon Paper Model with Cockpit

Good Evening.
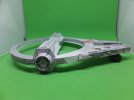
Update on my Millennium Falcon.

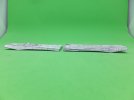
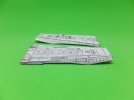
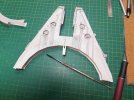
Since last reporting, finished the Left Docking Port.
Pretty much a repeat of the right one, just some different greebles.
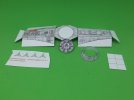
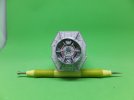
Left%20Docking%20Port%20%202_zpsfcyshltm.jpg

Left%20Docking%20Port%20%203_zpsborgfylu.jpg

Left%20Docking%20Port%20%204_zpsqago2mqv.jpg

Left%20Docking%20Port%20%205_zps4wfgclrr.jpg

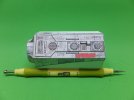
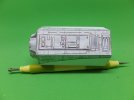
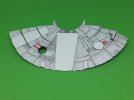
The two Equipment pods for the upper and lower front were next. Those were simple enough pieces to construct.
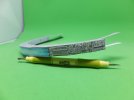
One wanted to twist pretty bad, but a couple of days with a bit of weight on the back seemed to cure that.
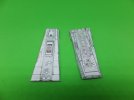
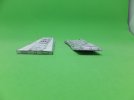
Centre%20Eq%20Pod%201_zpsobumqkht.jpg

Centre%20Eq%20Pod%202_zpsskoy35cs.jpg

Centre%20Eq%20Pod%203_zpspxlmvmzh.jpg

Centre%20Eq%20Pod%204_zpsg2u9tytg.jpg

The rest will be resolved when it gets attached to the hull.
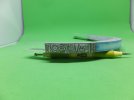
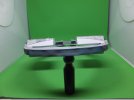
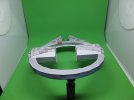
The mid rear section with the engine was next.
I had the option of the engine area off or lit. Since this model will be mounted in a flying state, lit was selected.
The graphic for the lit engine had to be laminated over the existing graphic, then left in the press to dry.
During this time the two end side wall pieces were cutout and the greeblies all added.
When dry, the engine graphic was edge glued to the top ring, a bit at a time. Left to dry then glue some more till it was glued in place. The two end pieces where then glued on. There was no bottom support yet. So when attaching the joint to the engine graphic, I used a square to line them up properly. When this was dry the bottom ring was attached. The same procedure as used before.
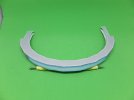
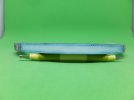
Engine%201_zpsgeqwxgny.jpg

Engine%202_zpswoyqhnvq.jpg

Engine%203_zps2umnrbur.jpg

Engine%204_zpspoelffh7.jpg

With the aft mid section done, it is time to assemble all these pieces to form the centre ring.

Thank you for following and MERRY CHRISTMAS.

Questions and comments welcome.

Jim
 
and Merry Christmas to you , Jim ;D

it's forecast to be a chilly 81 F here on Friday :p

Hot chocolate not

U M
 
Thanks for the Christmas present here, Jim.
It's a gift to be able to watch you work your paper magic
 
urumomo said:
and Merry Christmas to you , Jim ;D

it's forecast to be a chilly 81 F here on Friday :p

Hot chocolate not

U M
Same here- Hollywood Florida baby- might as well be May

This papercraft build is just amazing! Don't think i'd have the patience for all that cutting (says I after s straight hour of cutting decals).
 
Seriously, paper modeling is one of the hardest to master. Harder than plastic. Wow! I would not have the patience to master this. Excellent job. Thank goodness for plastic.
 
Hey Im building this same model and went looking for instructions and found your posts thanks this is great. going to build mine with landing gear and I doubled the size on mine :D
 
Thanks do we have any photos of this thing built cant find much on the net.
 
There are no photographs of this model that I am aware of. There had been a couple of people start it over the years, but no pics.

Jim
 
OK thanks I guess you will be the first. Anything I build I will post on my web page.
 
Good evening all.
Hope you had a good Christmas and New Years.

Time for an update.
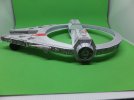
Over the Holidays started on assembling the centre ring of the Falcon.

Ring%201_zpsmpcz6isf.jpg

It actually went together quite well. Had to do a little filing on the Docking Ports to get them to fit, but not too much.

Ring%202_zpsj9rw1g8x.jpg

Ring%203_zpscoajnp3m.jpg

Ring%204_zpsnx16jk96.jpg

Ring%205_zpss0ygh7qq.jpg

Ring%206_zpsuz6xref5.jpg

This ring is also the support structure that the rest of the hull is built upon. So it was the first to assemble.
With the ring assembled, the first part of the hull to work on is the Top Front. This piece will be the hardest to fit and therefore will be the first. The rest the tolerances are a little looser.

Upper%20Hull%201_zpssbntpgs0.jpg

After assembling and installing all the internal greebles and the front engineering pod, started attaching it to the frame, first along the docking ports.
When dry start attaching the front fist, verifying that the cross over greebles on the front align with the mandibles. Glue the rest of this hull slowly along the edge, toward the middle. Trimming and fitting as necessary.
When this dried, I am now working on the external greebles for this section.

Upper%20Hull%202_zpscxjg2wua.jpg

Upper%20Hull%203_zps24wiuf0y.jpg

Upper%20Hull%204_zpsym97yvok.jpg

Upper%20Hull%205_zpsnpxtgjtu.jpg

Upper%20Hull%206_zps4fzh49vj.jpg

A few more to do, then to start on the lower front section.
When the top and bottom front are done, the Cockpit can then be installed.

Thank you for following.
Questions and comments welcome.

Jim
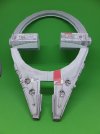
 
Looking fine there Jim. That top front addition is nicely done. It's fun to watch this going together. I like seeing how the different parts have been separated out and what they look like before assembly.
 
Hello,wonderful work!!!
I am a designer of this model and I am pleased that he is being built.
He has a few mistakes and a good manual is missing but I tried to do the model of many retails without which the falcon didn't look out in order to well.

Model 3d sketchup downloadable I gave here (good for manual)
https://3dwarehouse.sketchup.com/model.html?id=4ebf7bc43d767bd425405c61741b95bb

This model of the Falcon downloadable here
http://www.starwars.pl/stuff_tf_modele_slawek.php
and
http://www.galaxykits.com/pobierz.php required registration

Unfortunately my model crash and his photographs were lost with the disk of the computer :'(

I apologise for my bad English
greetings from Polish
SÅ‚awek& Translator :)
 
Greetings Slawek and welcome to SMA.
I want to thank you for this model.
I'm having a lot of fun building it. Love the detail in the design.
The couple of scaling errors that I found were easy enough to fix.
I hope I am doing your design justice.
Again thank you.

JIm
 

Latest posts

Back
Top