Ferris928
New Member
- Joined
- May 7, 2009
- Messages
- 623
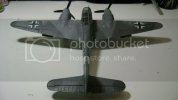
Messerschmitt Me 410B-1/U2/R4
1/48th Revell-Monogram Promodeller
Built Out Of Box.
Detailing depict the aircraft flown by Major Eduard Tratt, Leading Zerstörer ace (destroyer ace), and Gruppe Kommandeur of II./ZG26, Köningsberg German, February 1944 with 38 Victories.
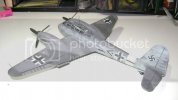
Or…at least I hope it does it justice.
I started this on May 8th 2009 (seems a lot longer ago) And now I’m calling it finished.
Build Page: http://www.scalemodeladdict.com/forum/index.php/topic,87.0.html
Building the Kit:
As far as building goes, this kit went together very well. The instructions are a little skittish around some of the cockpit, but in the end things worked well.
Painting and Detailing:
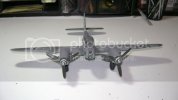
This was my first time doing (Attempting) the German ‘Mottling’ style of camouflage. Members have commented to me that I got it right, and I thank you for it. I think it got it right too.
The issued decals were fairly good. They went down real well with Micro-set and Micro-sol. The only problems I hade were the white band near the tail and one of the crosses on the bottom starboard wing. The cross was damaged before it was put in the water and it came open when I lifted it up. So that more than likely came while shipping or being bumped around. It came out great in the end. The white band on the other hand took a lot more work to get it to conform to the fuselage. My advice to anyone when they’re confronted with this decal is to just mask and pint the stripe. Save the heartburn and stress for some other time.
The masking was a pain. I should’ve looked for cut masks. There are a few panels that weren’t masked completely, but they’re not prominent enough to truly call it a failure.
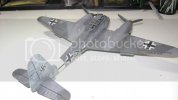
I used Tamiya, Testors Model Master, and Polly Acrylics on this plane. All worked really well except the Polly. Polly paints have a fast drying time from what I’ve found out. The blue under body color kept drying and clogging my AB. So I mixed my own with Tamiya colors. The other Polly colors worked fine for some reason.
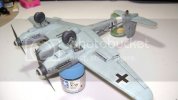
Future was used as the gloss coat before and after decals. No problems there. I used oil paints for the panels and in the process of rubbing off the excess on the bottom, managed to knock all the wing balance thingies that hang down. So they’re not on the finished kit. Will have to work on that for the next kit.
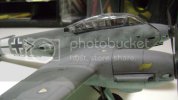
For a flat coat I used Model Master Flat Clear Acrylic. I got the bottom done, then became distracted with other things and set the kit aside for a while. Then when I came back recently to finish it I made the mistake of using a different flat on the top of the plane. I used an extremely old bottle of Polly flat clear. This then decided to frost up on me and cause my heart to sink. I thought that I had just screwed up the whole thing. It went on fine and then it changed. I tried to rub it out with water-didn’t work. I tried acrylic thinner-nope, didn’t work. I thought that maybe if I cover it with Future it might somehow clear up. Nope! So I came up with the last idea of gently sanding it down as a last resort.
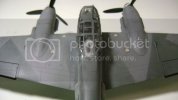
So I broke out the Fine sanding stick and started at it. I was able to get most of it off. Now the aircraft has a bit of a faded(?) look to it. It was acceptable to me.
I was going to plan on doing engine exhaust stains and the radio wire above the aircraft. But since I was able to avert 1 crisis, I decided not to take the chance on anymore. Maybe in the future if I do another 410 things will go better and I’ll get more detailed.
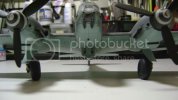
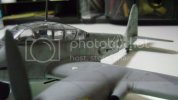
Thanks for checking it out.
Thanks for all the support you guys.
I hope you enjoy the pics.
Ferris.
1/48th Revell-Monogram Promodeller
Built Out Of Box.
Detailing depict the aircraft flown by Major Eduard Tratt, Leading Zerstörer ace (destroyer ace), and Gruppe Kommandeur of II./ZG26, Köningsberg German, February 1944 with 38 Victories.

Or…at least I hope it does it justice.
I started this on May 8th 2009 (seems a lot longer ago) And now I’m calling it finished.
Build Page: http://www.scalemodeladdict.com/forum/index.php/topic,87.0.html
Building the Kit:
As far as building goes, this kit went together very well. The instructions are a little skittish around some of the cockpit, but in the end things worked well.

Painting and Detailing:
This was my first time doing (Attempting) the German ‘Mottling’ style of camouflage. Members have commented to me that I got it right, and I thank you for it. I think it got it right too.
The issued decals were fairly good. They went down real well with Micro-set and Micro-sol. The only problems I hade were the white band near the tail and one of the crosses on the bottom starboard wing. The cross was damaged before it was put in the water and it came open when I lifted it up. So that more than likely came while shipping or being bumped around. It came out great in the end. The white band on the other hand took a lot more work to get it to conform to the fuselage. My advice to anyone when they’re confronted with this decal is to just mask and pint the stripe. Save the heartburn and stress for some other time.
The masking was a pain. I should’ve looked for cut masks. There are a few panels that weren’t masked completely, but they’re not prominent enough to truly call it a failure.

I used Tamiya, Testors Model Master, and Polly Acrylics on this plane. All worked really well except the Polly. Polly paints have a fast drying time from what I’ve found out. The blue under body color kept drying and clogging my AB. So I mixed my own with Tamiya colors. The other Polly colors worked fine for some reason.

Future was used as the gloss coat before and after decals. No problems there. I used oil paints for the panels and in the process of rubbing off the excess on the bottom, managed to knock all the wing balance thingies that hang down. So they’re not on the finished kit. Will have to work on that for the next kit.

For a flat coat I used Model Master Flat Clear Acrylic. I got the bottom done, then became distracted with other things and set the kit aside for a while. Then when I came back recently to finish it I made the mistake of using a different flat on the top of the plane. I used an extremely old bottle of Polly flat clear. This then decided to frost up on me and cause my heart to sink. I thought that I had just screwed up the whole thing. It went on fine and then it changed. I tried to rub it out with water-didn’t work. I tried acrylic thinner-nope, didn’t work. I thought that maybe if I cover it with Future it might somehow clear up. Nope! So I came up with the last idea of gently sanding it down as a last resort.

So I broke out the Fine sanding stick and started at it. I was able to get most of it off. Now the aircraft has a bit of a faded(?) look to it. It was acceptable to me.
I was going to plan on doing engine exhaust stains and the radio wire above the aircraft. But since I was able to avert 1 crisis, I decided not to take the chance on anymore. Maybe in the future if I do another 410 things will go better and I’ll get more detailed.


Thanks for checking it out.
Thanks for all the support you guys.
I hope you enjoy the pics.
Ferris.
