You are using an out of date browser. It may not display this or other websites correctly.
You should upgrade or use an alternative browser.
You should upgrade or use an alternative browser.
Messerschmitt Me-329
- Thread starter Papermodder
- Start date
Papermodder
Modeller in both Plastic and Paper Card
- Joined
- Jan 2, 2013
- Messages
- 1,224
Thank you Tim.
Jim
Jim
Papermodder
Modeller in both Plastic and Paper Card
- Joined
- Jan 2, 2013
- Messages
- 1,224
Good evening.
Finished gluing the front fuselage skin to the framework. As well finished trimming out the cockpit area and the front landing gear compartment.
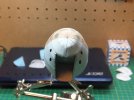
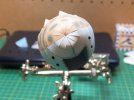
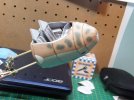
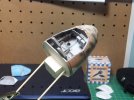
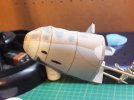
From here will start the construction of the framework for the main body of the fuselage.
The small lip that you see around the cockpit is the attachment point for the canopy.
Thank you for watching.
Jim
Finished gluing the front fuselage skin to the framework. As well finished trimming out the cockpit area and the front landing gear compartment.


From here will start the construction of the framework for the main body of the fuselage.
The small lip that you see around the cockpit is the attachment point for the canopy.
Thank you for watching.
Jim
Papermodder
Modeller in both Plastic and Paper Card
- Joined
- Jan 2, 2013
- Messages
- 1,224
Time for an update.
Today has been very productive so far.
Skins 5 & 6 were cut out and assembled, so as to be able to verify alignment with the front fuselage and to decide on assembly procedure.
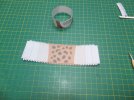
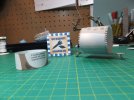
Next, started on the framework for the main fuselage.
The first section cutout and assembled was the bomb bay, as it is the main support for this section.
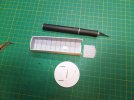
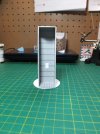
The associated bulkheads were cutout and attached to the bomb bay.
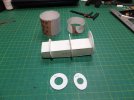
Skin 6 was slid onto the framework to check fit and skins 7 and 8 were cutout and glue strips applied.
These are now ready to be shaped and assembled.
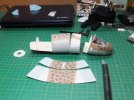
This is where I am at tonight. Tomorrow will assemble skins 7&8 these will be attached to skin 6. Because of the shape of the fuselage, skin 5 will not be attached till after skins 6,7 and 8 are attached to the framework.
Have a good evening.
Questions and Comments welcome.
Jim
Today has been very productive so far.
Skins 5 & 6 were cut out and assembled, so as to be able to verify alignment with the front fuselage and to decide on assembly procedure.


Next, started on the framework for the main fuselage.
The first section cutout and assembled was the bomb bay, as it is the main support for this section.


The associated bulkheads were cutout and attached to the bomb bay.

Skin 6 was slid onto the framework to check fit and skins 7 and 8 were cutout and glue strips applied.
These are now ready to be shaped and assembled.

This is where I am at tonight. Tomorrow will assemble skins 7&8 these will be attached to skin 6. Because of the shape of the fuselage, skin 5 will not be attached till after skins 6,7 and 8 are attached to the framework.
Have a good evening.
Questions and Comments welcome.
Jim
Quaralane
Well-Known Member
- Joined
- May 22, 2009
- Messages
- 11,262
Looking good.
Also looks like the canopy work happening in the background
Also looks like the canopy work happening in the background
Papermodder
Modeller in both Plastic and Paper Card
- Joined
- Jan 2, 2013
- Messages
- 1,224
Thank you Patrick.
That is an unglazed build of the canopy, I was using to check fit and placement.
I will be vacuforming the actual canopy.
Jim
That is an unglazed build of the canopy, I was using to check fit and placement.
I will be vacuforming the actual canopy.
Jim
Papermodder
Modeller in both Plastic and Paper Card
- Joined
- Jan 2, 2013
- Messages
- 1,224
Good Evening all.
Today was able to install all the skins onto the main framework.
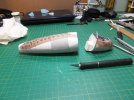
As well was able to cutout the rear cockpit area, the bomb bay and the tail gun area. The rear cockpit deck was now able to be installed.
Here is how we stand tonight.
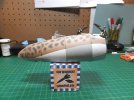
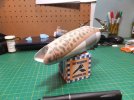
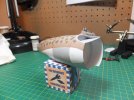
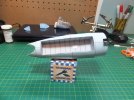
Before the front fuselage is attached to the main fuselage, I want to work on the tail gun area first. Trying to minimize the handling of the cockpit area as much as possible.
Have a great evening and thank you for following.
Jim
Today was able to install all the skins onto the main framework.

As well was able to cutout the rear cockpit area, the bomb bay and the tail gun area. The rear cockpit deck was now able to be installed.
Here is how we stand tonight.


Before the front fuselage is attached to the main fuselage, I want to work on the tail gun area first. Trying to minimize the handling of the cockpit area as much as possible.
Have a great evening and thank you for following.
Jim
cargoman5126
Anything in scale I'm into it...
- Joined
- Nov 7, 2012
- Messages
- 829
Coming along nicely. Looking good... 
Papermodder
Modeller in both Plastic and Paper Card
- Joined
- Jan 2, 2013
- Messages
- 1,224
Thank you Cargoman.
Jim
Jim
Papermodder
Modeller in both Plastic and Paper Card
- Joined
- Jan 2, 2013
- Messages
- 1,224
Hello, short update.
While working on the tail gun pod, Skin 10, which is the pod enclosure, has to have bulkhead W31 glued in as an attachment point to the main fuselage and help with skin 10's shape. Problem, W31 in no way is going to fit. Fits the wide open end but not the narrow end where it belongs. Now bulkhead W10 which is attached to W9 is the right height, so used W10's cutout as a template to trim W31 to size.
Skin 10 compared to size of W31.
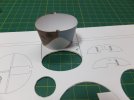
Skin compared to size of W10.
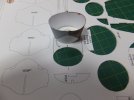
With the modified W31 glued in place skin 10 fits perfectly into skin 9 at the end of the fuselage. This is why I don't like to discard the used cutout sheets till the end. They can save your bacon.
Pics will come as this section is more advanced.
Thank you for following.
Jim
While working on the tail gun pod, Skin 10, which is the pod enclosure, has to have bulkhead W31 glued in as an attachment point to the main fuselage and help with skin 10's shape. Problem, W31 in no way is going to fit. Fits the wide open end but not the narrow end where it belongs. Now bulkhead W10 which is attached to W9 is the right height, so used W10's cutout as a template to trim W31 to size.
Skin 10 compared to size of W31.

Skin compared to size of W10.

With the modified W31 glued in place skin 10 fits perfectly into skin 9 at the end of the fuselage. This is why I don't like to discard the used cutout sheets till the end. They can save your bacon.
Pics will come as this section is more advanced.
Thank you for following.
Jim
warped_one
New Member
- Joined
- Apr 19, 2013
- Messages
- 236
looking nice so far
Papermodder
Modeller in both Plastic and Paper Card
- Joined
- Jan 2, 2013
- Messages
- 1,224
Thank you Warped one.
Jim
Jim
Papermodder
Modeller in both Plastic and Paper Card
- Joined
- Jan 2, 2013
- Messages
- 1,224
Good evening.
Last couple of days has seen some work on the tail gun.
The tail gun enclosure has now been mounted to the fuselage, and started work on the gun itself.
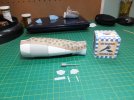
This tail gun is not fixed and has horizontal and vertical movement.
The gun barrel is rolled 24lb paper and 1.5mm in dia. Since the barrel will be handled to move this assembly, it is too fragile as it stands. I inserted a .5mm steel wire into the barrel to support it. Now much stronger.
The horizontal pivot mount was assembled and the gun moves freely.
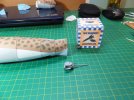
Next up is the vertical pivot and the main gun body.
Thank you for following.
Questions and comments welcome.
Jim
Last couple of days has seen some work on the tail gun.
The tail gun enclosure has now been mounted to the fuselage, and started work on the gun itself.

This tail gun is not fixed and has horizontal and vertical movement.
The gun barrel is rolled 24lb paper and 1.5mm in dia. Since the barrel will be handled to move this assembly, it is too fragile as it stands. I inserted a .5mm steel wire into the barrel to support it. Now much stronger.
The horizontal pivot mount was assembled and the gun moves freely.

Next up is the vertical pivot and the main gun body.
Thank you for following.
Questions and comments welcome.
Jim
Papermodder
Modeller in both Plastic and Paper Card
- Joined
- Jan 2, 2013
- Messages
- 1,224
Thank you Timbaux.
Jim
Jim
Papermodder
Modeller in both Plastic and Paper Card
- Joined
- Jan 2, 2013
- Messages
- 1,224
Hello.
I was determined to finish the tail gun today and was fairly successful.
Cut out the parts for the frame of the tail gun turret and cut out slots for the pivot pin to fit into the centre of the frame.
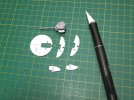
The frame is now assembled and ready to install the gun. It is at this point I realized a slight mistake. The Horizontal pivot should have been assembled with the coloured side in. :
I'll just colour the inside and that will cover it.
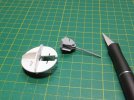
With the gun installed into the frame, it is time to cutout the skins for turret.
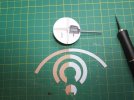
These had to be shaped and carefully edge glued to the turret frame. Where these skins intercede into area of the gun mount, had to be trimmed, to allow easy movement of the gun.
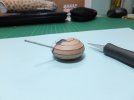
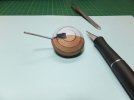
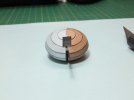
This assembly was then mounted into the tail gun enclosure, with two small pieces of steel wire and glued to the pivot points on the enclosure. The gun was then checked for easy vertical and horizontal movement.
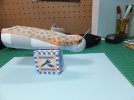
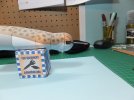
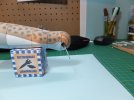
Two sets of external skins are cutout shaped, then edge glued to the tail gun enclosure. Making sure that no glue touches the turret and allows free vertical movement.
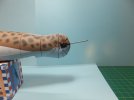
I slid the front fuselage in place to have a see how it all looked with the tail gun complete. Also wanted to check the CG of the fuselage, with the tail gun installed. Just barely nose heavy. I think some weight is needed to the front fuselage before I close it up. Don't need a tail dragger. ;D
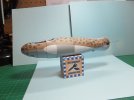
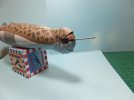
This is how it stands tonight.
Thank you for following.
Questions and comments are welcome.
Jim
I was determined to finish the tail gun today and was fairly successful.
Cut out the parts for the frame of the tail gun turret and cut out slots for the pivot pin to fit into the centre of the frame.

The frame is now assembled and ready to install the gun. It is at this point I realized a slight mistake. The Horizontal pivot should have been assembled with the coloured side in. :
I'll just colour the inside and that will cover it.

With the gun installed into the frame, it is time to cutout the skins for turret.

These had to be shaped and carefully edge glued to the turret frame. Where these skins intercede into area of the gun mount, had to be trimmed, to allow easy movement of the gun.


This assembly was then mounted into the tail gun enclosure, with two small pieces of steel wire and glued to the pivot points on the enclosure. The gun was then checked for easy vertical and horizontal movement.


Two sets of external skins are cutout shaped, then edge glued to the tail gun enclosure. Making sure that no glue touches the turret and allows free vertical movement.

I slid the front fuselage in place to have a see how it all looked with the tail gun complete. Also wanted to check the CG of the fuselage, with the tail gun installed. Just barely nose heavy. I think some weight is needed to the front fuselage before I close it up. Don't need a tail dragger. ;D


This is how it stands tonight.
Thank you for following.
Questions and comments are welcome.
Jim
Quaralane
Well-Known Member
- Joined
- May 22, 2009
- Messages
- 11,262
Some nifty engineering there
Papermodder
Modeller in both Plastic and Paper Card
- Joined
- Jan 2, 2013
- Messages
- 1,224
Thank you Patrick.
I always like when a model has some animation to it, rather than all static.
Jim
I always like when a model has some animation to it, rather than all static.
Jim
Papermodder
Modeller in both Plastic and Paper Card
- Joined
- Jan 2, 2013
- Messages
- 1,224
Thank you Timbaux.
My main glue of choice is Aleene's Clear Gel Tacky Glue.
For some things I do use thick CA. Just have to be careful with CA as it can soak in too deep into the paper and stain it.
Jim
My main glue of choice is Aleene's Clear Gel Tacky Glue.
For some things I do use thick CA. Just have to be careful with CA as it can soak in too deep into the paper and stain it.
Jim
