jagmkx
New Member
- Joined
- Jul 19, 2021
- Messages
- 4
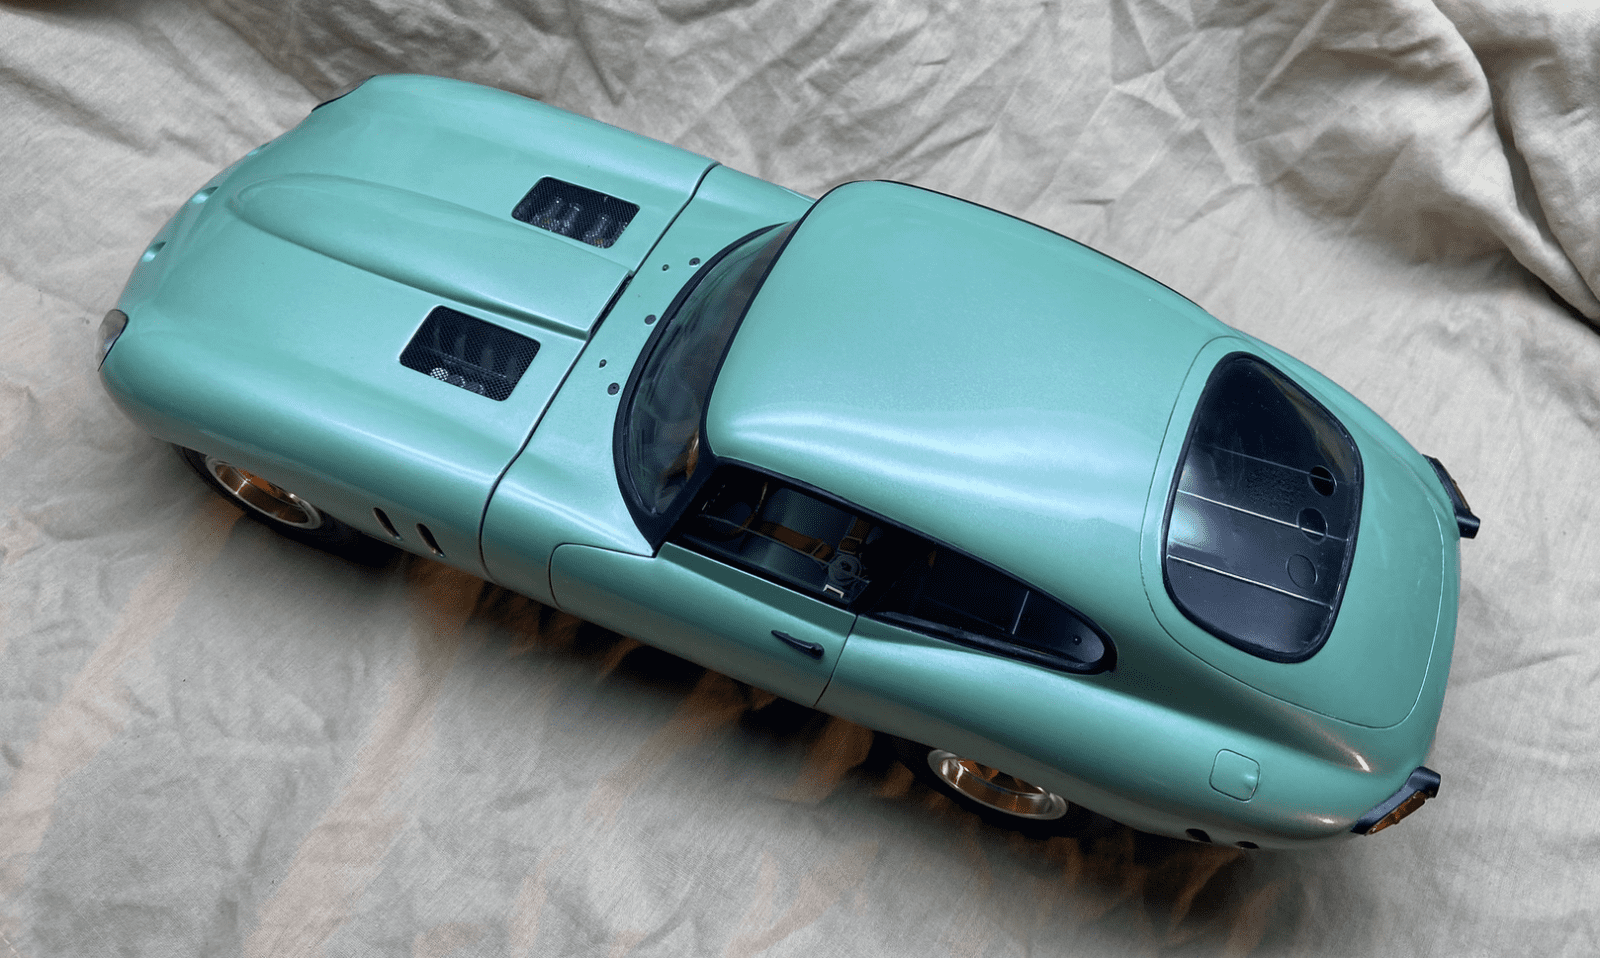
I built 50% of this kit over 15 years ago. Eventually, the box was too large to ignore.
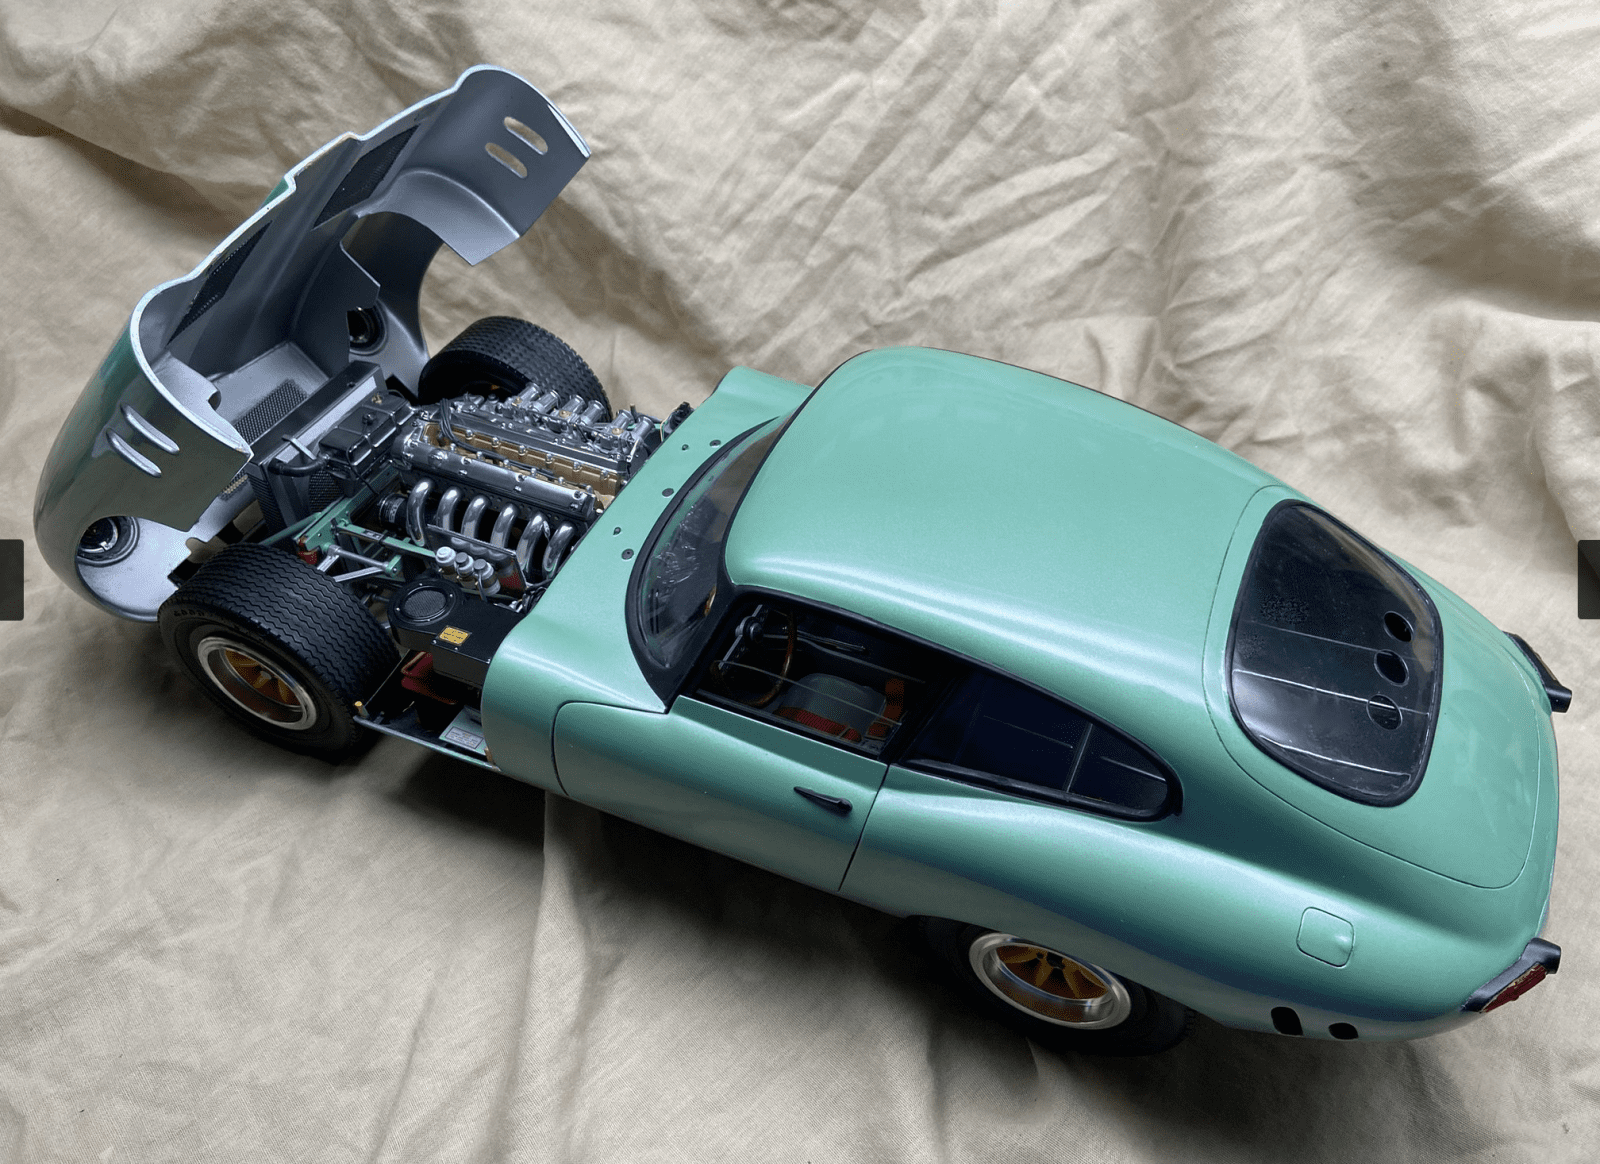
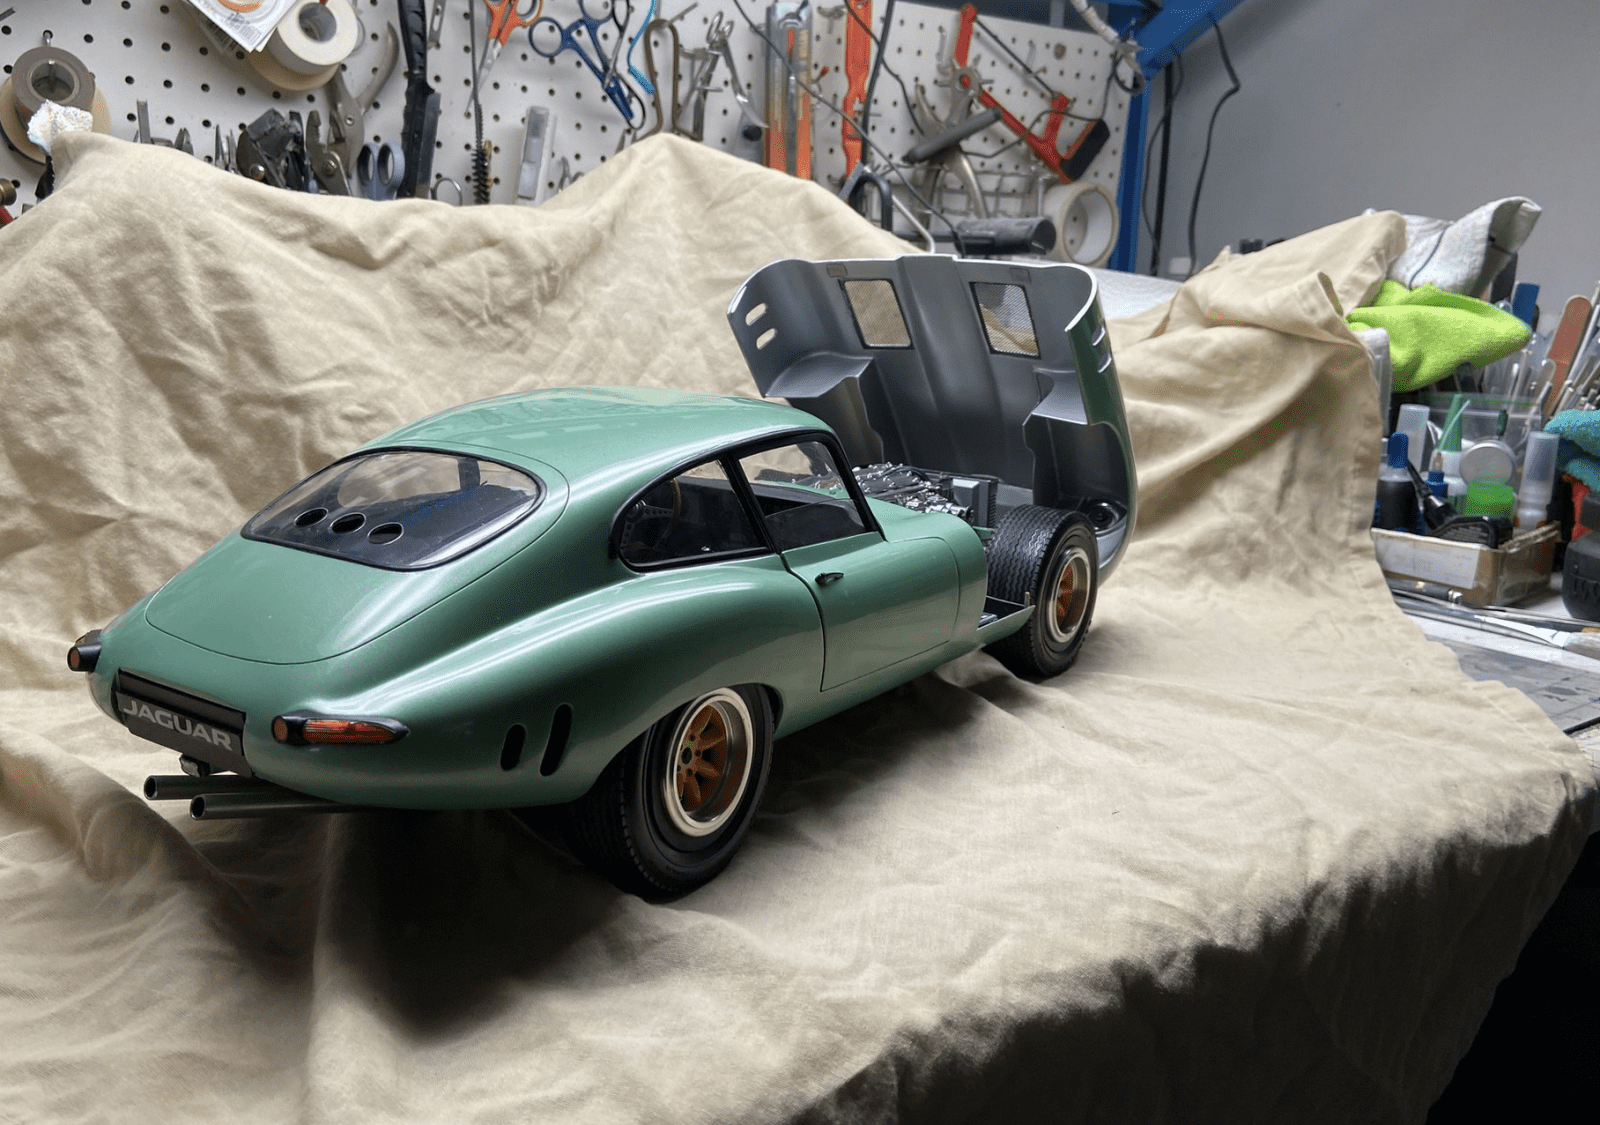
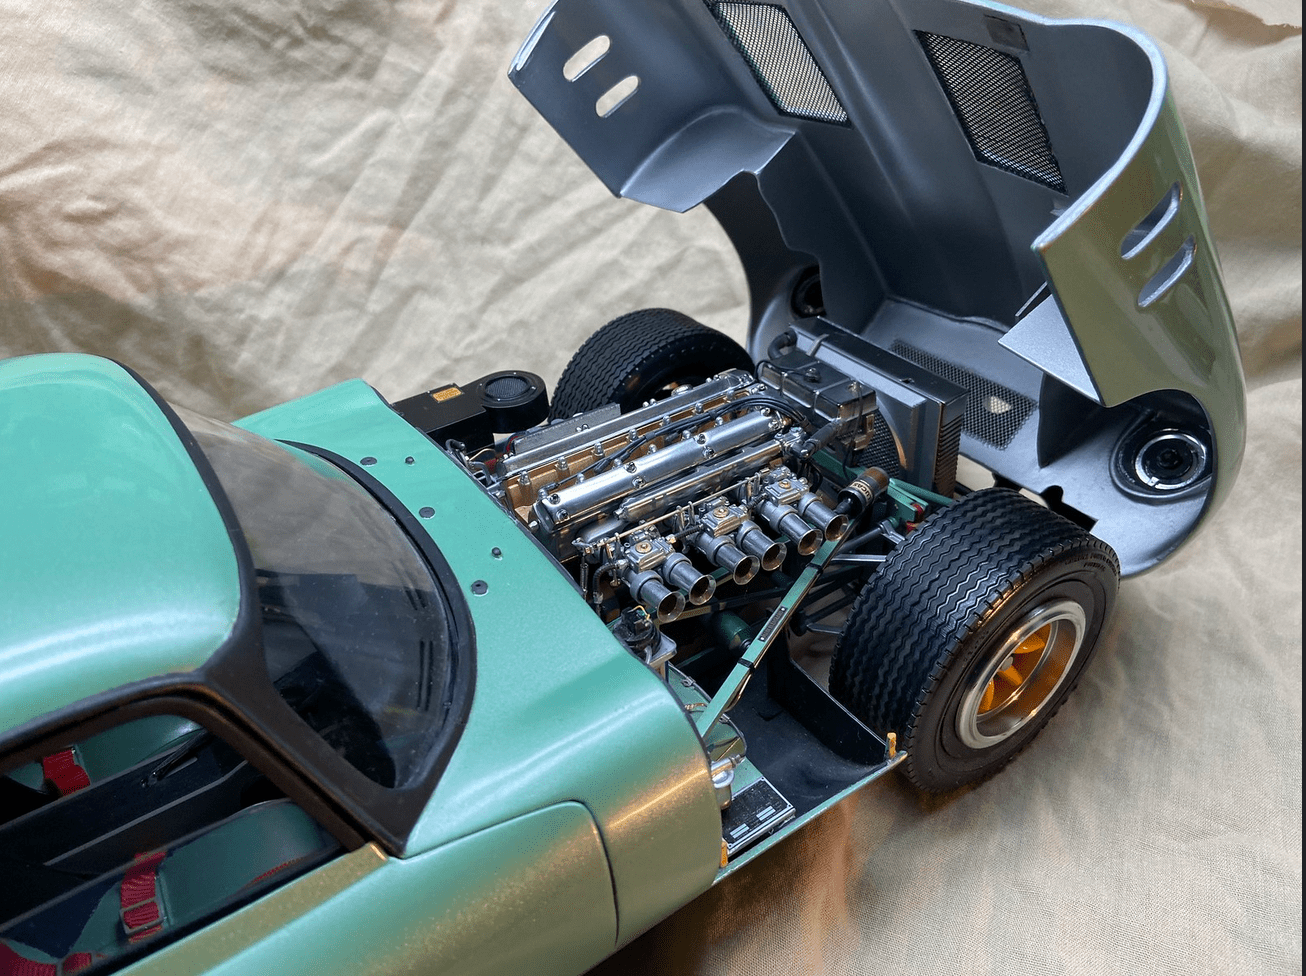
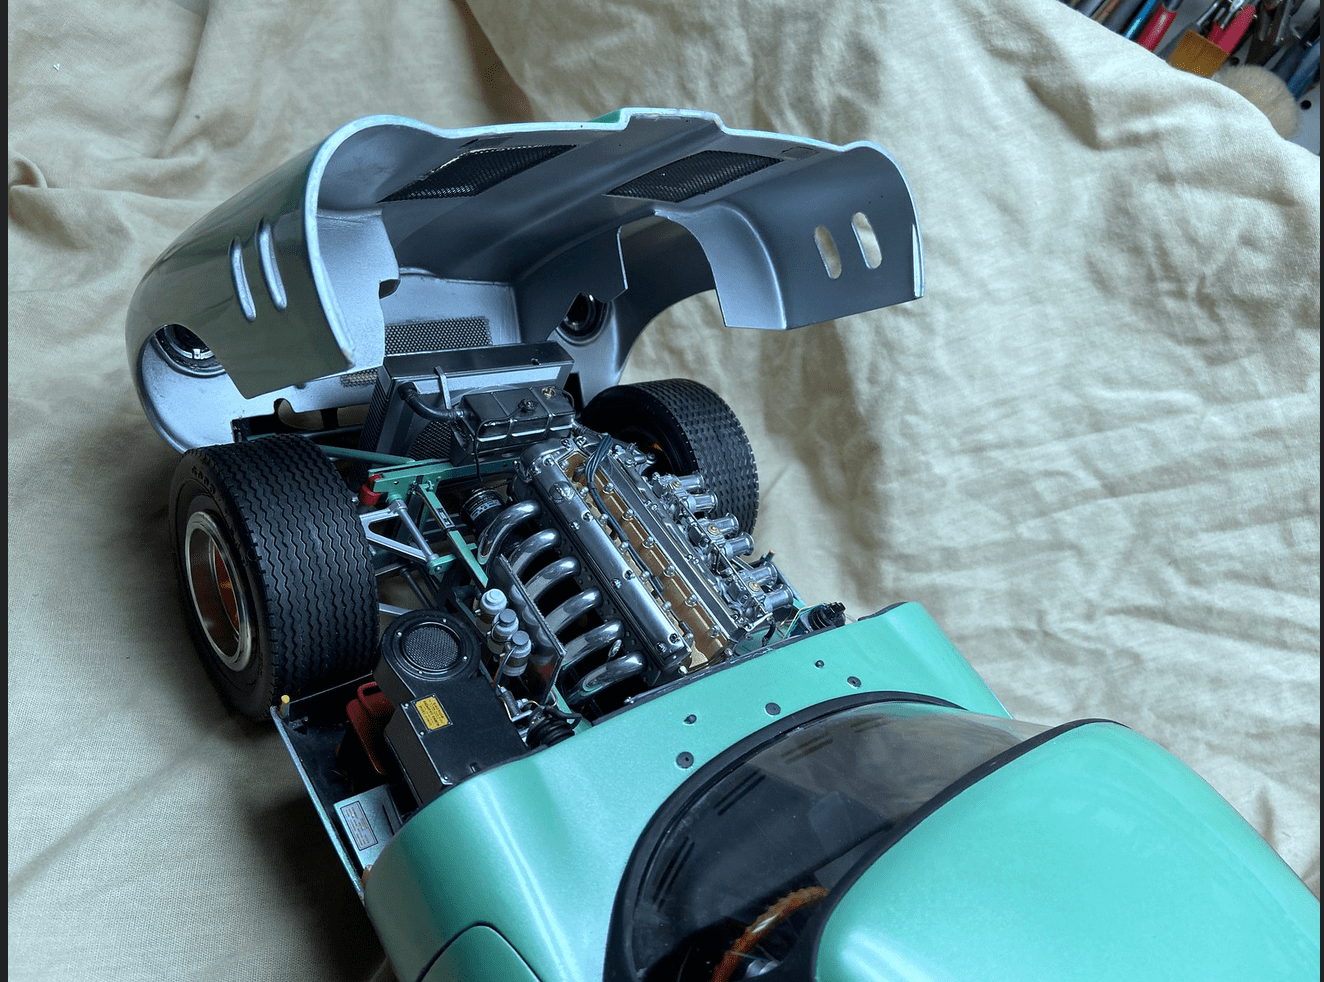
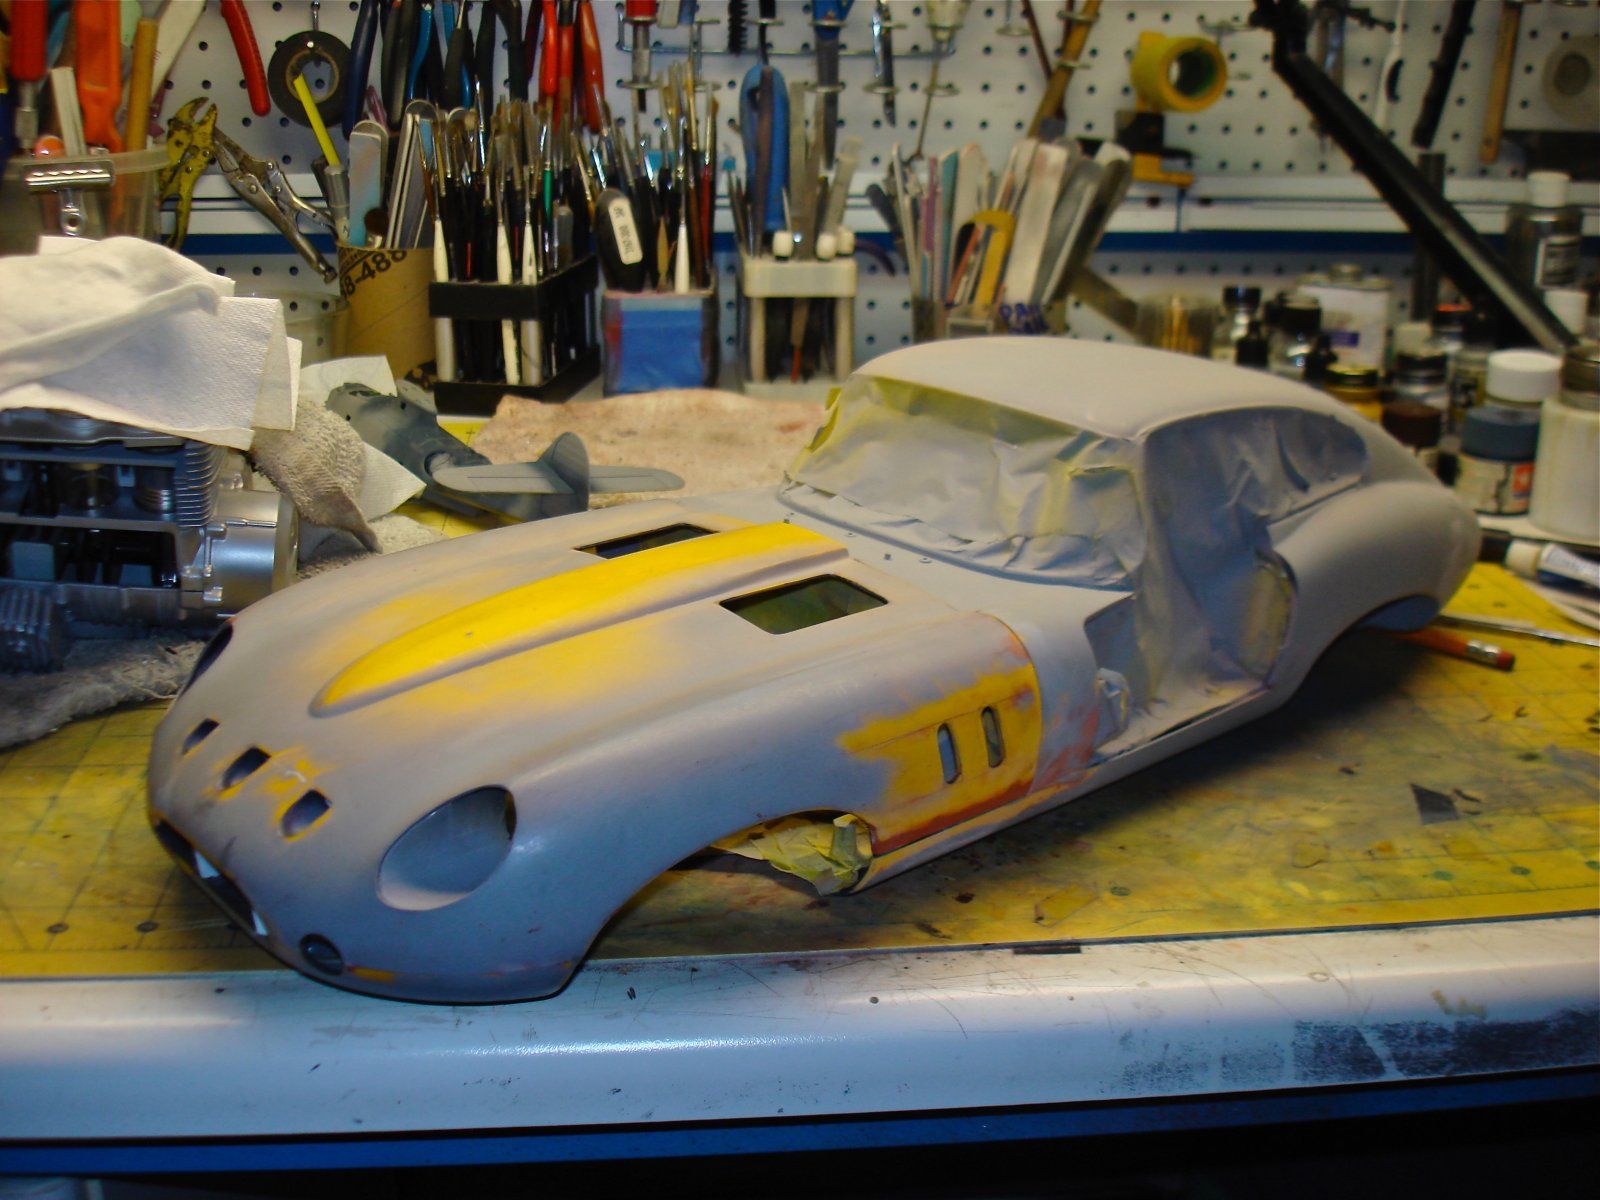
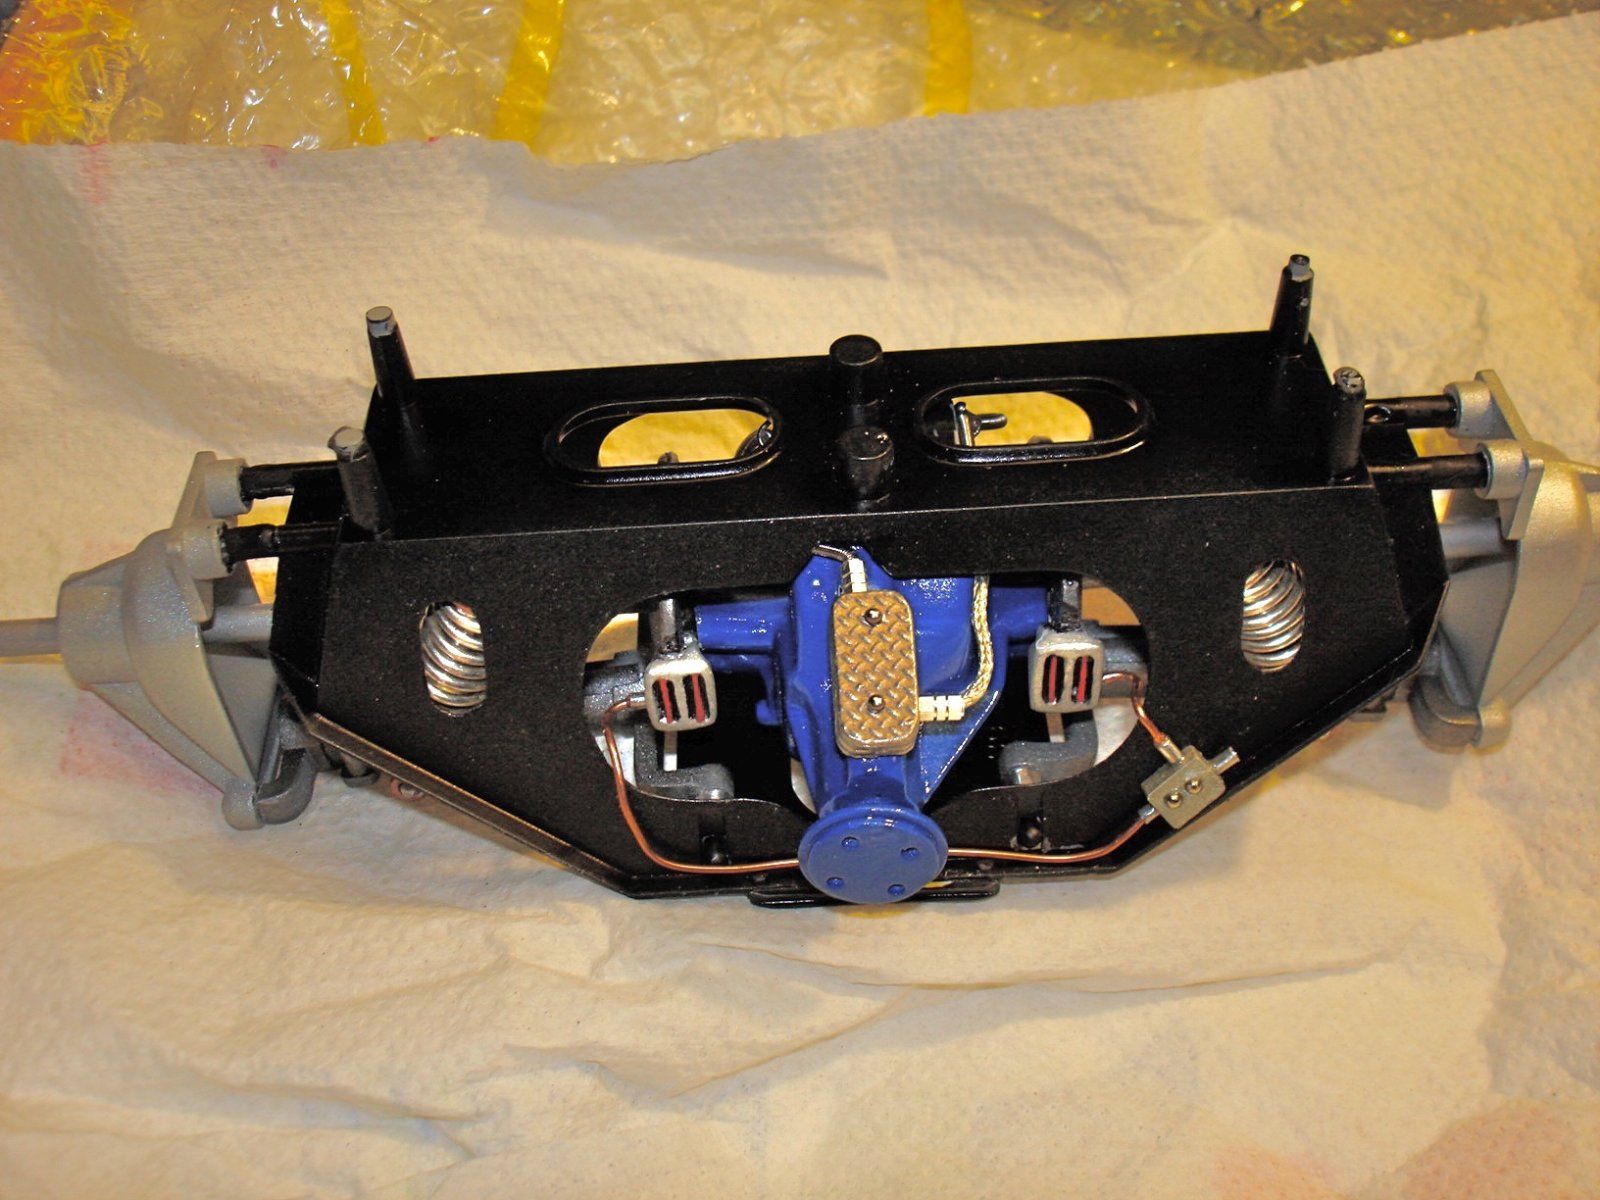
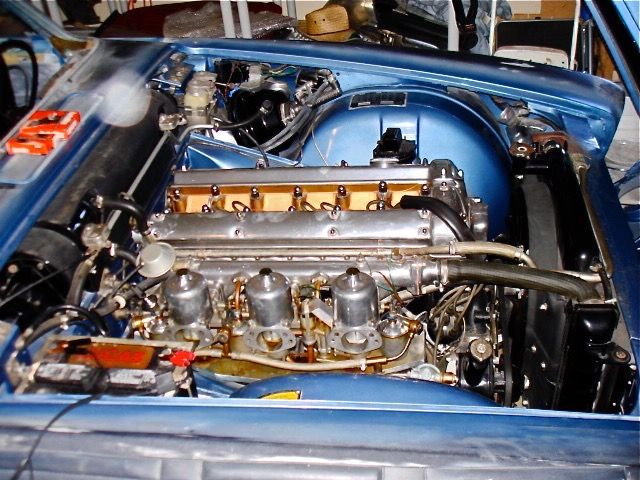
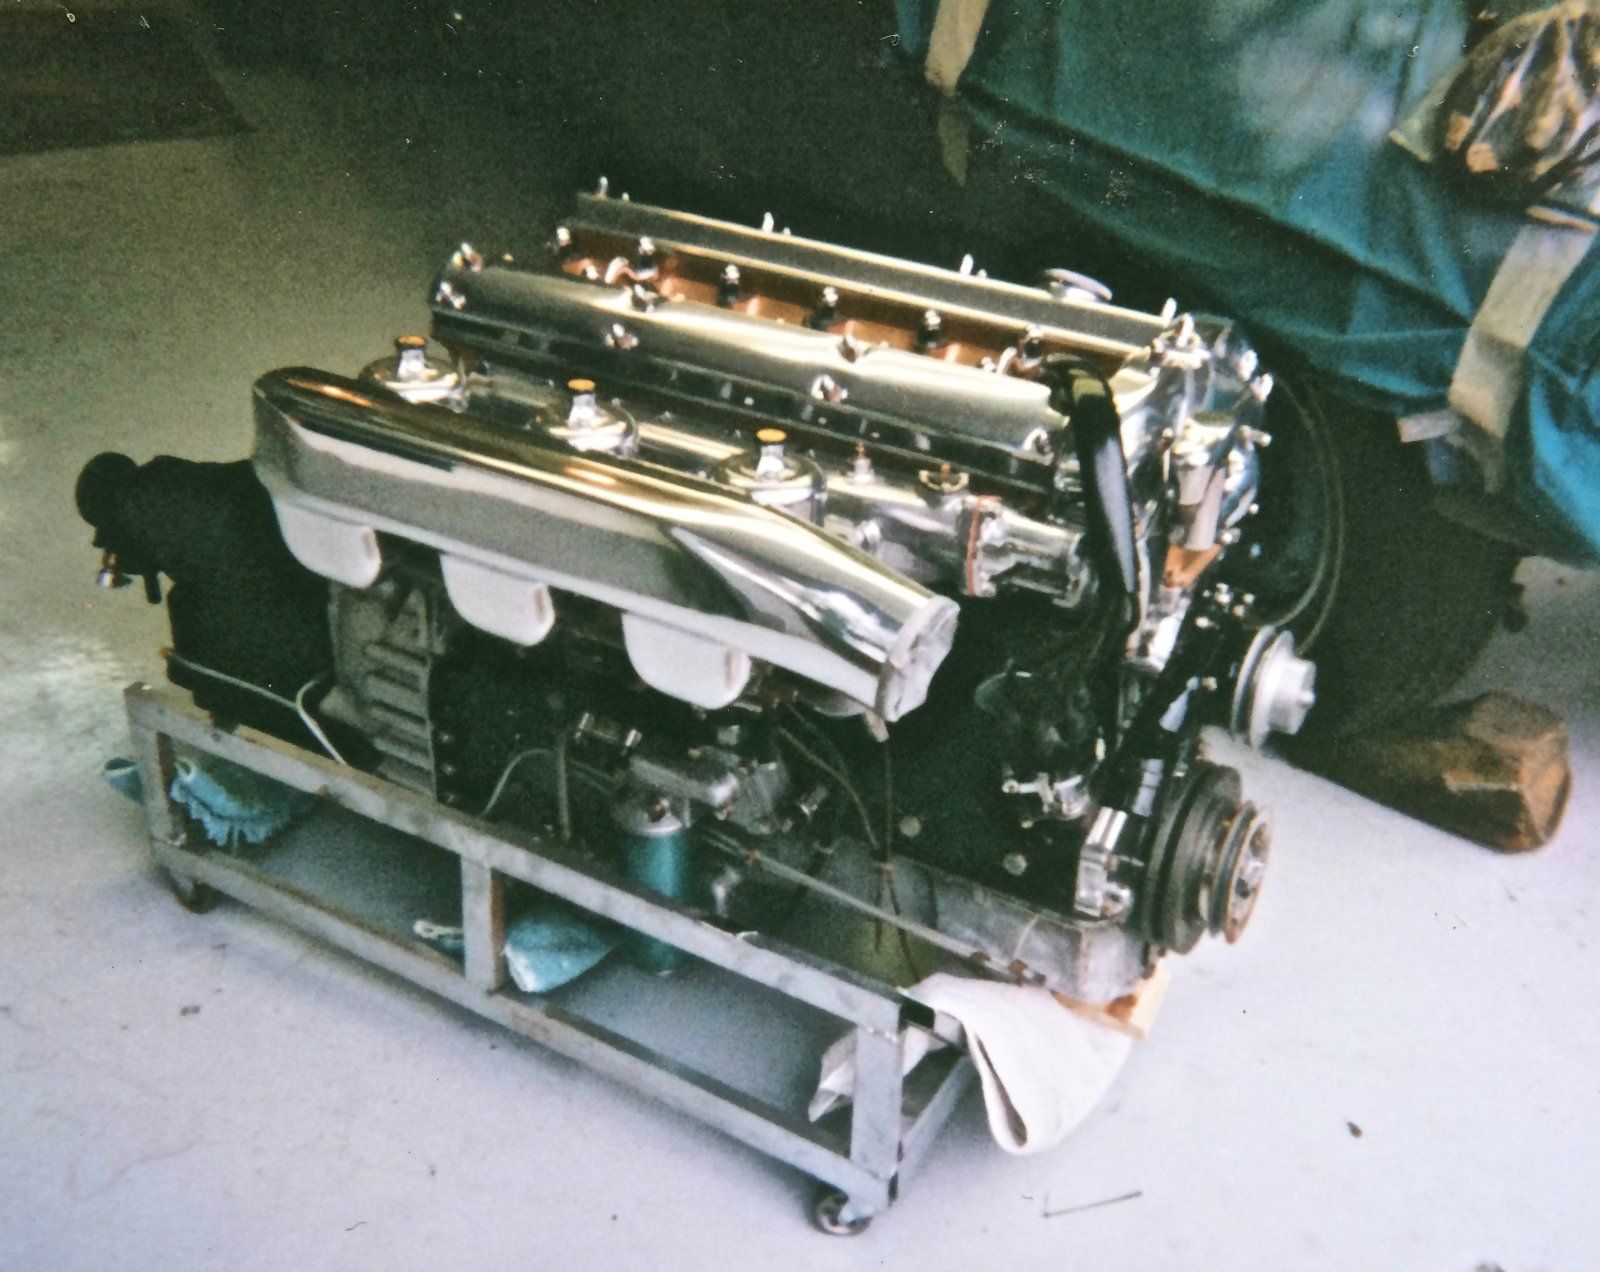
This is what I always wanted to do to my real E Type. This kits 'reputation' didn't disappoint: I see it as a vintage toy kit that always wanted to be a presentable model. For me, that required considerable effort and 're engineering' to get close to the goal. In addition to the GTO style body cues, I re profiled the nose, added RC Brembo Front Brakes, Minilte Wheels, Tire Valves, and Five Point Belts. I widened the tires by sectioning tires from two kits, then scratch built the Bonnet Inner Panels, Intake Manifold, Rear Suspension Brake Lines, Diff Cooler, Coil Springs, Triple Webers, Intake Trumpets, Spark Plug Wires, Aluminum Exhaust Headers, Brake Booster, Throttle Linkage, Bonnet Intakes, Optima Battery, added Resin Spark Plugs and Fluorescent styrene rods for headlight bulbs. As a 'Track Day' weekend racer, I deleted the bumpers, front turn signals, wipers, added a low pressure exhaust and cut pressure vents in the rear window. The paint is Tamiya TS60 Pearl Green with Mr. Hobby Clear. The only adhesive that worked reliably on this ancient plastic was E6000 along with many brass pins and magnets to add strength.

This is what I always wanted to do to my real E Type. This kits 'reputation' didn't disappoint: I see it as a vintage toy kit that always wanted to be a presentable model. For me, that required considerable effort and 're engineering' to get close to the goal. In addition to the GTO style body cues, I re profiled the nose, added RC Brembo Front Brakes, Minilte Wheels, Tire Valves, and Five Point Belts. I widened the tires by sectioning tires from two kits, then scratch built the Bonnet Inner Panels, Intake Manifold, Rear Suspension Brake Lines, Diff Cooler, Coil Springs, Triple Webers, Intake Trumpets, Spark Plug Wires, Aluminum Exhaust Headers, Brake Booster, Throttle Linkage, Bonnet Intakes, Optima Battery, added Resin Spark Plugs and Fluorescent styrene rods for headlight bulbs. As a 'Track Day' weekend racer, I deleted the bumpers, front turn signals, wipers, added a low pressure exhaust and cut pressure vents in the rear window. The paint is Tamiya TS60 Pearl Green with Mr. Hobby Clear. The only adhesive that worked reliably on this ancient plastic was E6000 along with many brass pins and magnets to add strength.
Attachments
Last edited:
") )
)


![Pampers Sensitive Baby Wipes, Clinically Proven, Fragrance Free, Unscented, Water Based, Hypoallergenic, Multi-Use, Hand Wipes 336 Wipes Total (6X Flip-Top Packs) [Packaging May Vary]](https://m.media-amazon.com/images/I/41KLBHu9CAL._SL500_.jpg)


 The engine cradle to body fit is poor and hence weak. I used many of my brass pins to secure it. Getting the bonnet to sit flush to the cowl is very difficult, for me anyway? (doors as well) I used Neo magnets to draw it (and the doors) flush but could have used stronger ones..but too strong and you start risking 'pull away damage"? But if you need to reduce the strength on a round Neo, just put a dot(s) of cello tape on one side and then you can adjust the strength via physical interference.