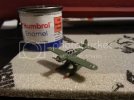
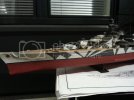
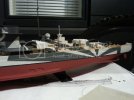
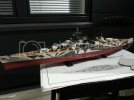
Heller Tirpitz 1/400, First build since I was something like 7

Hi and apologies for leaving this thread hanging here for 2 years, but since I recently found the motivation to finish the ship I thought I might post the progress here too.

Thing is, like the thread's topic suggests, modelling isn't my nr.1 hobby, and I've had a few setbacks with this project.
In the last two years I've moved twice, and haven't had a place to work on the Tirpitz so the motivation died fast. Last nail in the coffin was my cat trampling all over the bridge/forward tower when I left the ship in a place I thought he couldn't get to. ::)

Now I'm building on the balcony because there's no furniture untill summer ;D

First things first I thought, have to repair all the cat damage to get anywhere with this build. Glued on both masts where they had snapped off (I know they're not perfectly straight ??? ). Still missing one of those larger ack-ack guns above the bridge, have to think of something smart there maybe leave another spot without one.
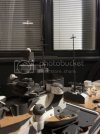
20151018_193550_zpsdfoeatti.jpg

Cut grooves into the whole deck along the already existing lines and painted, still need maybe one coat to finish it off nicely:
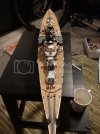
20151018_193621_zpsiftbcnu4.jpg

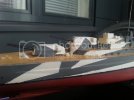
Got also started on the aft superstructure's camo! Very rough still but definetly getting there. Remember, all the paint is applied with a brush and not masking anything, just freehanding the camo. :D
(don't look at the black-stripe along the waterline, that's getting fixed)
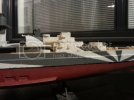
20151018_193609_zpsgygljvb1.jpg

And here's the whole thing as it sits, minus a few guns still drying after paint:
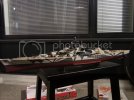
20151018_194117_zps7igqgwcp.jpg
 
Thank you, to be honest it looks fine from a distance but up close its still pretty rugged ;D

Progress is slow, but I try to work on something every day when I'm off work.
Been painting all kinds of smaller parts during the last few day. Got started on painting some lifeboats, the rear main batteries and all the secondary turrets.

This is 2 coats of white and getting started on the grey disruption patterns:

20151022_162322_zpsztibaq0x.jpg

The camo on the rear supestructure is also slowly taking form, still lots of rough patches and crooked lines. Also tried on the rear main batteries to check alignment on the camo:

20151022_163019_zpsadqf9bc0.jpg
 
Ah, OK, at closer range, I see what you mean. A little bleeding under the masking for example.

I've been experimenting with the technique of spraying a thin layer of clear acrylic over my masking, to seal it, and then applying the color. It's worked pretty well for me, in cases where I needed a crisp line.
 
I found out freehand sucks and masking rocks! ;D
So I masked the sides again, touched up on the white and painted over all darkgrey areas of the camo. Looks hell of a lot better now. Pics incoming when the camo dries, I get to mask and repaint the black stripe along the water line and paint another layer of red on the underbelly.

Plan is I'll salvage what I can of this model (think it will look ok when done anyway), then get either Prinz Eugen or Scharnhorst and try to avoid all the mistakes I made on this one. ;)

Btw. Is the acrylic available in rattlecan? Since I don't own a compressor or airbrush, and I want to keep the costs down on modelling for now.
 
Looking pretty good bro... that's a big beast! I usually go for hand painting over masking myself, but here's a tip for painting light colors over dark ones... get yourself a can of Rustolem Clear Satin (in a rattle can). Spray it over the dark paint you want to paint over. Then paint your light color. Sometimes I've found that the dark color will bleed into the paint if painted directly over the top. One thing too... allow the paint to dry and cure completely... usually overnight... to prevent the color bleed. That helps alot! Keep up the good work thou!
 
eNax said:
...I found out freehand sucks and masking rocks!...

Oh, you painted the camo freehand? OK, that makes sense, then. Yes, I ran into the same kind of issue, with a 1/1200 Pyro Essex-class carrier, of all things. It's a slam build, something I wanted to finish quickly, just to get something done. I finished the kit as the Yorktown (CV-10) and painted her in her dazzle measure. Most of the boundaries look OK, especially since its 1/1200, but I have a couple more in the stash, for a little table-top wargame collection, plus some Iowas, and I will definitely mask and spray them.

As far as paints go, there are commercial acrylics in spray cans, like Krylon, but I don't think I've ever used a rattlecan acrylic. My spray cans are all Tamiya or Model Master. I can say that they work very well, but you do want to have a well-ventilated area, whether you're spraying enamels or acrylics or anything else.
 
OK ok, back with a small update! Let's start with something different, I took inventory of all broken and missing parts:

- Scout plane (broken with some struts missing)
- Smaller caliper AA-guns (2 double barrels missing and one base missing)
- Larger caliper AA-gun (whole gun missing)
- Rear superstructure rigging mast (parts broken off)
- Bridge radar (broken, missing a part)

I was a bit disheartened by all the broken and missing things at first, but I've seen such amazing stuff on this forum so I decided I'll do my best at fixing everything and scratch building what I have to.
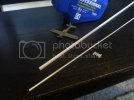
I bought 2 different diameter round plastic profile and 1 square to get started, think I still need smaller diameter round profile for the small caliper AA-guns.

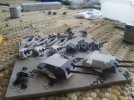
Decided the AA-guns can wait and got started on the scout plane, which looked like this:

20151109_150740_zpspkcbdtsn.jpg

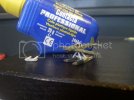
The smallest profile I have turned out too thick but decided I'll roll with it. Went with the simplest supports I could think of for the pontoons :-X

20151109_152921_zpsrqgli0lo.jpg

Paint was a PITA, haven't tried painting anything this small and detailed yet. Especially the small Luftwaffe bar crosses turned out to be tricky... I have to say I'm pleased with what I managed to do, and don't think the too thick supports really look that bad :D

20151109_212715_zpsqr5106tb.jpg

I repainted the lower hull with red, redid the black waterline stripe and touched up on the parts of the camo that bothered me:

20151109_221729_zps0azsghfy.jpg

20151109_221751_zpsgma9viwf.jpg

Here's the whole beast as she sits now:

20151109_221856_zpslnfwrixt.jpg

Feels like I'm finally starting too see the results! After getting those pesky AA-guns built, I still have some search lights and radars to glue in, then I can get started on the railings and anchors and chains.
 
First of all, sorry for a no pictures update but I don't have anything worth posting atm. I've been putting in some hours on it but I'm getting more and more upset by the quality of the kit. In particular the detail on the AA-guns is woeful and the plastic railings are even worse. These things really put me off the model but then again I really want to finish it.
So to get my drive back I've been digging around the internet for aftermarket parts. I easily found some PE railings on ebay and learned that a company called White Ensign Models makes an anti-aircraft gun PE-set for Kriegsmarine ships. I thought what the heck, let's dive in at the deep end and try do this ship some justice and most importantly finish the build! (PE scares me though :'( ).
I still have to order the stuff and fiddle around with it, so don't expect updates just yet! ;D
 

Latest posts

Back
Top