He-111 H-6 (Border Models 1/35)

Scale Model Addict - Model Tips, Guides, Tools & Tech, Tutorials, and Community

Help Support Scale Model Addict:

Edbert

Well-Known Member
Joined
May 16, 2024
Messages
3,117
This is going to be a long thread, perhaps not in content but in time. This is probably the most complex aircraft model I've ever seen. The plastic is very nice but very soft (which is good and bad for me), the part-count is very high with sprues going from A to S (some duplicated as in 2x) not counting PE and clear. However, the instructions are terrible and confusing.

When looking for help deciphering the instructions I found this. Check out this part-1 video, it is a long series, and he gets pretty frustrated too, in subsequent videos as well not just part-1...


Just as an example, this one photo is some of the parts that go into the forward cockpit.
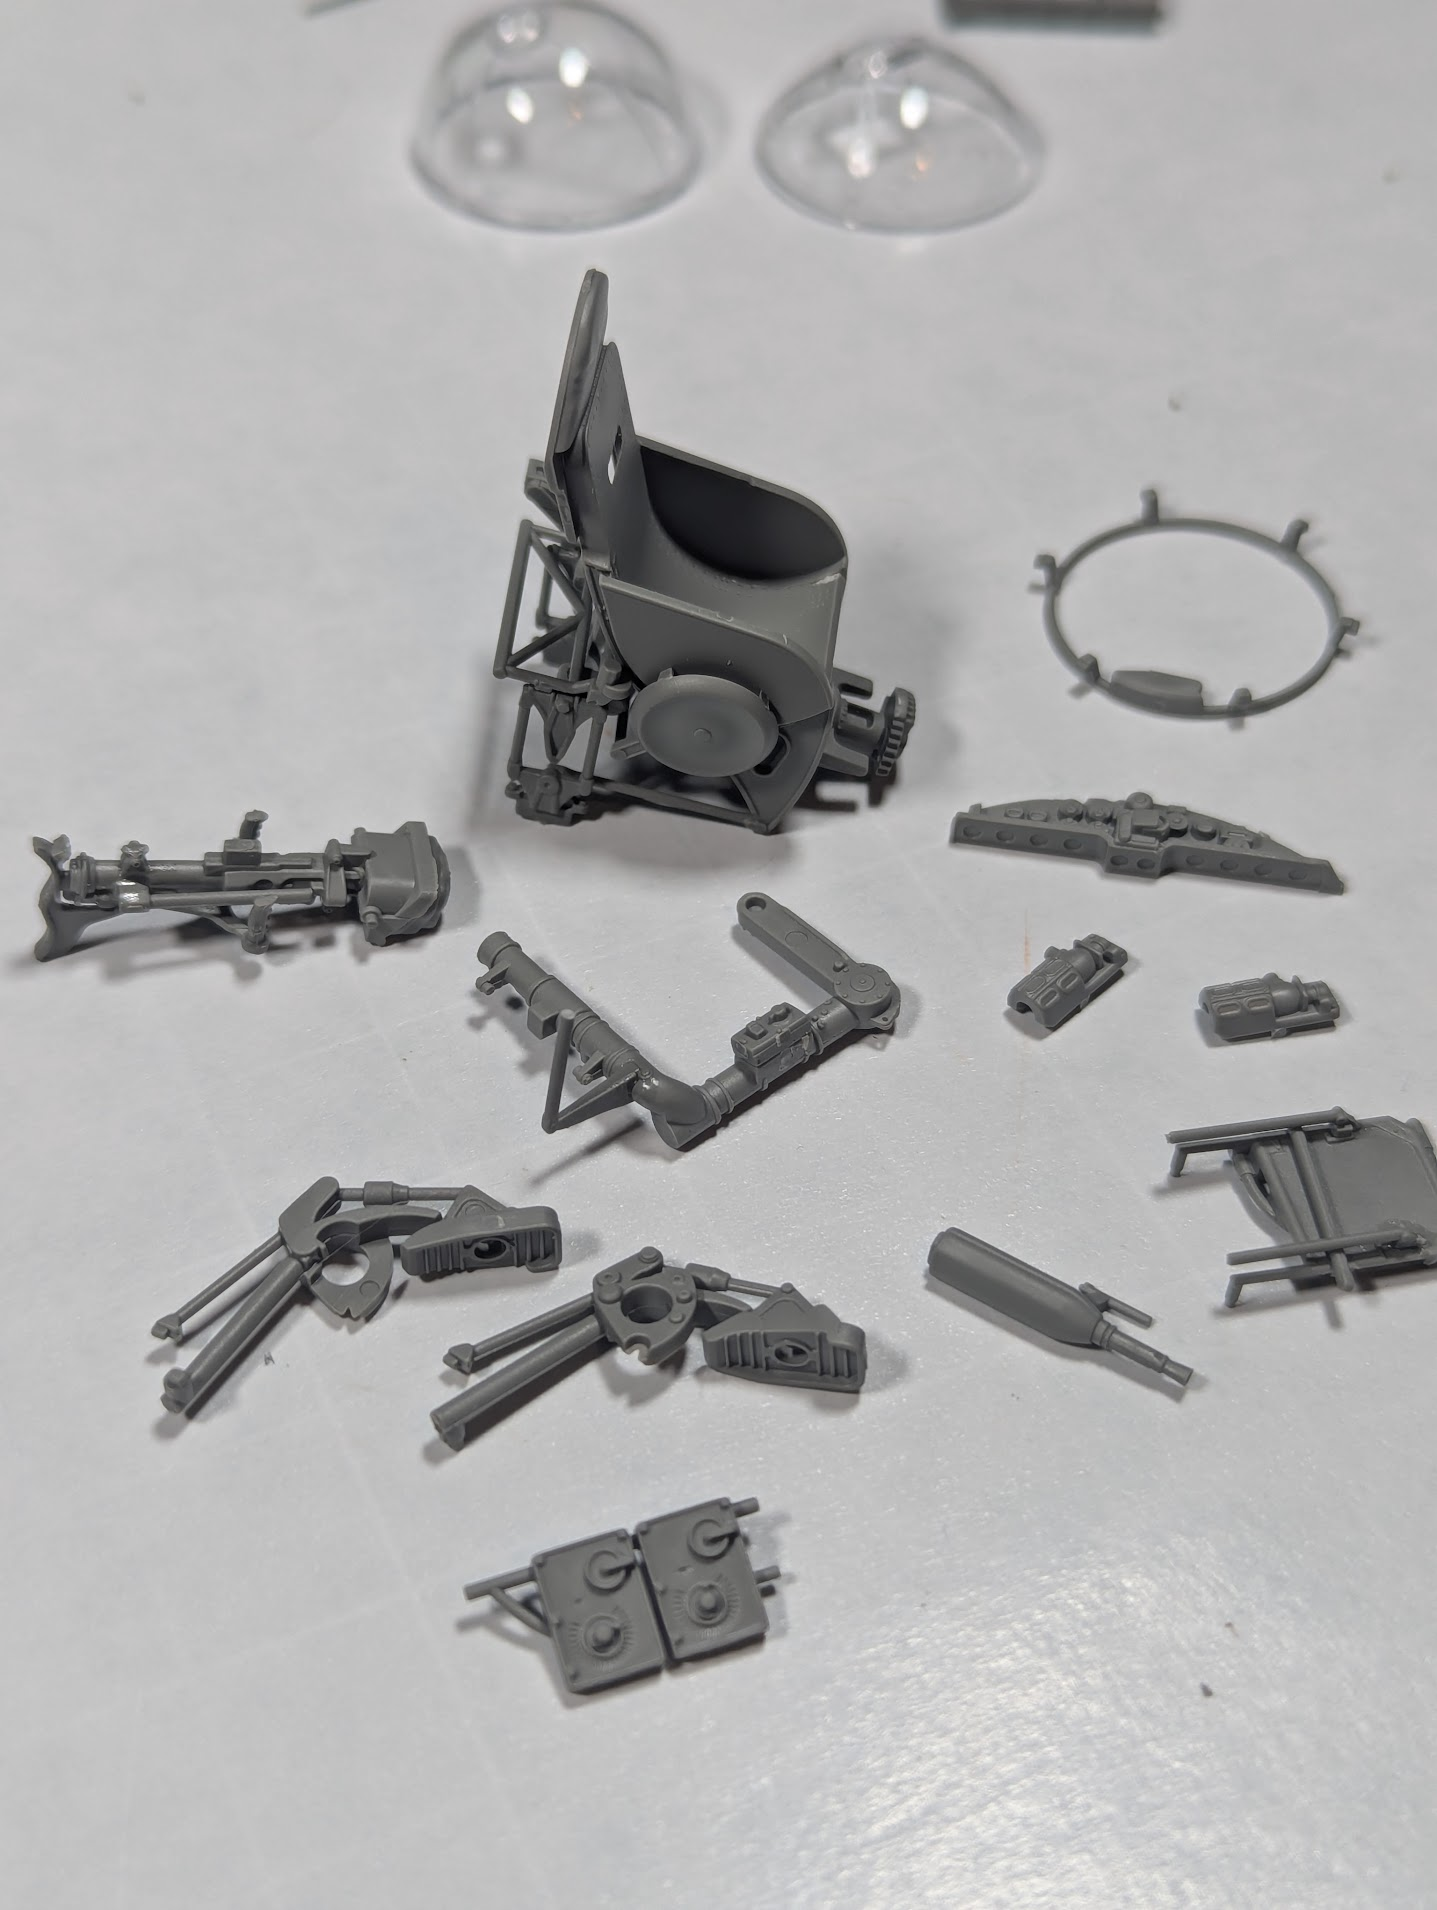
1777468953115.png
 
Last edited:
As an Amazon Associate we earn from qualifying purchases. Product prices and availability are accurate as of the date/time indicated and are subject to change.
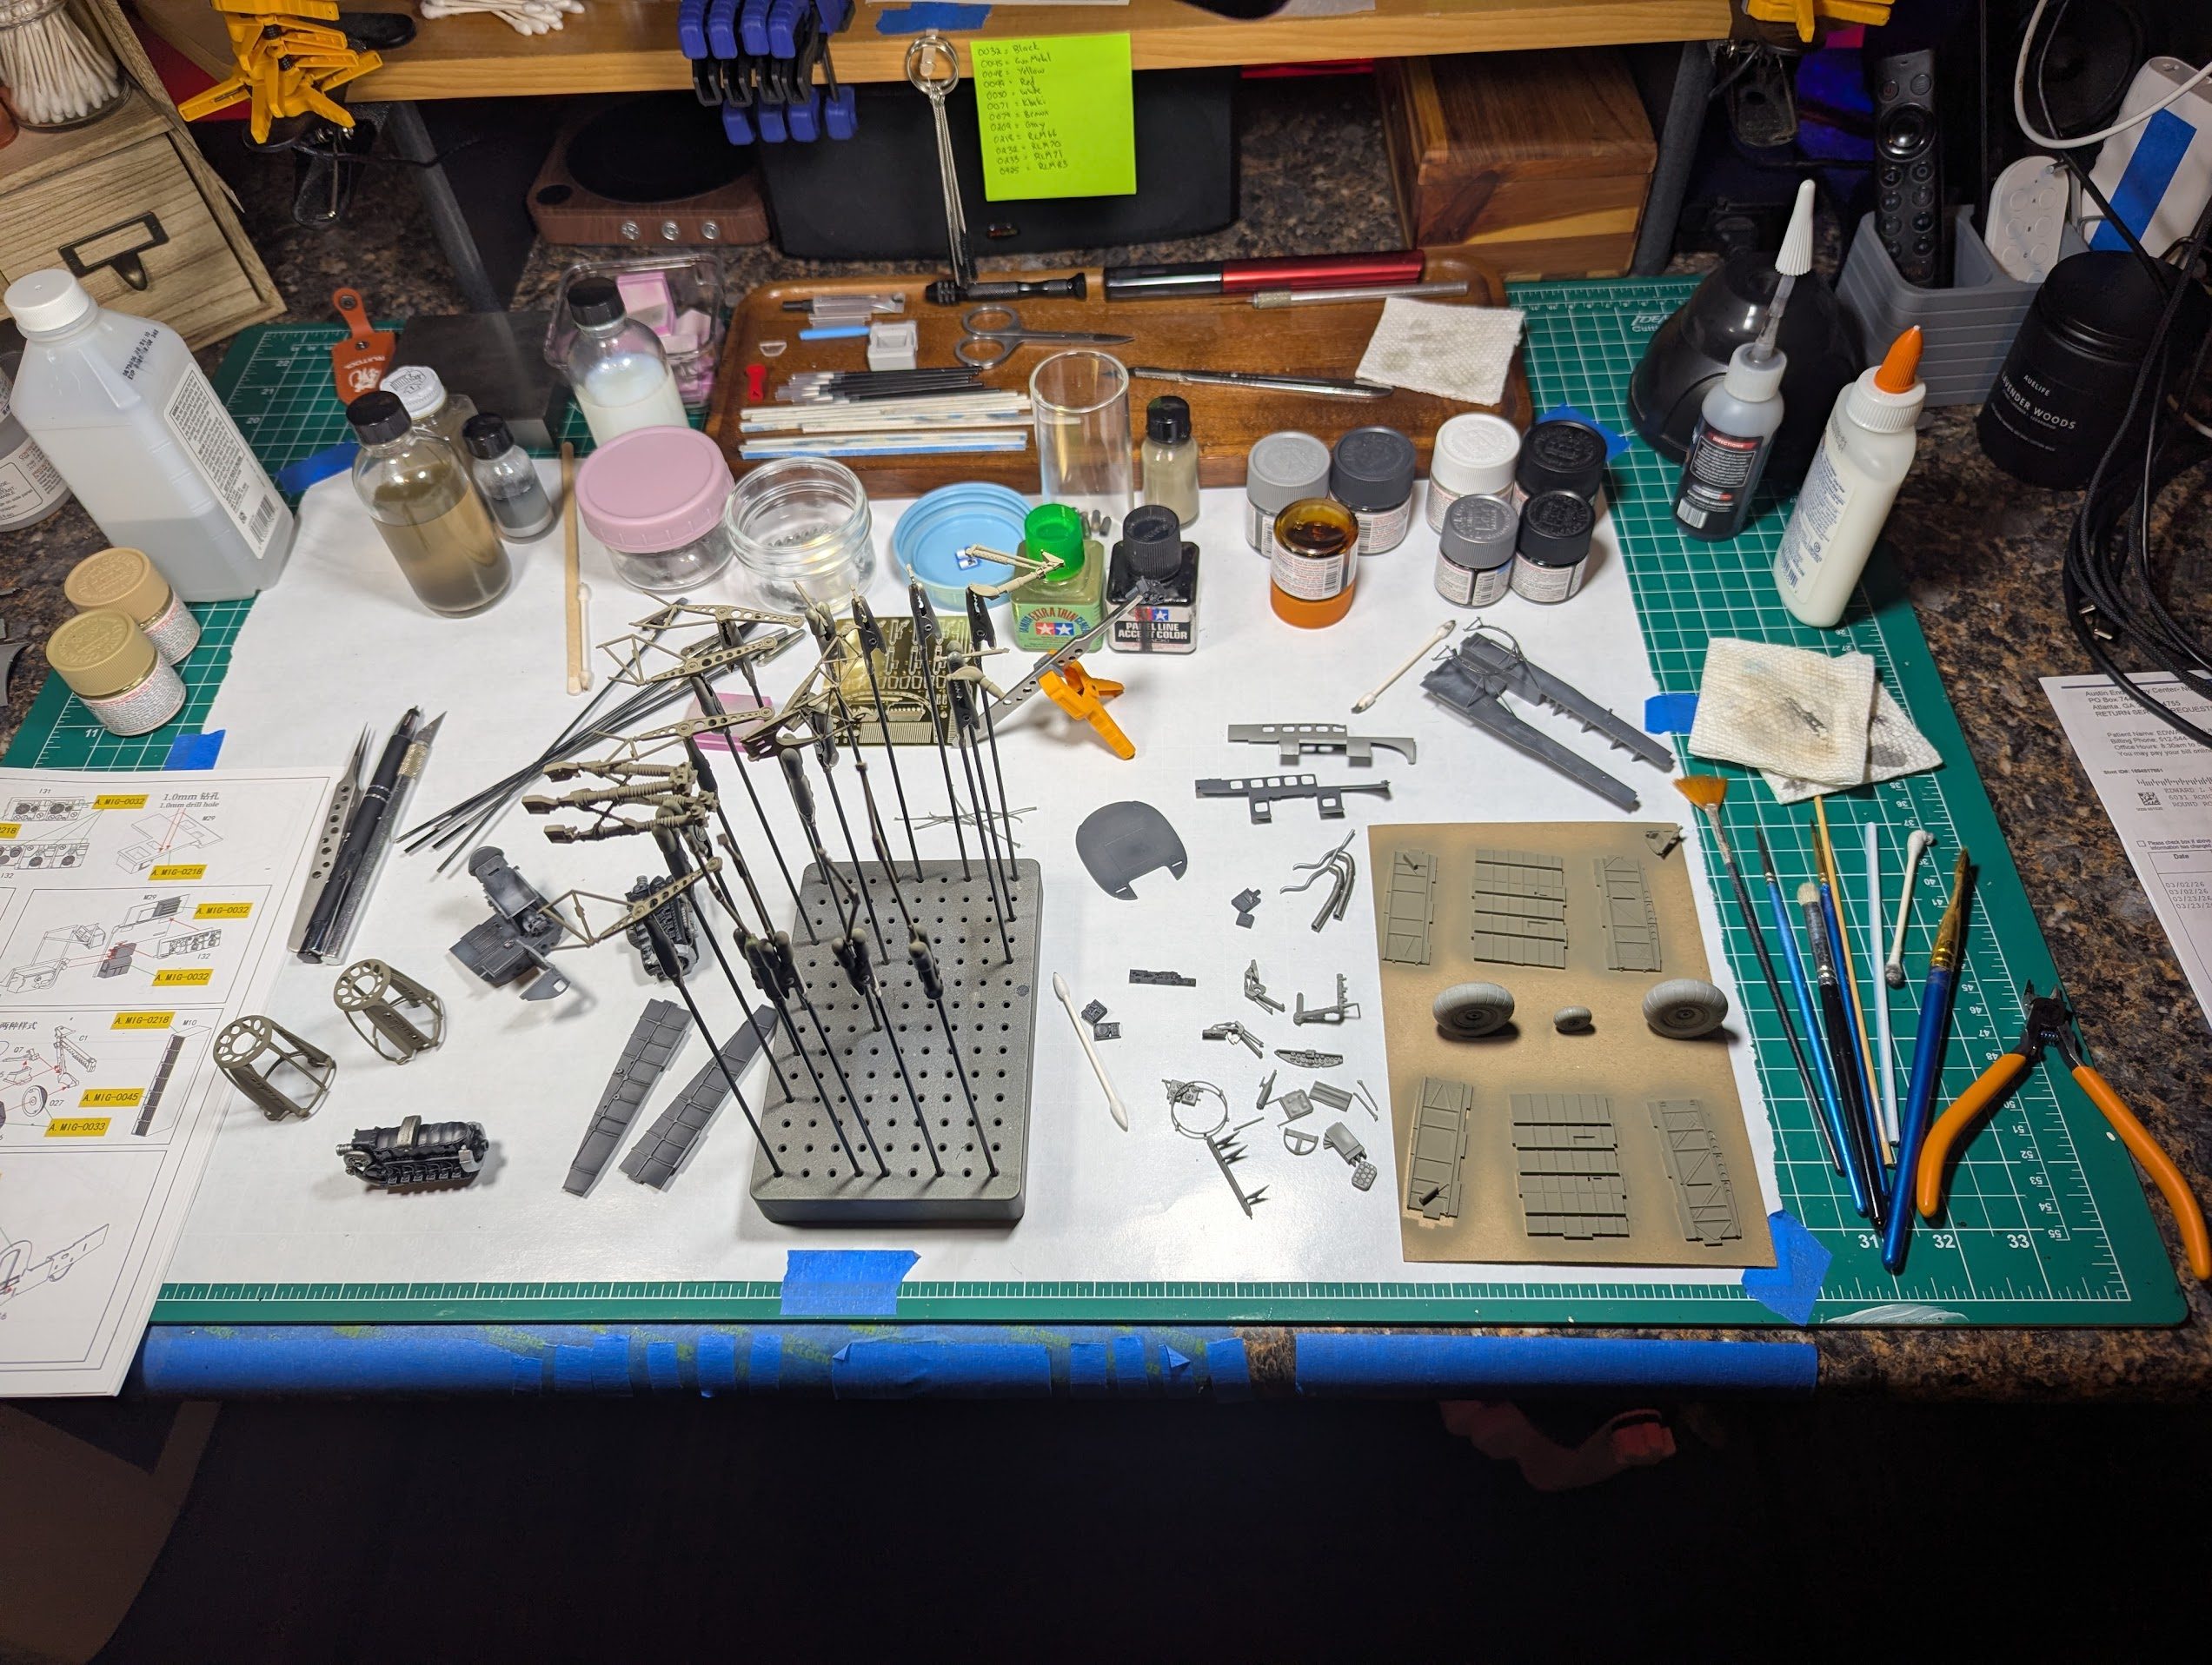
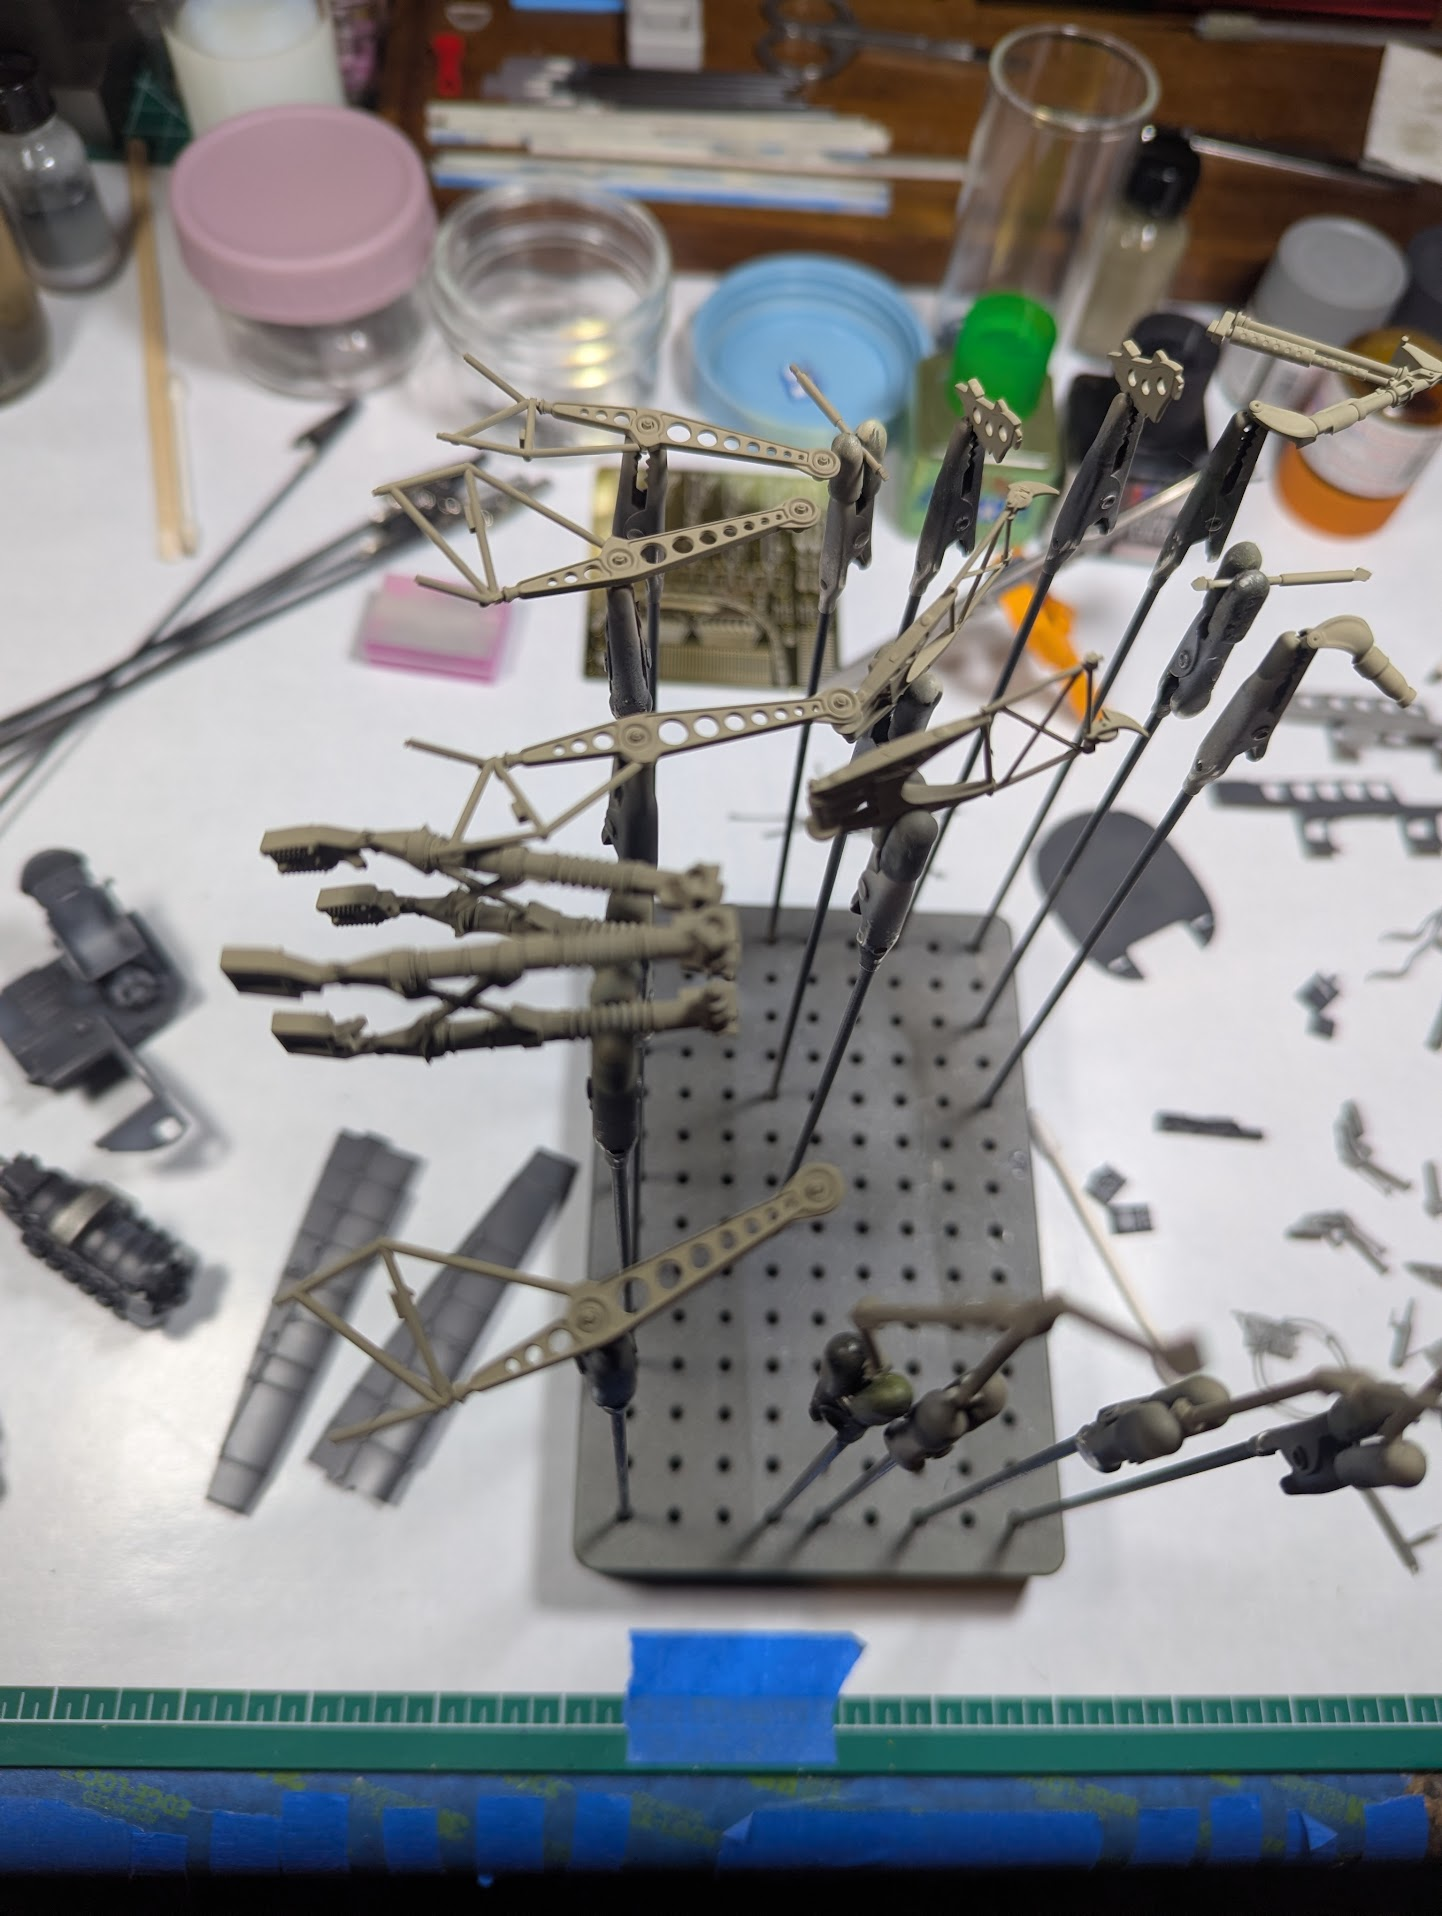
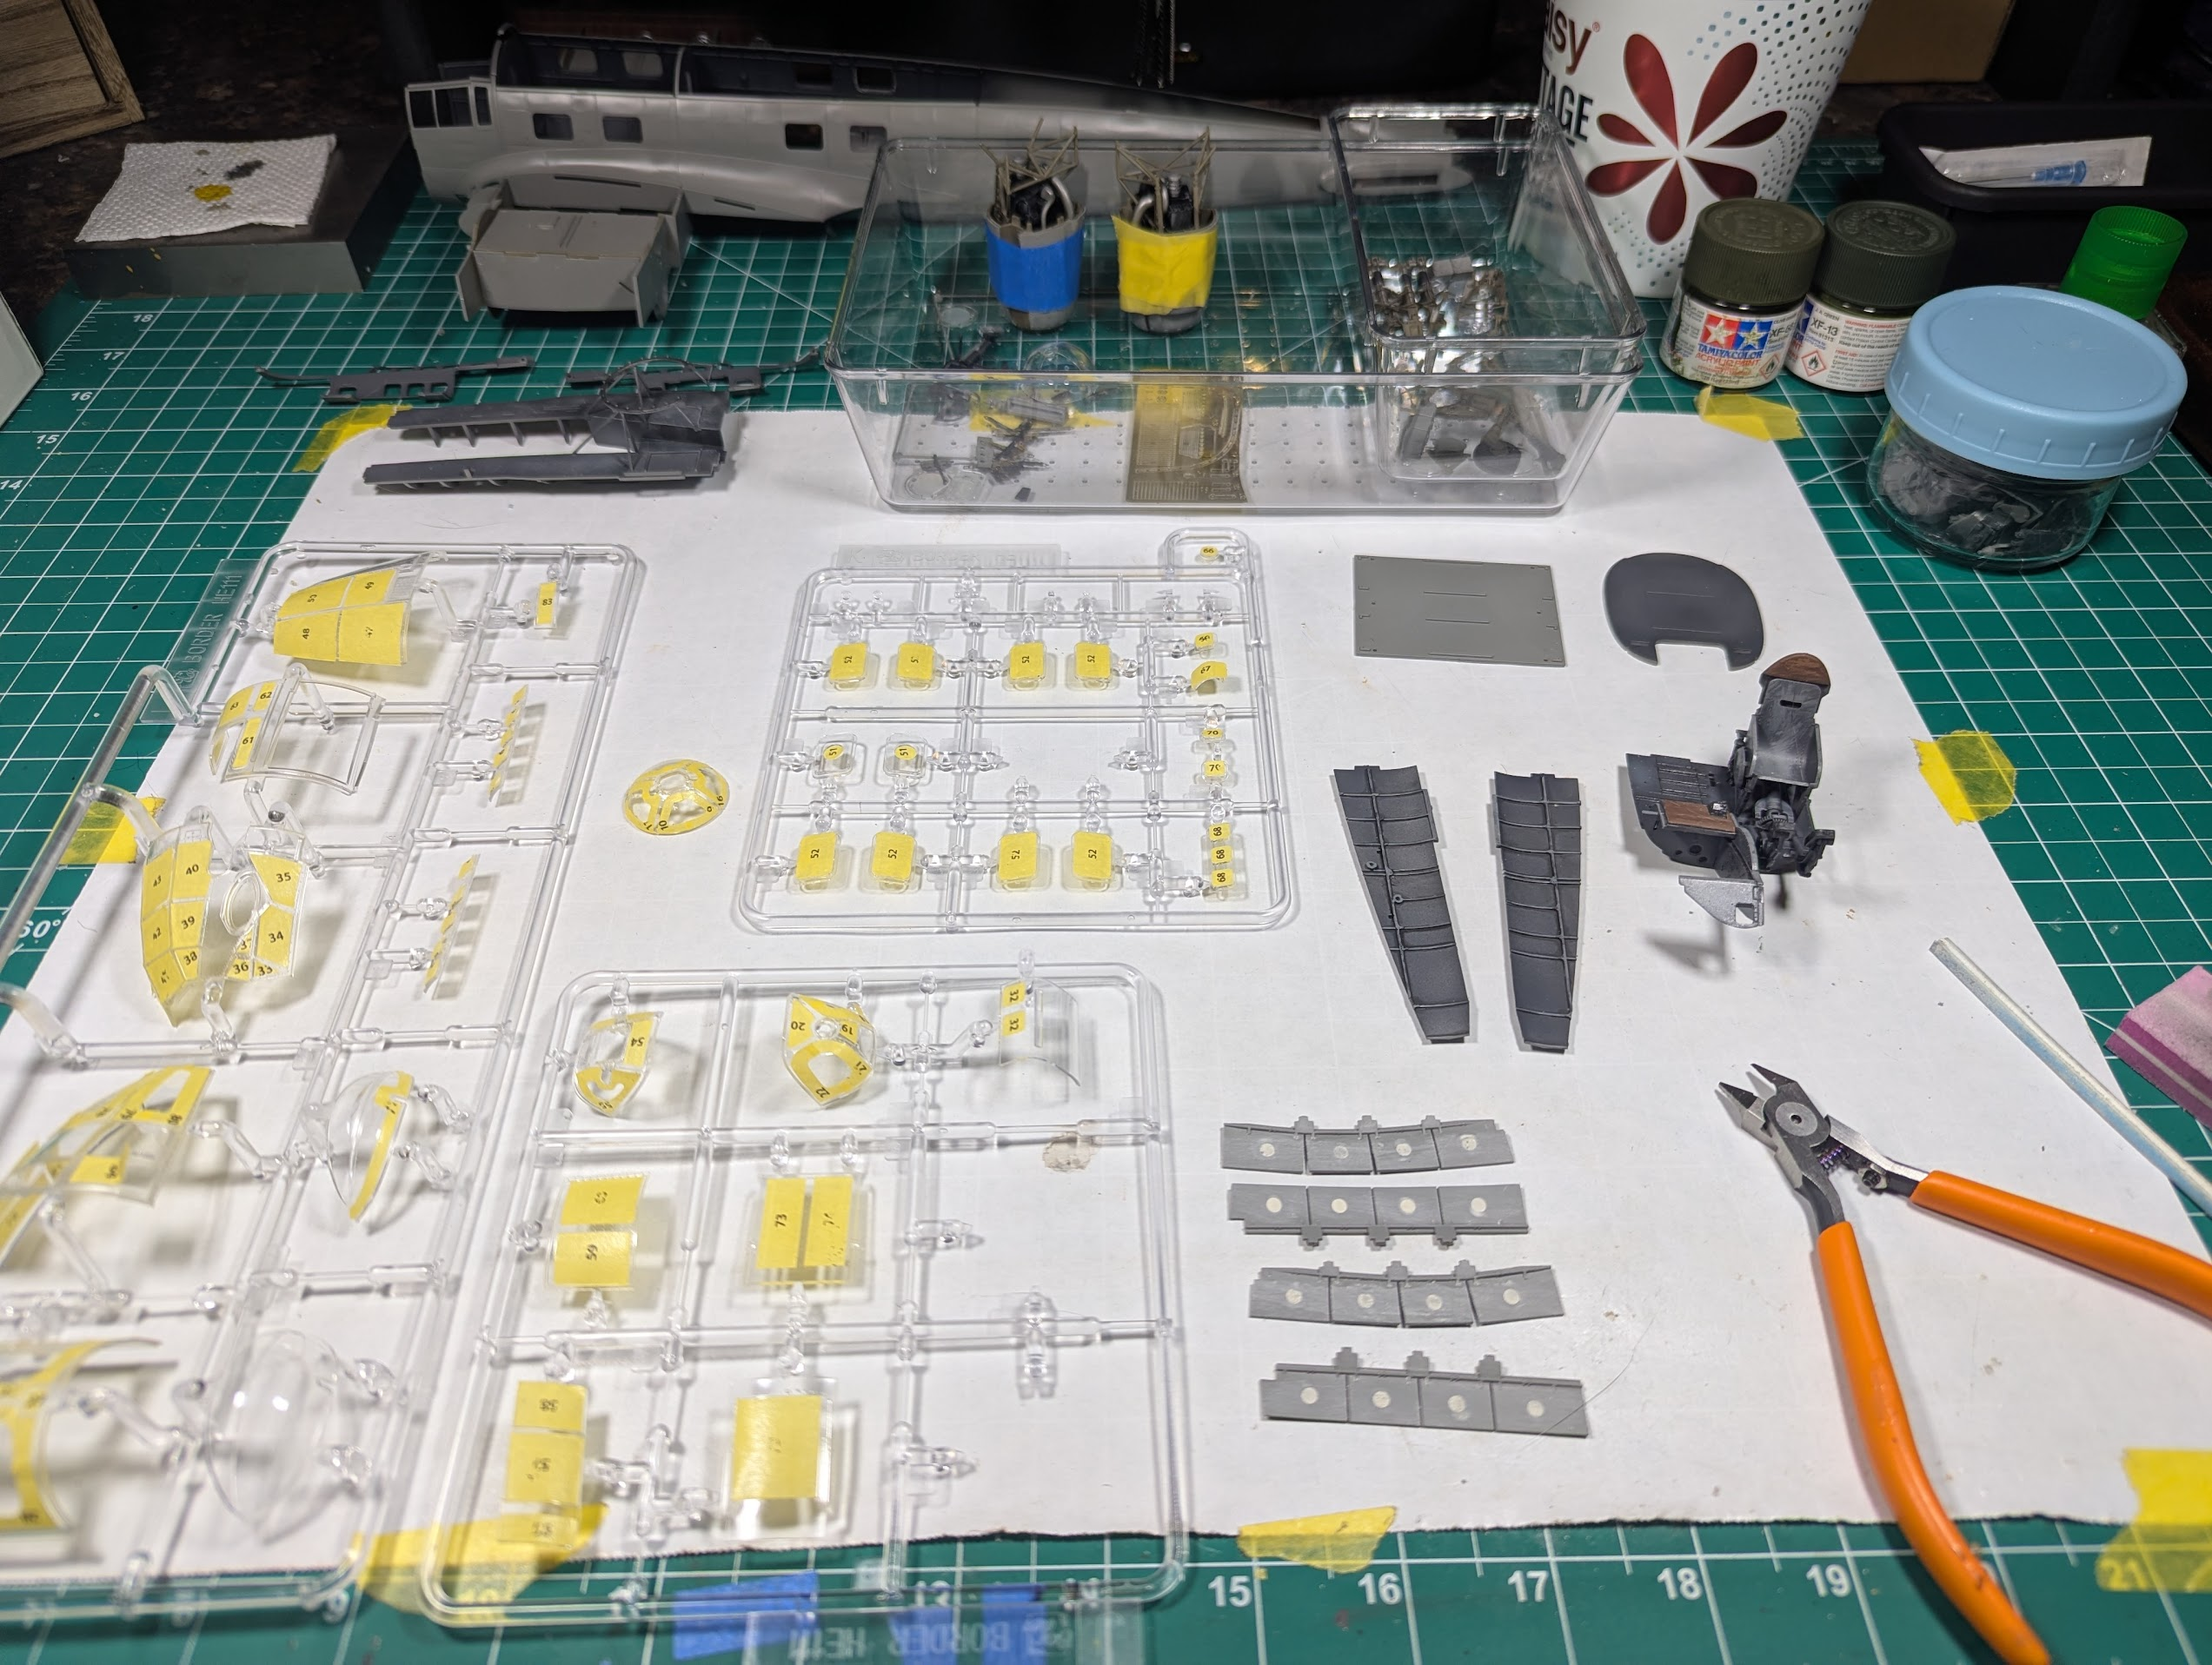
This is one of my favorite stages of a build. Typically I'd say I do not like chaos, but my bench says I do.

1777670451337.png


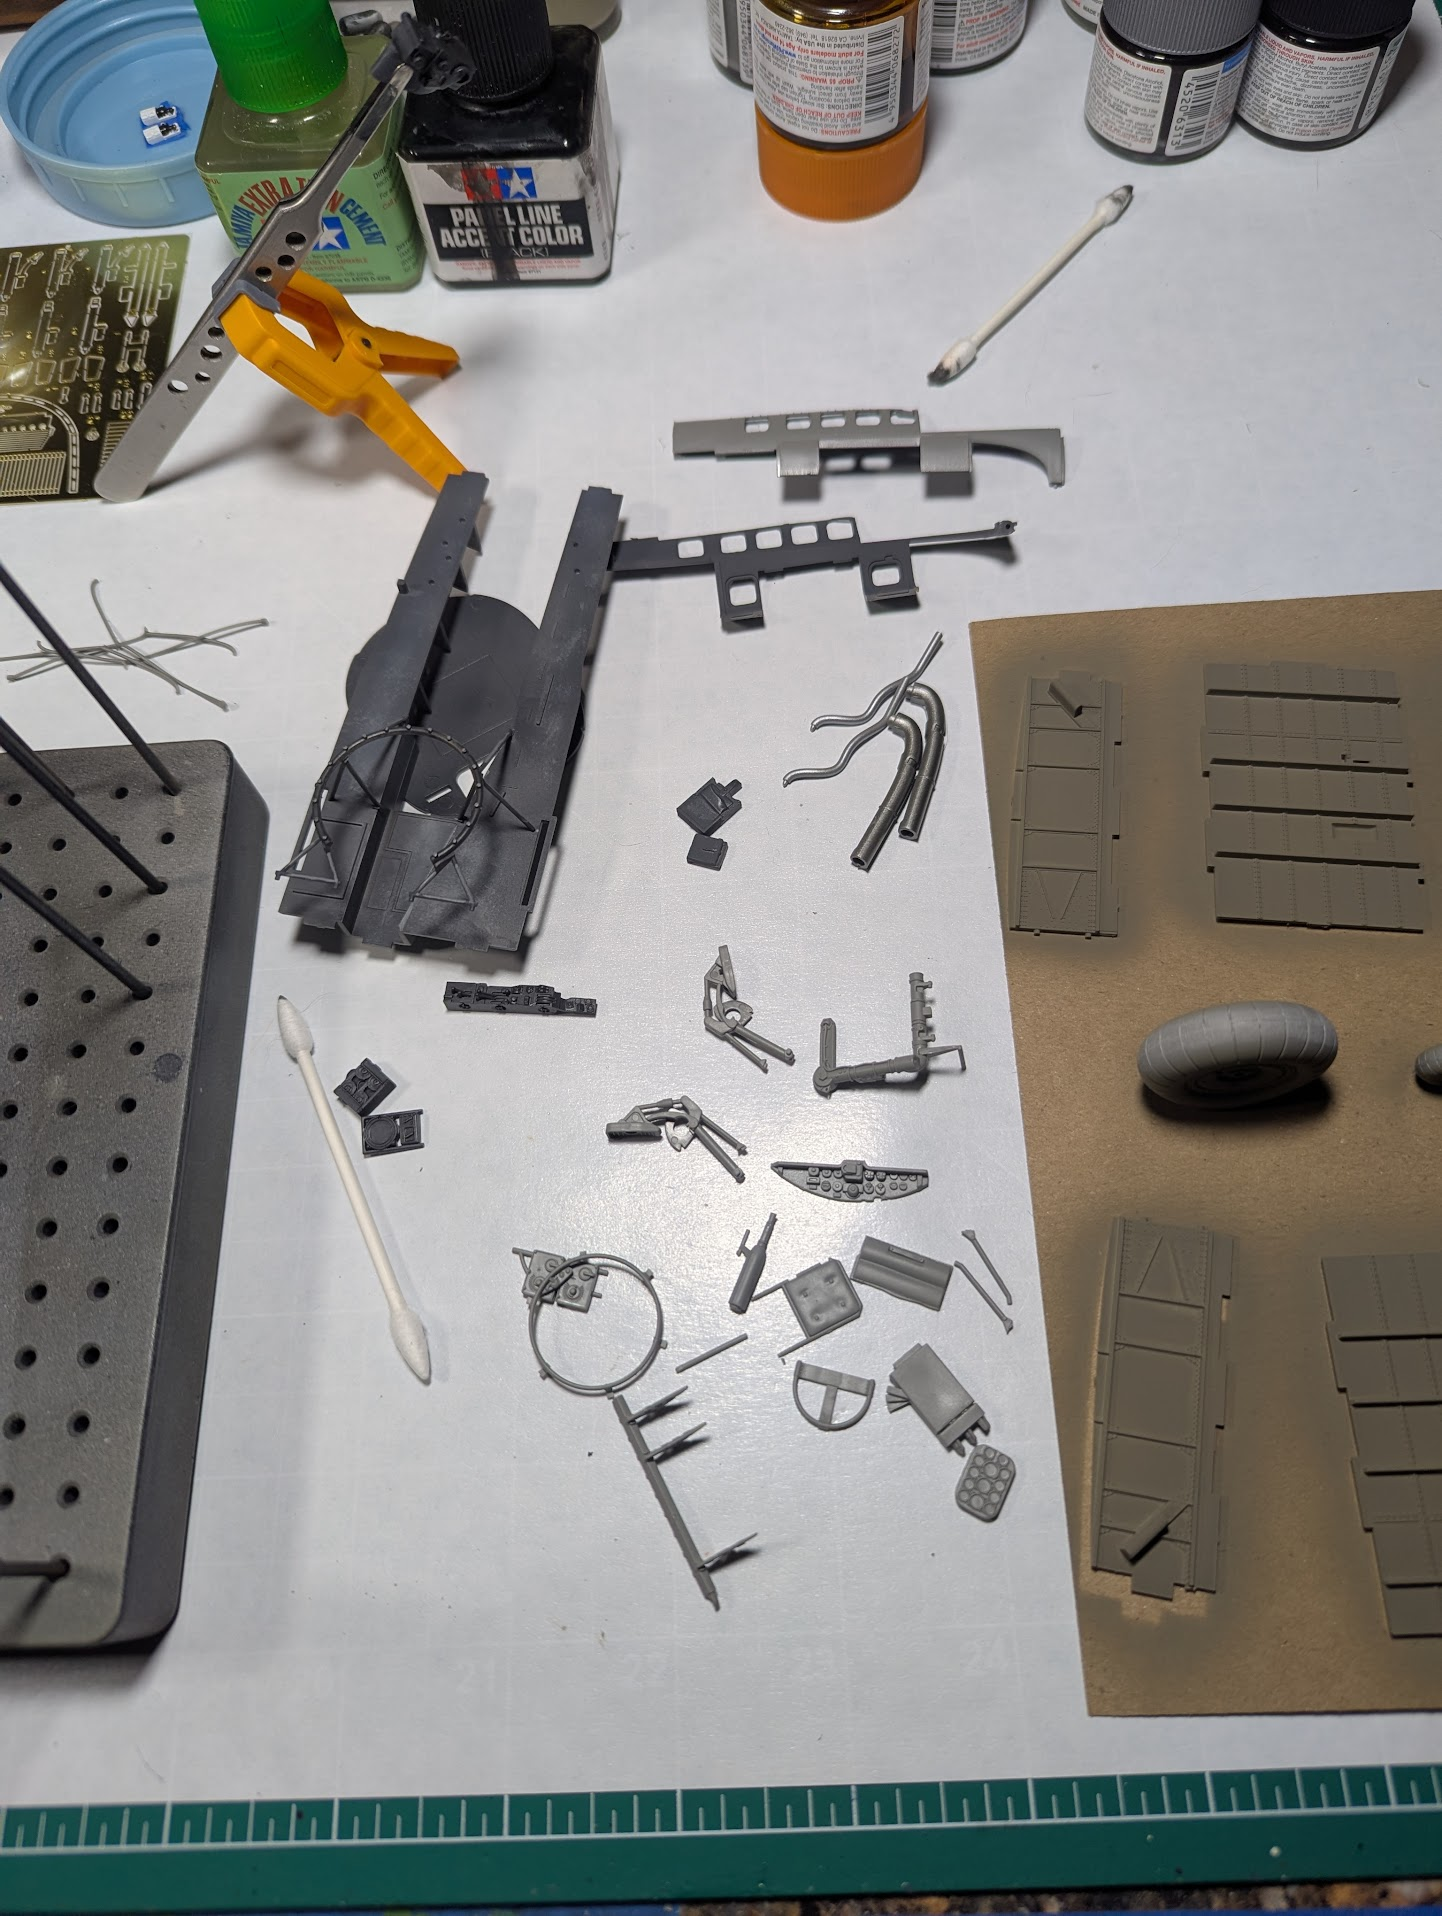
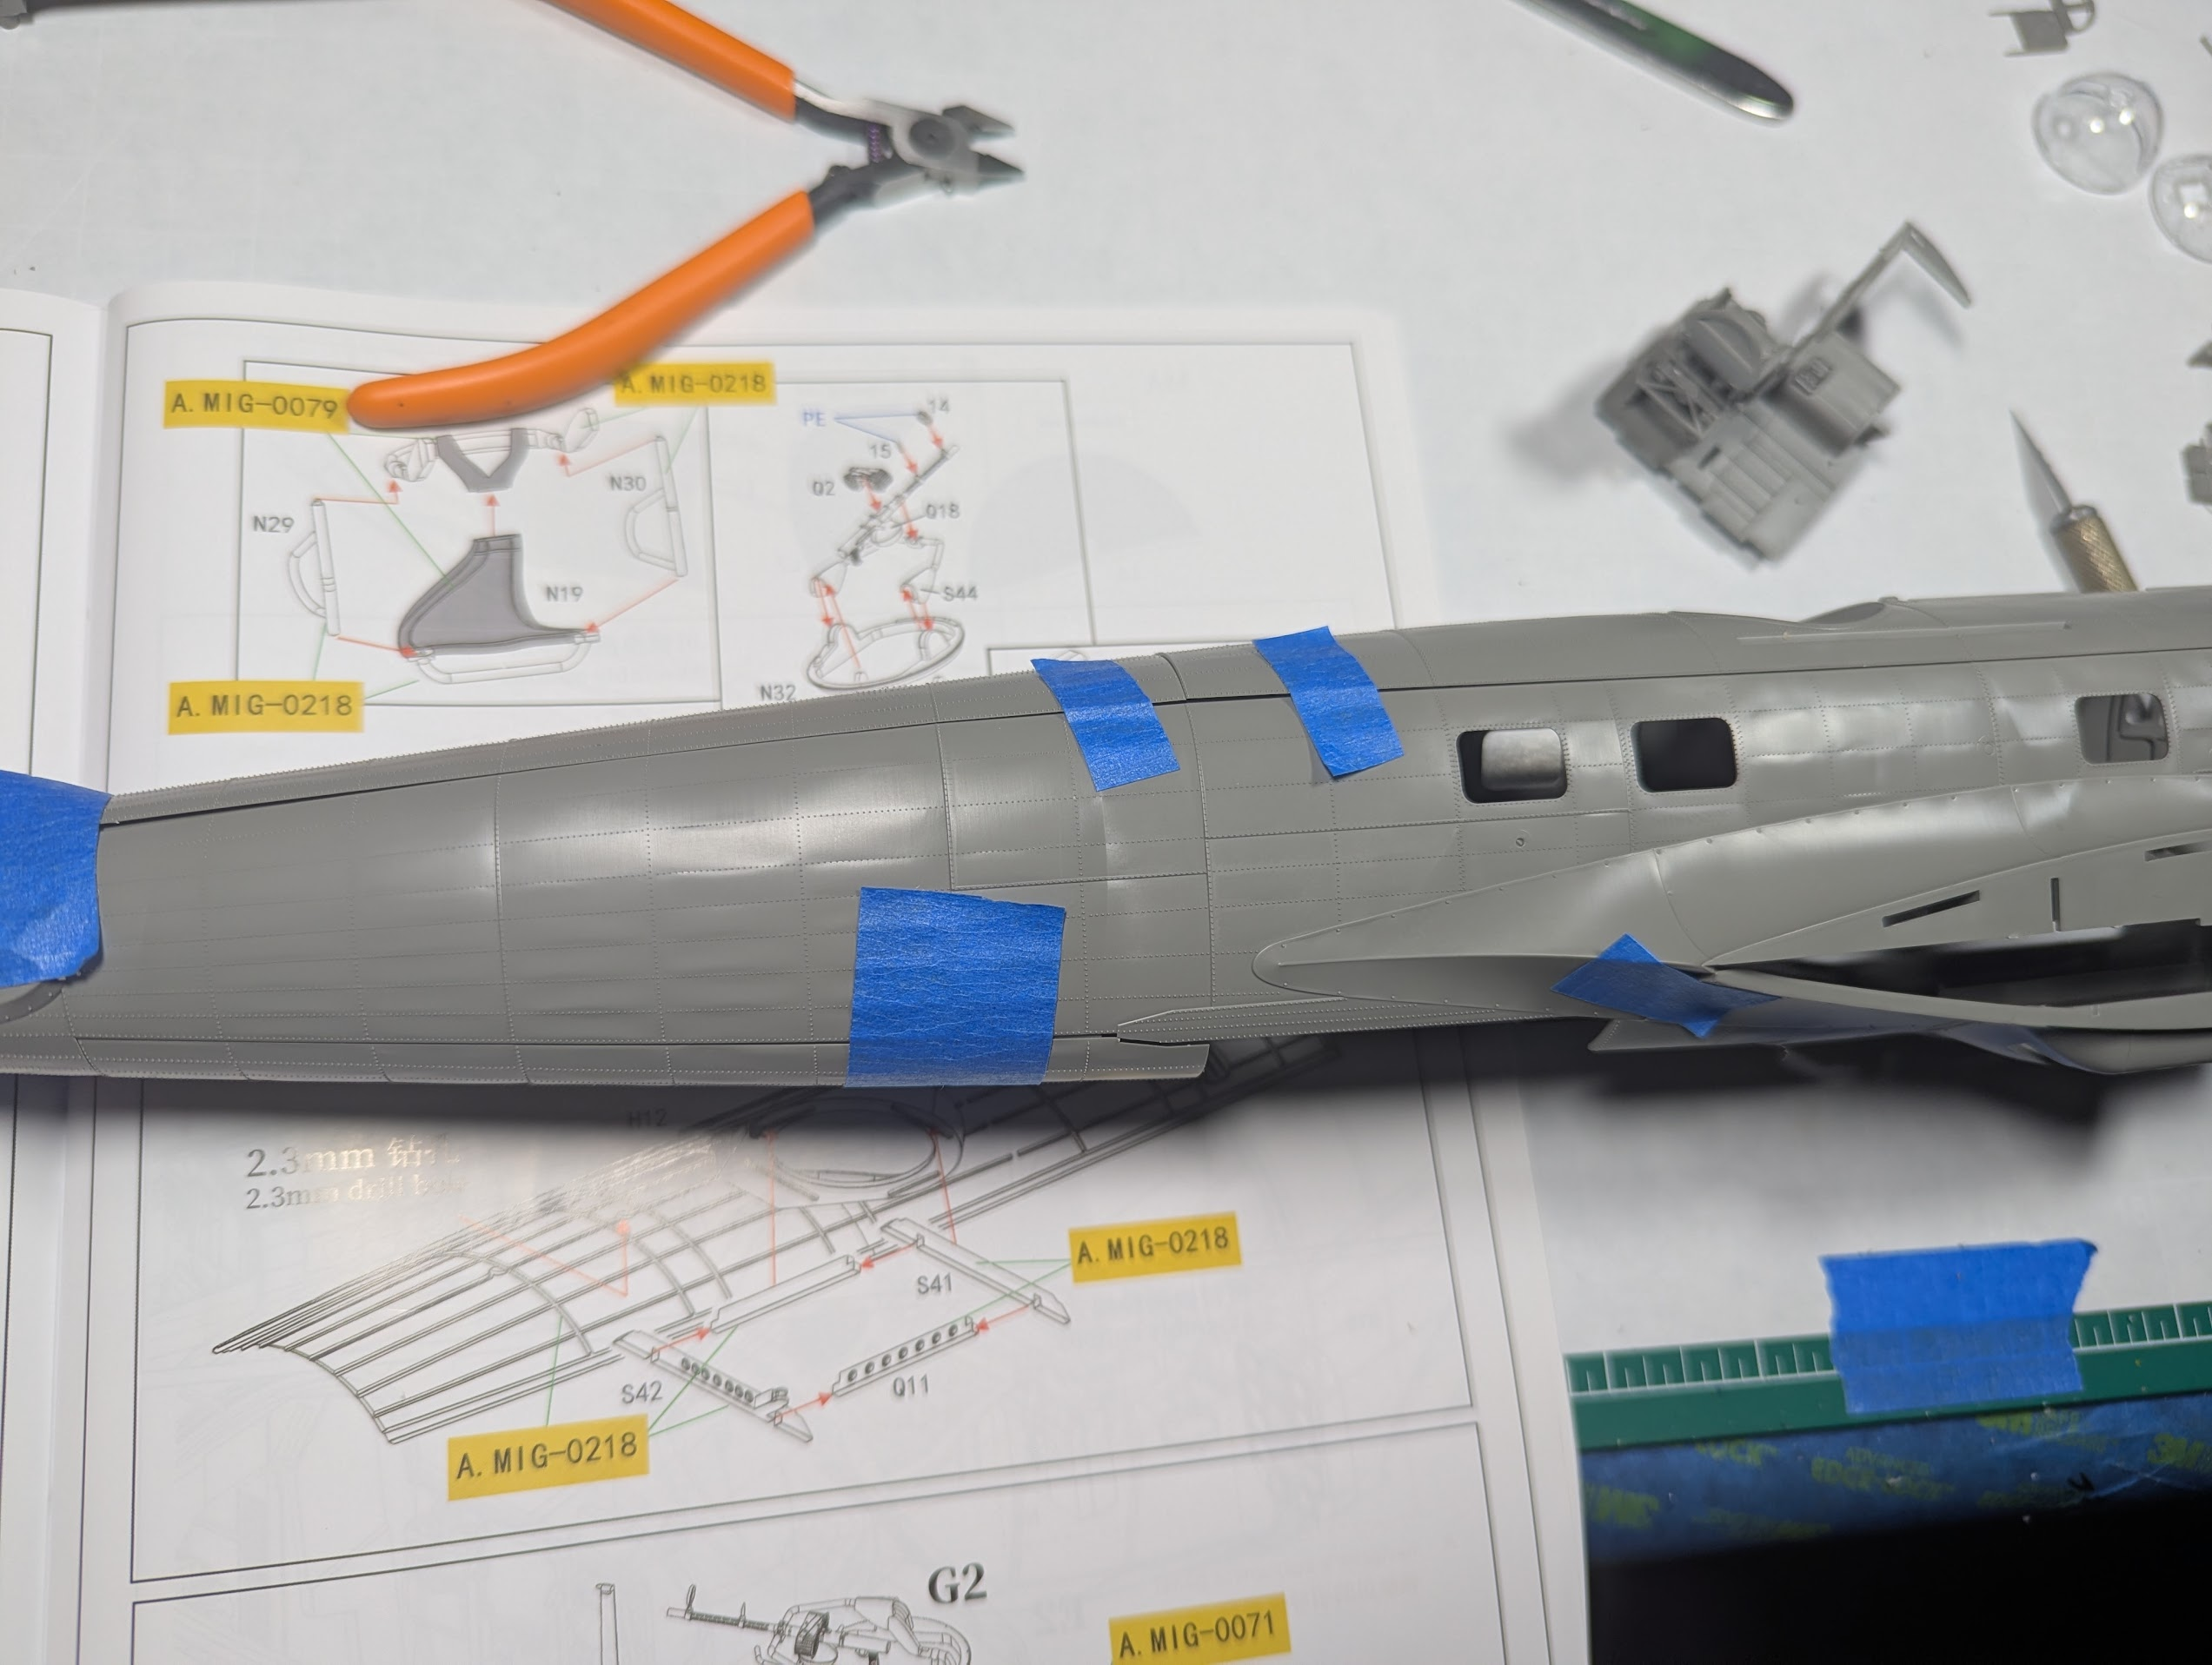
Working on various steps of the instructions at once is my habit, but with this kit is mandatory.

1777670498355.png

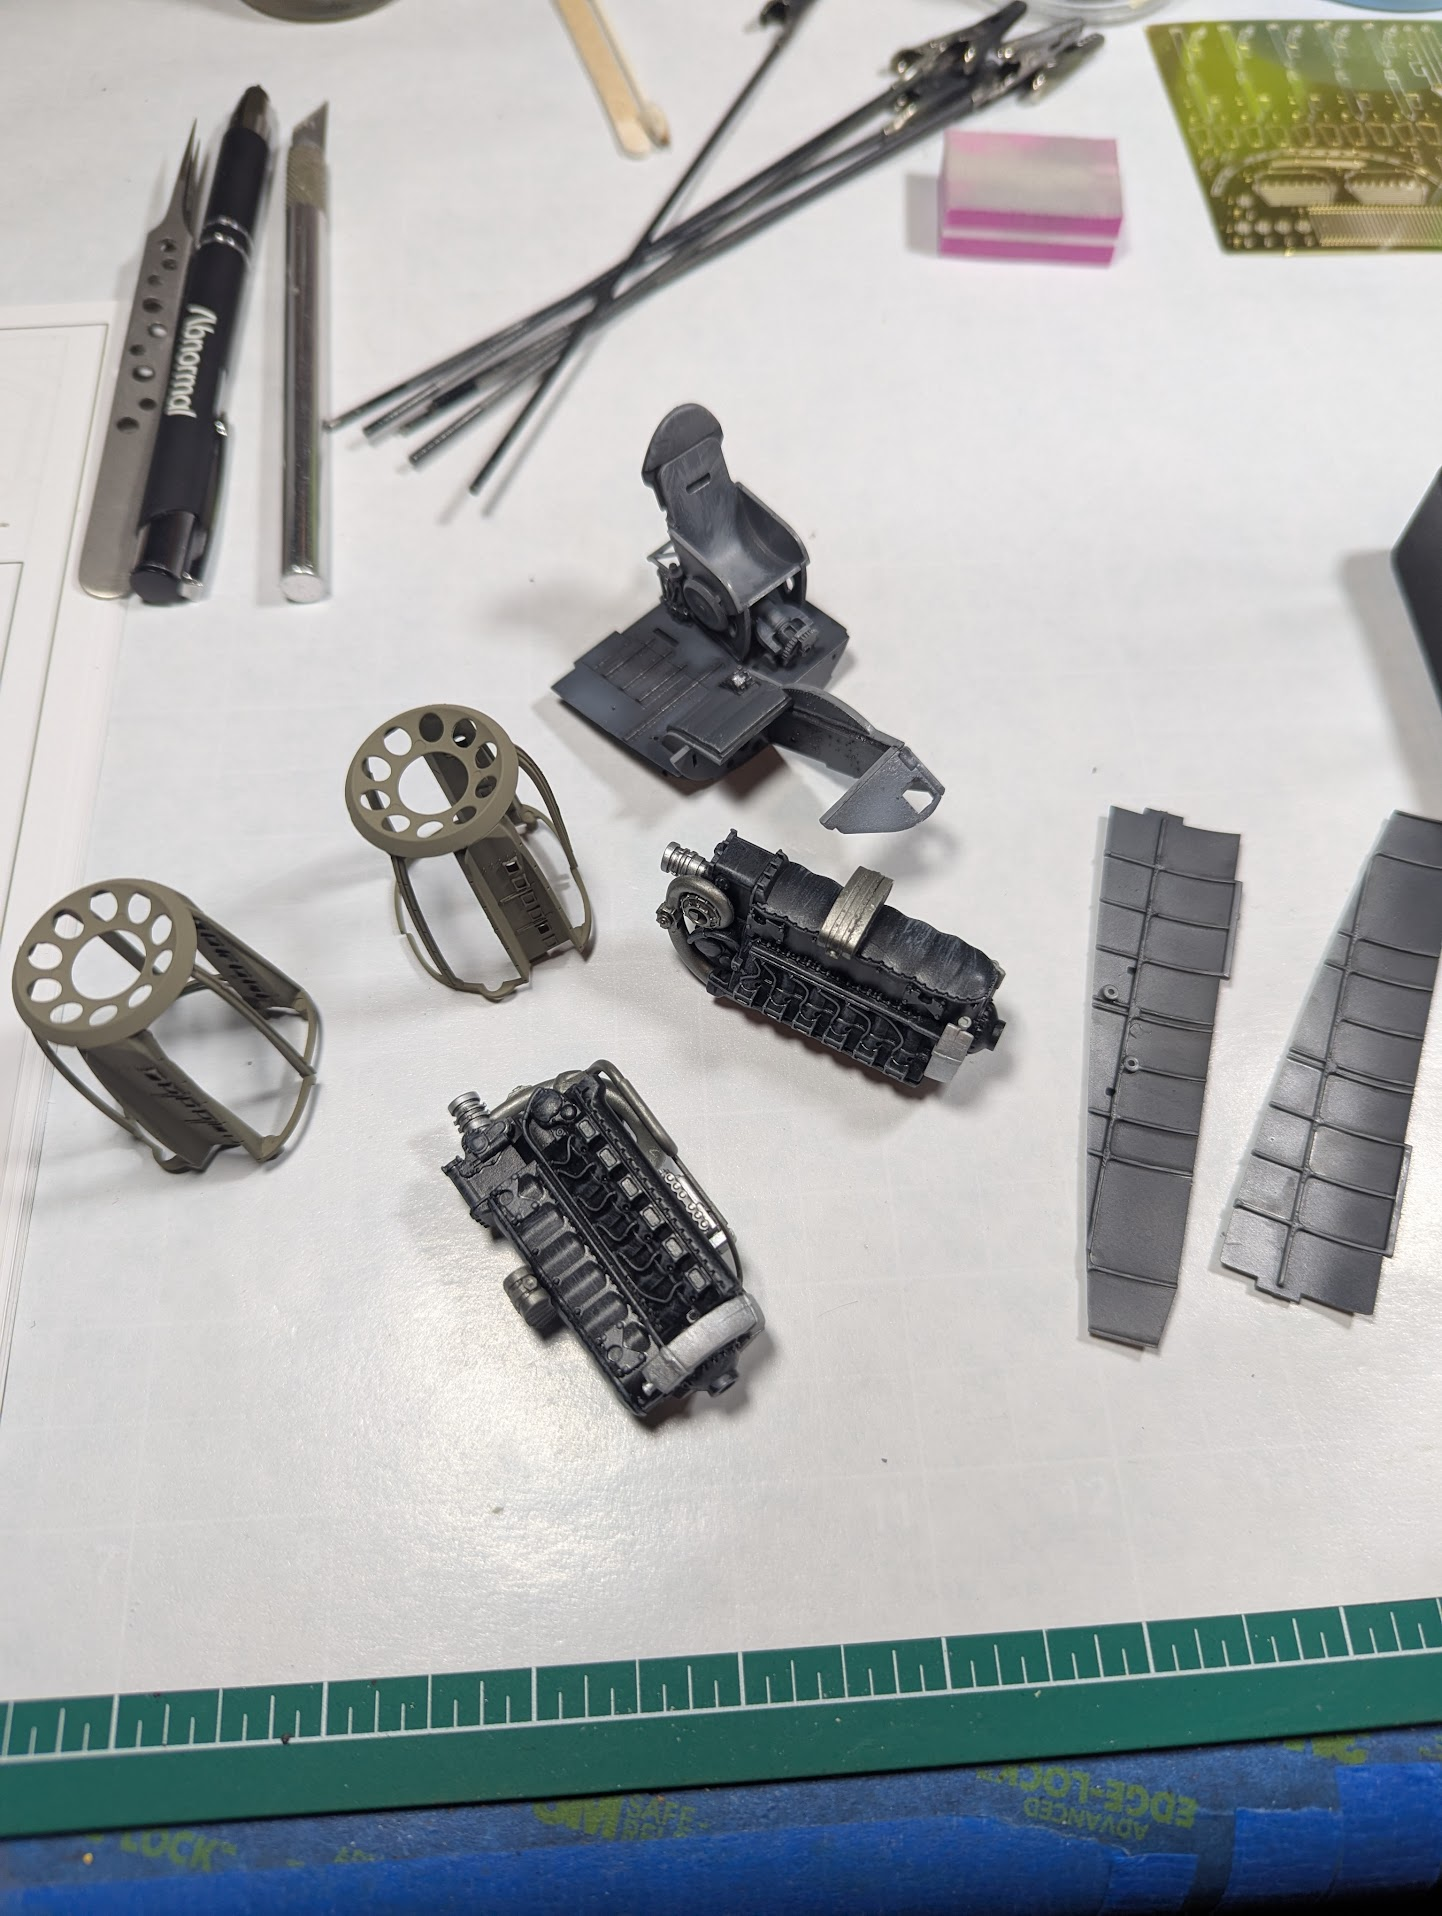
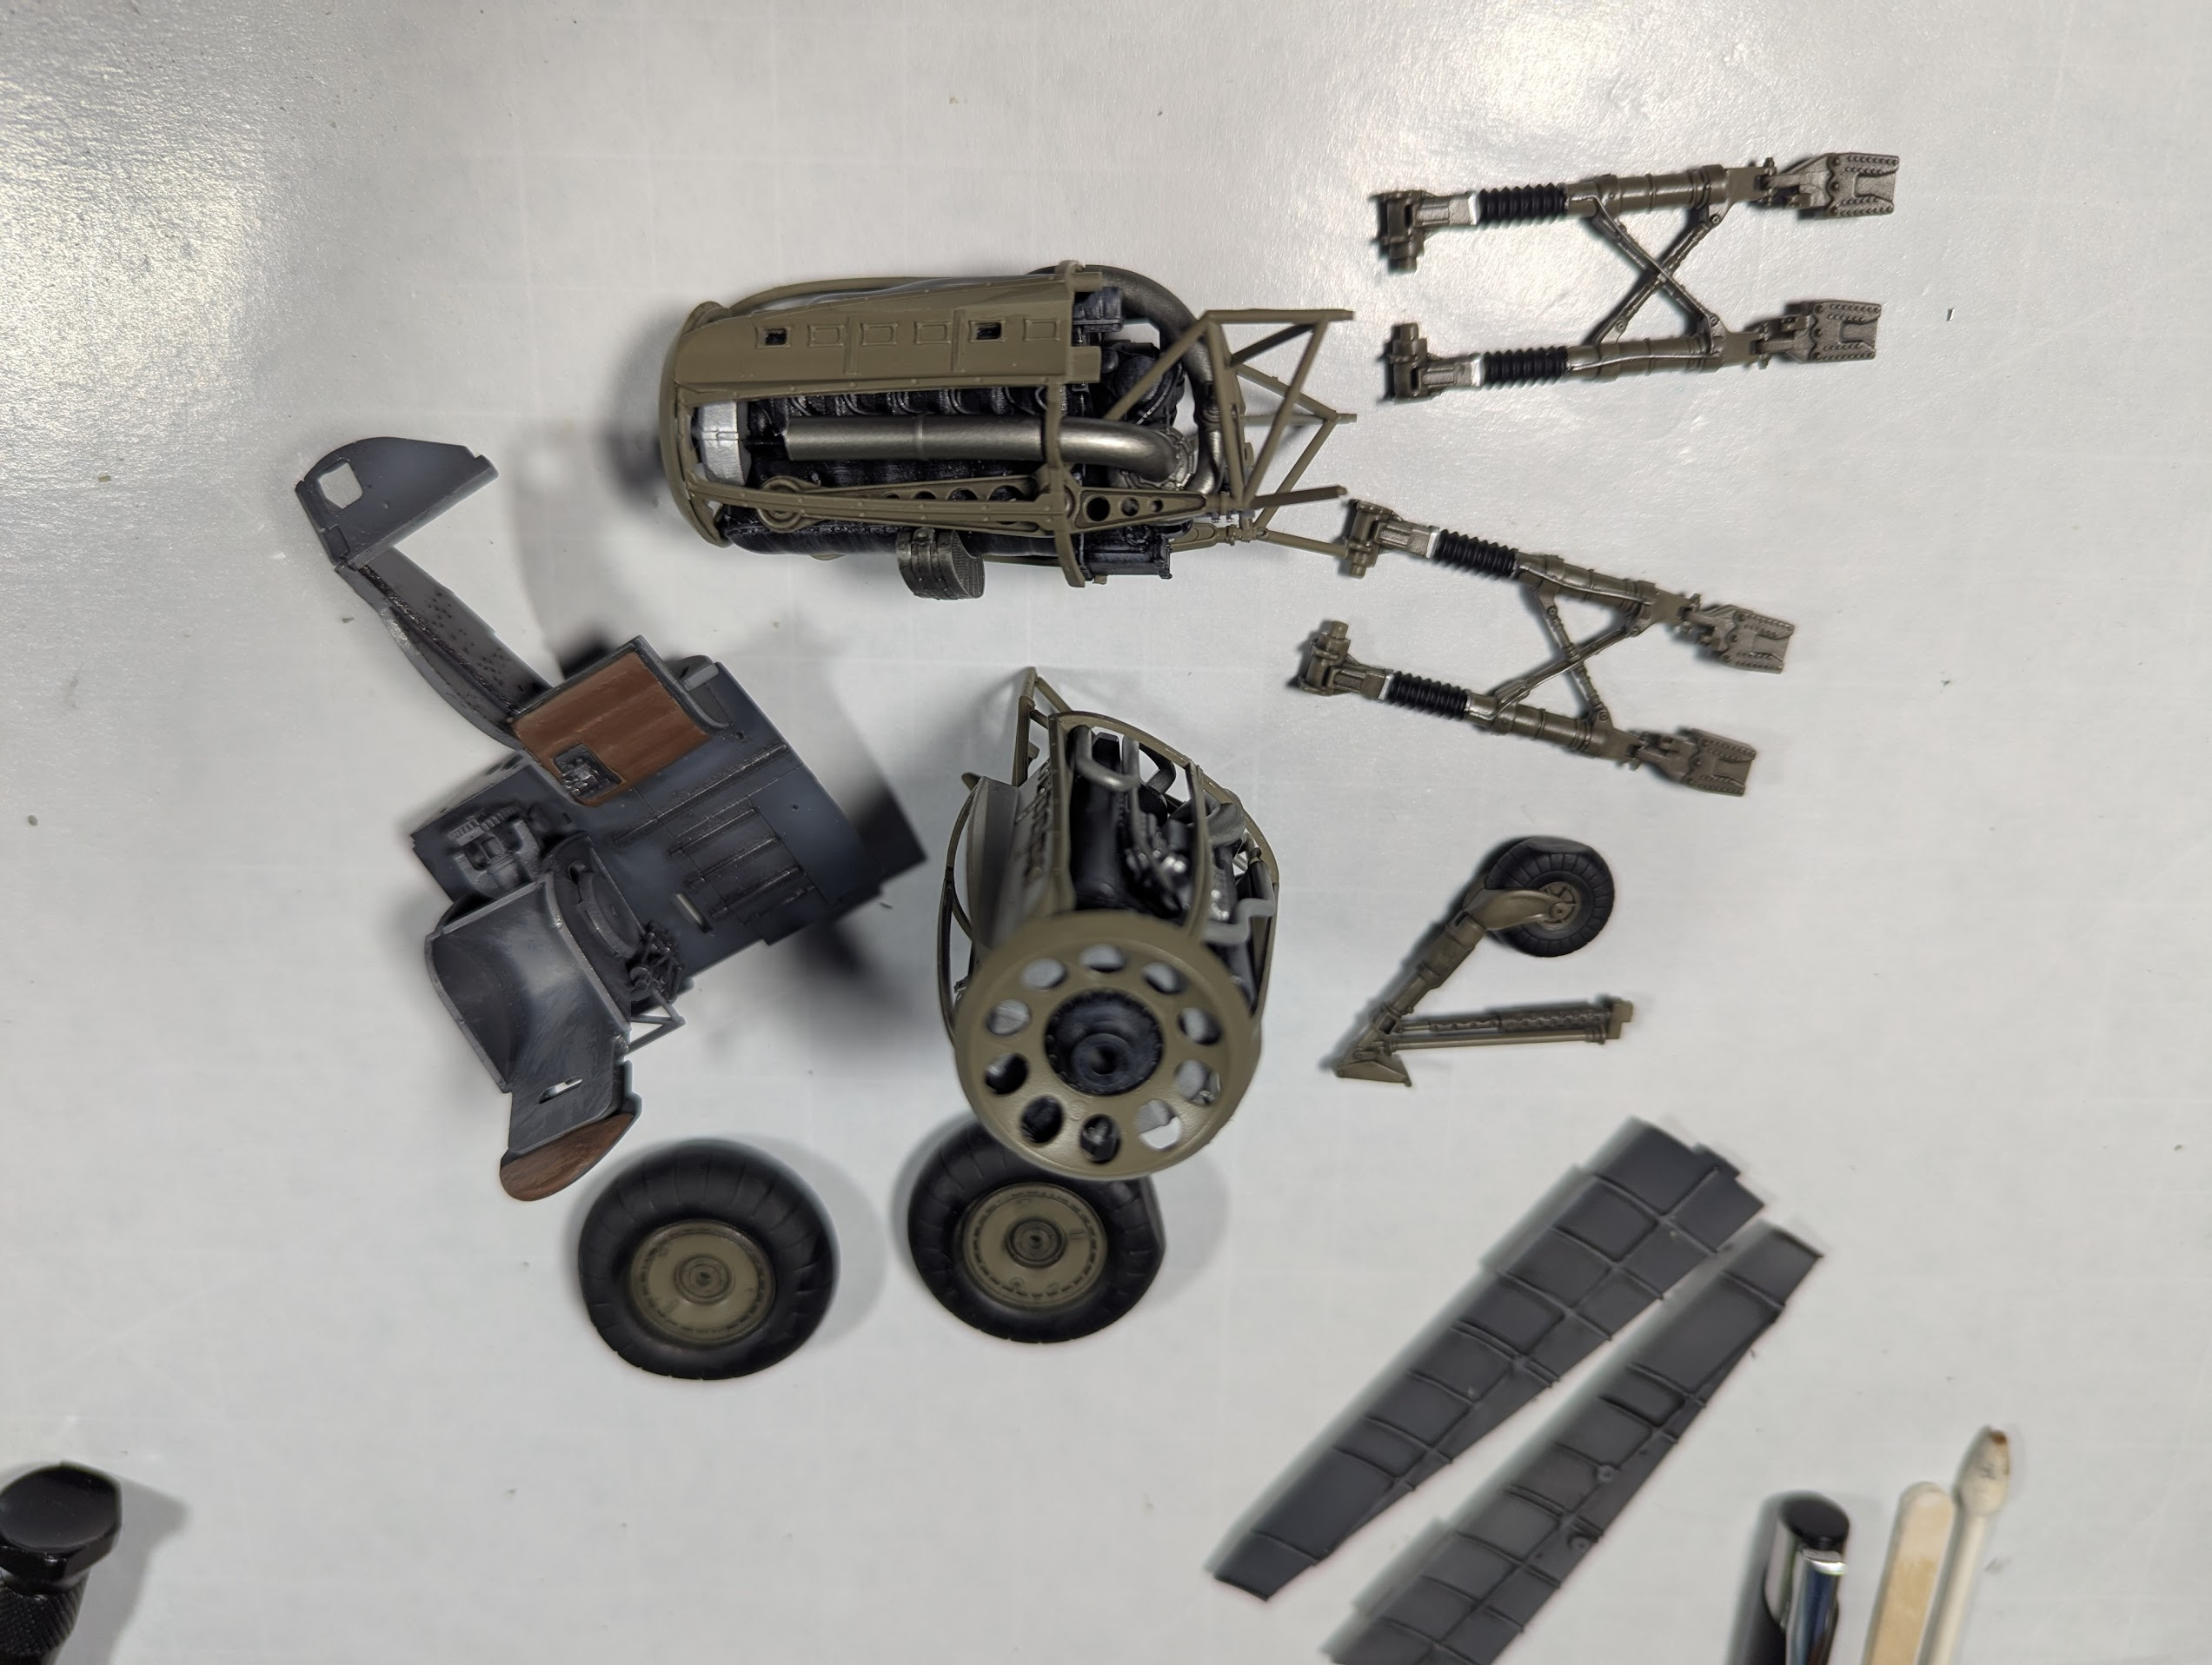
Pilot's seat is obvious, the odd bit to the pilots left is a padded section for the nose gunner to lie upon, it retracts like a roll-top desk to allow him to switch from gunner to bombardier. Two small holes near there are where his seat will mount. The two panels are shaded with light and dark RLM66. I then darkened some areas with panel liner, and highlighted the ribs in an exaggerated way since it will be hard to see well through the side windows of the rear fuselage. The engines and their frames are obvious, several parts remain to be attached until after paint, just to ensure they align with exhaists and supercharger intake.

1777670736136.png

Engine mounts and various landing gear bits, waiting for a clearcoat.

1777670779723.png

The floor of the rear section, sides of the lower gondola, control column (the thick U-shaped thing), the rudder pedals which stick out into the open area of the nose, and various other itty bits waiting for paint. On the right are the wheels and the landing gear bays also needing clear.
 
I need to address that PE soon. I've had issues in the past with paint adhering to the brass, no matter how or what I used to prime it. This time I'm going to try a mild acid bath and see if that helps.
 
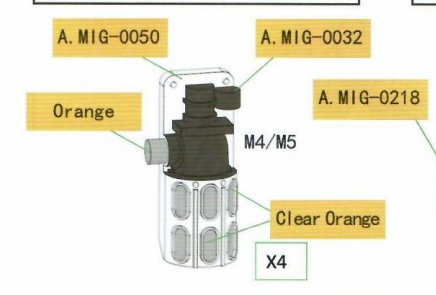
Do any of you Luftwaffles know what these are in real life?

1777671313223.png


The 050 color is white and the 032 is black, so with the orange they are gonna really stick out on the dark and grey interior.
 
I was thinking it was possibly an oxygen supply of some sort, but it is too small for a tank, maybe it was a constant-flow regulator with the masks fit onto the orange nozzle?. German bombers didn't typically fly at extreme altitudes, maybe in the final part of the war, so that might be way off.

I've asked in my club's discord too. Will post here if I find out.
 
Interested to see how this works out, the acid bath turned the brass a very dark brown, it smells like old metal and rubs off on fingers. That I can rub it off makes me question the efficacy as a primer.

1777753122647.png
 
Had similar experience... Timing, I think the point is a mild etch, but it can be had to predict. I've had to rinse lightly to remove excess.
Sometimes PE has a coating already, and I suspect not all PE is the same composition, so reacts differently .
 
Will post here if I find out.
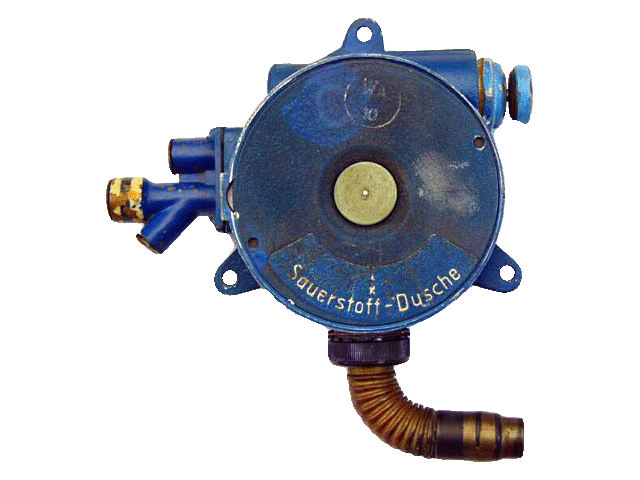
It is a "Sauerstoffdusche" (I copy-pasted that), no idea what it translates too literally (sounds like "foul-stuff-german"), but it is an oxygen regulator/supply sort of thing which makes sense given the location of them within the aircraft.
 
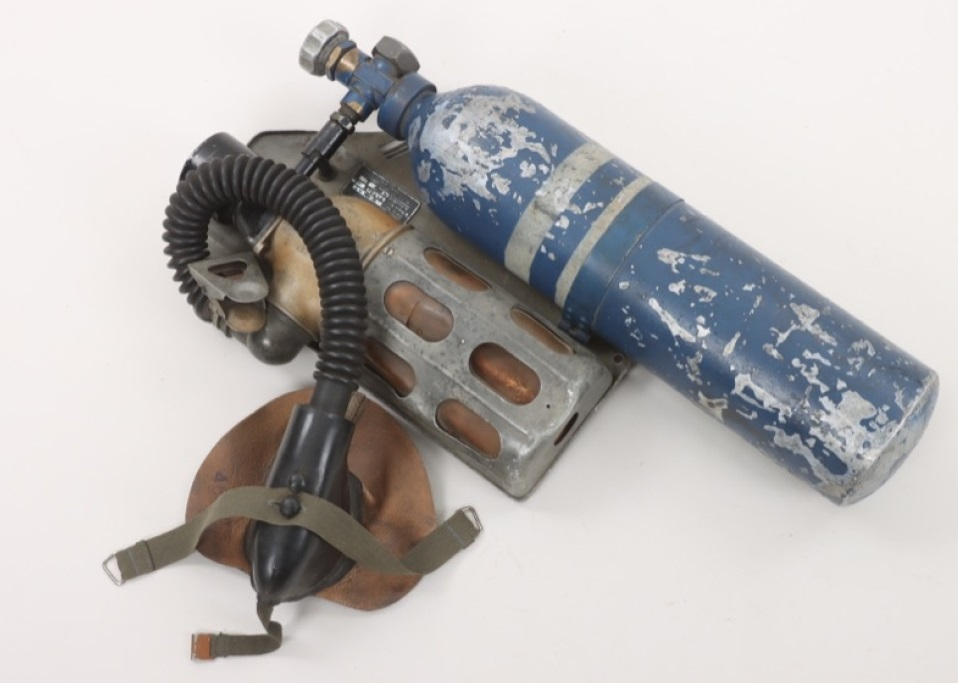
Here's a photo of a vintage unit.

1777907462410.png


I've seen these in early 109s, E-model for sure, I think the F as well. In later versions the unit changed (in 109s) to look like this, one reason I did not recognize it.

1777907544156.png

I know the greatest model airplane company in the world (Kotare) is coming out with an "Emil" soon, so I expect to be making the older version again soon.
 
It is a "Sauerstoffdusche" (I copy-pasted that), no idea what it translates too literally
Sauerstoff is what in English is called "oxygen" but literally it means "sour-substance" or "acid-substance" because it was once thought that oxygen is what causes acids to be acidic. (English has "sour" for the taste but "acid" for the chemical effect, whereas German has sauer for both meanings.) Stoff is the generic word in German for a substance or amount of material. Dusche means shower, a loanword from French douche which is a dirty word in American English but in most other languages just means "shower" — as in the water sprinkler you stand under to wash yourself.
 
I was planning on taking a break soon anyway. Only one company makes a canopy mask set for this "new arrival" and they are in Eastern Europe. Shipping will be slow and all that.

1778012091100.png


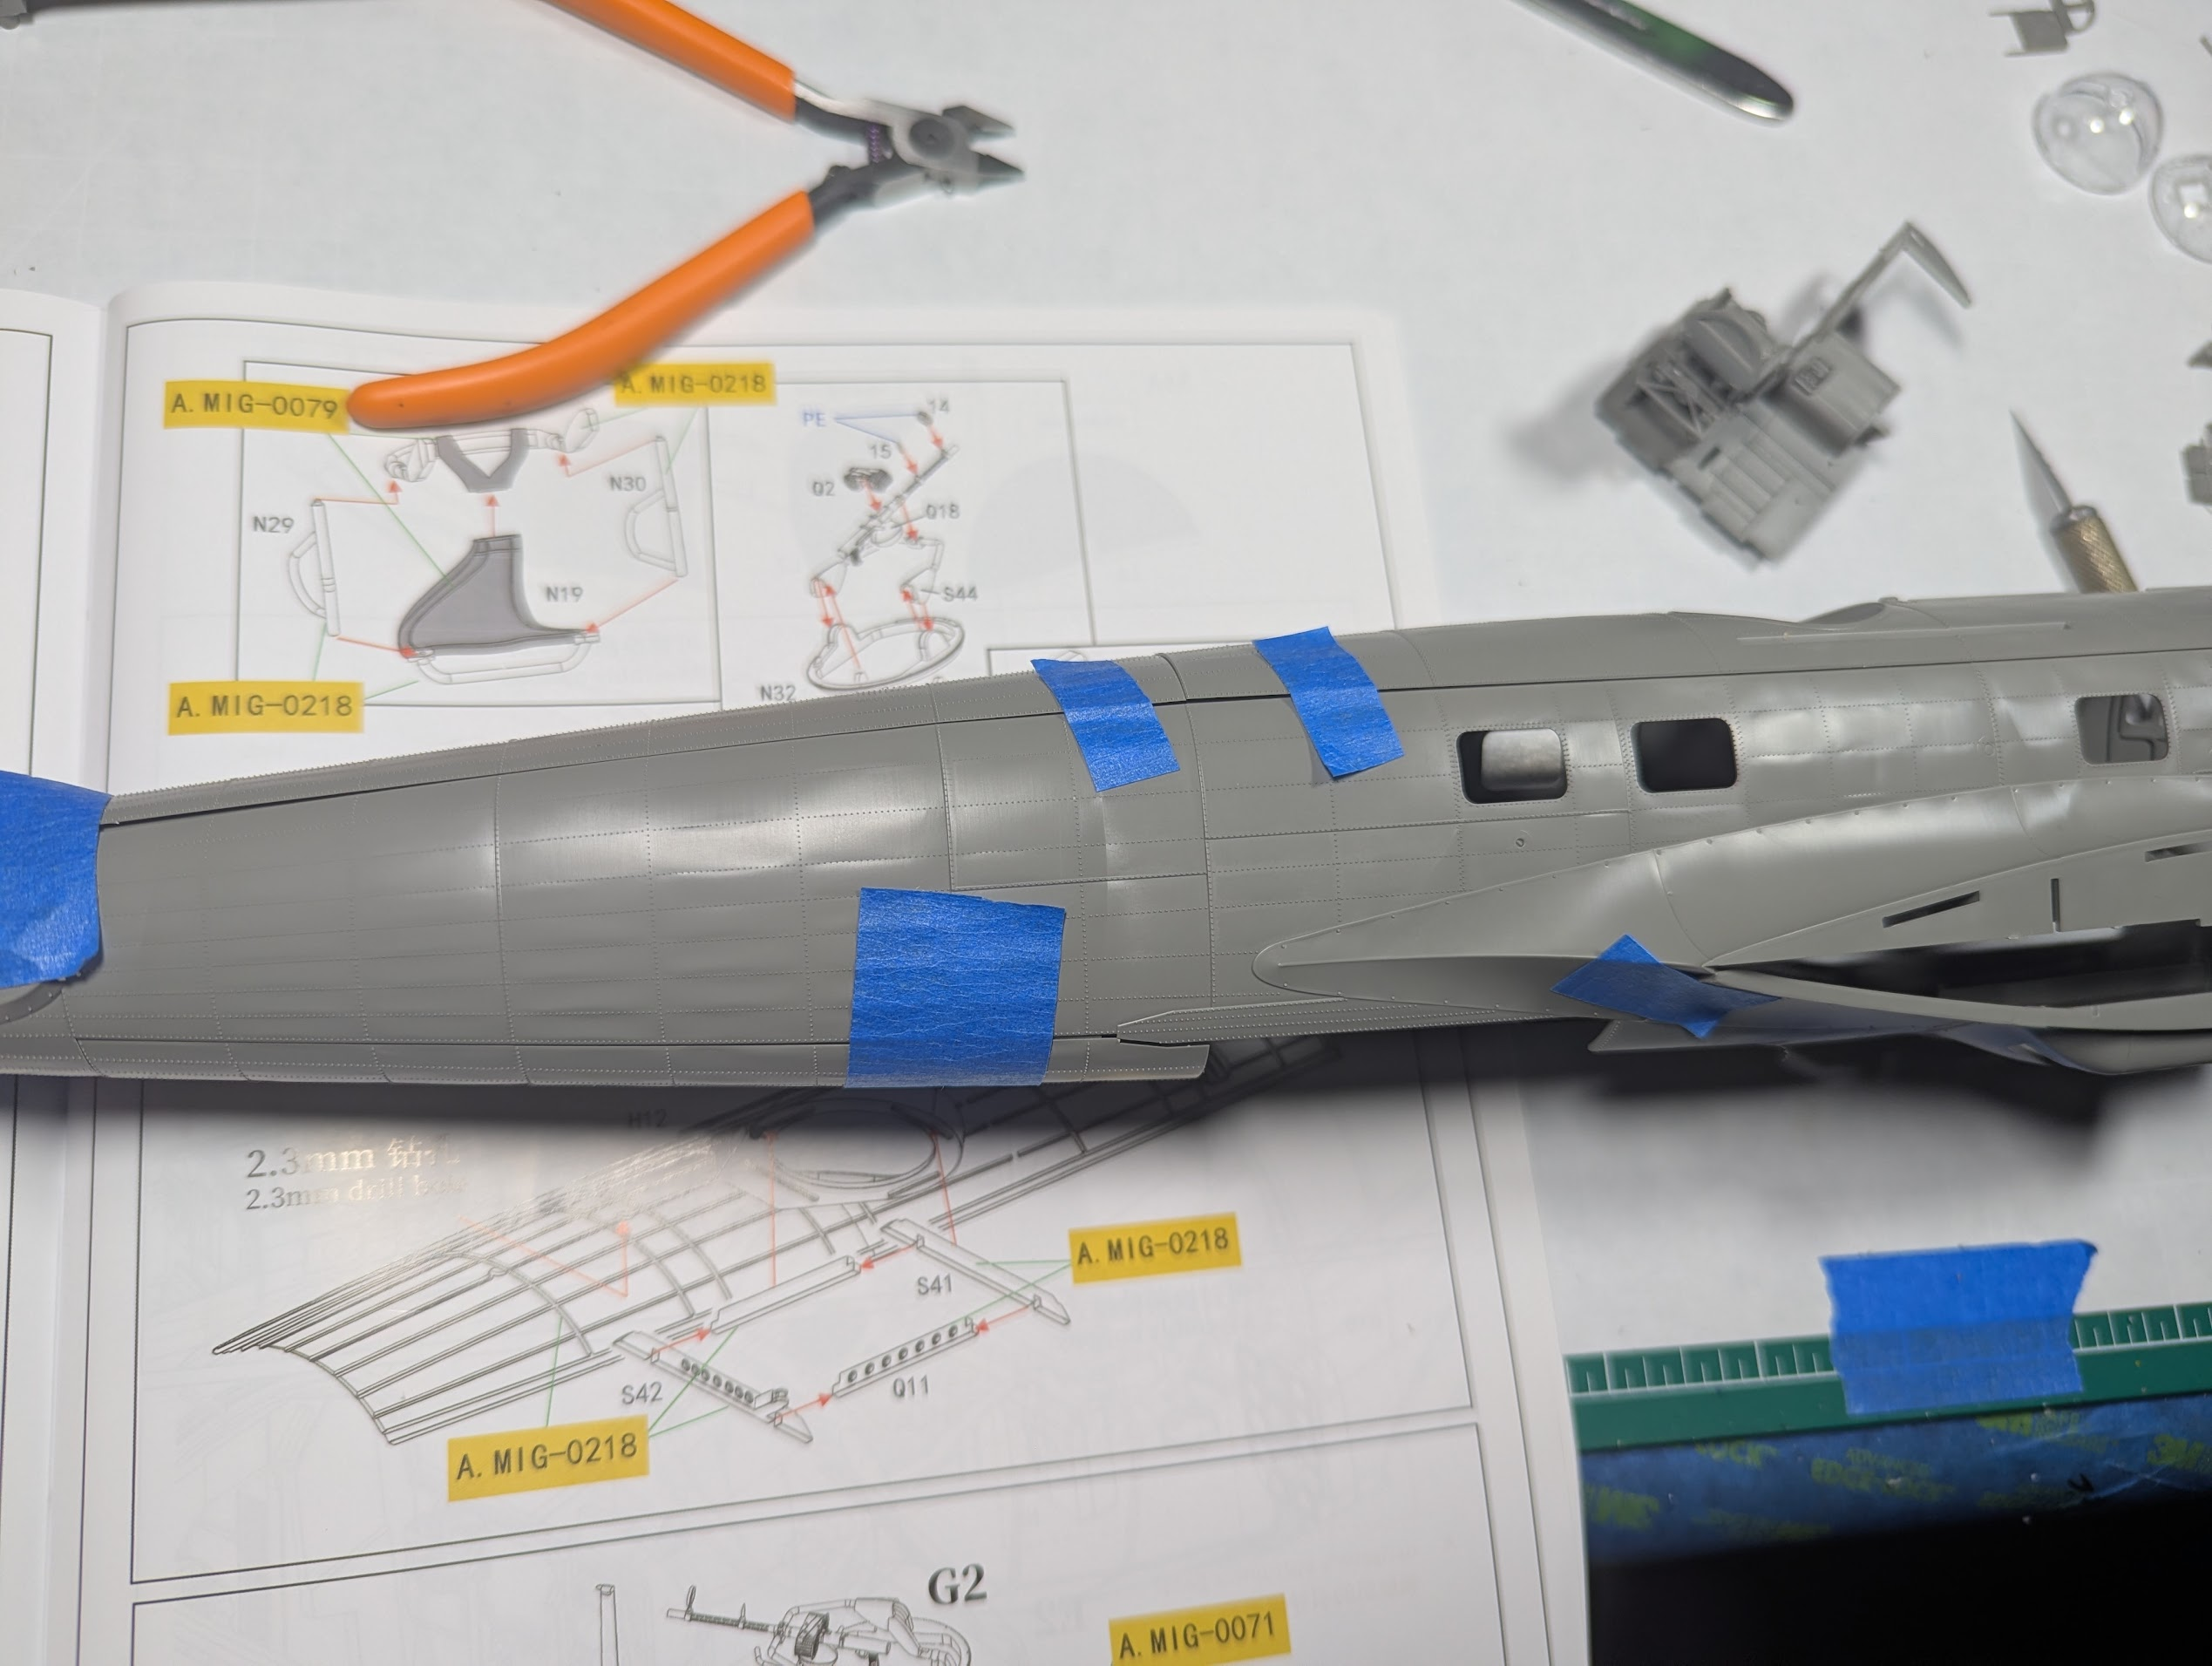
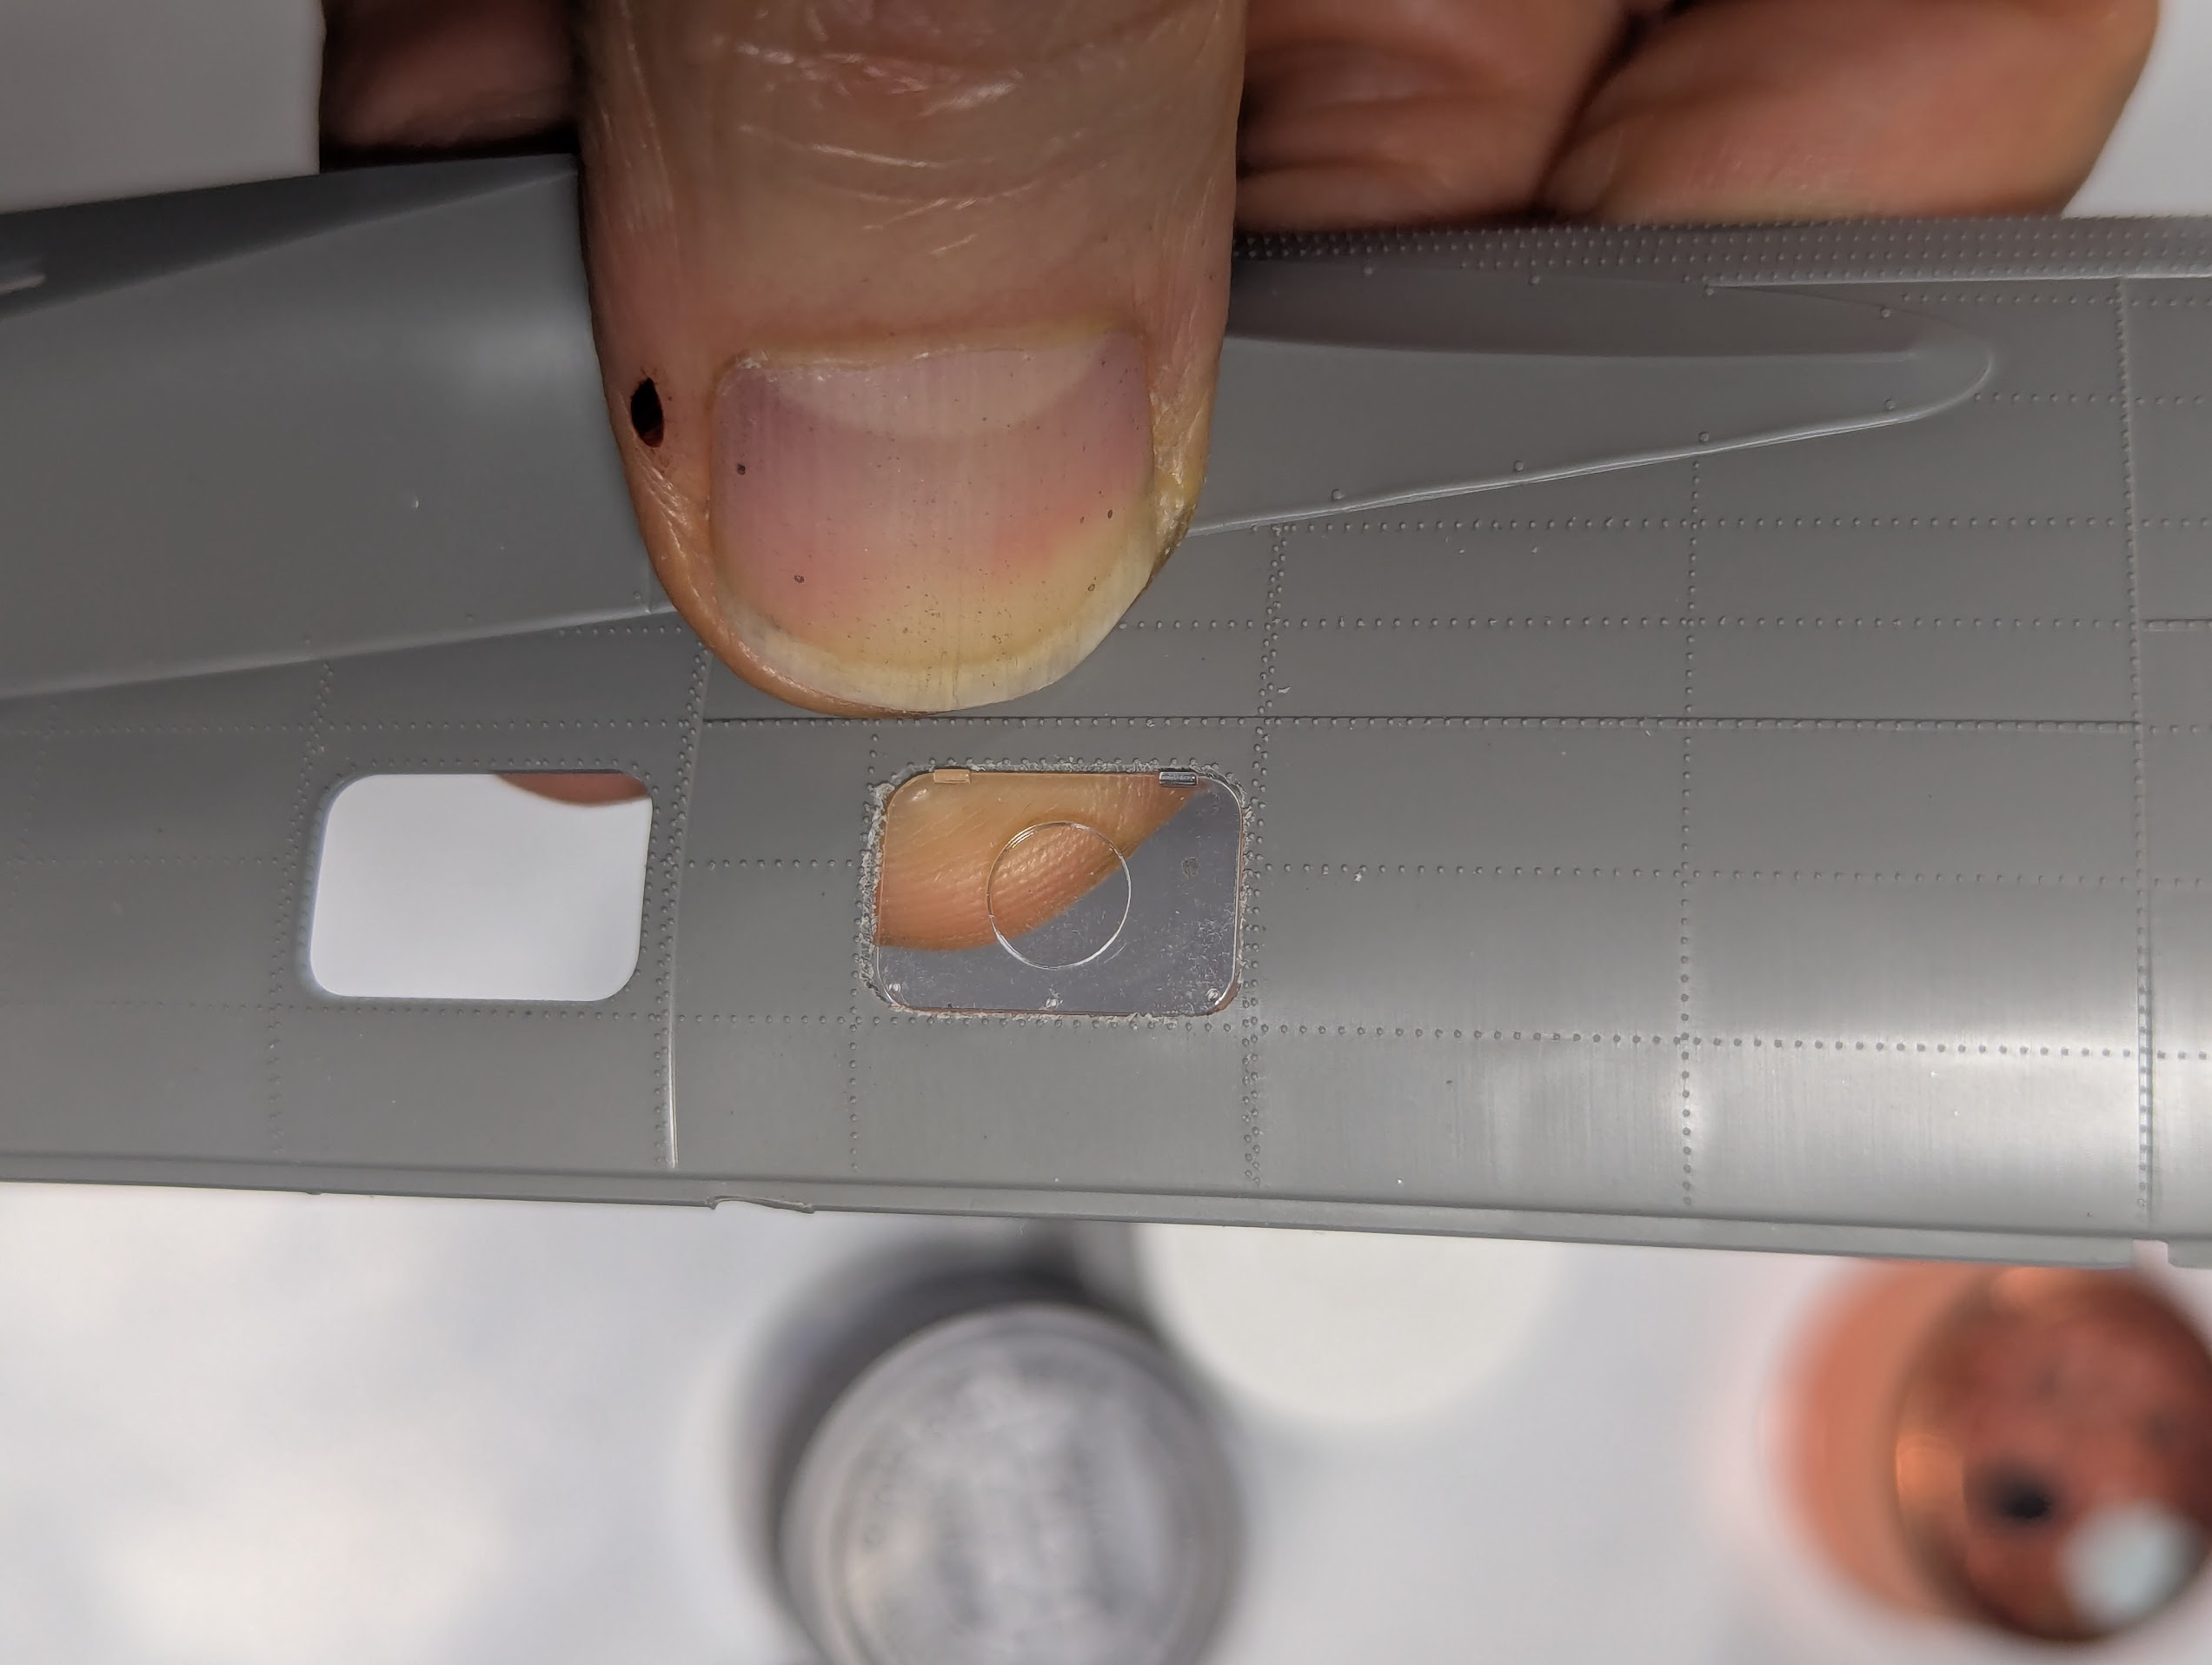
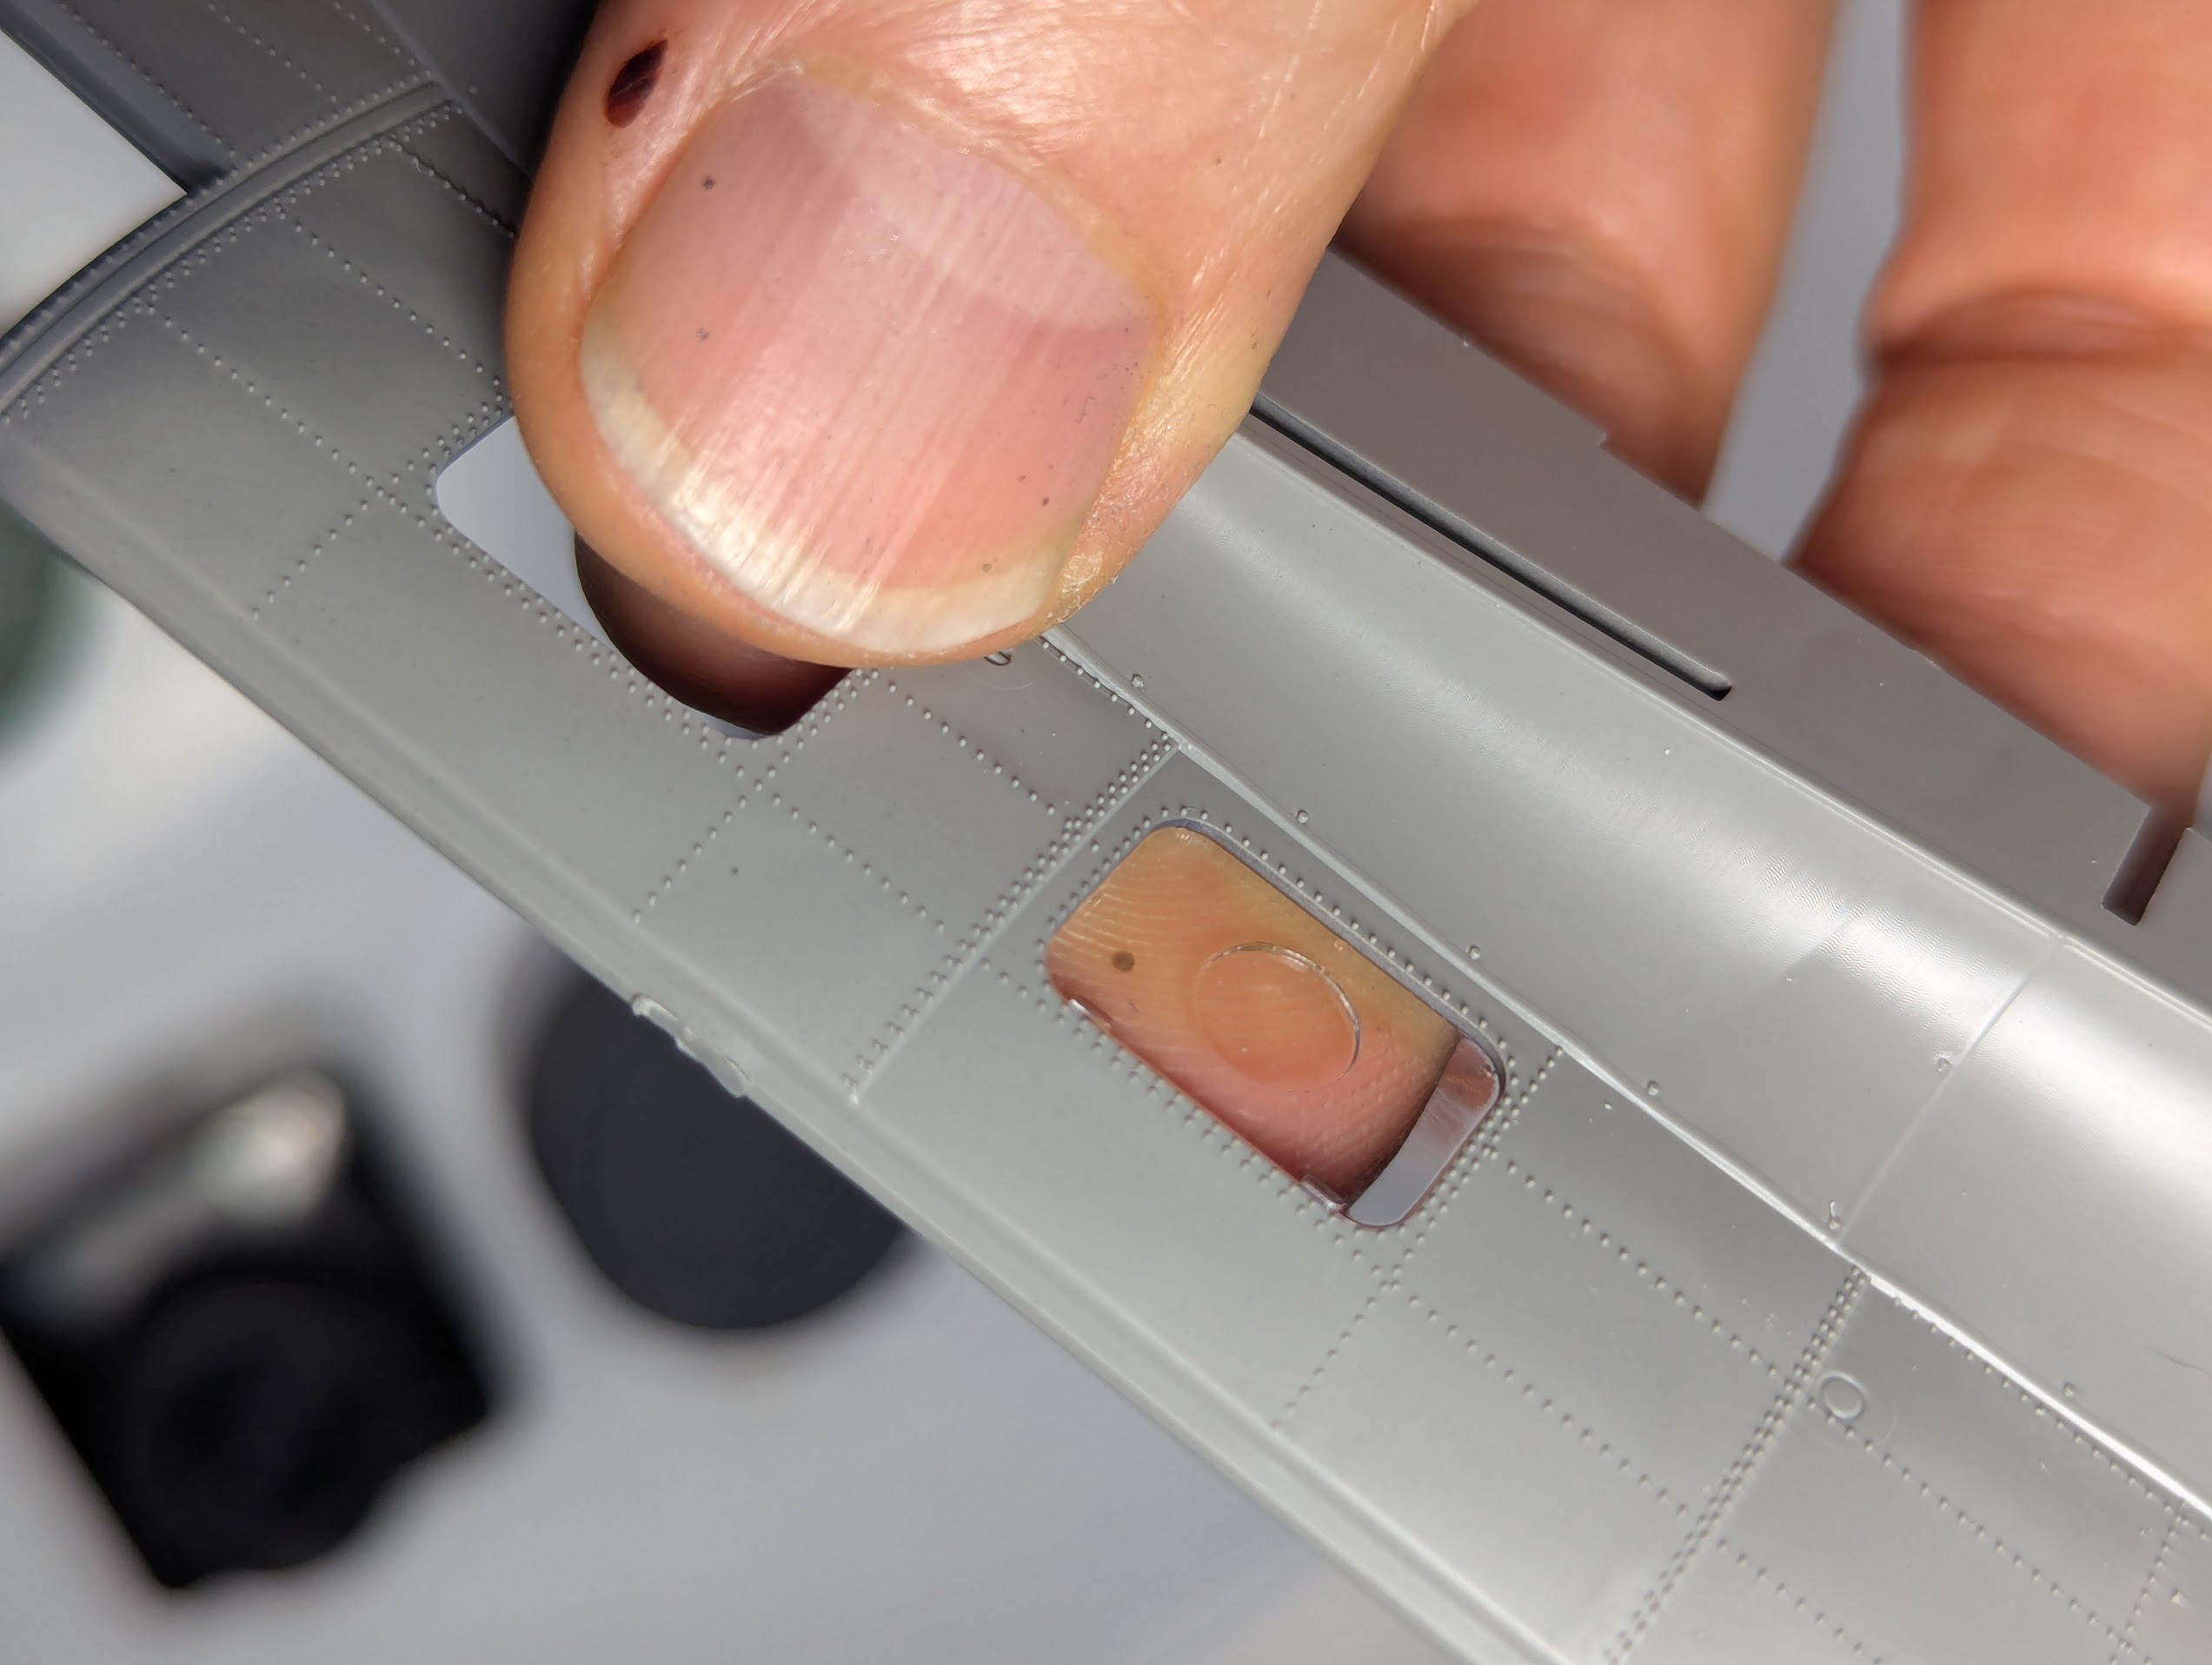
But I ran into a problem today. I have been very frustrated by the poor instructions, yet lauded the detail and overall fit of the parts, assuming one could figure out where they go. But watching videos out ahead of where I am at (see original post) I found out that that guy had trouble fitting the windows into the fuselage. Then a bit later I hear on a FB post the same thing. I decided to check it out and for sure, the side windows DO NOT FIT!

1778012145579.png

It is close, but not near close enough. That top edge (photo is upside down) with the little hinges is flush. But note, neither side is fitting into the openeing, nor is the bottom, the lip is clearly visible there.

1778012403072.png

Spent some time with sanding stick and patience and it sorta fits, but those rivets are right on the edge, and frankly it looks like ass. I know I can clean up the edges a bit. But this is the type of thing that moved up the "take a break" stage.

Also proves (IMO) what I suspected with the terrible instructions. They could not have sent out some test kits to known builders for troubleshooting or final green-light. Impossible to think they went into production knowing things like this.
 
I feel like much of the initial trauma has passed, enough to drag this guy back out.

1783469490917.png

Spent some time with canopy masks, everything went well.

1783469528309.png

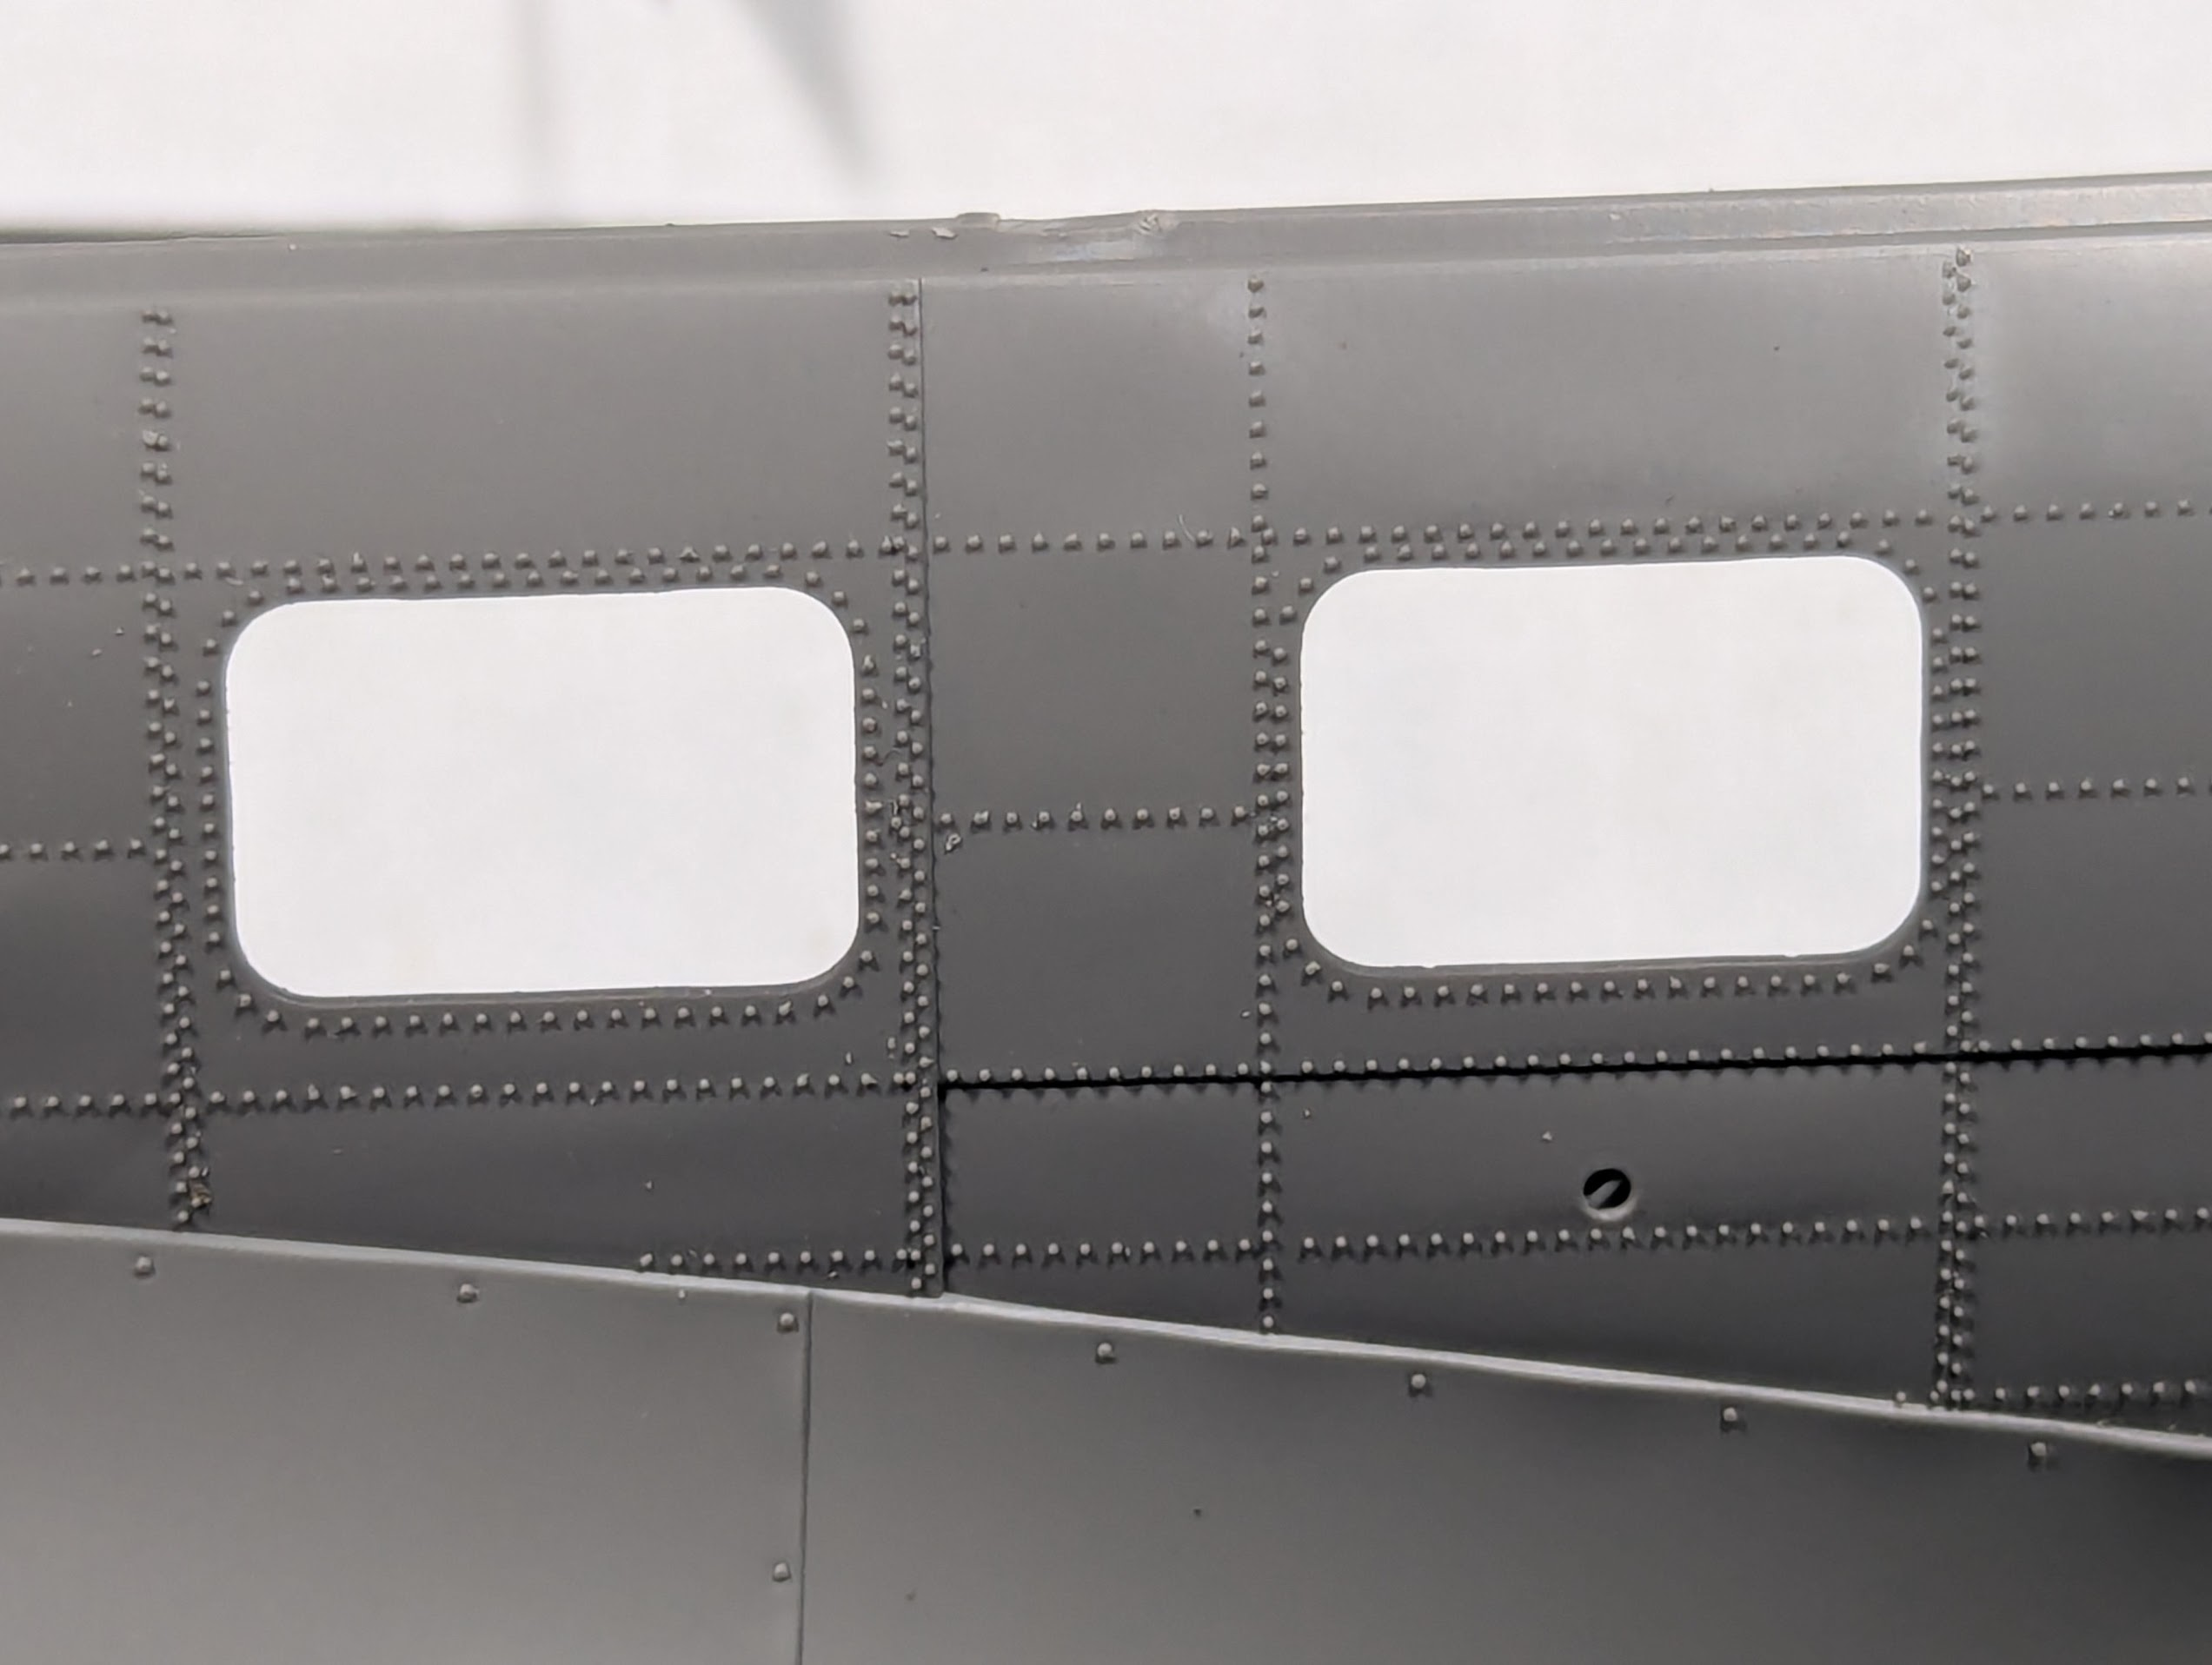
This is what one fuselage half shows for the side windows. Molding (casting?) is excellently detailed, maybe the best I've ever seen. Notice the uneven sheet metal of the wing fillet in between the rivets? But this picture (^^^) shows exactly what I have to sand/cut away, the entire inner circle of rivets, around each of the windows shown have to be removed.

1783469694885.png

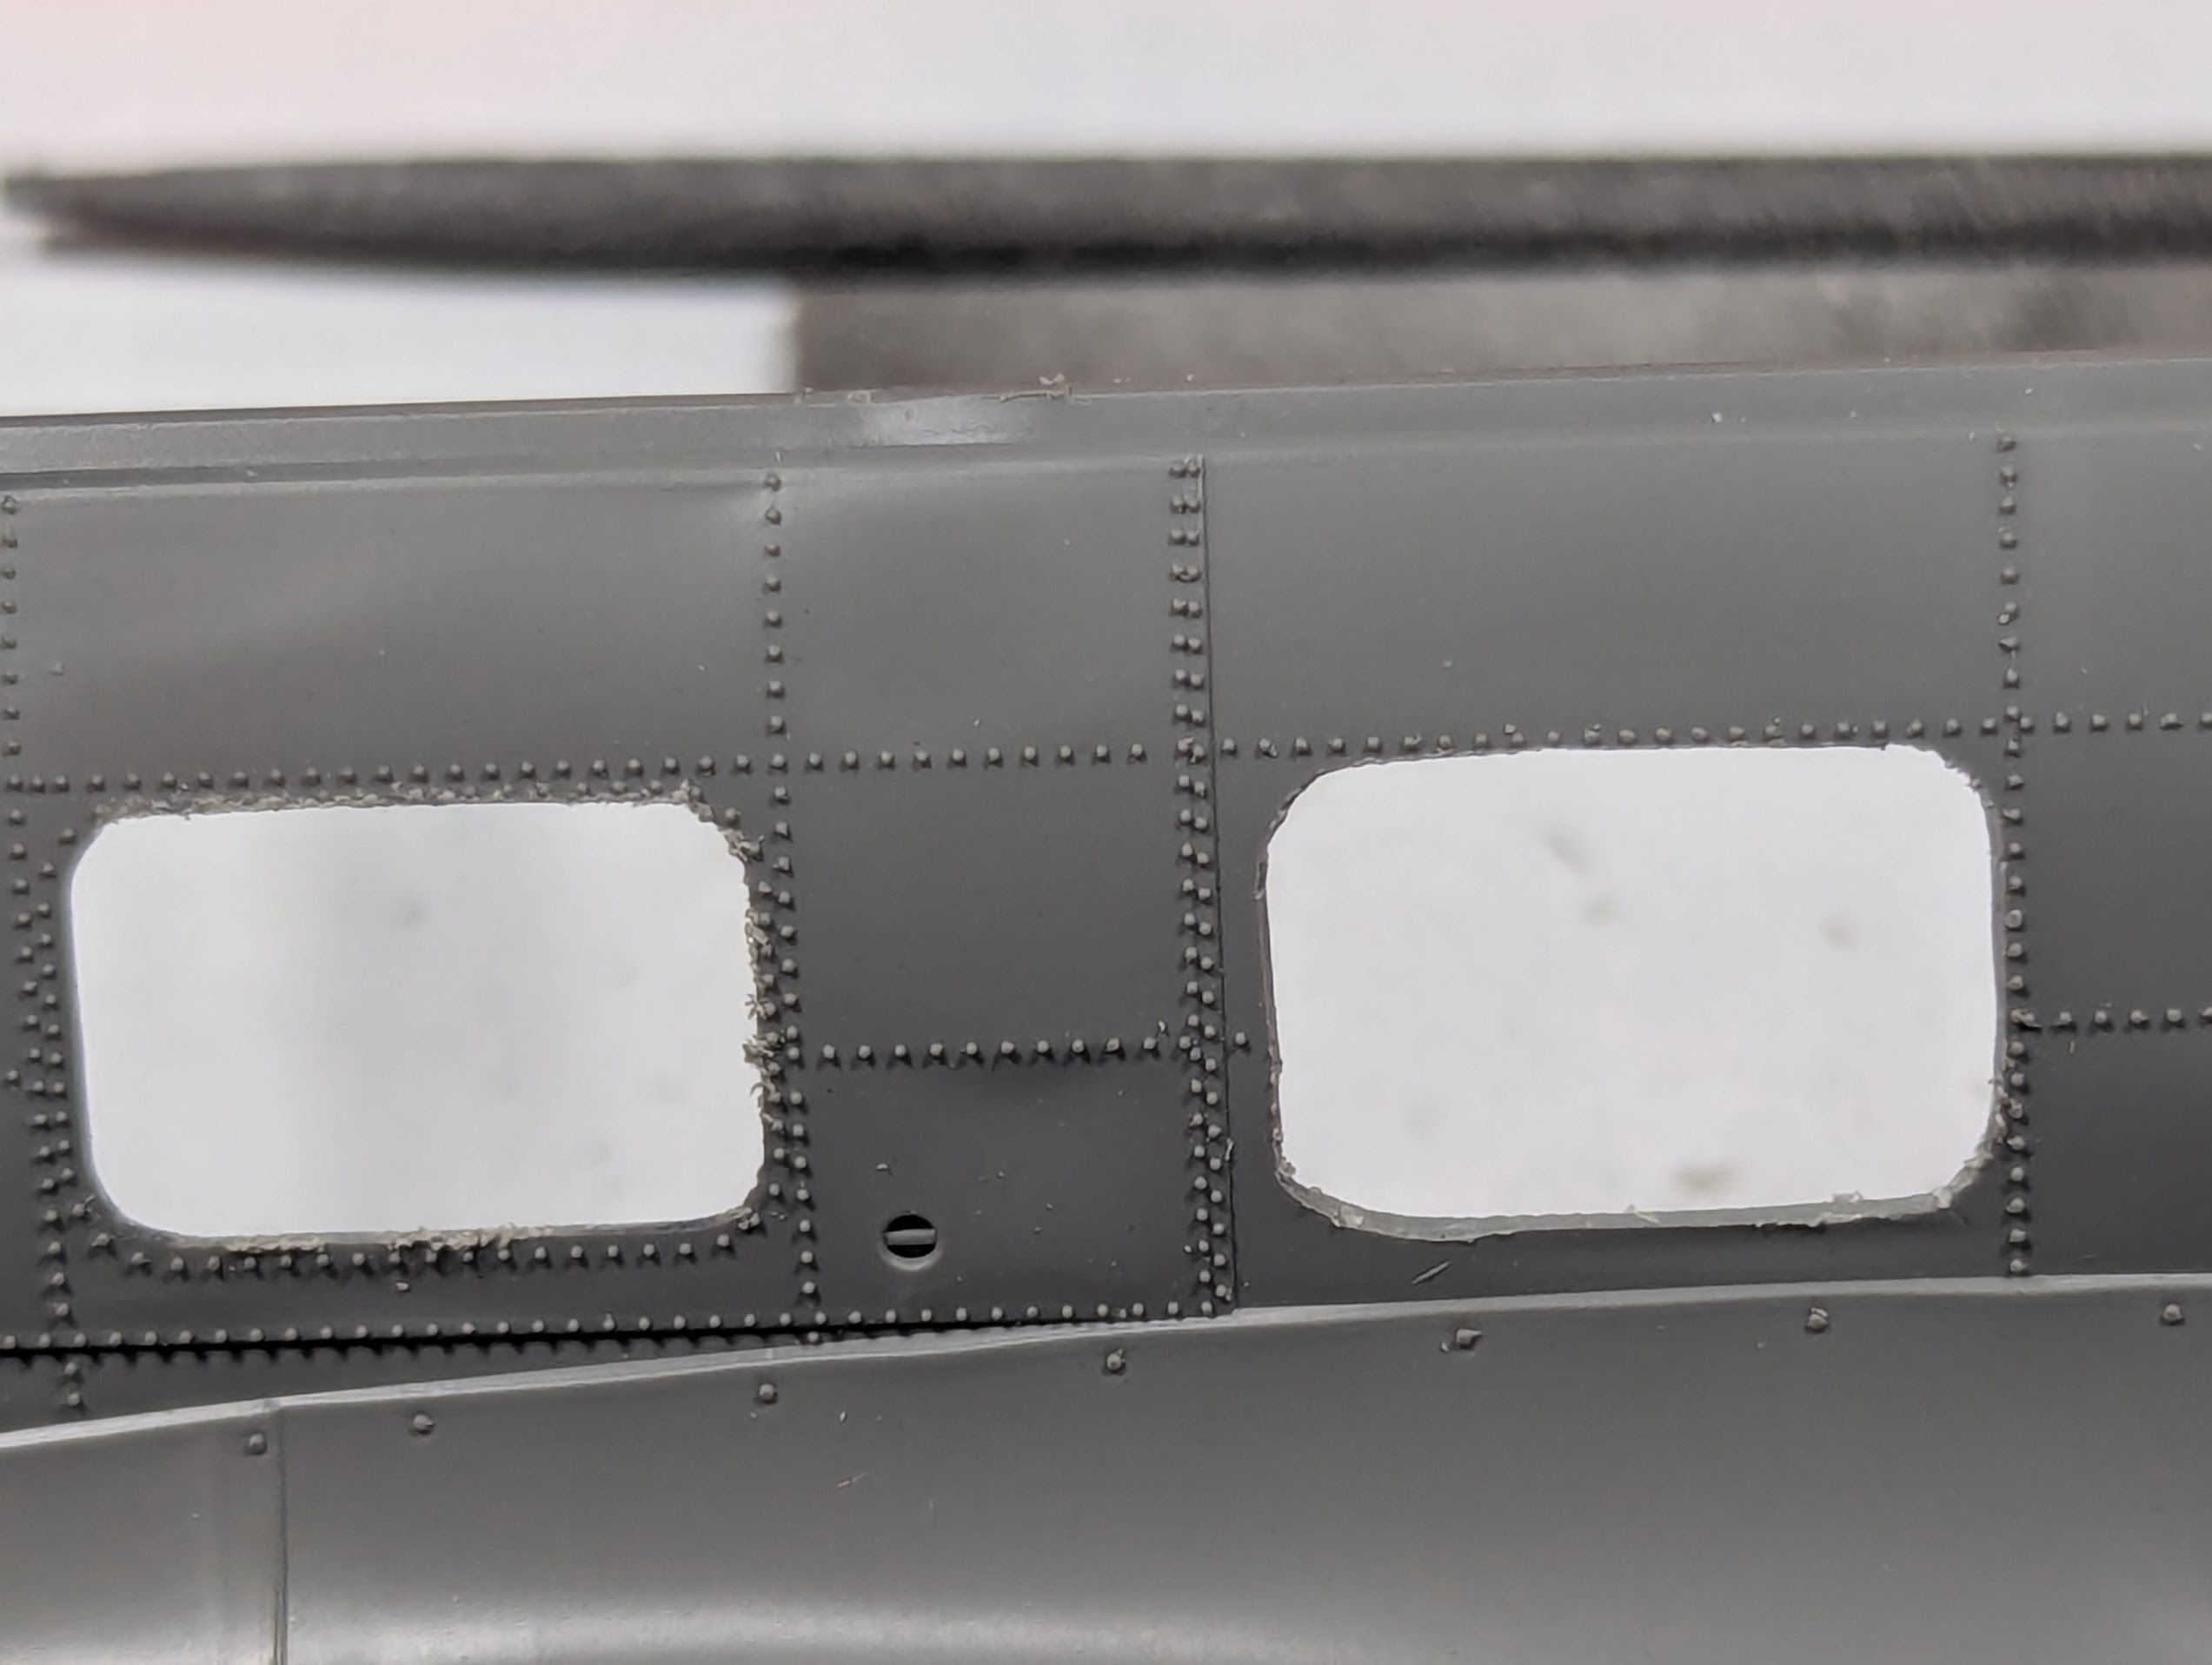
I was enjoying the really soft plastic chosen by Border, the exact opposite of an Eduard or Hasegawa kit which are hard and brittle. The window on the left was worked with a file, and it needs a LOT more material removed. The one on the right is ALMOST there, just some smoothing and attention to the corners and I can force the clear part into the opening.

1783469824596.png


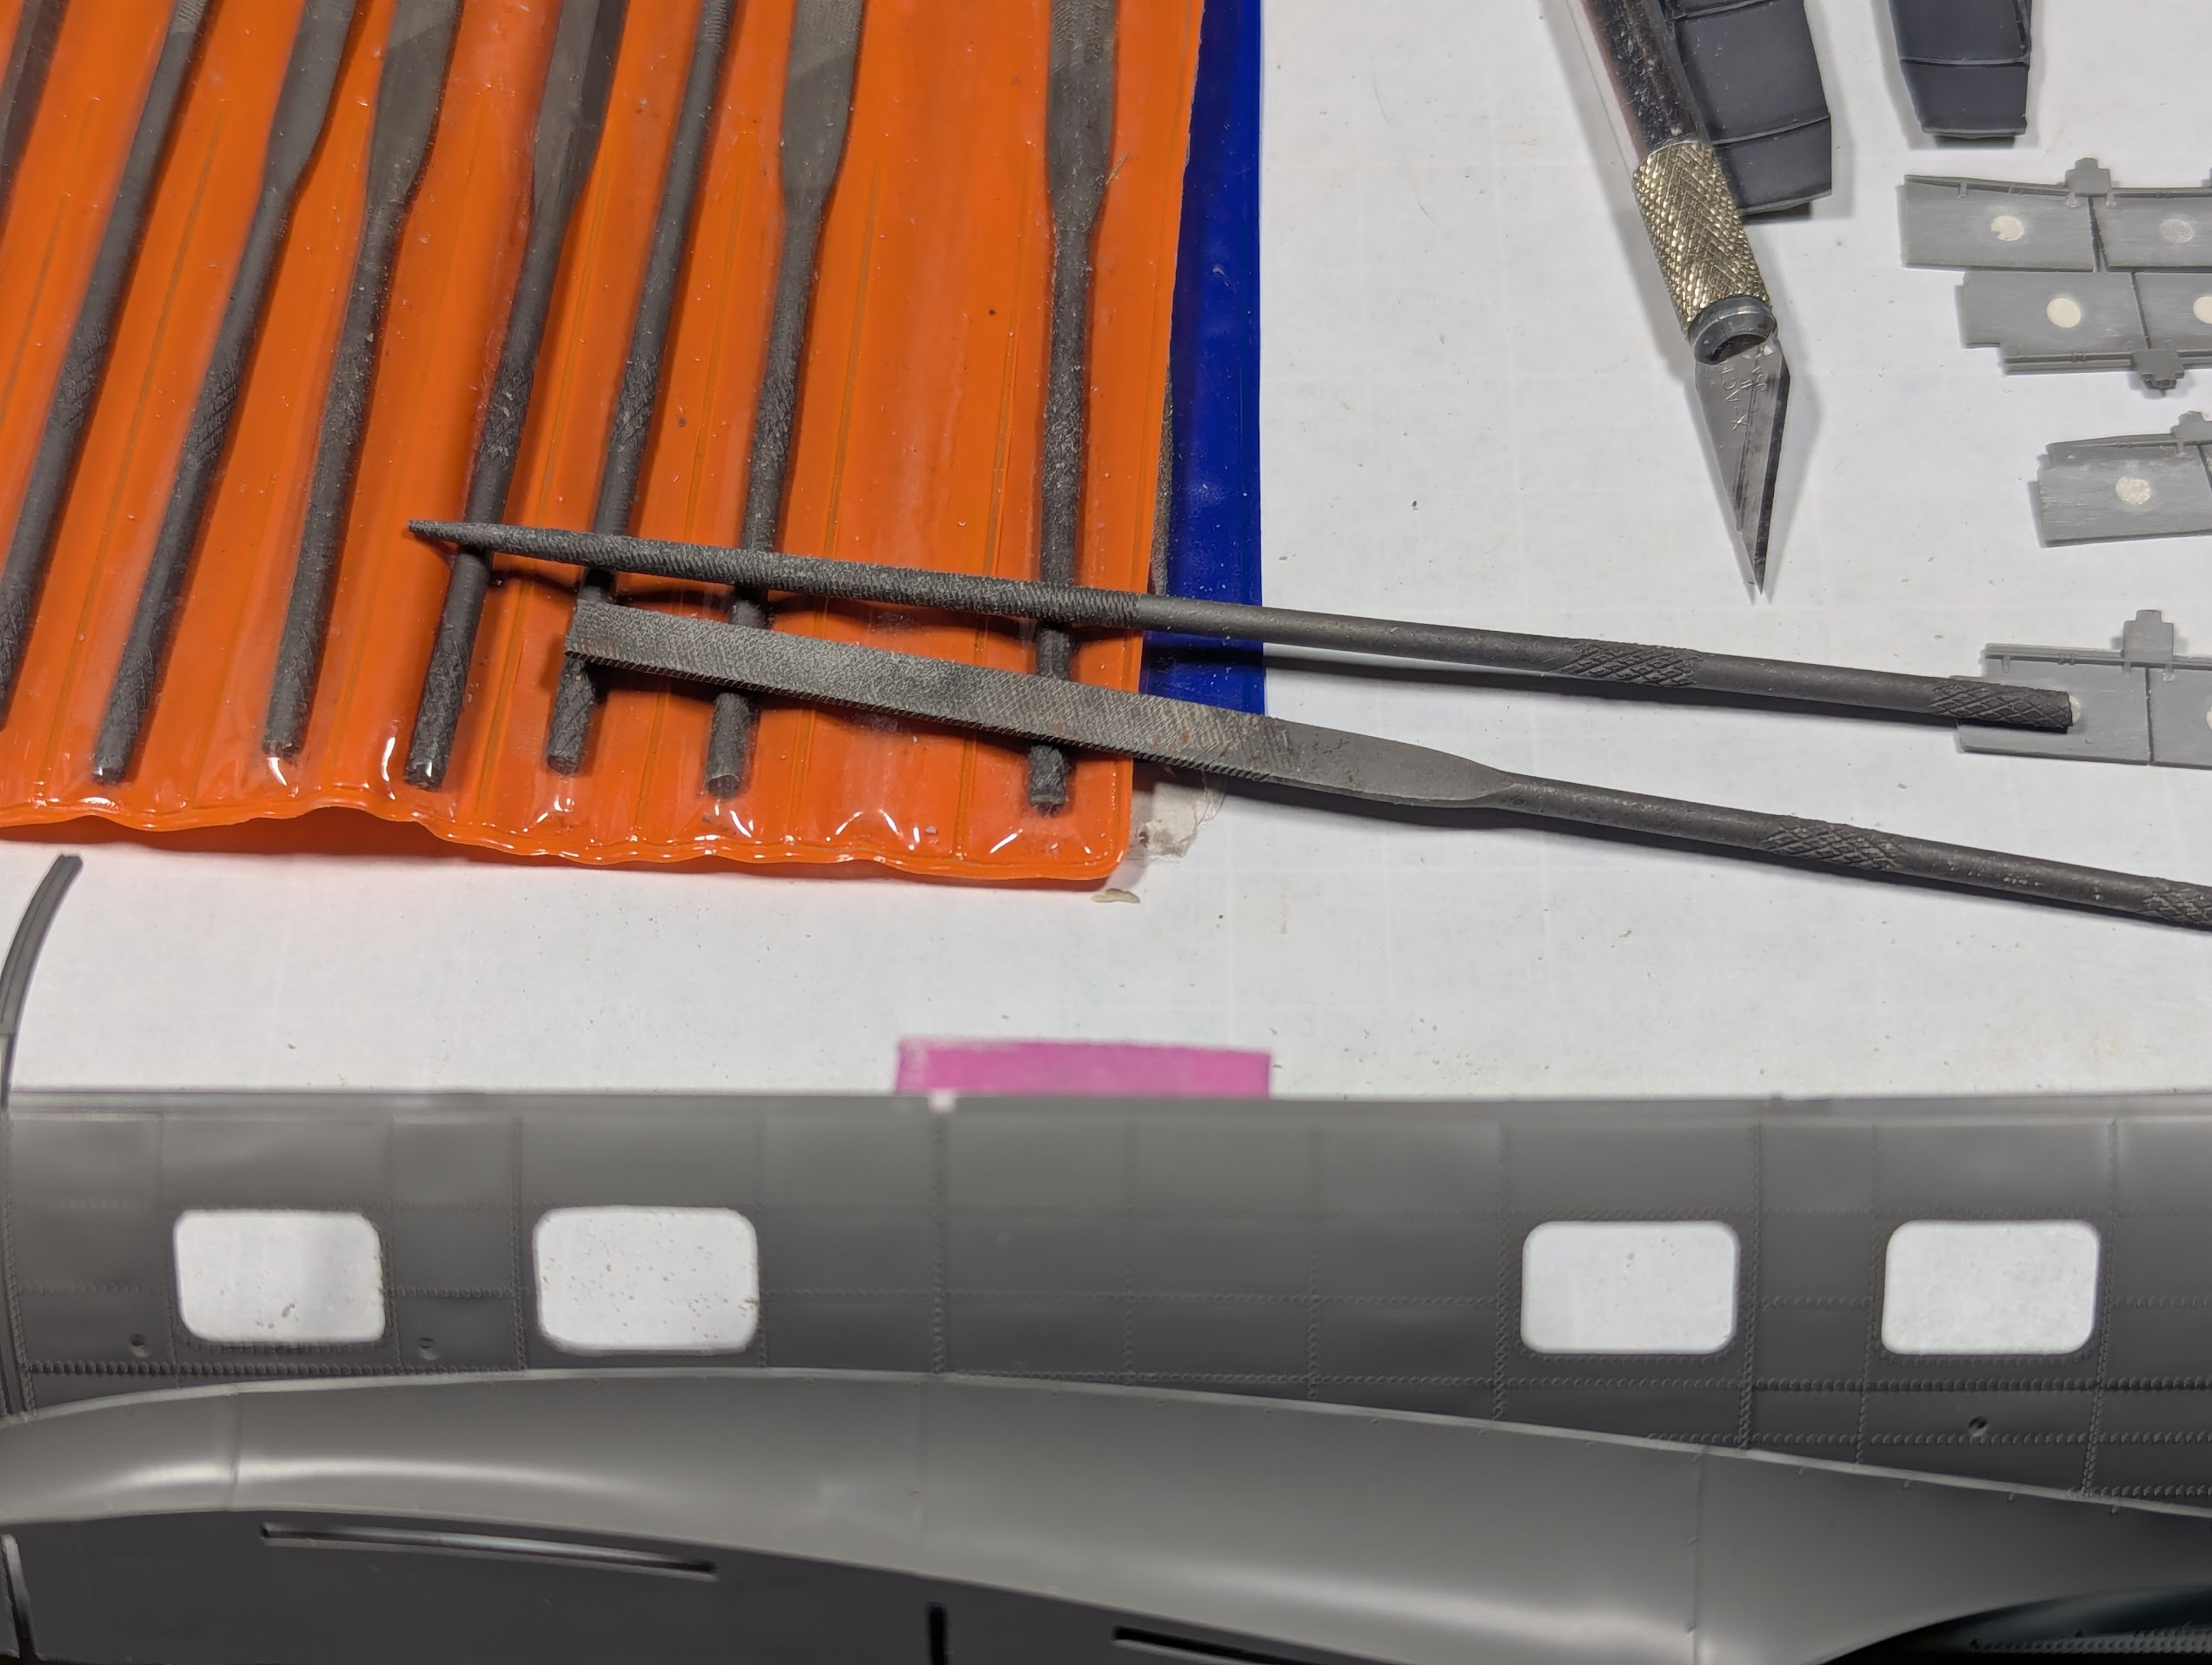
But there are 8 of these fsckers!
 
I feel like much of the initial trauma has passed, enough to drag this guy back out.

View attachment 195667
Spent some time with canopy masks, everything went well.

View attachment 195668
This is what one fuselage half shows for the side windows. Molding (casting?) is excellently detailed, maybe the best I've ever seen. Notice the uneven sheet metal of the wing fillet in between the rivets? But this picture (^^^) shows exactly what I have to sand/cut away, the entire inner circle of rivets, around each of the windows shown have to be removed.

View attachment 195669
I was enjoying the really soft plastic chosen by Border, the exact opposite of an Eduard or Hasegawa kit which are hard and brittle. The window on the left was worked with a file, and it needs a LOT more material removed. The one on the right is ALMOST there, just some smoothing and attention to the corners and I can force the clear part into the opening.

View attachment 195670

But there are 8 of these fsckers!
Why does that have to be removed?
 
Why does that have to be removed?
The side glass (plastic windows) does not fit into the openeings in the fuselage. Not even close to be honest.

I've looked around and it is not a misprint in my kit. EVERYONE who has this kit says they do not fit. 100% proof the manufacturer never tested one before greenlighting the manufascture. The instructions implied that, parts not numbered correctly and steps out of step with each other in the instructions. But simple dry-fitting not fitting is unacceptable.

I wish there could be a group complaint that would force Border Models to re-issue new clear parts or entire fuselage halves. But I doubt they'll sell many more of these unless they do.
 

Latest posts

Back
Top