gaps. GAPS!
- Thread starter Psylow
- Start date
Elm City Hobbies
Active Member
- Joined
- May 7, 2009
- Messages
- 3,239

Just to name a few. Asking what putty to use, you may as well ask a person who makes the best airbrush, best paint, favorite hockey team, best beer. Ask 10 different people, and you will likely get 10 different answers.
the Baron
Ich bin ja, Herr, in Deiner Macht
- Joined
- May 12, 2009
- Messages
- 2,263
Hi, Psylow, I'll take a stab at it.
As your question suggests, there are different materials for different kinds of seams or gaps.
For seams that are visible but otherwise relatively tight, that is, you can see 'em, but you couldn't fit a piece of paper into 'em, I'll try to avoid creating them in the first place. Take 2 halves of a fuselage, for example. I'll use liquid cement to join the parts, and squeeze them gently, so as not to distort the shape, but enough to let the melted plastic extrude along the seam. When the glue cures, you can scrape that bead of plastic away and have a clean seam that can be lightly sanded and disappears easily.
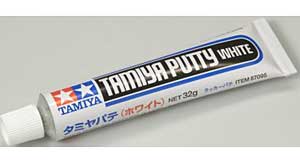
I'll also use putty thinned with acetone, for seams like this. I use two methods. I will apply the putty to the seam, using a toothpick, or flat blade, removing the excess, and then using a cotton swab dipped in acetone, I remove the remaining excess putty, leaving only putty in the seam. When this dries and cures, it can be sanded smooth. Or I will put a blob of putty on my palette (any impermeable surface will do) and add acetone with an eye dropper, and stir with a toothpick, till it's a thick liquid. I apply this to the seam with an old paintbrush. (I call this "homemade Mr Surfacer"). Let it cure, then sand.
I will also use Mr Surfacer on seams like these, but I found that it was easier to use thinned putty.
On gaps, where you can see daylight because parts don't meet quite right, I've used putty, on narrower gaps; stretched sprue and liquid cement; styrene card slices and liquid cement; or combinations of putty, styrene pieces (on styrene kits) or bits of resin casting blocks and putty. The plastic or resin pieces help fill the gap, and the cement or putty helps hold it together.
I have also used wood putty (Elmer's) on some of my metal figures, sometimes hardening it with a shot of CA glue.
Hope that helps!
Brad
As your question suggests, there are different materials for different kinds of seams or gaps.
For seams that are visible but otherwise relatively tight, that is, you can see 'em, but you couldn't fit a piece of paper into 'em, I'll try to avoid creating them in the first place. Take 2 halves of a fuselage, for example. I'll use liquid cement to join the parts, and squeeze them gently, so as not to distort the shape, but enough to let the melted plastic extrude along the seam. When the glue cures, you can scrape that bead of plastic away and have a clean seam that can be lightly sanded and disappears easily.
I'll also use putty thinned with acetone, for seams like this. I use two methods. I will apply the putty to the seam, using a toothpick, or flat blade, removing the excess, and then using a cotton swab dipped in acetone, I remove the remaining excess putty, leaving only putty in the seam. When this dries and cures, it can be sanded smooth. Or I will put a blob of putty on my palette (any impermeable surface will do) and add acetone with an eye dropper, and stir with a toothpick, till it's a thick liquid. I apply this to the seam with an old paintbrush. (I call this "homemade Mr Surfacer"). Let it cure, then sand.
I will also use Mr Surfacer on seams like these, but I found that it was easier to use thinned putty.
On gaps, where you can see daylight because parts don't meet quite right, I've used putty, on narrower gaps; stretched sprue and liquid cement; styrene card slices and liquid cement; or combinations of putty, styrene pieces (on styrene kits) or bits of resin casting blocks and putty. The plastic or resin pieces help fill the gap, and the cement or putty helps hold it together.
I have also used wood putty (Elmer's) on some of my metal figures, sometimes hardening it with a shot of CA glue.
Hope that helps!
Brad
Psylow
New Member
- Joined
- Jul 3, 2012
- Messages
- 38
That's what I wanted to know
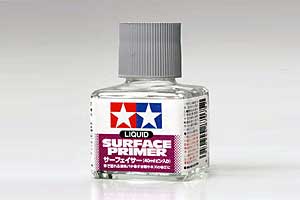
For the above quote you would use something like the Tamiya liquid surface primer? Does this make the seam go away? Same idea with the putty. The purpose is to eliminate the seam right?
the Baron said:For seams that are visible but otherwise relatively tight, that is, you can see 'em, but you couldn't fit a piece of paper into 'em, I'll try to avoid creating them in the first place. Take 2 halves of a fuselage, for example. I'll use liquid cement to join the parts, and squeeze them gently, so as not to distort the shape, but enough to let the melted plastic extrude along the seam. When the glue cures, you can scrape that bead of plastic away and have a clean seam that can be lightly sanded and disappears easily.
For the above quote you would use something like the Tamiya liquid surface primer? Does this make the seam go away? Same idea with the putty. The purpose is to eliminate the seam right?
Splashcoat
New Member
- Joined
- Oct 9, 2010
- Messages
- 421
Exactly, the idea is to hide the seam. My favourite method to hide a hair-line seam like this is to brush liquid cement over the seam and then sand it smooth once it dries. After that, I'll brush Mr. Surfacer (or putty thinned with acetone) over the seam line. With Mr. Surfacer you can usually tell if the seam is filled because it will settle into the deeper parts of the seam and leave a line on the surface. Just keep applying layers of Mr. Surfacer until there's no sign of a seam and then sand the whole thing smooth with fine sandpaper. I find wet sanding at around 400 grit works pretty well.
Splashcoat
New Member
- Joined
- Oct 9, 2010
- Messages
- 421
After the wiring, for certain. In fact, all assembly should be finished and the model "closed-up" before you start filling the seams. Your next step after filling should be priming and then painting.
Splashcoat
New Member
- Joined
- Oct 9, 2010
- Messages
- 421
I agree with Quarterlane. If the leds or backlit clear parts are fairly large, I'll mask with tape before painting. Smaller leds or small drilled window or formation lights can be covered with a small drop of masking fluid. I'll usually only apply primer and colour coat over the masks; that is, I'll take the masks off before applying a clear coat. This helps to blend the lights into the overall finish of the model and also avoids creating a step of paint/clear around the masks.
the Baron
Ich bin ja, Herr, in Deiner Macht
- Joined
- May 12, 2009
- Messages
- 2,263
Psylow said:That's what I wanted to know
the Baron said:For seams that are visible but otherwise relatively tight, that is, you can see 'em, but you couldn't fit a piece of paper into 'em, I'll try to avoid creating them in the first place. Take 2 halves of a fuselage, for example. I'll use liquid cement to join the parts, and squeeze them gently, so as not to distort the shape, but enough to let the melted plastic extrude along the seam. When the glue cures, you can scrape that bead of plastic away and have a clean seam that can be lightly sanded and disappears easily.
For the above quote you would use something like the Tamiya liquid surface primer? Does this make the seam go away? Same idea with the putty. The purpose is to eliminate the seam right?
Actually, for that specific technique, I wouldn't need the surface primer to fill the seam, because the melted plastic itself fills the seam, or better described, eliminates the seam. But yes, for a visible but very fine seam (ie, a fine separation between 2 parts), I imagine you could use the Tamiya product. I've never used it, but from Splashcoat's response, I suspect that it's similar to Mr Surfacer? I like his suggestion, to use some liquid cement over a fine seam-that does sort of the same thing as using the cement to join the pieces in the first place--and then using Mr Surfacer to finish it. Mr Surface works very well on fine seams. Hope that helps clarify what I said.
Splashcoat
New Member
- Joined
- Oct 9, 2010
- Messages
- 421
@ The Baron - You've got it. Mr. Surfacer and Tamiya Surface Primer are pretty much the same thing. Mr. Surfacer comes in a couple of grades of fineness, Mr. Surfacer 1000 & 500. MS1000 has finer particles in it than MS500 and is also a thinner consistancy, kind of like really thin paint. MS500 is best for filling seams, I also like to use it to seal and feather out large puttied areas.
@ Psylow - When folks are talking about "melted plastic" they're talking about the small ridge of plastic squeezed out of a seam when you join two parts with solvent cement. Here's the trick: take the two parts you want to join and hold them together (even better, use some clamps or elastic bands); apply solvent cement to the join with a brush (the solvent is thin like water and capillary action will draw the solvent into the join); the solvent will soften both edges of the join and when you squeeze the parts together, will cause a little dissolved plastic to smoosh up out of the join. One this is dry you can scrape or file or sand down this ridge of plastic and the join will be practically invisible. My favourite brand of solvent cement is Plastruct Plastic Weld, but any styrene solvent cement will do.

@ Psylow - When folks are talking about "melted plastic" they're talking about the small ridge of plastic squeezed out of a seam when you join two parts with solvent cement. Here's the trick: take the two parts you want to join and hold them together (even better, use some clamps or elastic bands); apply solvent cement to the join with a brush (the solvent is thin like water and capillary action will draw the solvent into the join); the solvent will soften both edges of the join and when you squeeze the parts together, will cause a little dissolved plastic to smoosh up out of the join. One this is dry you can scrape or file or sand down this ridge of plastic and the join will be practically invisible. My favourite brand of solvent cement is Plastruct Plastic Weld, but any styrene solvent cement will do.
Psylow
New Member
- Joined
- Jul 3, 2012
- Messages
- 38
This is all the stuff I want to know. Since this is all new to me I don't know much technique or tools need to perform a certain task. This is starting to make more sense. I am working on a little snap together enterprise d and this will be a great opportunity to test some of these techniques.
the Baron
Ich bin ja, Herr, in Deiner Macht
- Joined
- May 12, 2009
- Messages
- 2,263
Splashcoat, thanks for confiming that about the Tamiya liquid filler and Mr Surfacer. Regarding Mr Surfacer, one reason I tried dissolving putty in acetone was to come up with a liquid filler that was a little thicker than the thickest grade of Mr Surfacer. As for liquid cement, I use another Plastruct product, too, their "Bondene", with the white label.
Splashcoat
New Member
- Joined
- Oct 9, 2010
- Messages
- 421
Cheers, Baron. I found out the hard way that Mr. Surfacer increases in thickness over time. I have a jar that got buried behind some stuff and pretty much doubled in thickness. I keep it for those situations where I need something thinner than putty but thicker than Mr. Surfacer. I'm pretty sure that if you left the lid off a jar overnight you would get the same result.
Splashcoat
New Member
- Joined
- Oct 9, 2010
- Messages
- 421
VoID_1 said:I was wondering whether the superglue/baking soda method works well on relatively small gaps?
For a small gap I'd probably skip the baking soda and use a layer or two of thicker (gap-filling) super glue.
VoID_1
Cool Banana's
- Joined
- Jun 15, 2012
- Messages
- 66
Splashcoat said:VoID_1 said:I was wondering whether the superglue/baking soda method works well on relatively small gaps?
For a small gap I'd probably skip the baking soda and use a layer or two of thicker (gap-filling) super glue.
I have ended up using thick super glue on my model, as per your recommendation. Saved me having to go to the shops to buy baking soda. Thanks