First Diorama Attempt

Scale Model Addict - Model Tips, Guides, Tools & Tech, Tutorials, and Community

Help Support Scale Model Addict:

beefychicken

Active Member
Joined
Sep 3, 2024
Messages
33
Hello, this is my first whack at a diorama, so it is far from the skill level of all those others on here.

I will begin where I began, with some foam and other raw materials.

The genesis of the thought to do this was from the 1925 Mack Dump Truck kit that was busily collecting dust on my shelf.

I had built it a very long time ago and after seeing it sitting for so long, I at one point decided to heavily weather it.

Then promptly put it back on the shelf to continue its duties as dust collector.

Then at some point it popped into my head to set into a diorama.

As I laid out the plans, I recalled that I had an old AMT Cat bulldozer kit that was sitting in the shed after my grandkids got a hold of it.

The damage wasn't a big deal, but the kit wasn't that great that I wanted to rebuild it so it went into the shed at some point.

So I dug it out and, working around the existing damage, I heavily weathered it.

The theme of the weathering was an ancient dozer sitting abandoned for eons due to what appeared to a broken drive mechanism that, after one hearty attempt, no one cared enough to come back and fix it.

I added in some additional damage due to vandals and what not.

So thus was born the plan and below and in subsequent posts, I will take you on the journey of my first diorama.

I will say one thing I learned almost immediately; both kits were 1/25 and that posed some serious problems.

One was the size that the base had to be to just accommodate both kits.

The other issue was a complete lack of figures that would be suitable for the theme.

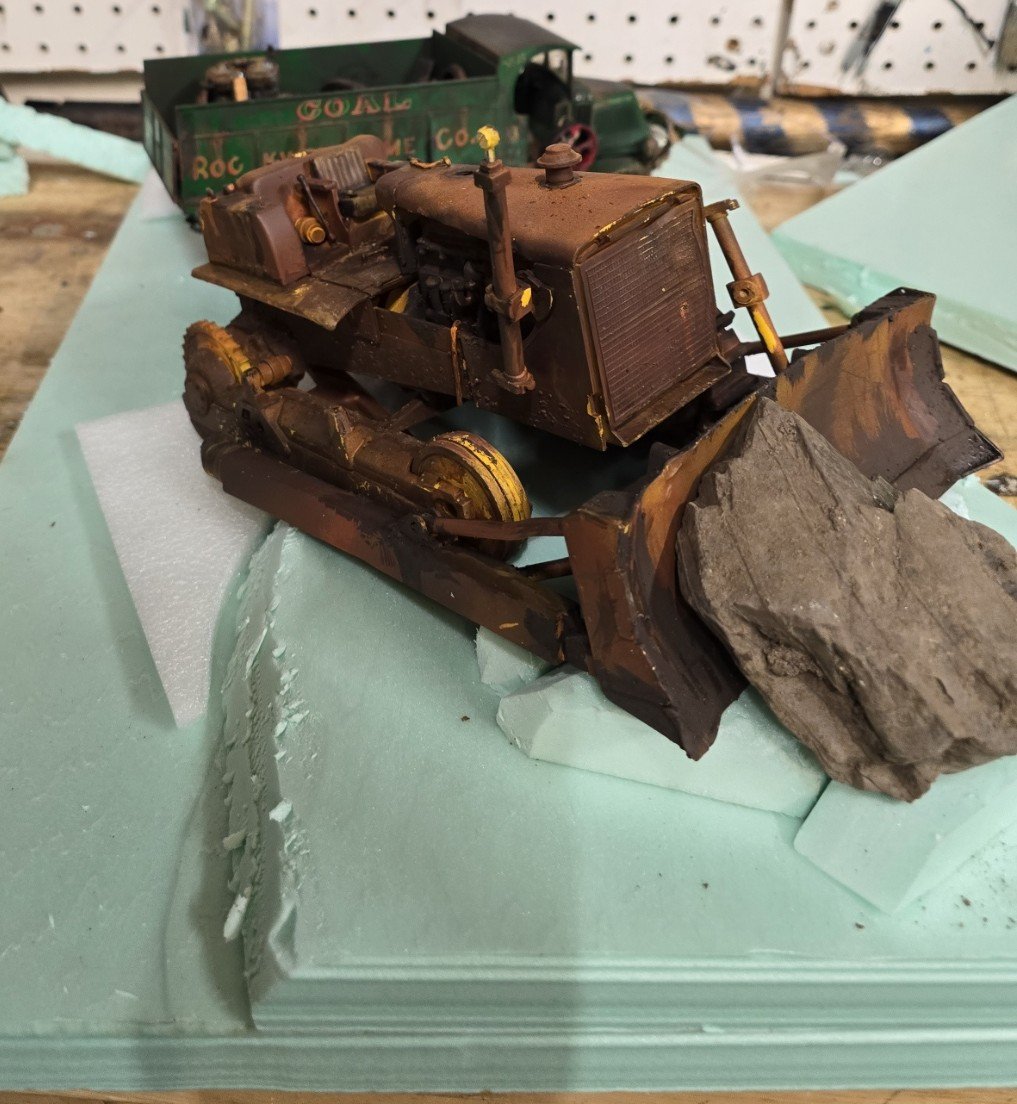
Here is the rough in with the foam board and my grim realization of just how huge this would be : )
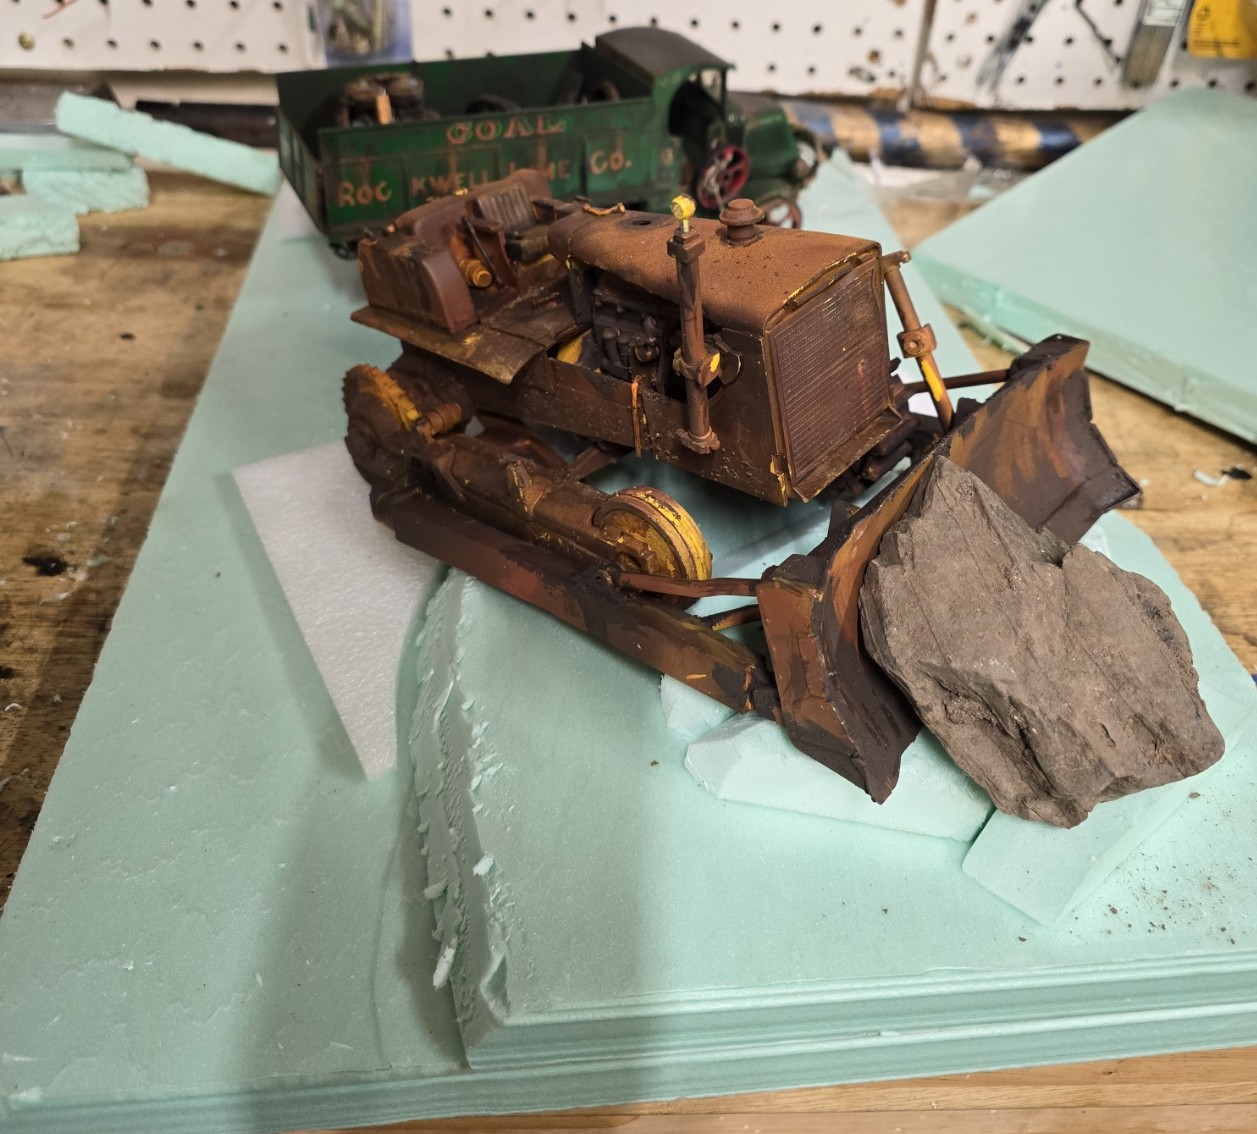
20250912_185223.jpg


Below are pictures of some of the initial fit and foam cutting. Notice the huge rock which I added as perhaps the reason for the dozer to have given up the ghost.
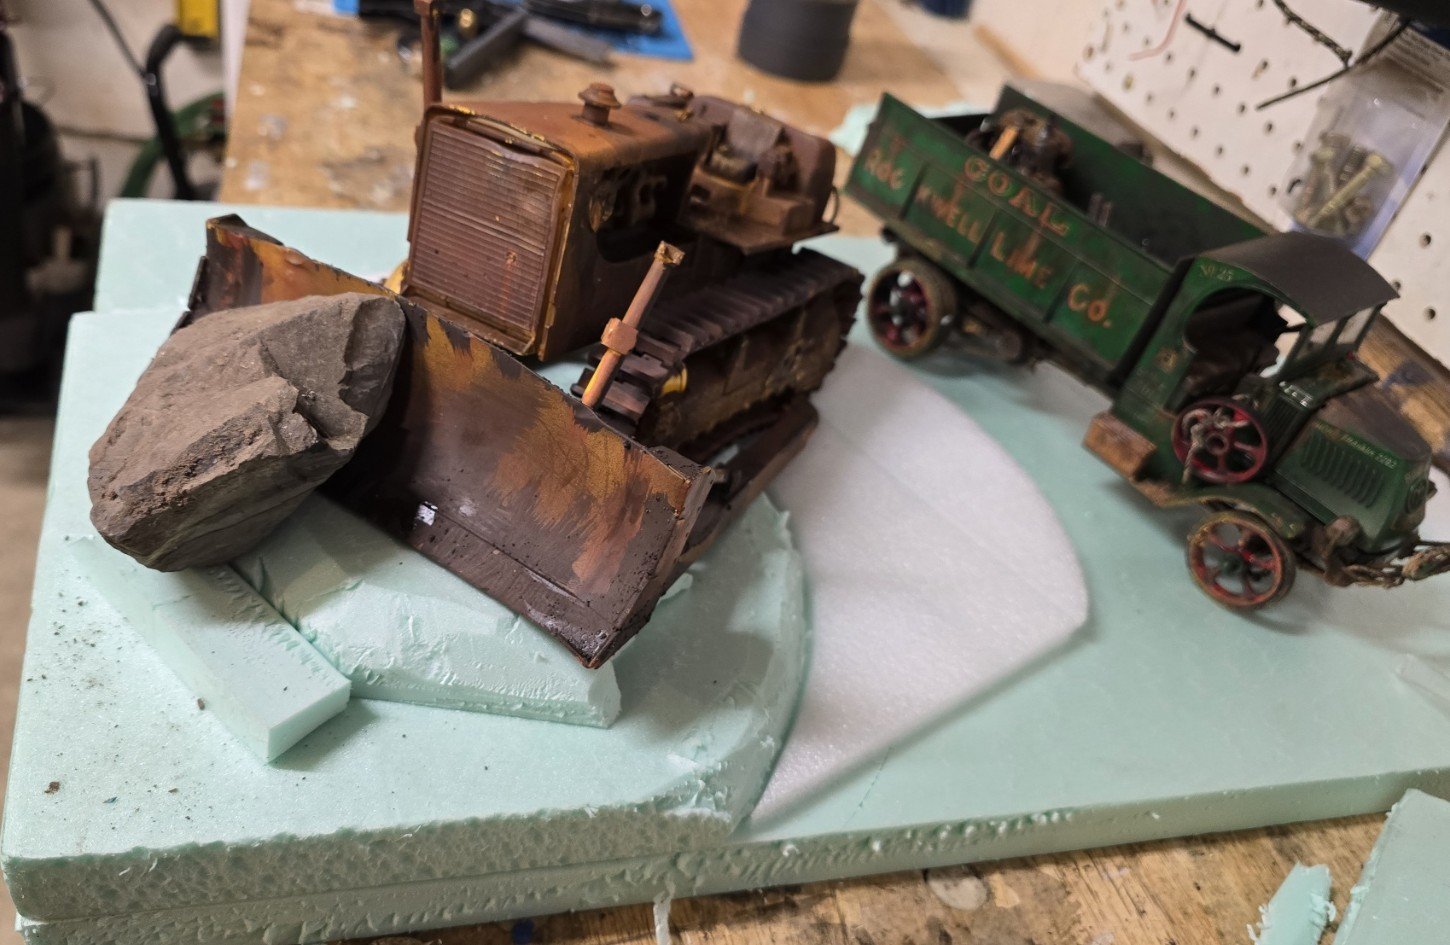
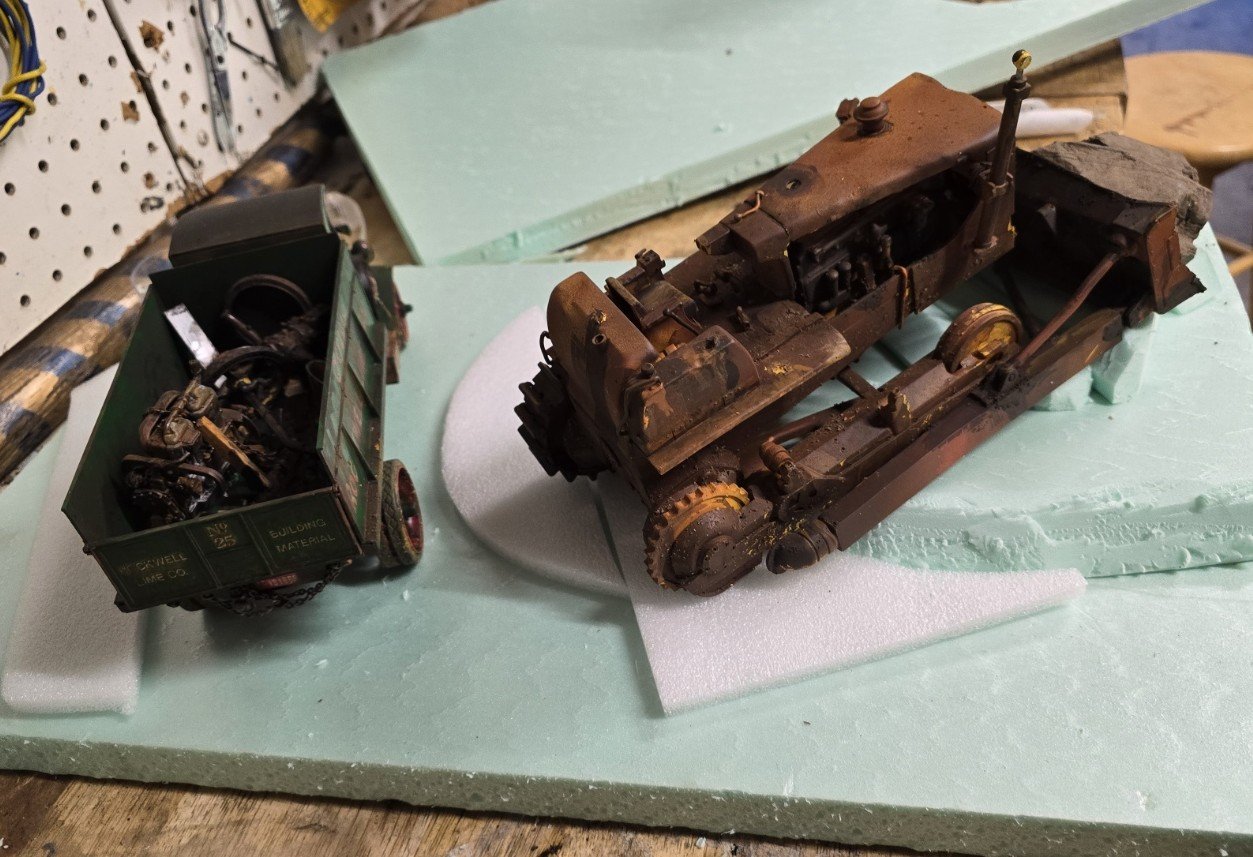
20250912_185228.jpg


20250912_185232.jpg


And as you can see, this thing is gonna be way too big. I spent a lot time trying to get everything placed in the smallest amount of realestate as possible without making it look overcrowded.
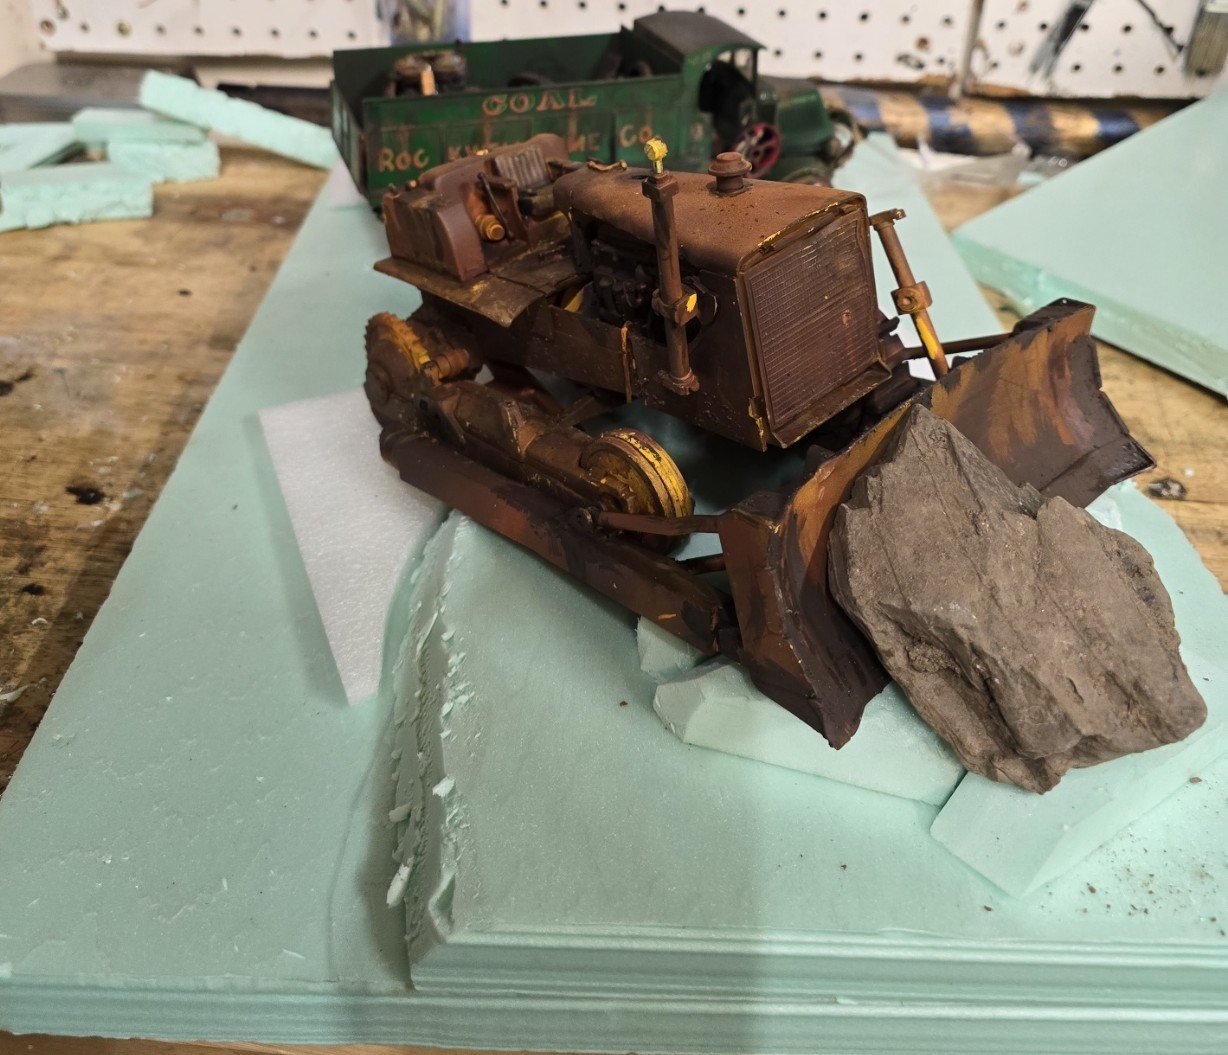
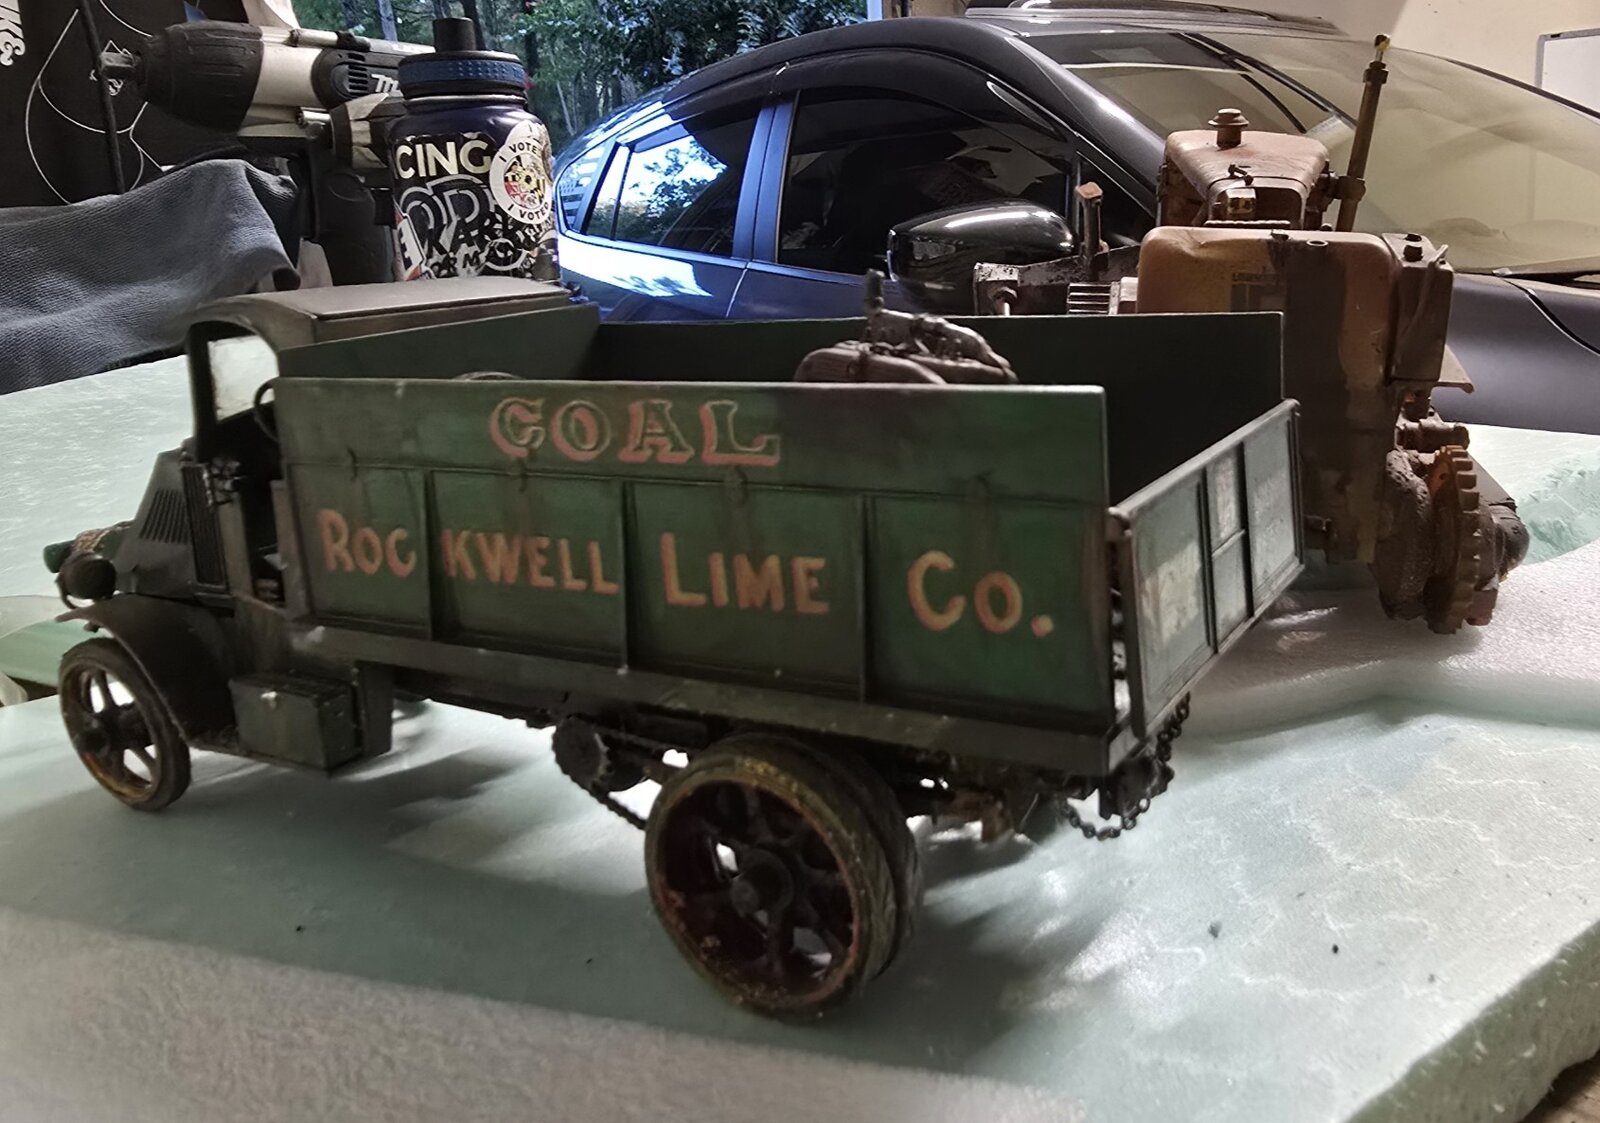
20250912_185239.jpg


20250912_185244.jpg


Thats it for now.
 

Attachments

  • 20250912_185237.jpg
    20250912_185237.jpg
    190.8 KB
Last edited:
everything placed in the smallest amount of realestate as possible
You did not ask, so apologies if I am stepping where I should not, but I think that trying to condense everything is a mistake.

The artistic way of saying it involves "white space", another way of saying it is less can be more, or let it breathe.

I think your models look fantastic, please consider giving the story (the point of a diorama IMO) more space for the viewer's eye to roam.
 
You did not ask, so apologies if I am stepping where I should not, but I think that trying to condense everything is a mistake.

The artistic way of saying it involves "white space", another way of saying it is less can be more, or let it breathe.

I think your models look fantastic, please consider giving the story (the point of a diorama IMO) more space for the viewer's eye to roam.
Good point.

Thus is the difference between social media and formal writing : )

Complied sir, I hope I got it right!
 
I think it's a great start. I always struggle with the "story" and size and shape. As Edbert says, let them breathe. Give it space.
First though, decide if the models are the heros, or is it the story. That will dictate the size and layout.
If im making the model the star of the show i use as small a base as possible. Even to where the model is bigger. But if it's a story, then the models are simply part of it. No more important than each other, or a building or a pile of rocks.
What I've learned in a diorama, is to let it grow, evolve, remove parts, add things, then take them away again thinking, " what the hell was i doing?!"
Just don't be constrained.
Express yourself. It's a work of art you're making.


Christ that sounded like I knew what I was talking about!
 
As an Amazon Associate we earn from qualifying purchases. Product prices and availability are accurate as of the date/time indicated and are subject to change.
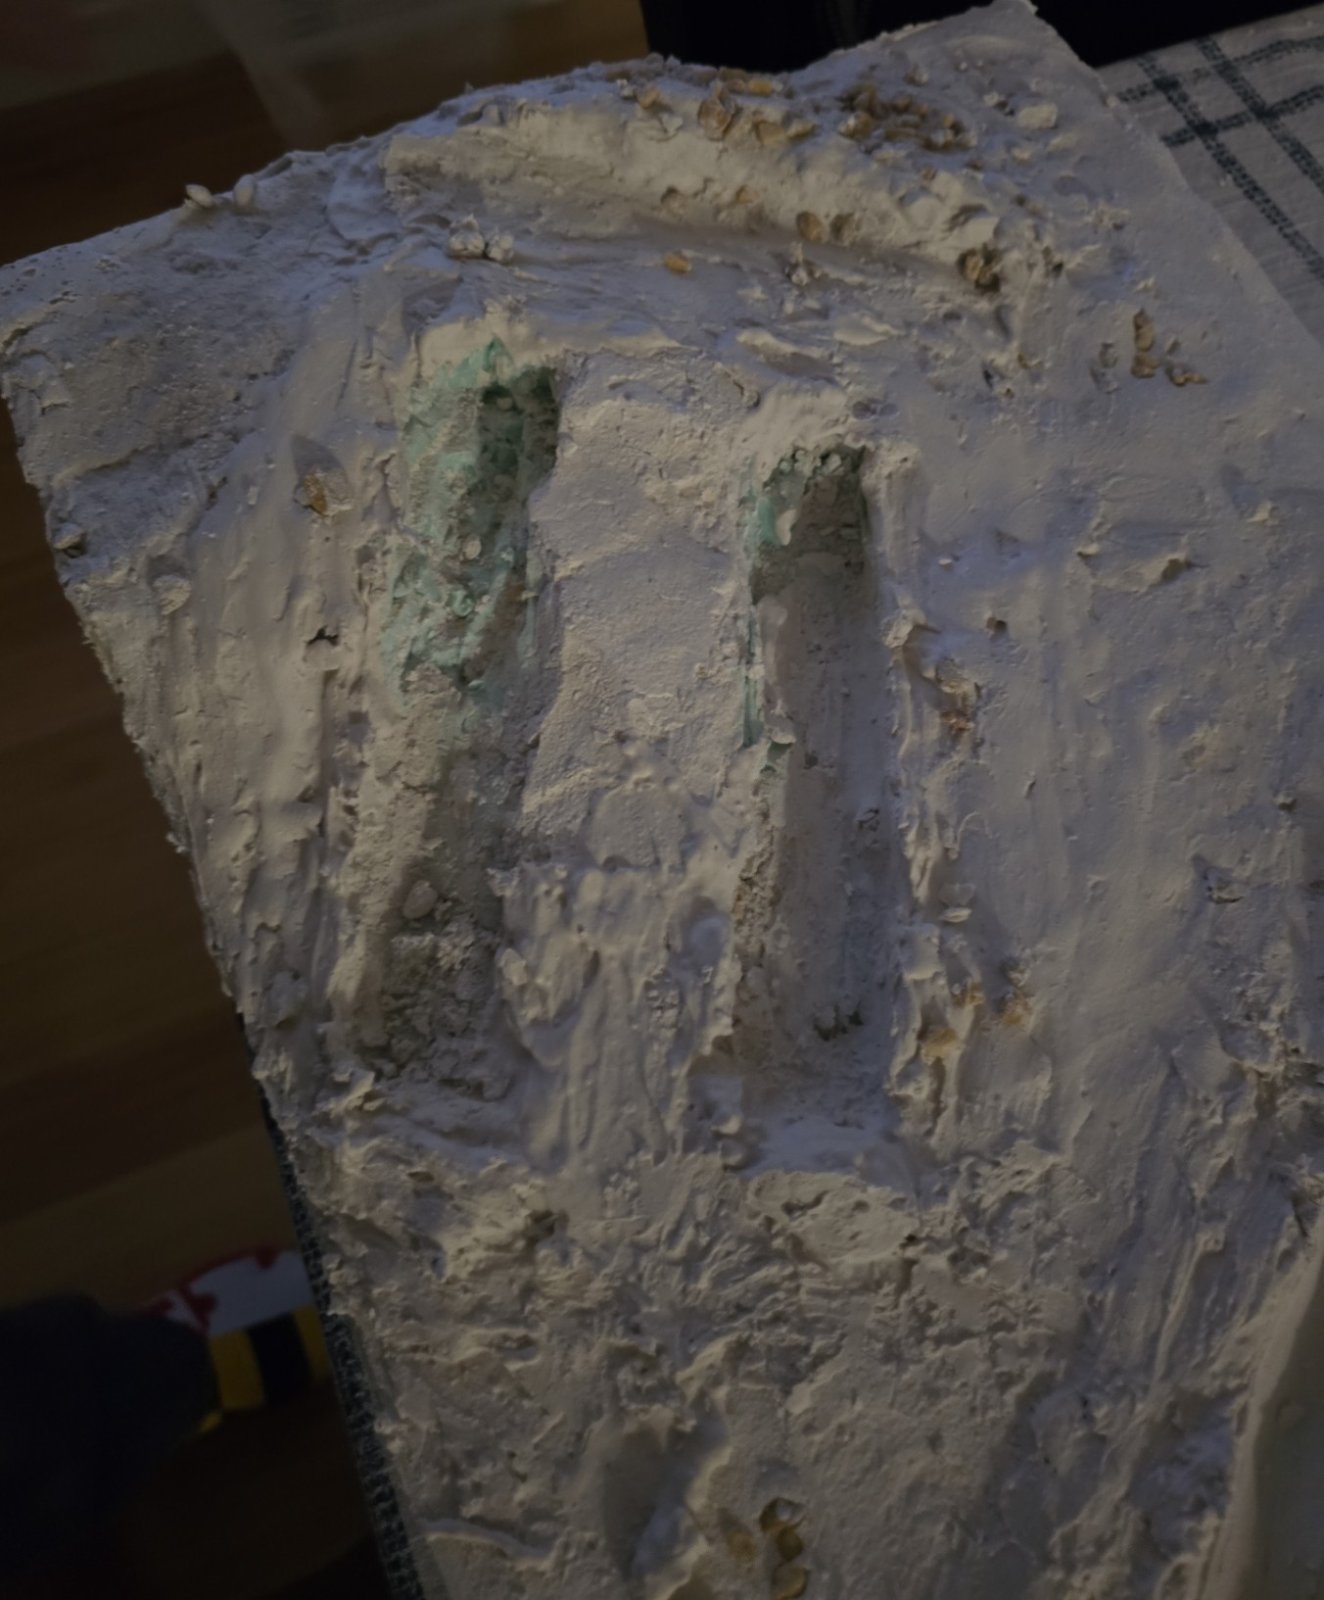
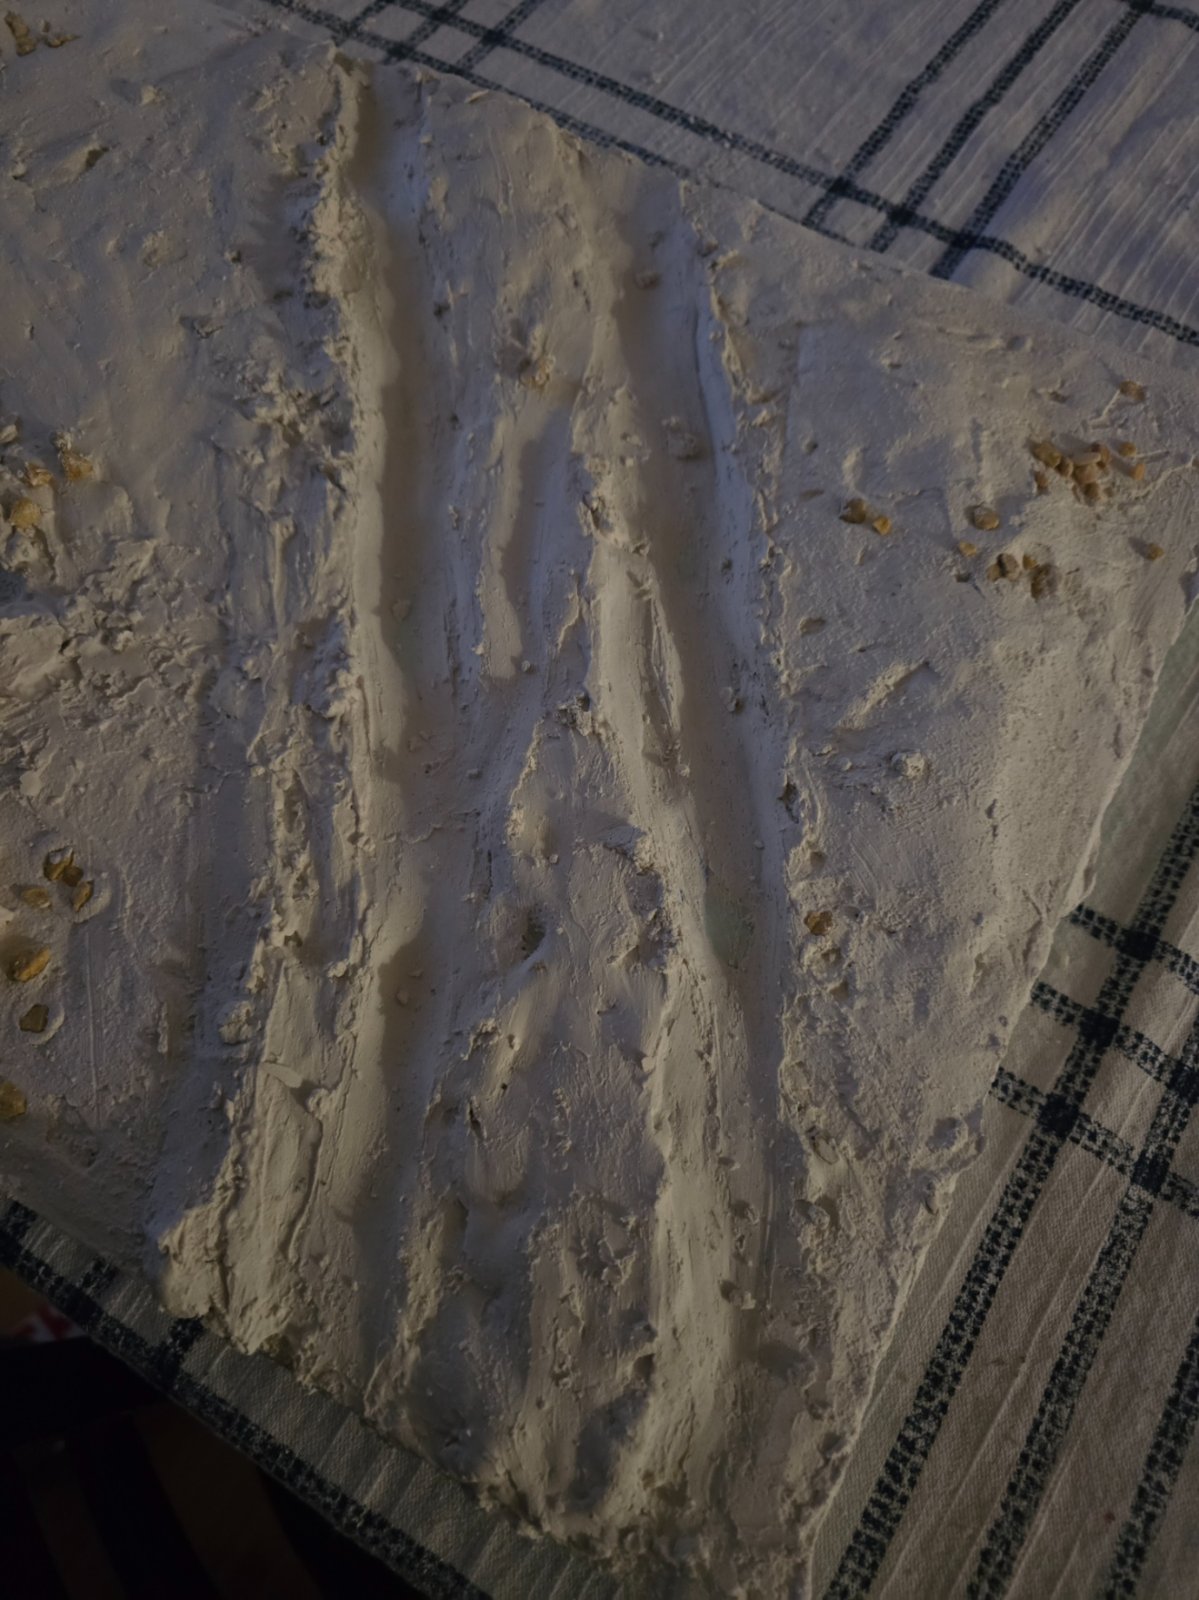
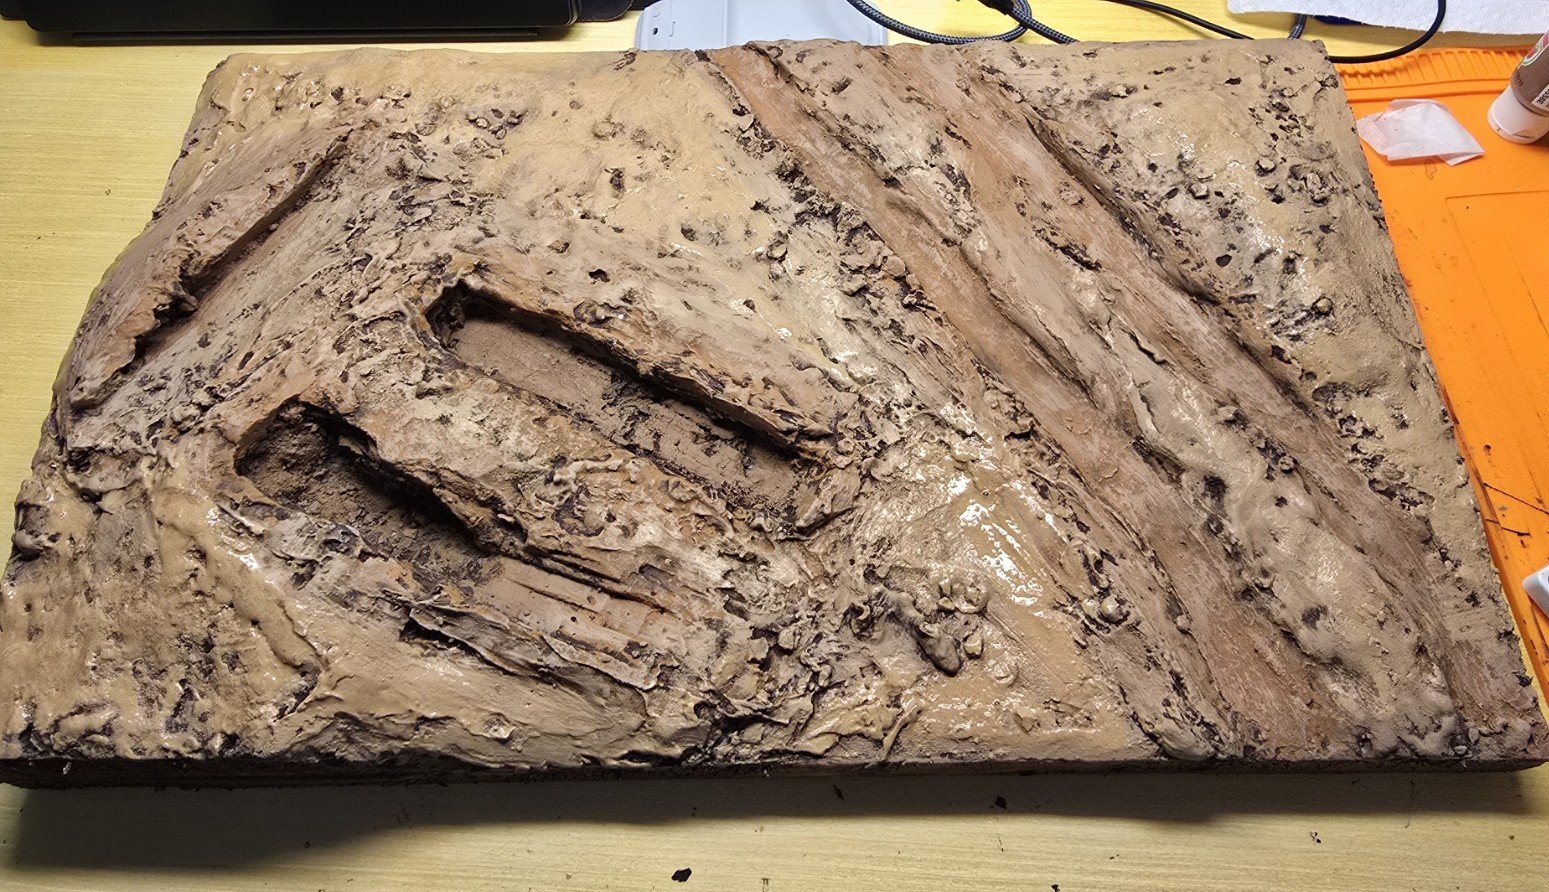
And thus begins the actual "ground".

This was an interesting time, to say the least. I looked up a dozen "how do I build a diorama base" online and I found 13 different ways to do it.

What I settled on at first was gypsum, sand and small stones. What I ended up with was some hybrid of joint compound, gypsum and sand and lots of mess….

Lessons learned … for me anyway -

Don't mix the small stones in the gypsum material – that made it nearly impossible to spread around. That was the point when I began using joint compound as I had scrape off the gypsum and restart.

Another lesson was that whatever plans I had for the terrain were quickly modified, low areas were filled in, high areas had to be trimmed. If ever do this again, I will lay out a simpler base foam terrain.

I think the most significant is the wood glue I used didn't like drying, ended up using hot glue in a number of places to keep them from shifting. (this was most likely the glue I used, but hot glue worked well)

And lastly, using the final version of the painted and weathered models to size the ruts and what not while the material was still soft made it really difficult as the compound, even mostly dry, made a mess on the tracks and tires and low parts.

Did I say I made a mess? Holy cow! Glad I moved to the garage instead of my workstation.

So, here are the pics with a few captions.


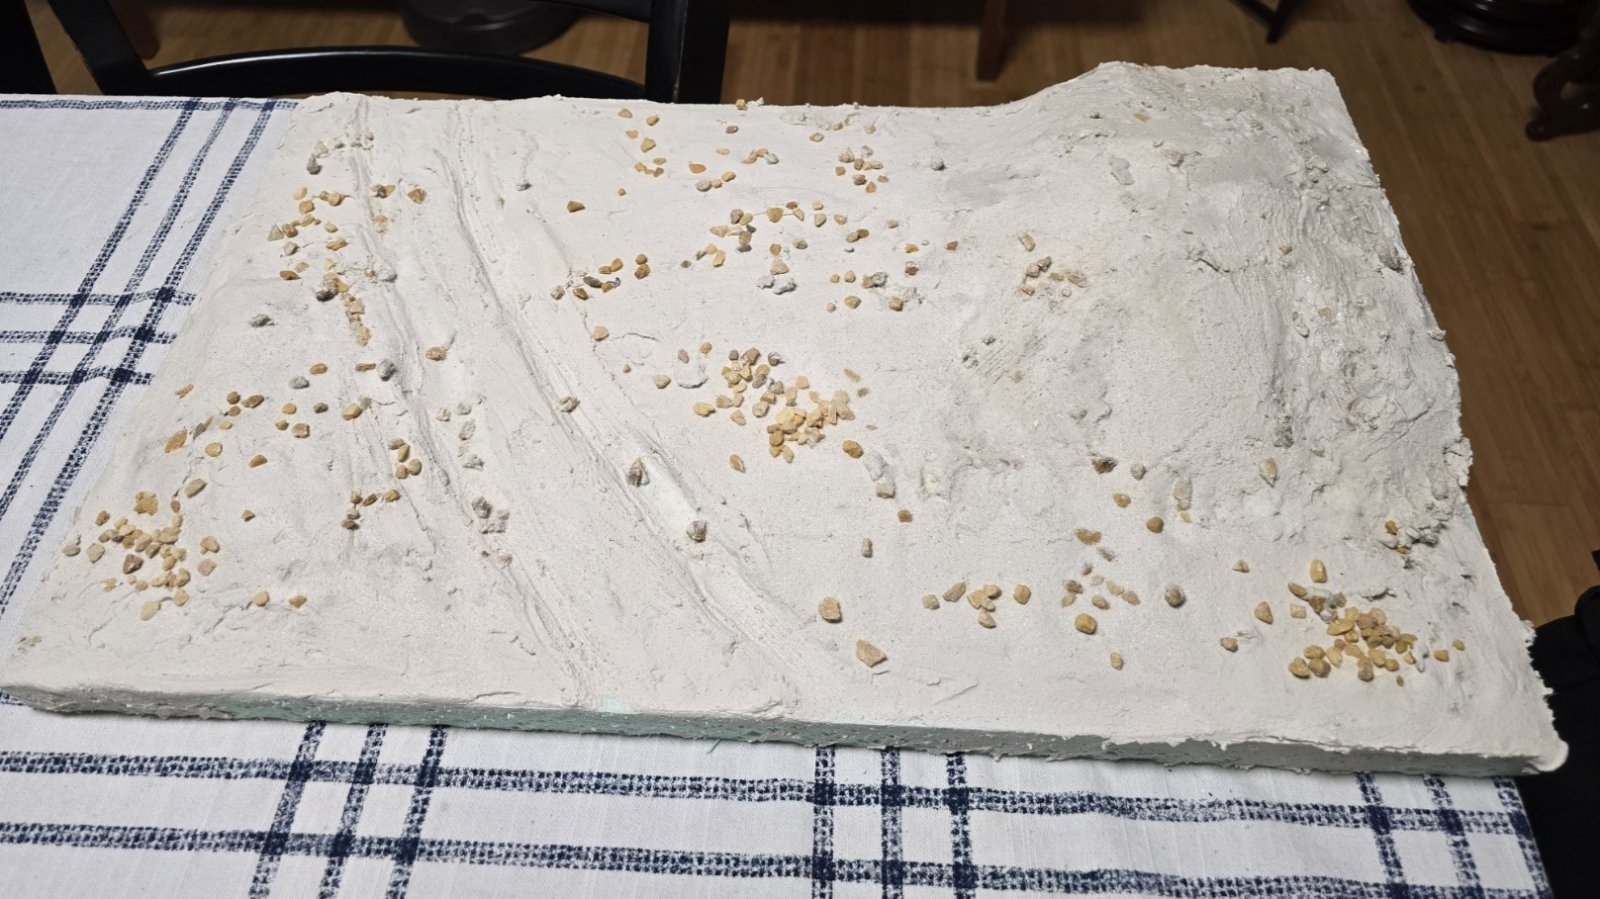
Below are my first runs with the intial set up and the dreaded stones every where.

I had to take this whole thing back the garage and restart for the most part.

20250914_192008.jpg


20250914_192012.jpg


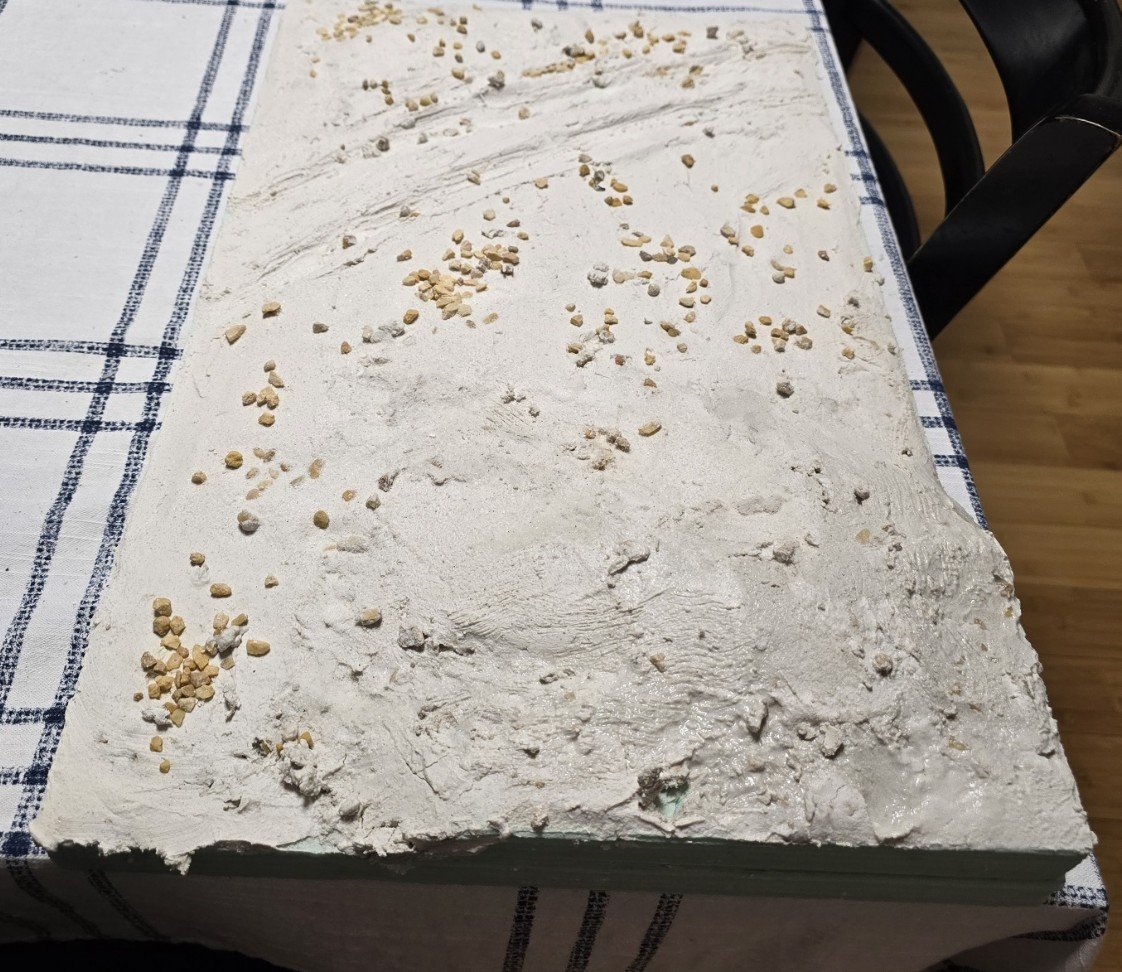
The next two pics are from my second round with a lot more joint compound and a lot less gypsum and stones!

This was also the point where I learned the lesson about not using the finshed models to set up the mounting points. This was really particular to my plan as I wanted the dozer to be buried and the truck to be in ruts.

And there is whole story (or shall I say "mistake"?) on the truck ruts that I will get into later.


20250917_185950.jpg


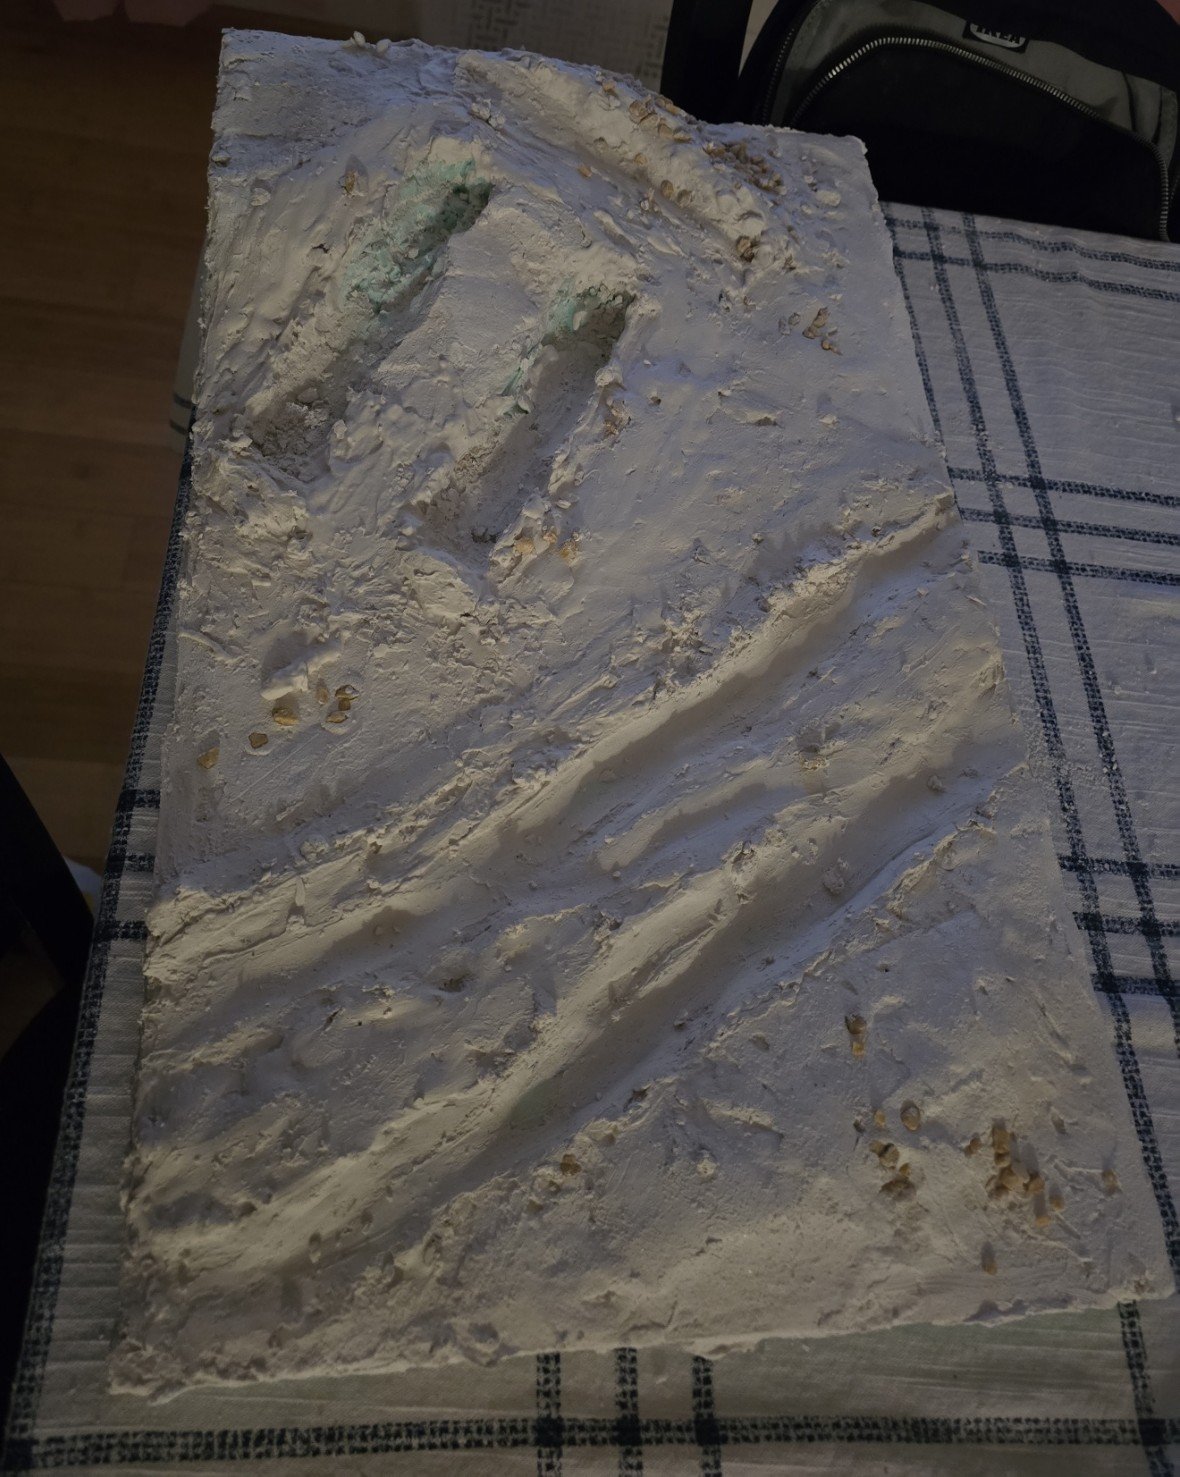
The next two photos are close ups of my (un)handy work.

If look closlely, you can see where I deviated from the original foam terrain.

20250917_185953.jpg


20250917_185957.jpg


Thats about it for the rough in.

the next series will encompass the painting which was the most enjoyable part.

It reminded of 1st grade art class where the teachers laid down a bunch of that brown paper and gave you those funny smellling paints, a paint shirt and some huge brushes! Brought back some memories.
 
using the final version of the painted and weathered models to size the ruts and what not while the material was still soft made it really difficult as the compound, even mostly dry, made a mess on the tracks and tires and low parts.
There are two easy ways to avoid getting the diorama material all over the model. One is to use the finished (or partly finished) model, like you did, but place some plastic kitchen foil over the diorama first. Leave that in place until the diorama dries, though, because trying to pull it off while the groundwork is still wet will probably pull groundwork up with it.

The other way is to use some spare lengths of track and/or wheels to impress tracks in the diorama. Though again, this is best done with kitchen foil in between, to avoid pulling up the groundwork with the track or wheel.
 
Not sure if you have tried it, or it would work for you, but I use scultamold for my bases. I did a model railway for my grand son a while back and used it for tunnels and parts of the base for rail and in between.
Cameron
 

Attachments

  • MODEL Rail Road Diorama final 1.JPG
    MODEL Rail Road Diorama final 1.JPG
    239.8 KB
  • MODEL Rail Road Diorama final 5.JPG
    MODEL Rail Road Diorama final 5.JPG
    315.3 KB
  • MODEL Rail Road Diorama final 13.JPG
    MODEL Rail Road Diorama final 13.JPG
    254.7 KB
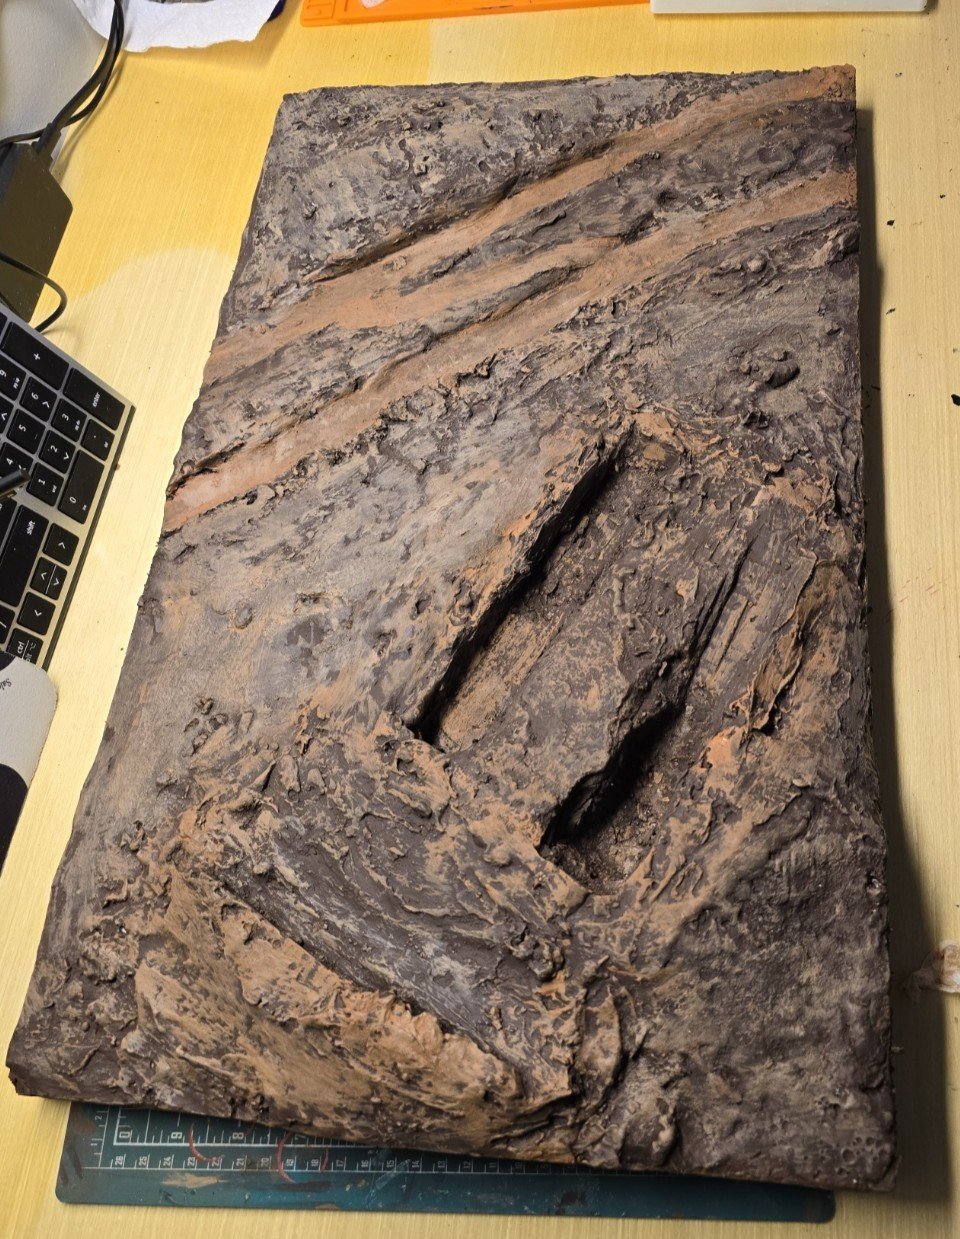
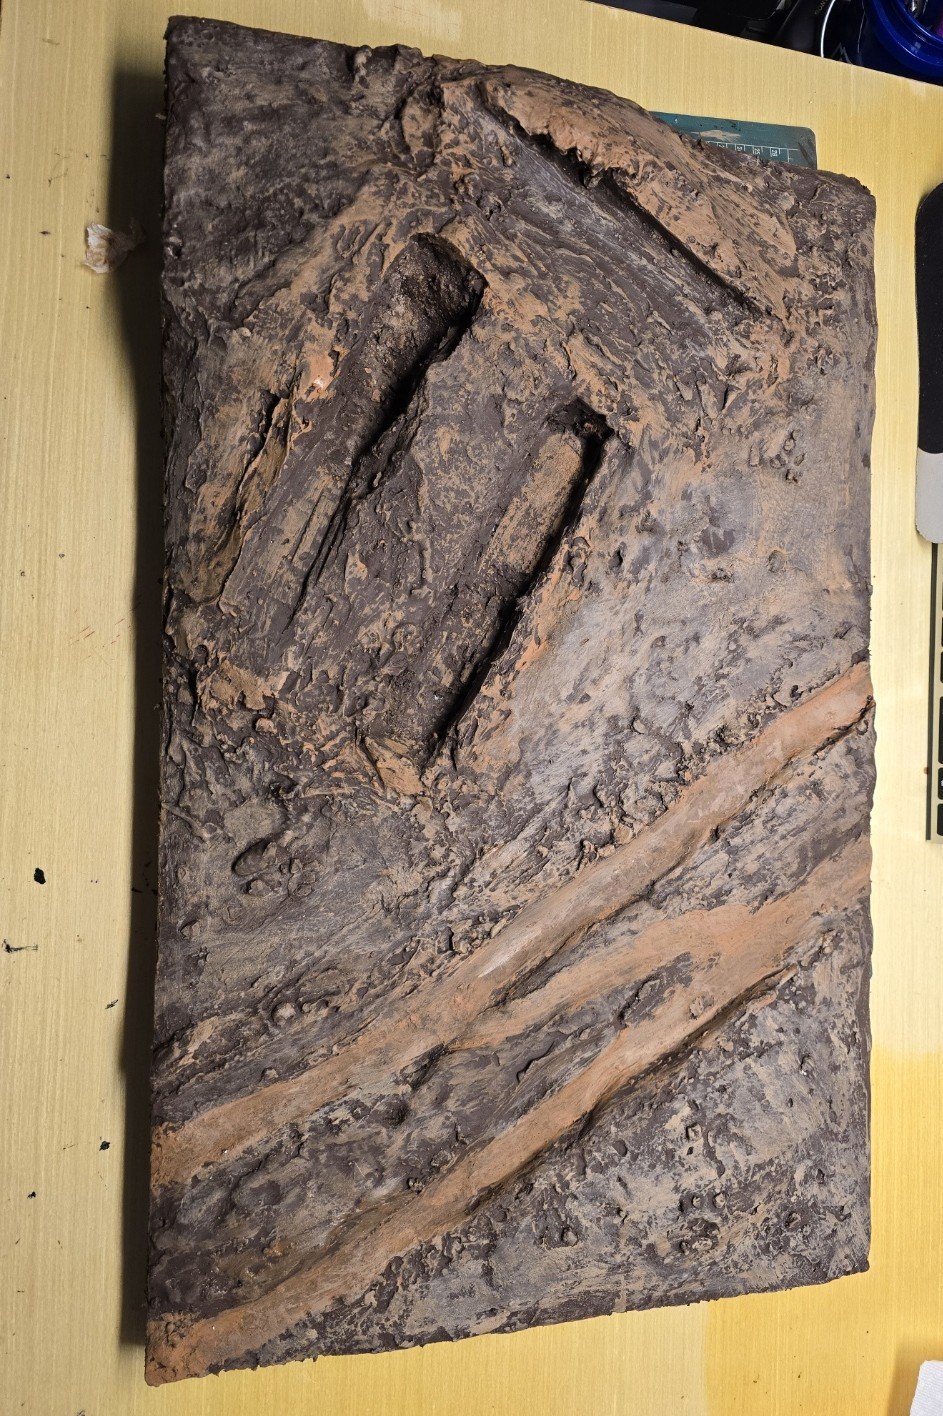
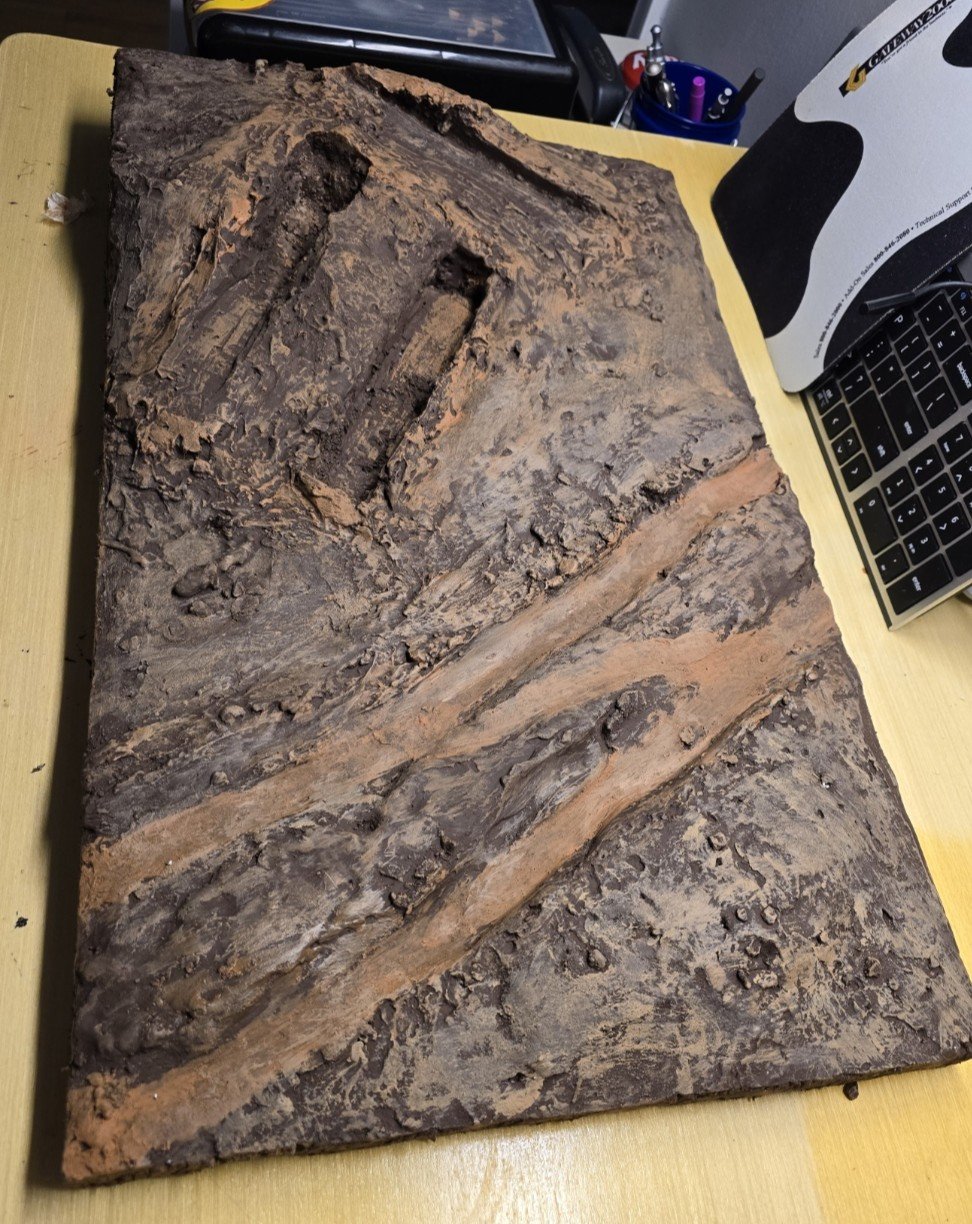
Well, just to keep this going and to keep all of you in suspense waiting for the final product, I present to you my 1st grade art project! Or at least that was it felt like.

I really enjoyed this part starting with buying the paints. I went to Walmart and began pulling all the brown shades from the .50 cent acrylic shelf!

It was great fun, no fussing over paint shading, brands, etc. just a bunch of cheap paint in numerous shades of brown.

Then once I started, I found the biggest brush in my arsenal and began mixing and painting and thinning and mixing and painting. No regard for detail lines, bleeding colors, etc. Just pure brutal brown paint. Ha!

Anyway, here are pics of the base after I decided I had it shaded the way I wanted. The pics really don't convey the shading and terrain effects very well.

The pics of the final product with all the grass, sticks, rocks, clear coats, etc. help clean it up a bit.

And here they are, don't judge me...

(I shot it from several angles trying to convey the shading and what not.)


20251004_153549.jpg


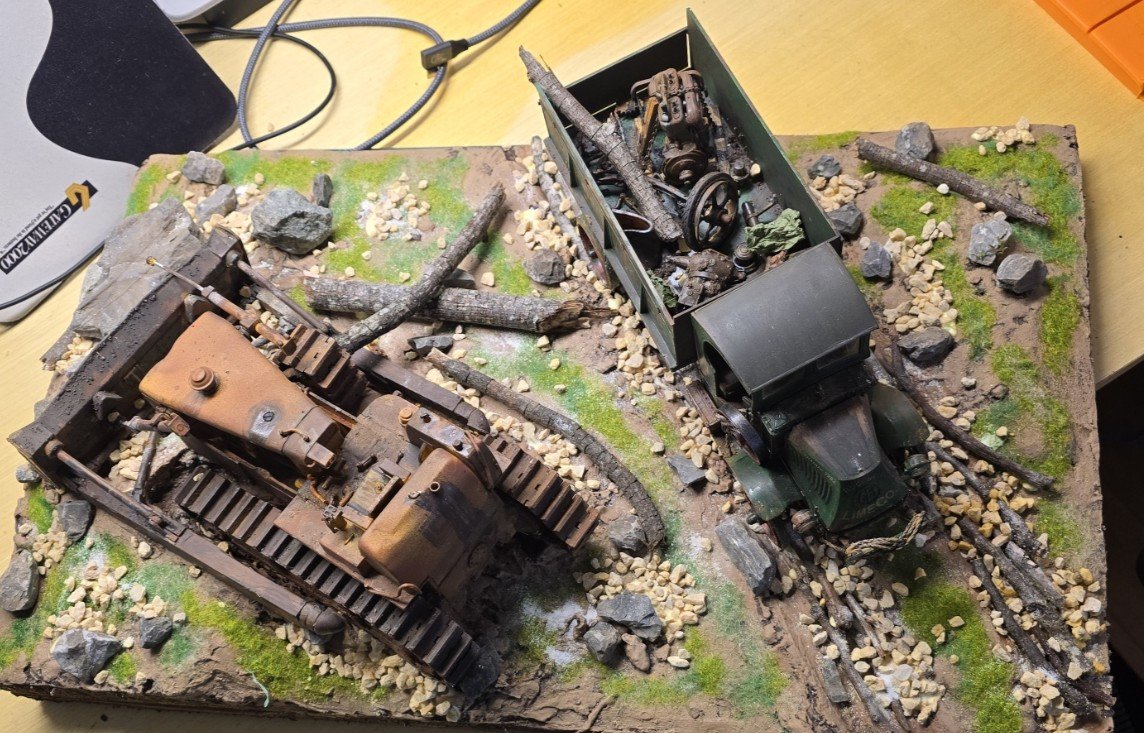
Not much to say actually, you can see the final resting place for the dozer, although I still ended up modding the ruts later on.

Also, the center ridge for the truck ruts was too high, so I went back in and shaved it down a bit and repainted. I also compensated for it by adding debris in the ruts - that wont be seen until the next post with the final product.


20251004_153558.jpg


Ok, heres your age test; in the picture below, who recognizes and/or remembers those cow graphics on the mouse pad?


20251004_153600.jpg


Another shot, still couldnt get the shading to come out in the pics.

Sometimes I think it looks more like a poorly made chocolate cake than a diorama. Dang! now I'm hungy for that fozen desert cake in the freezer, too bad its Lent : (


20251010_151845.jpg


See you in the next post when I wrap this thing up!
 
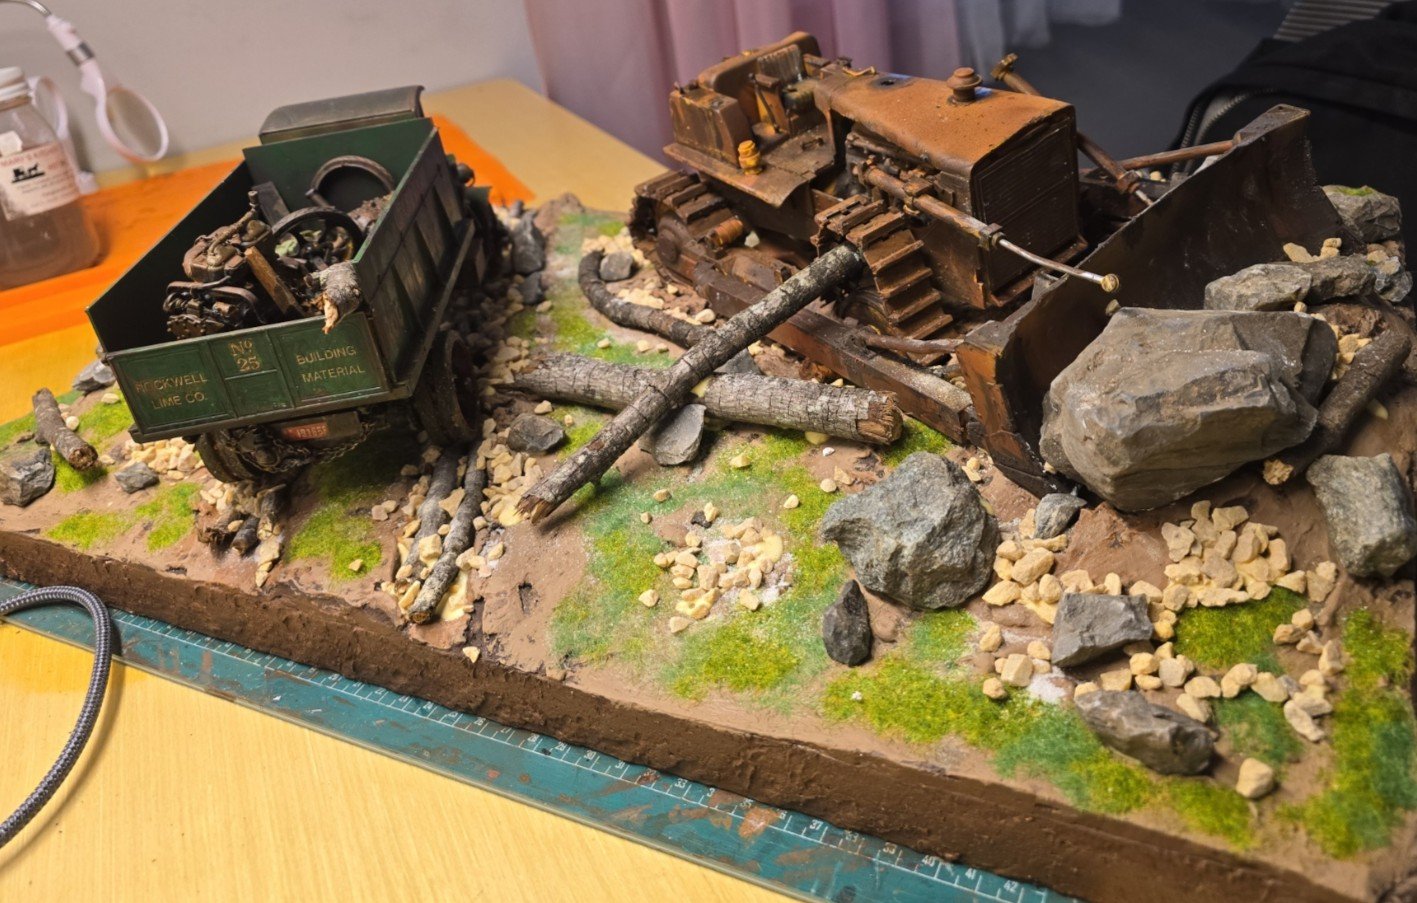
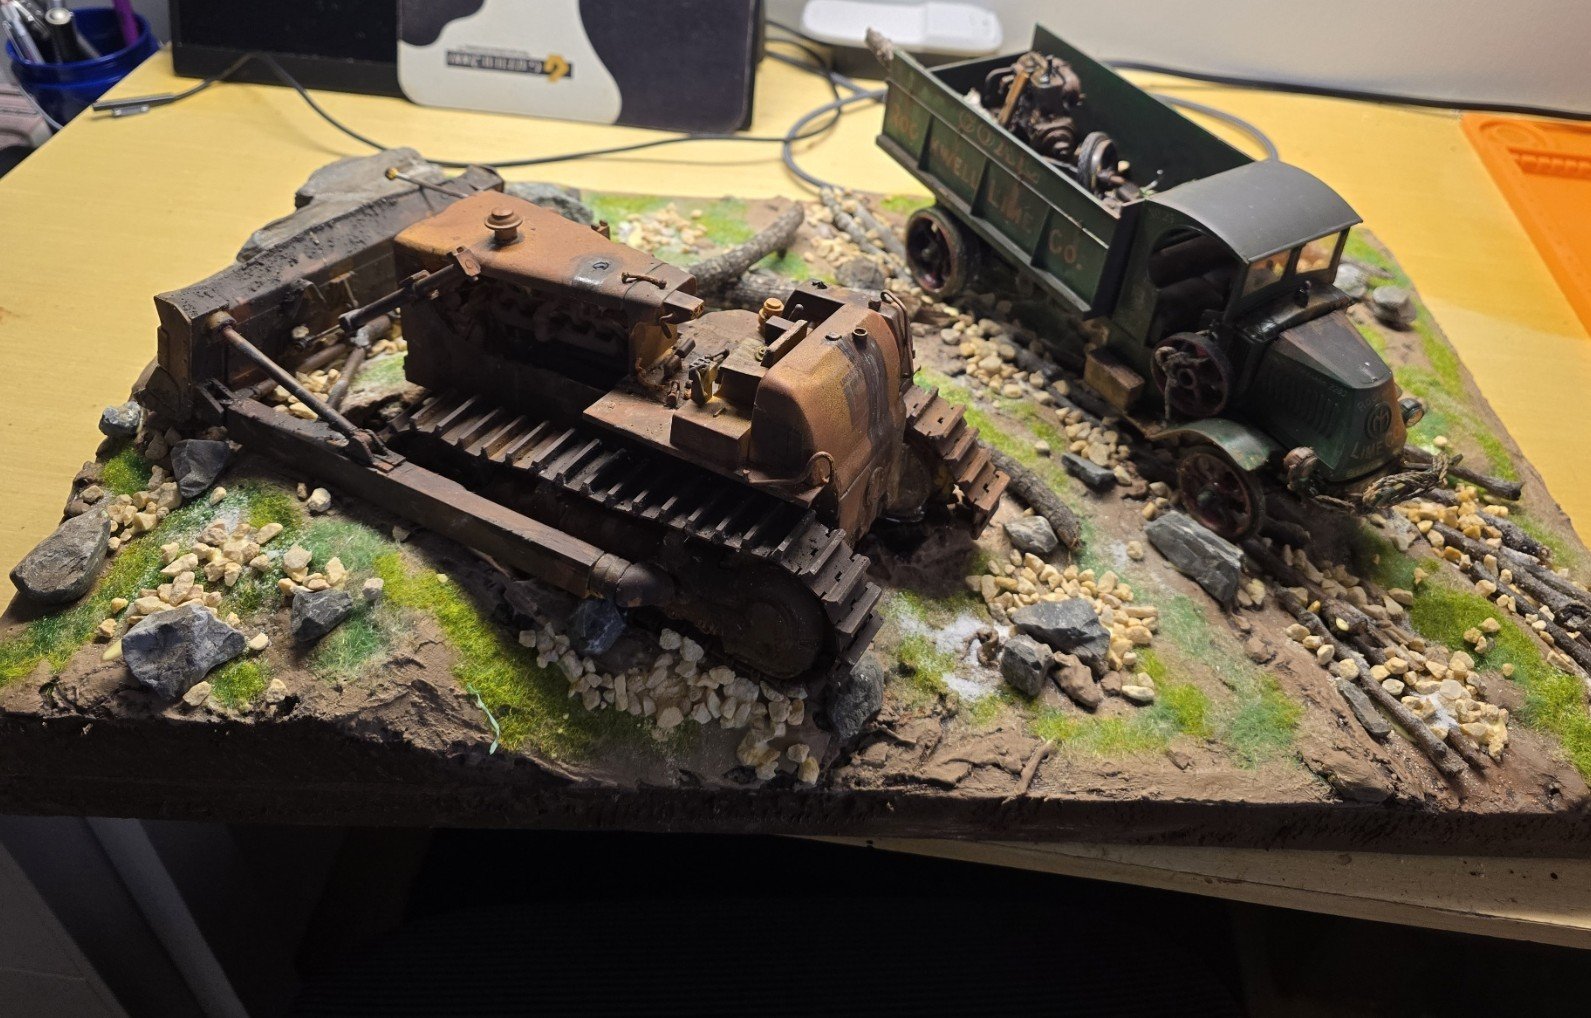
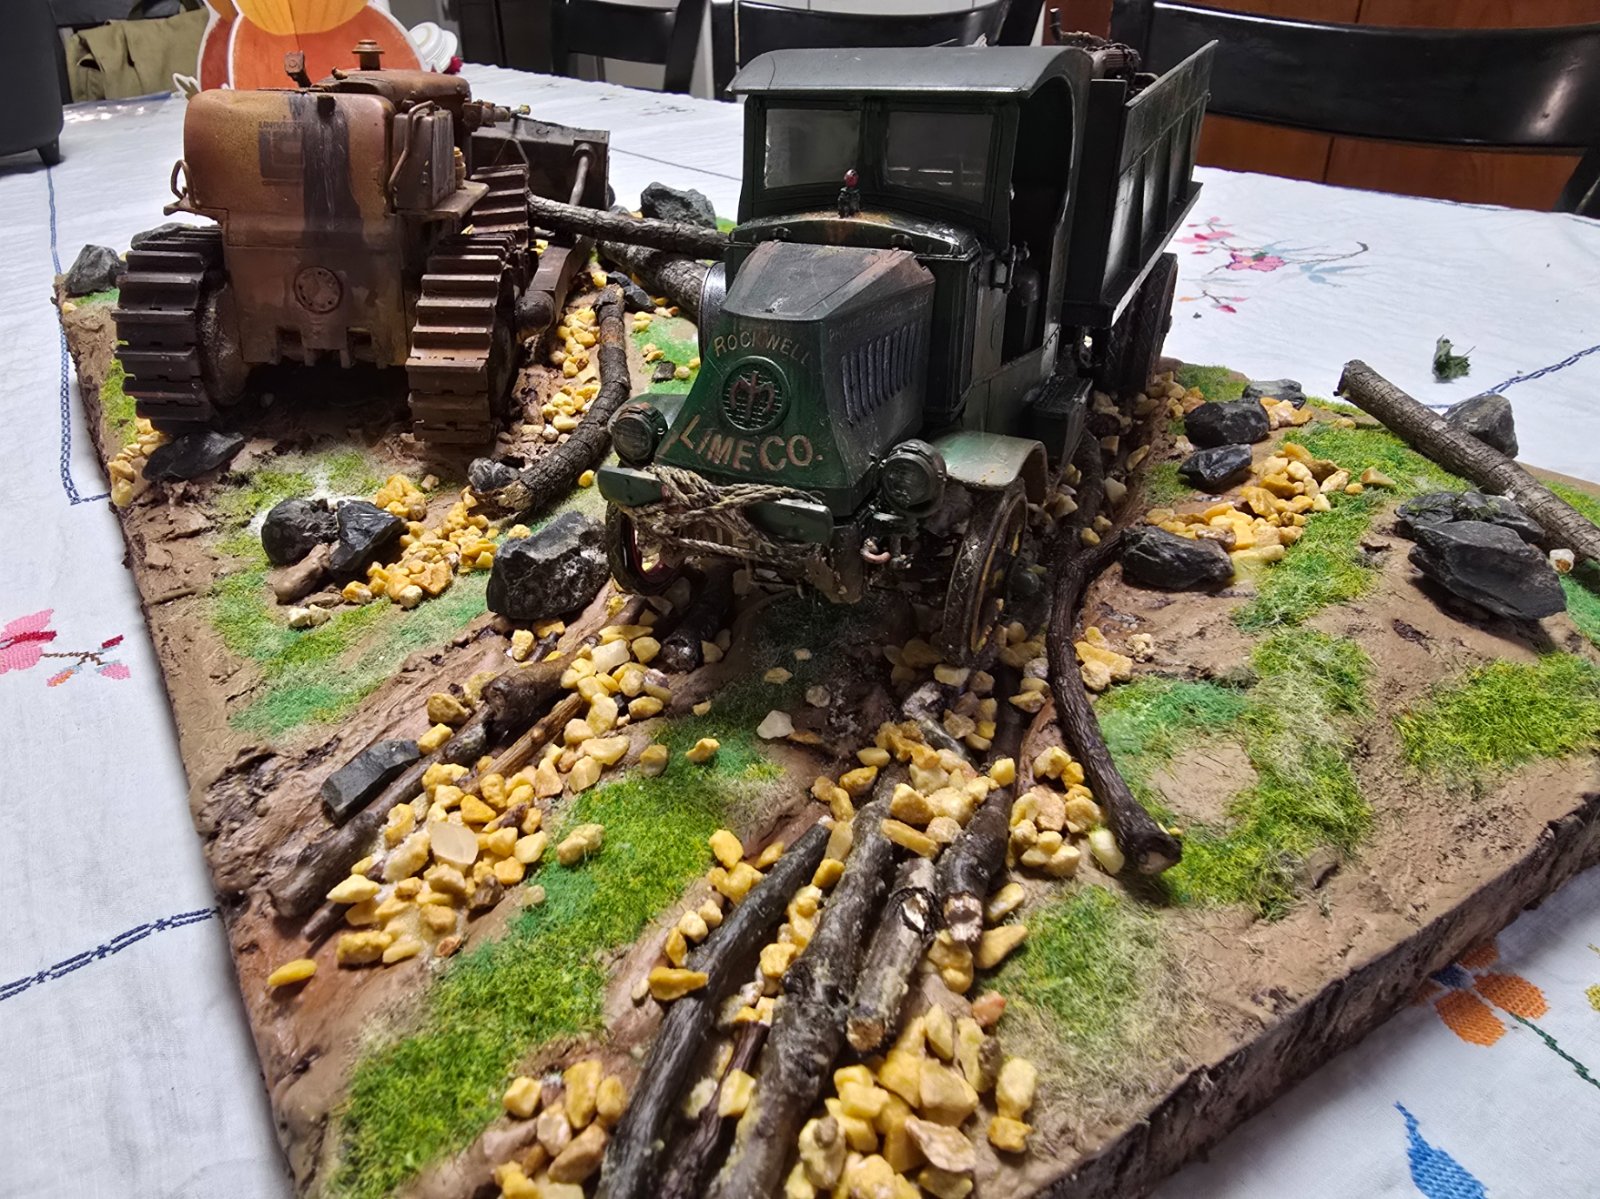
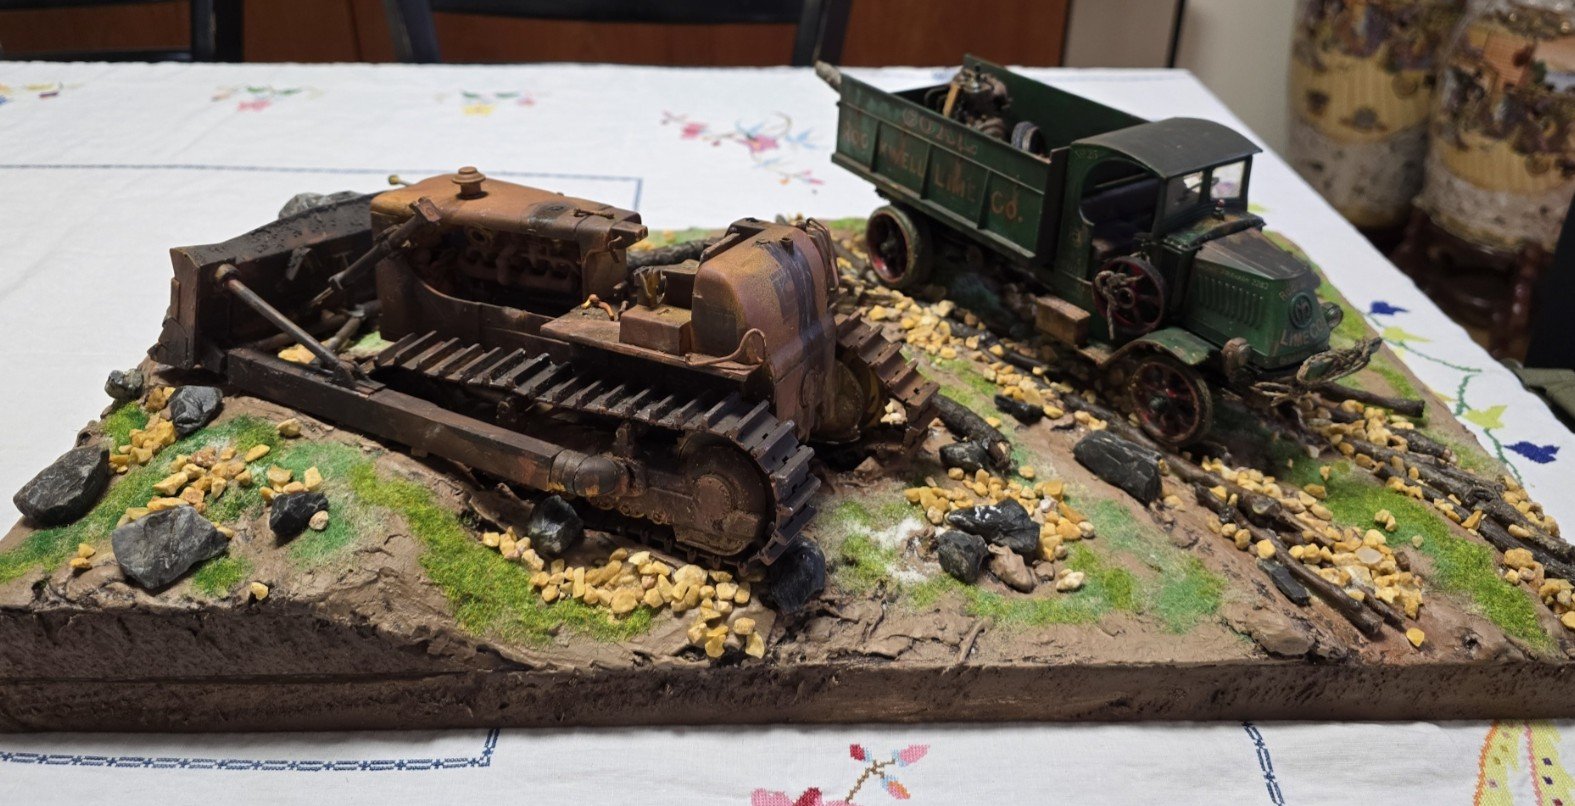
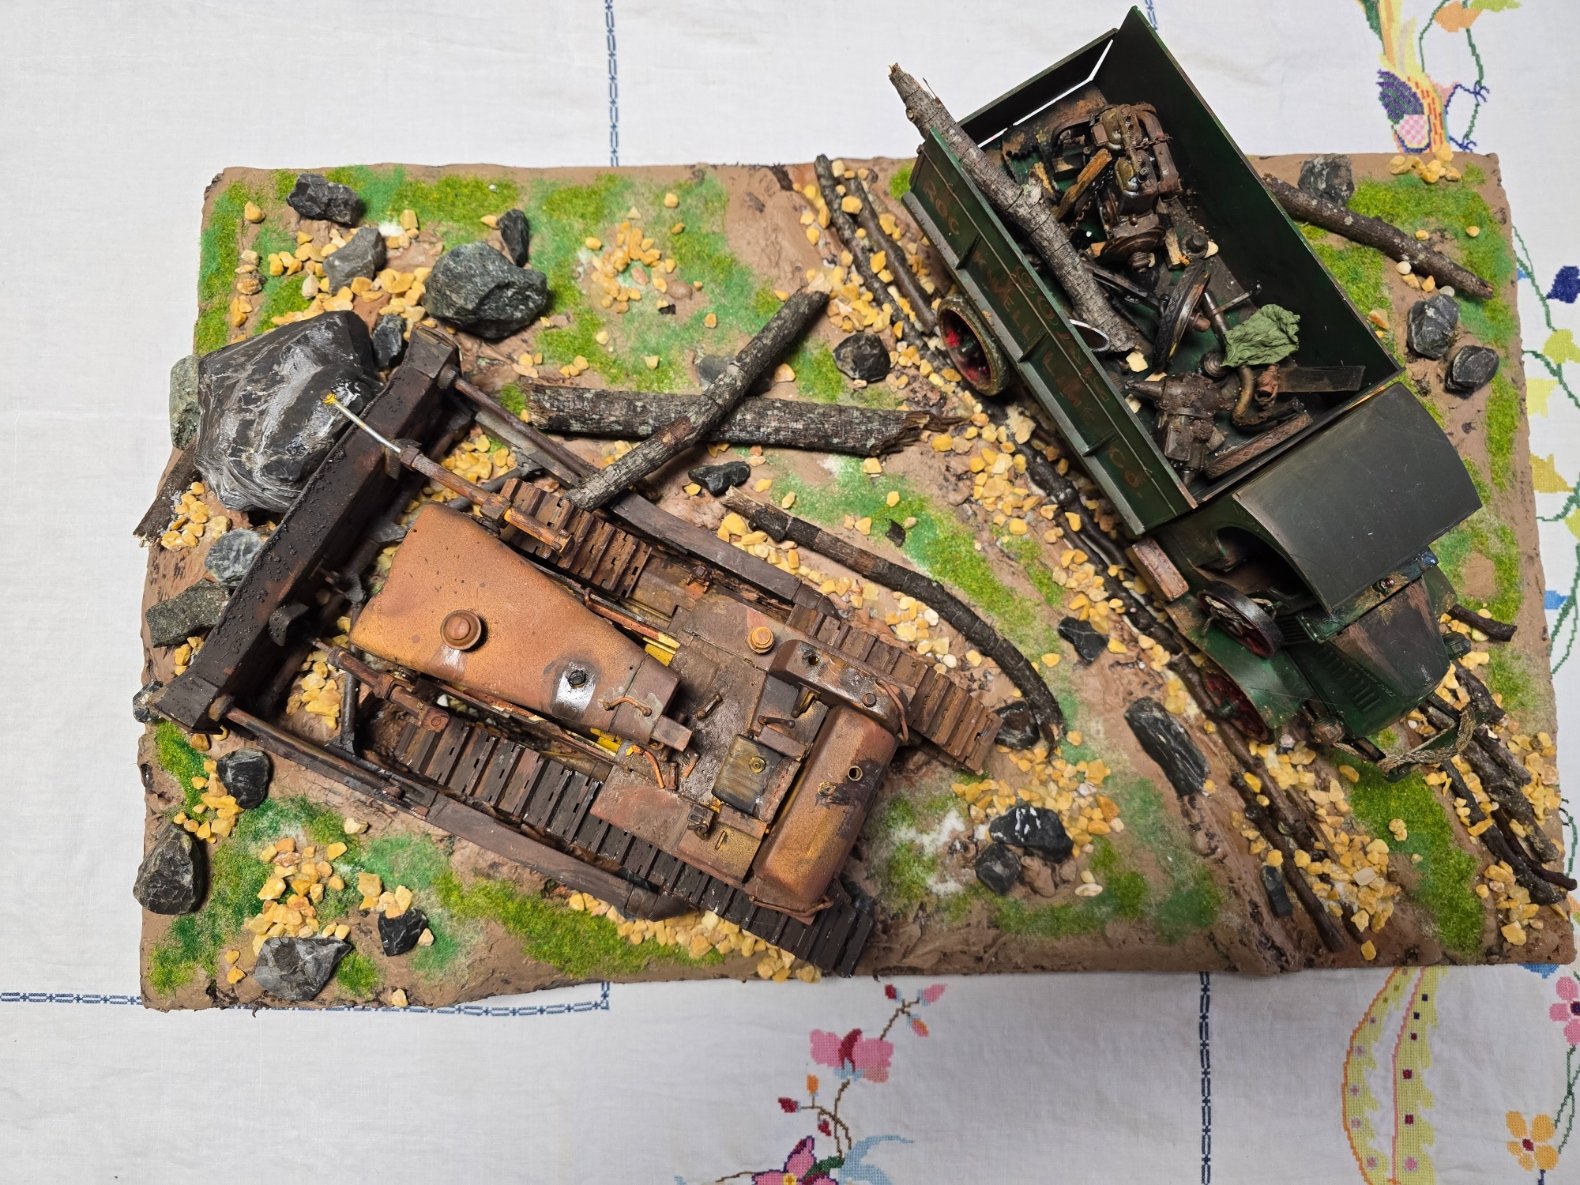
Well, at long last, here is the final product!

This was also very much an on the fly type of project, I had some sketches as I noted earlier and a vision in my head.

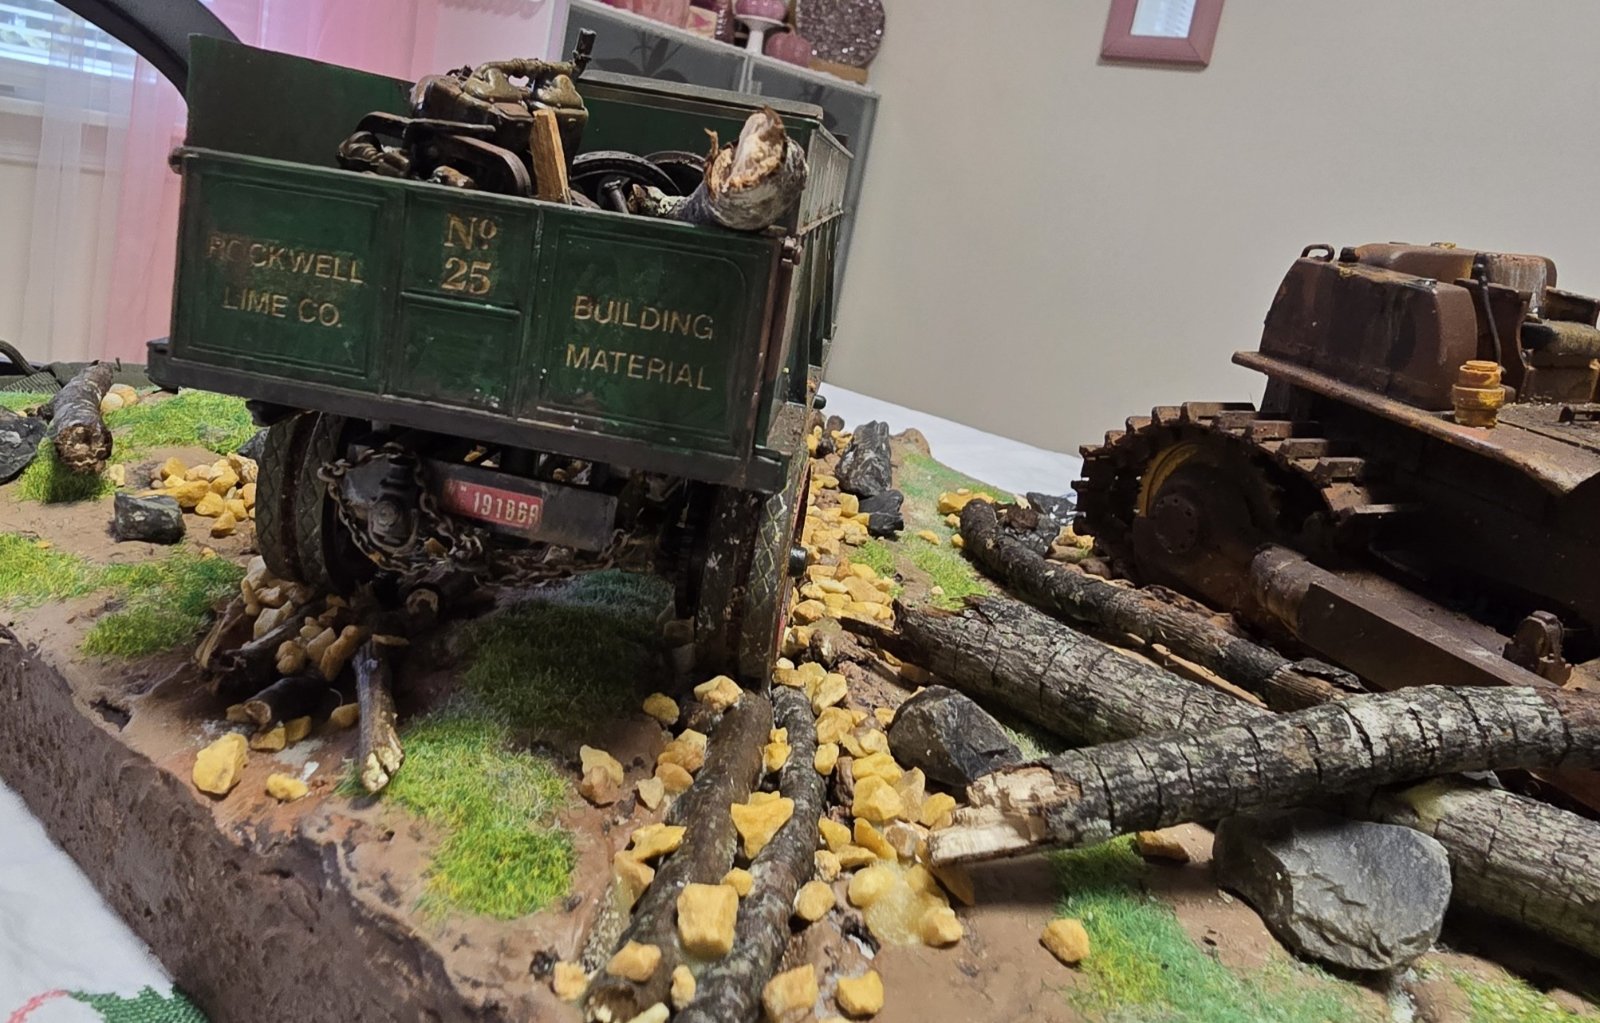
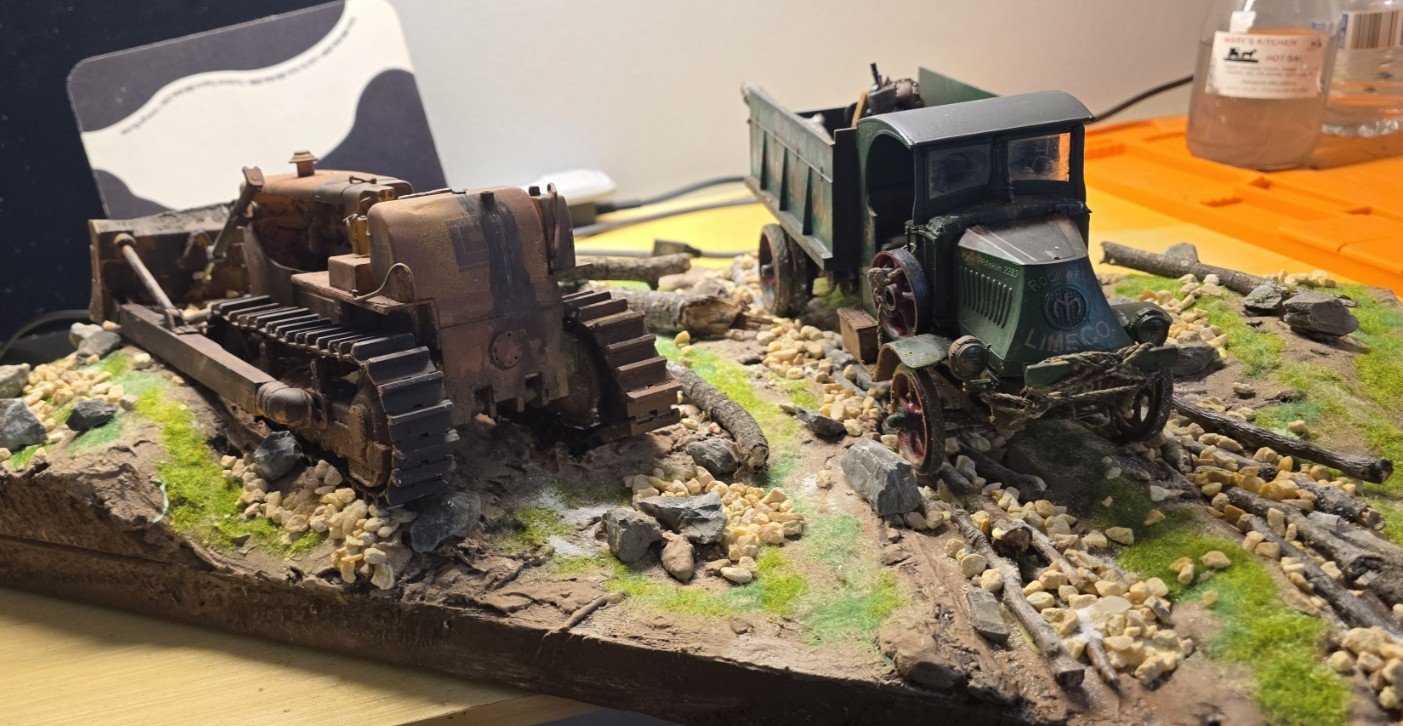
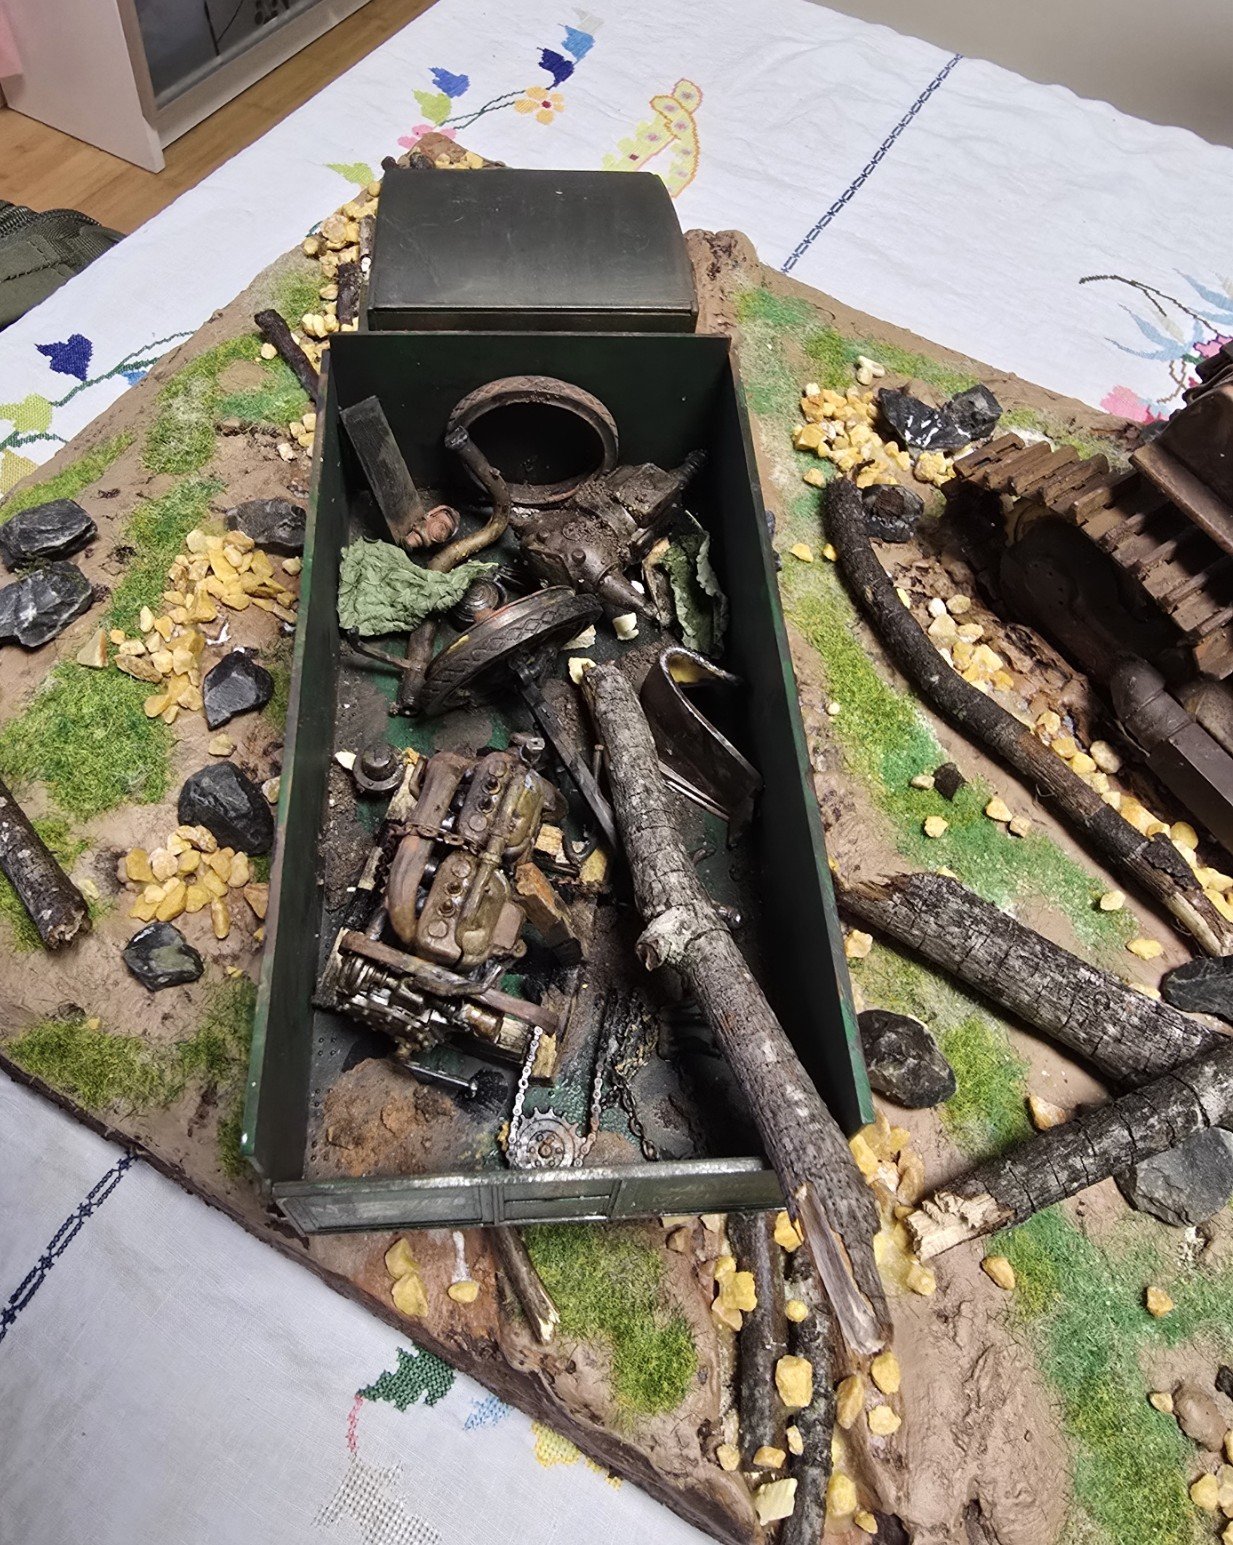
Then finally as the dozer got placed in its final resting place and the USV (Unmanned Surface Vehicle) – recall my chagrin earlier regarding the dearth of usable 1/25 figures - is conveniently rolling past on its way from somewhere to somewhere

– with a load of who knows what –

Well I know what's in there, its scavenged parts from a partially built Mack Stake Truck that I got for nearly nothing from eBay.

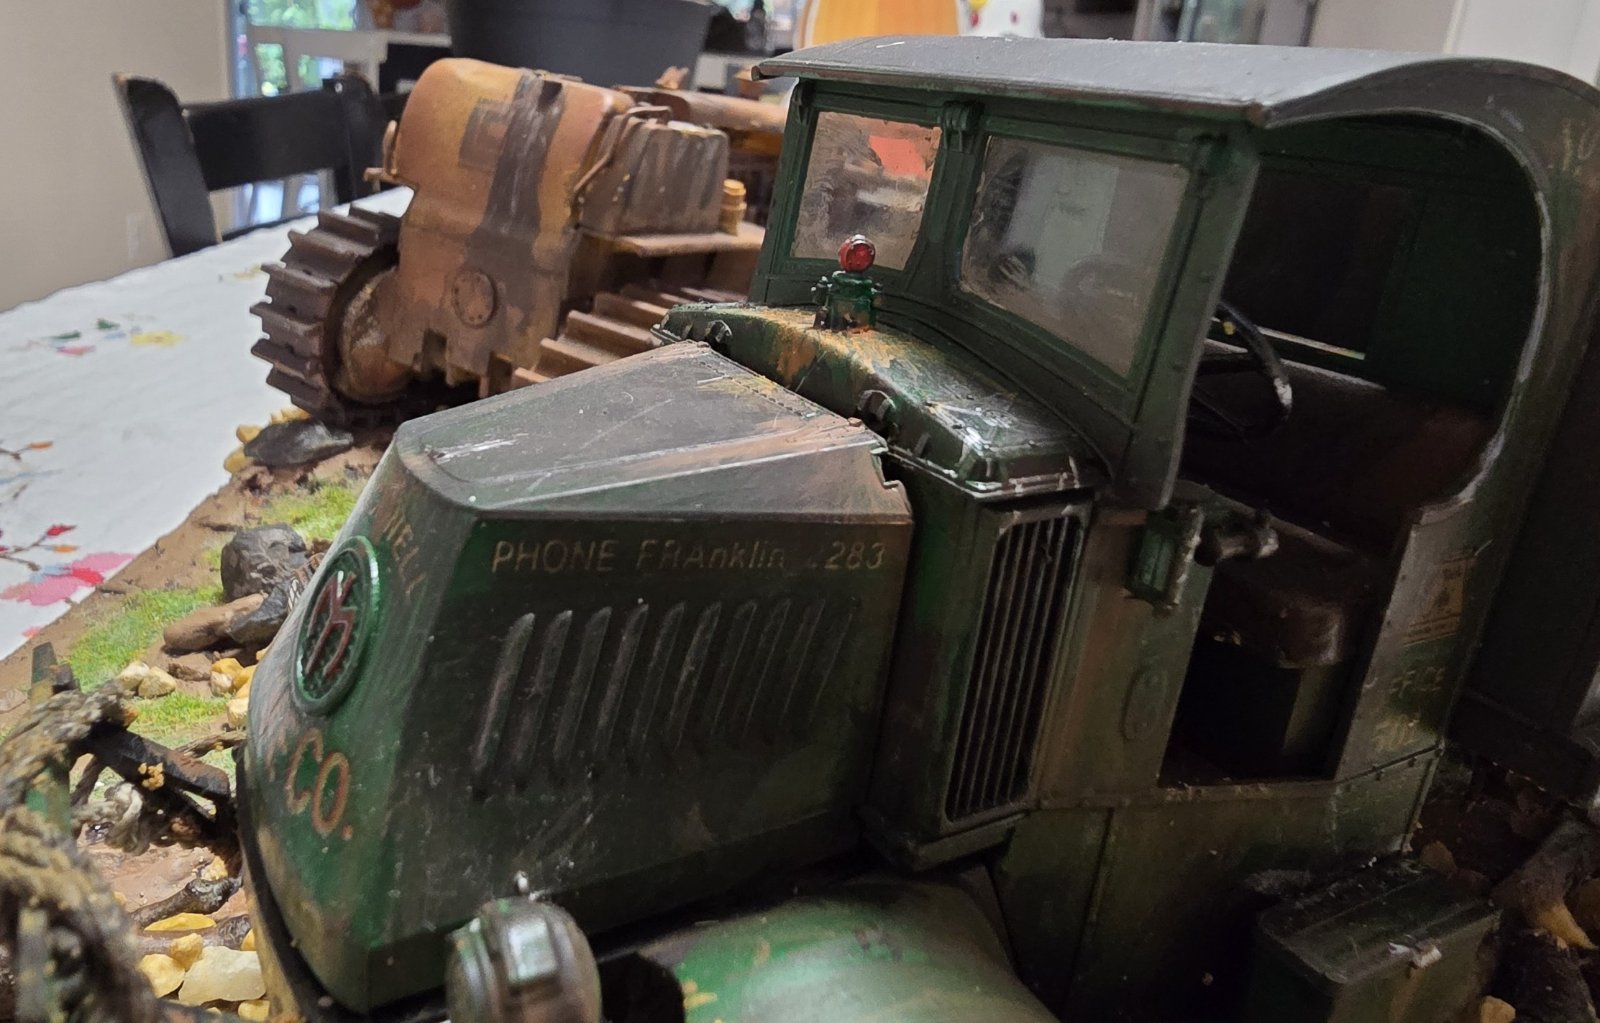
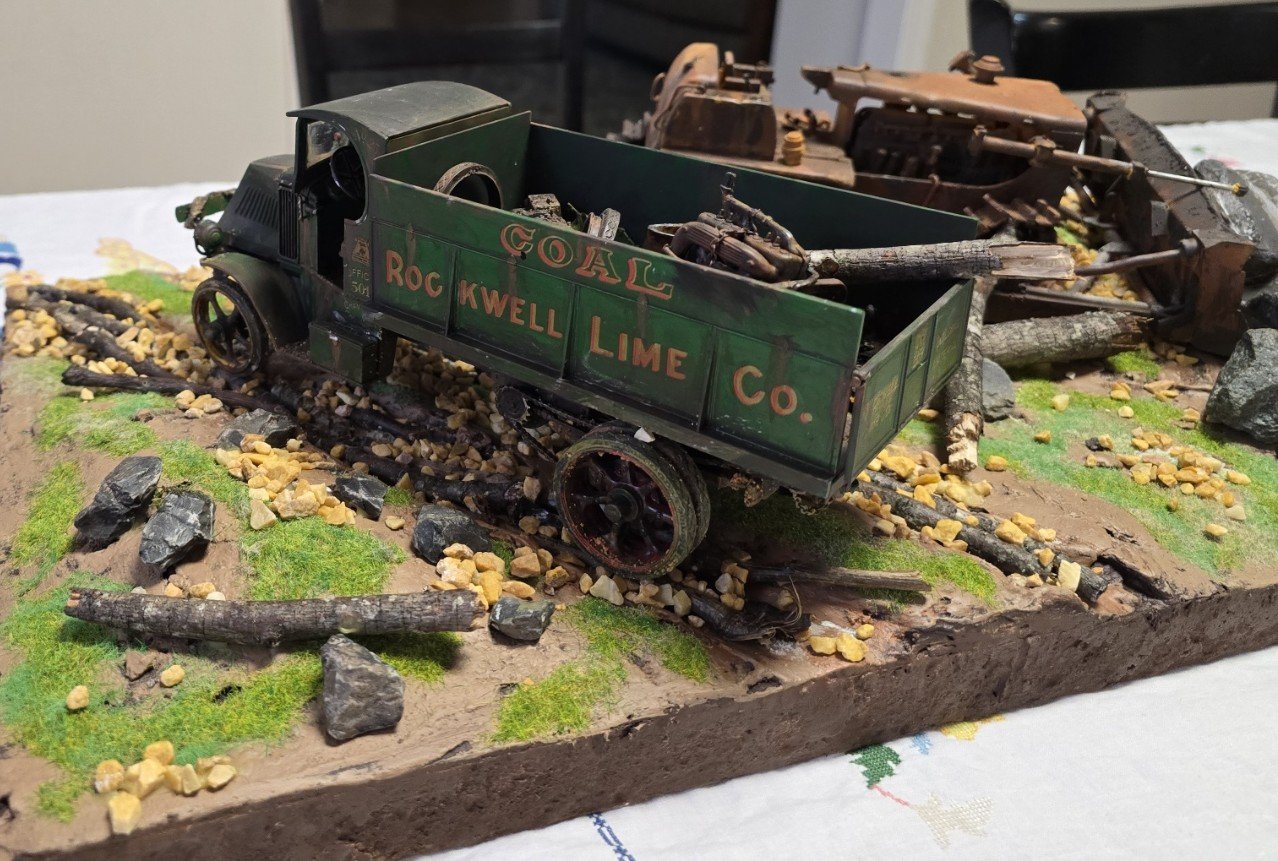
You know, loading the back of that truck was another high point of this set up. I just started scavenging parts, chains, and general junk. The just loaded them up with my best efforts at rust, oil leaks and general malaise.

I liked doing that entire part, but please, we all have to suspend belief a little because who the heck lifted all that crap all the way up into that dump bed?

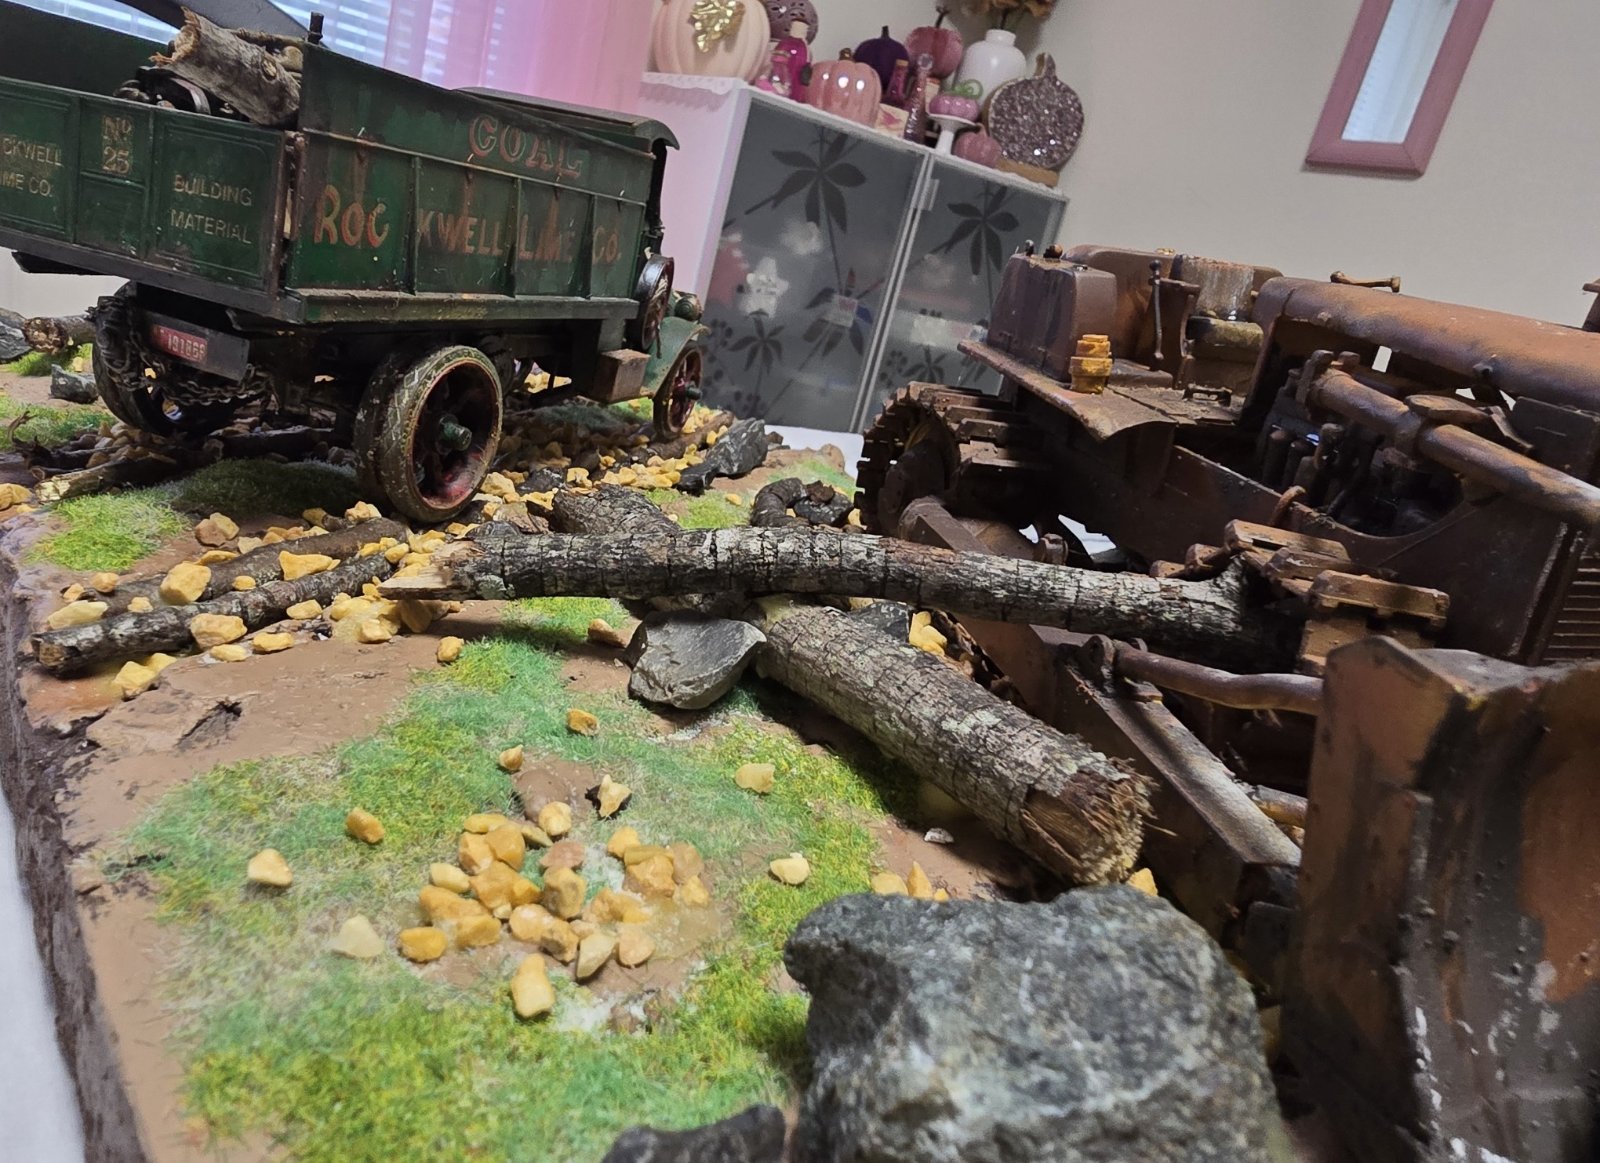
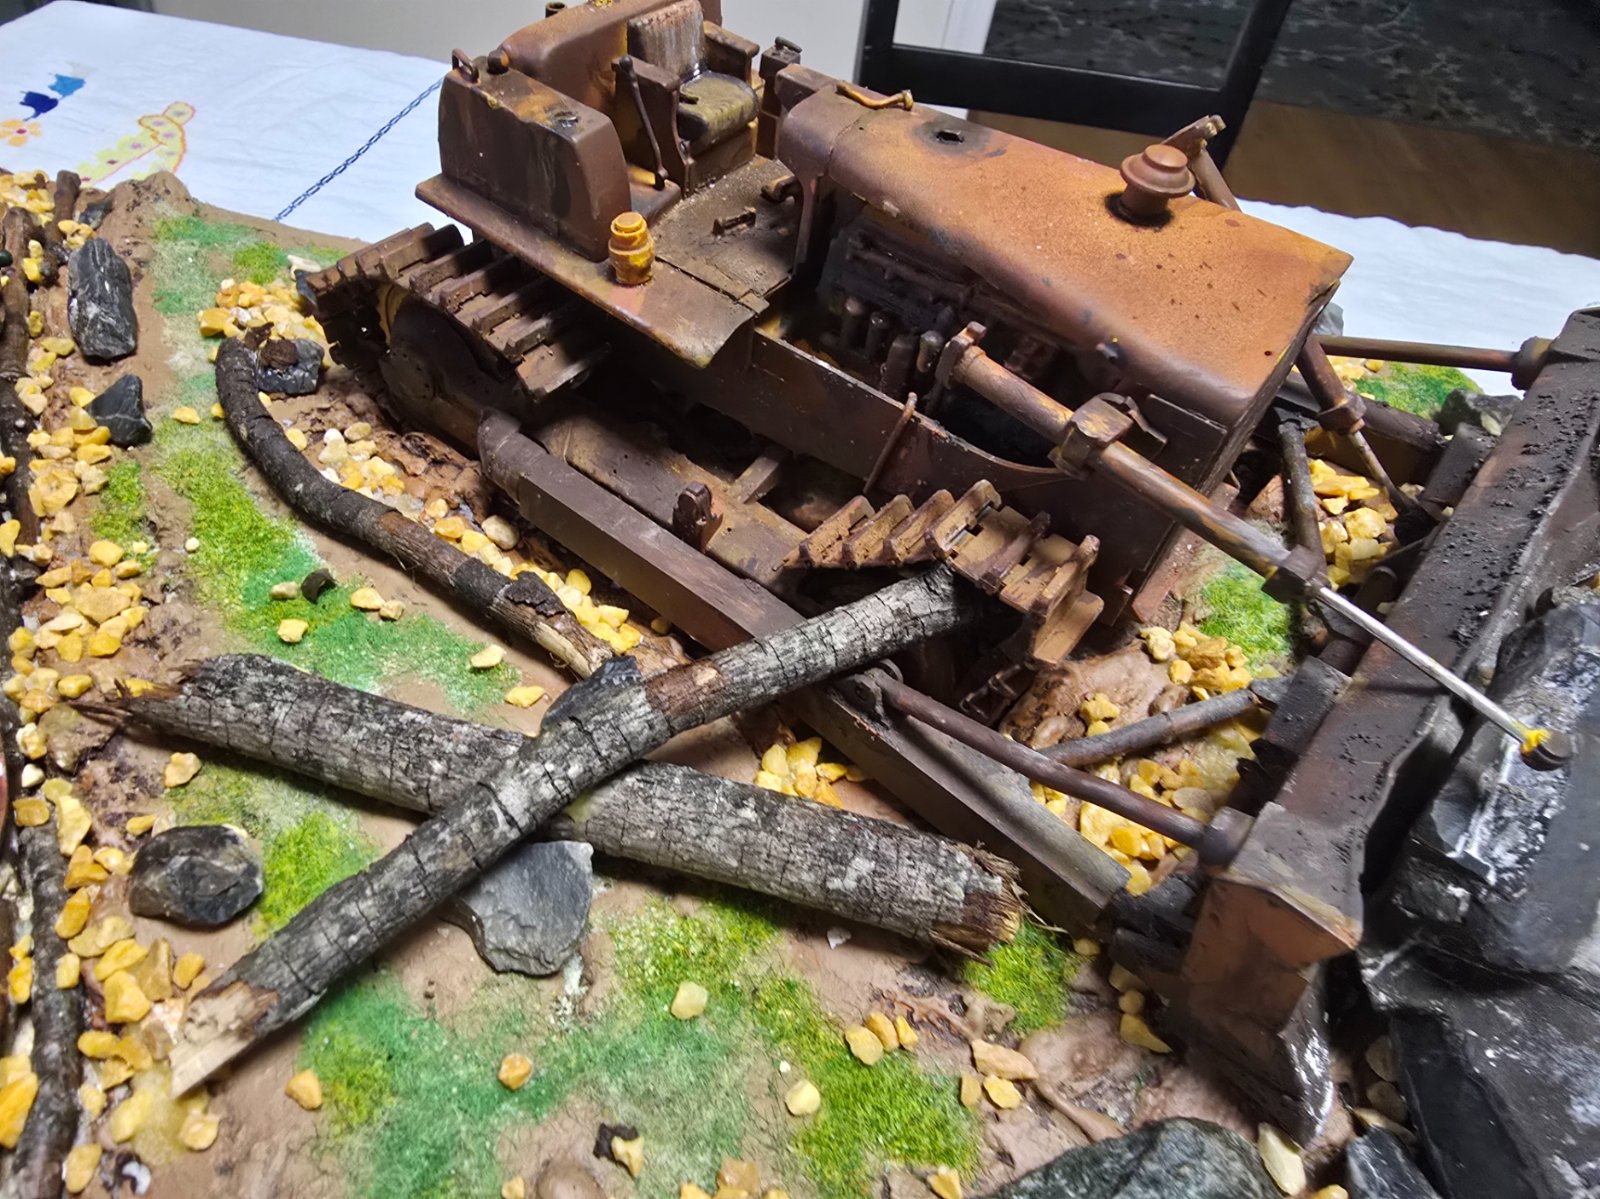
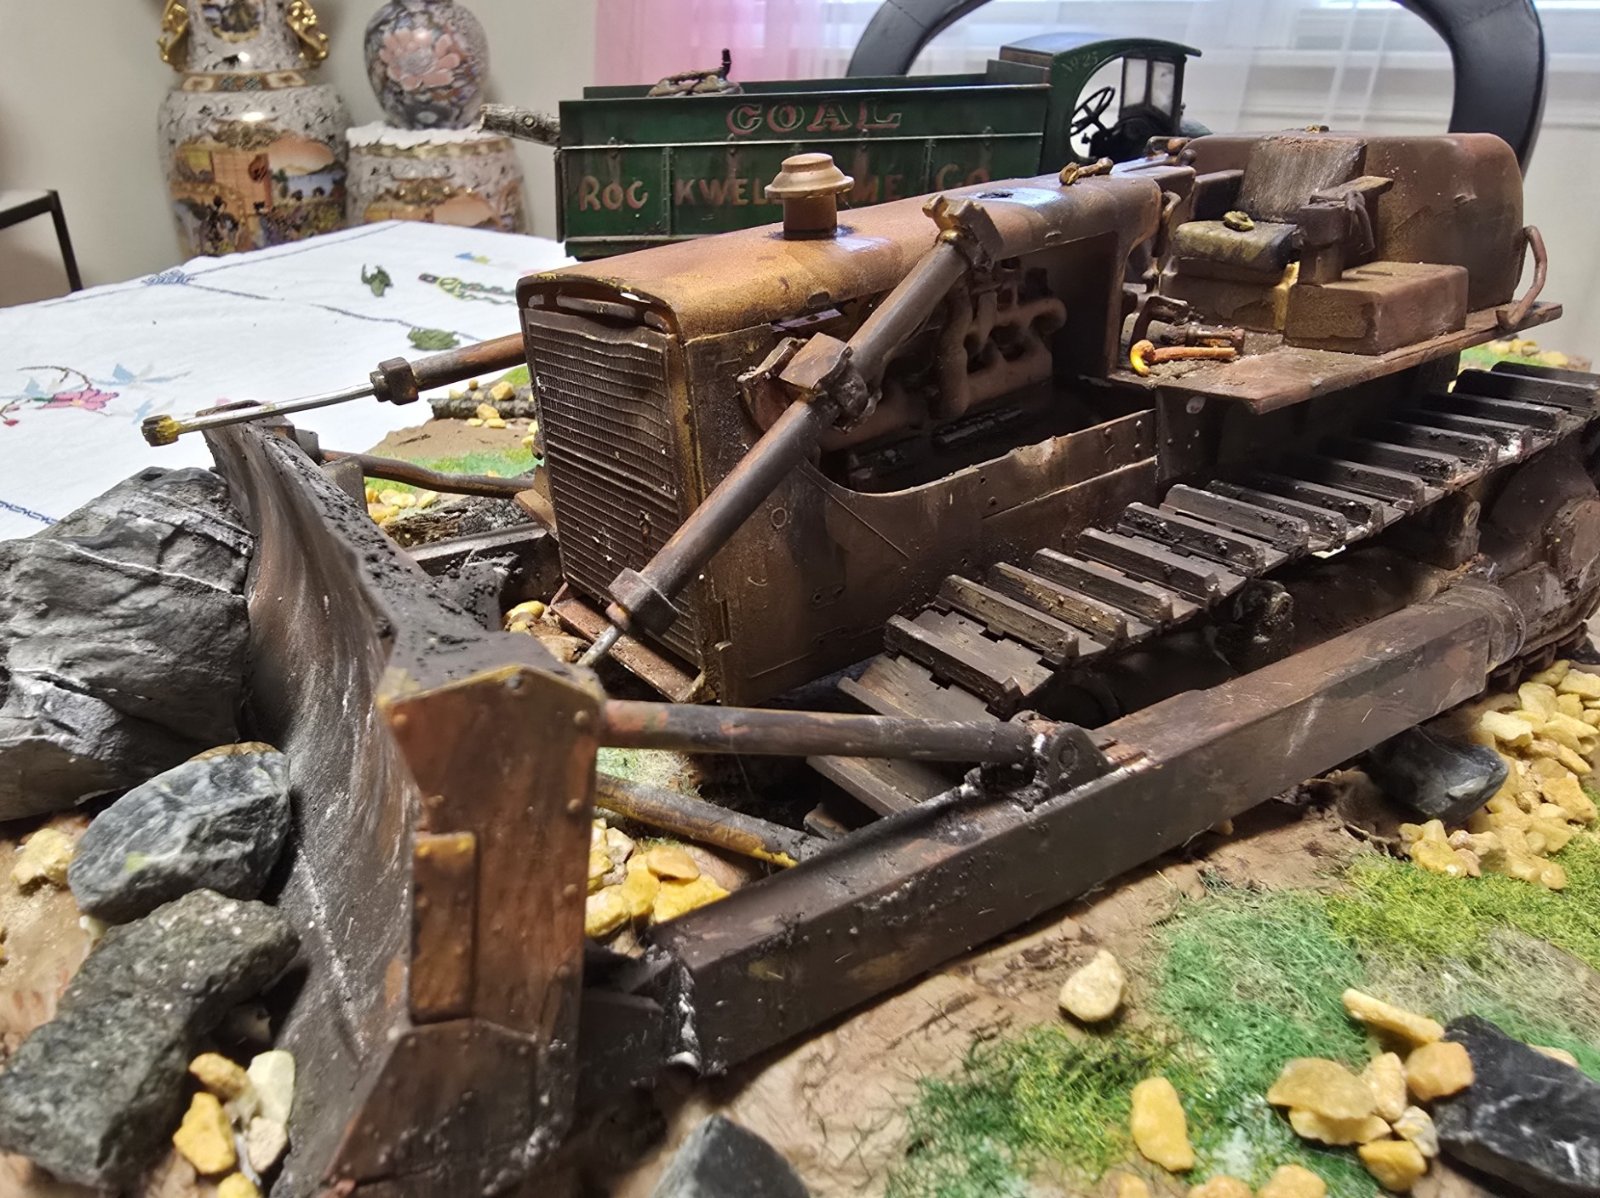
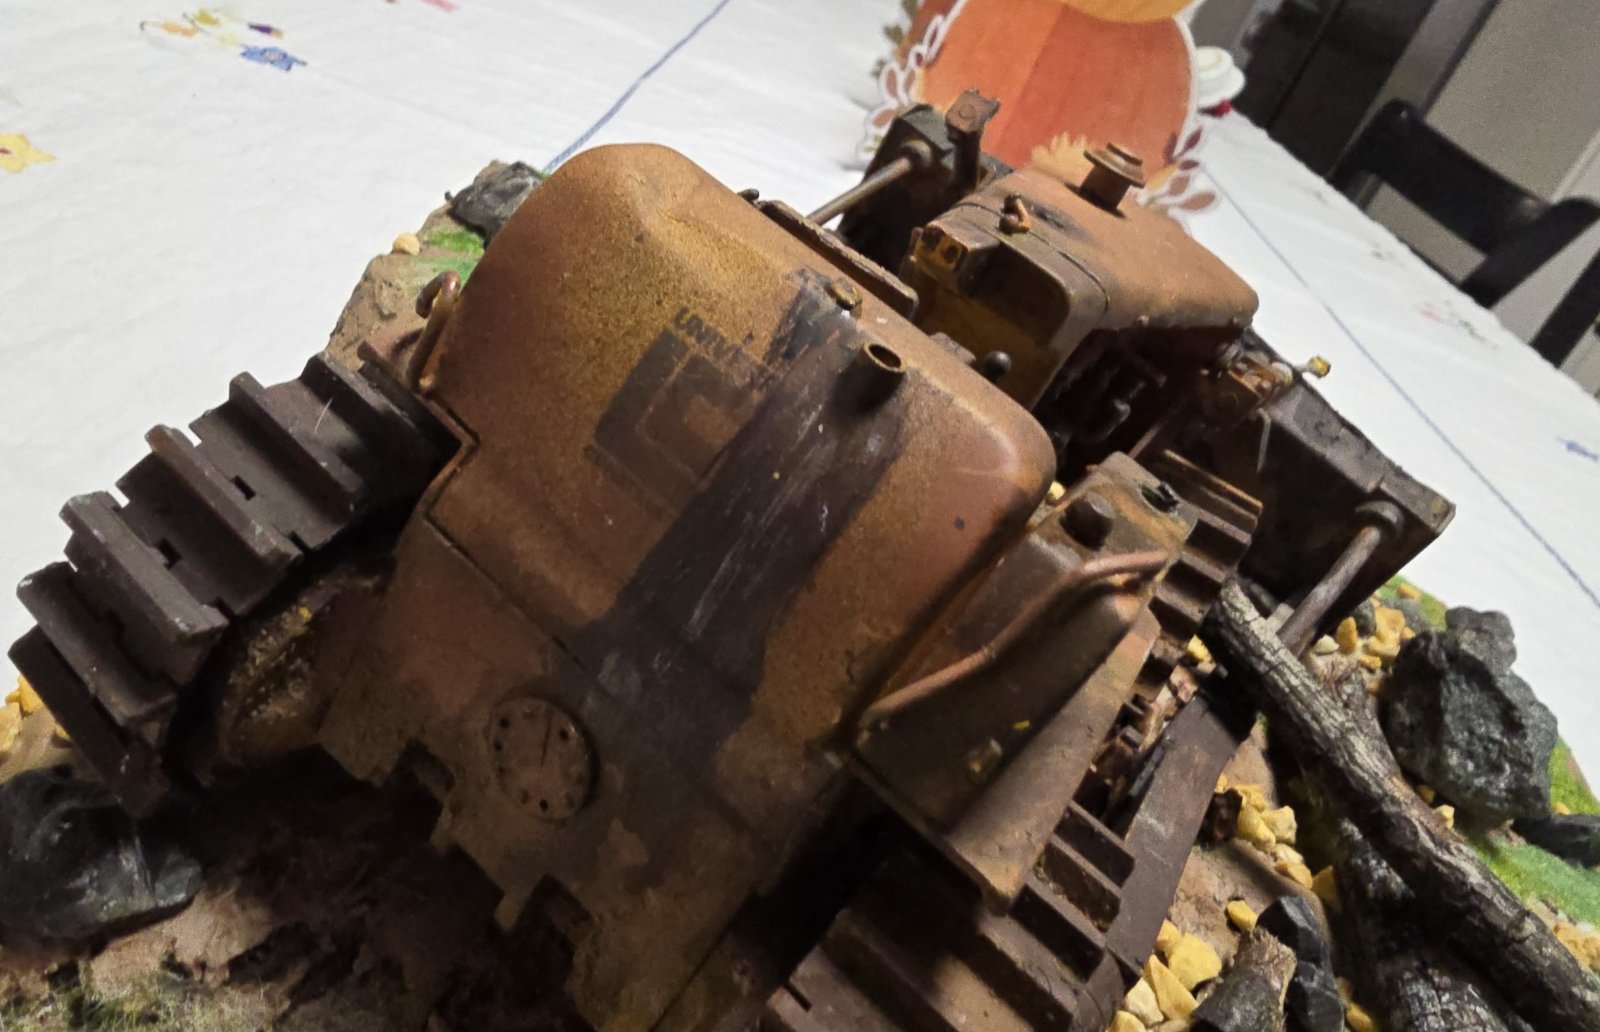
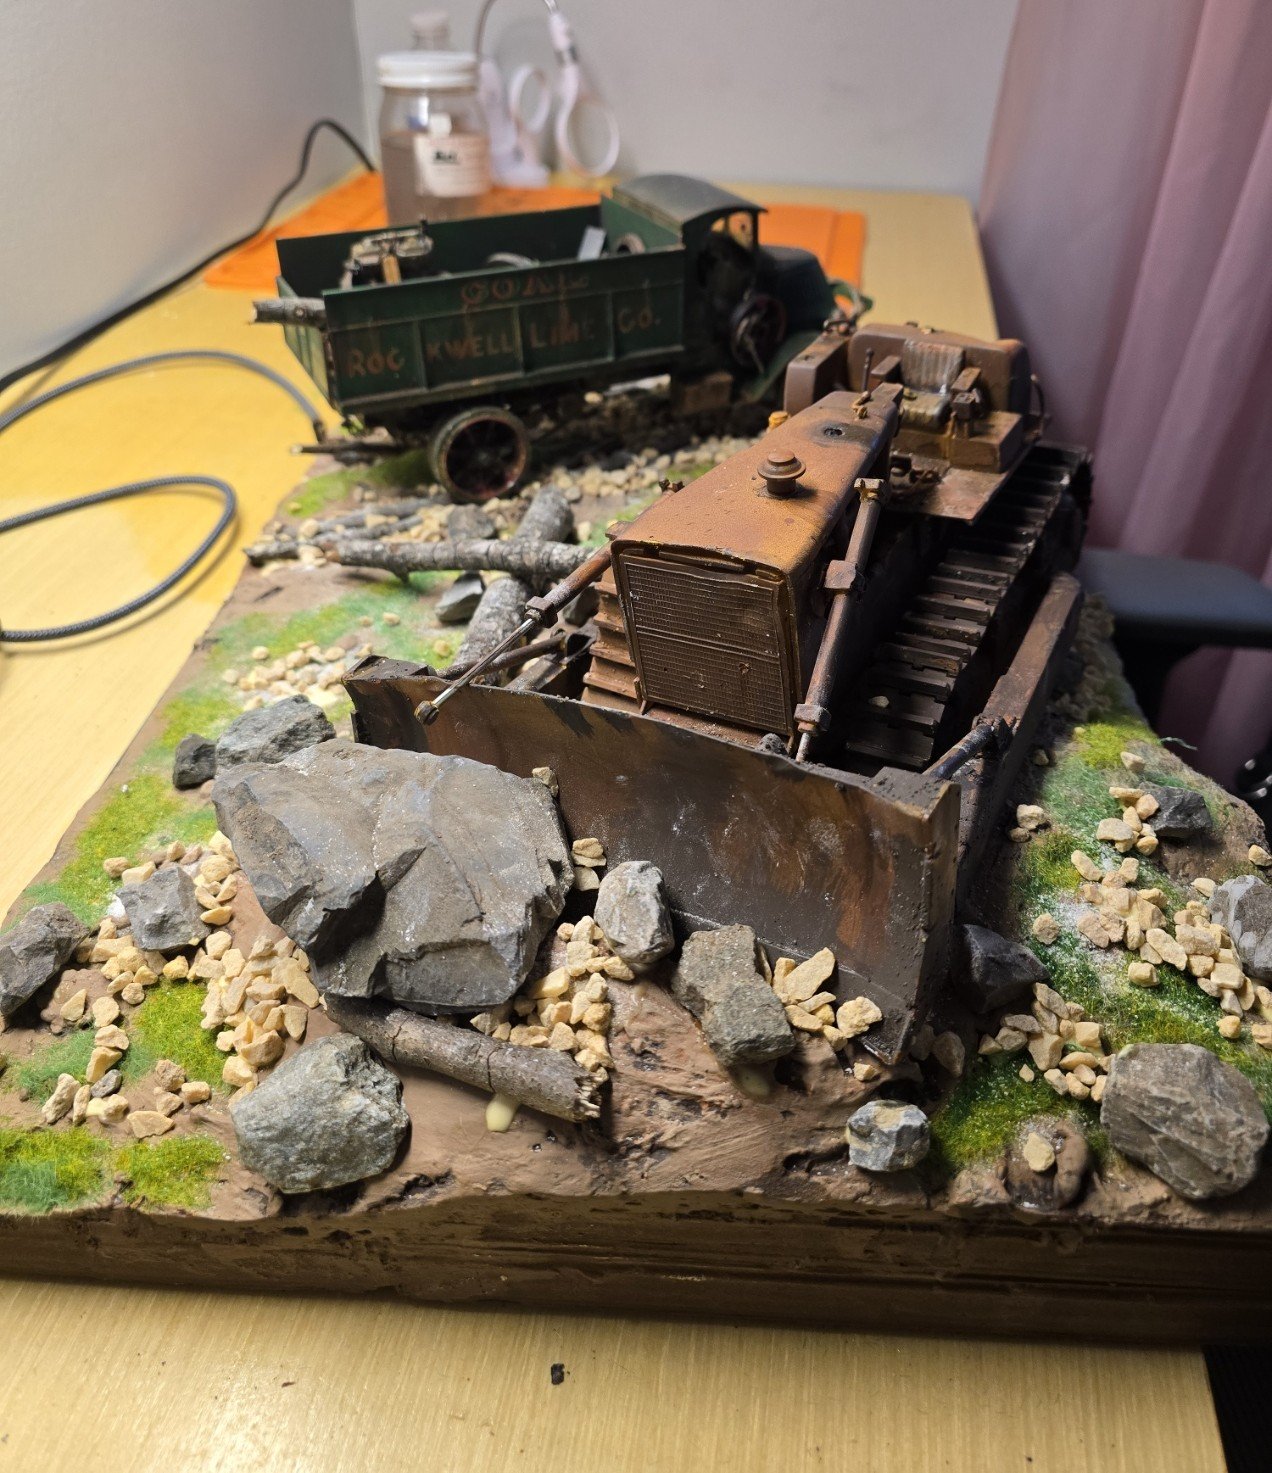
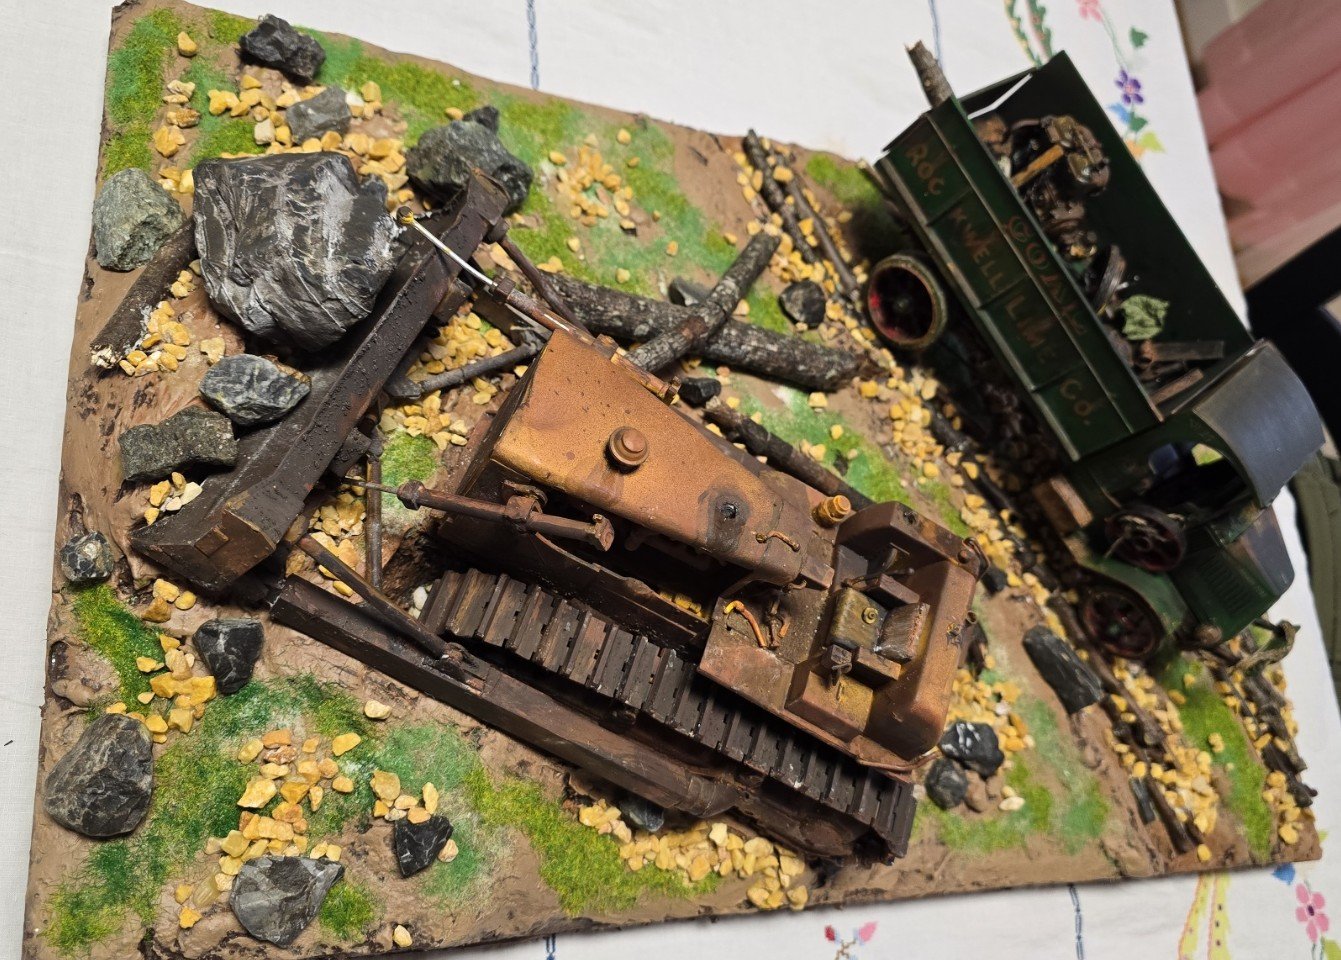
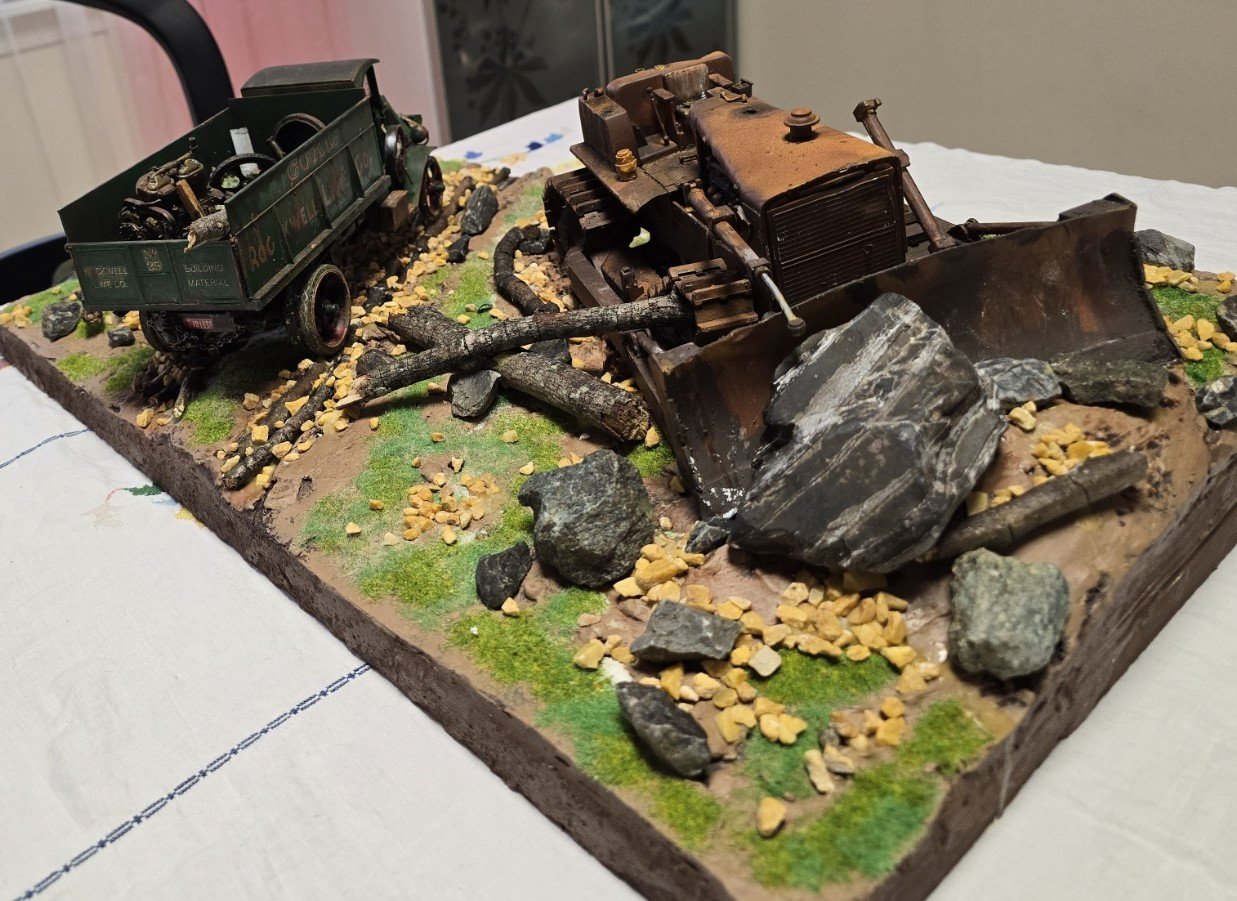
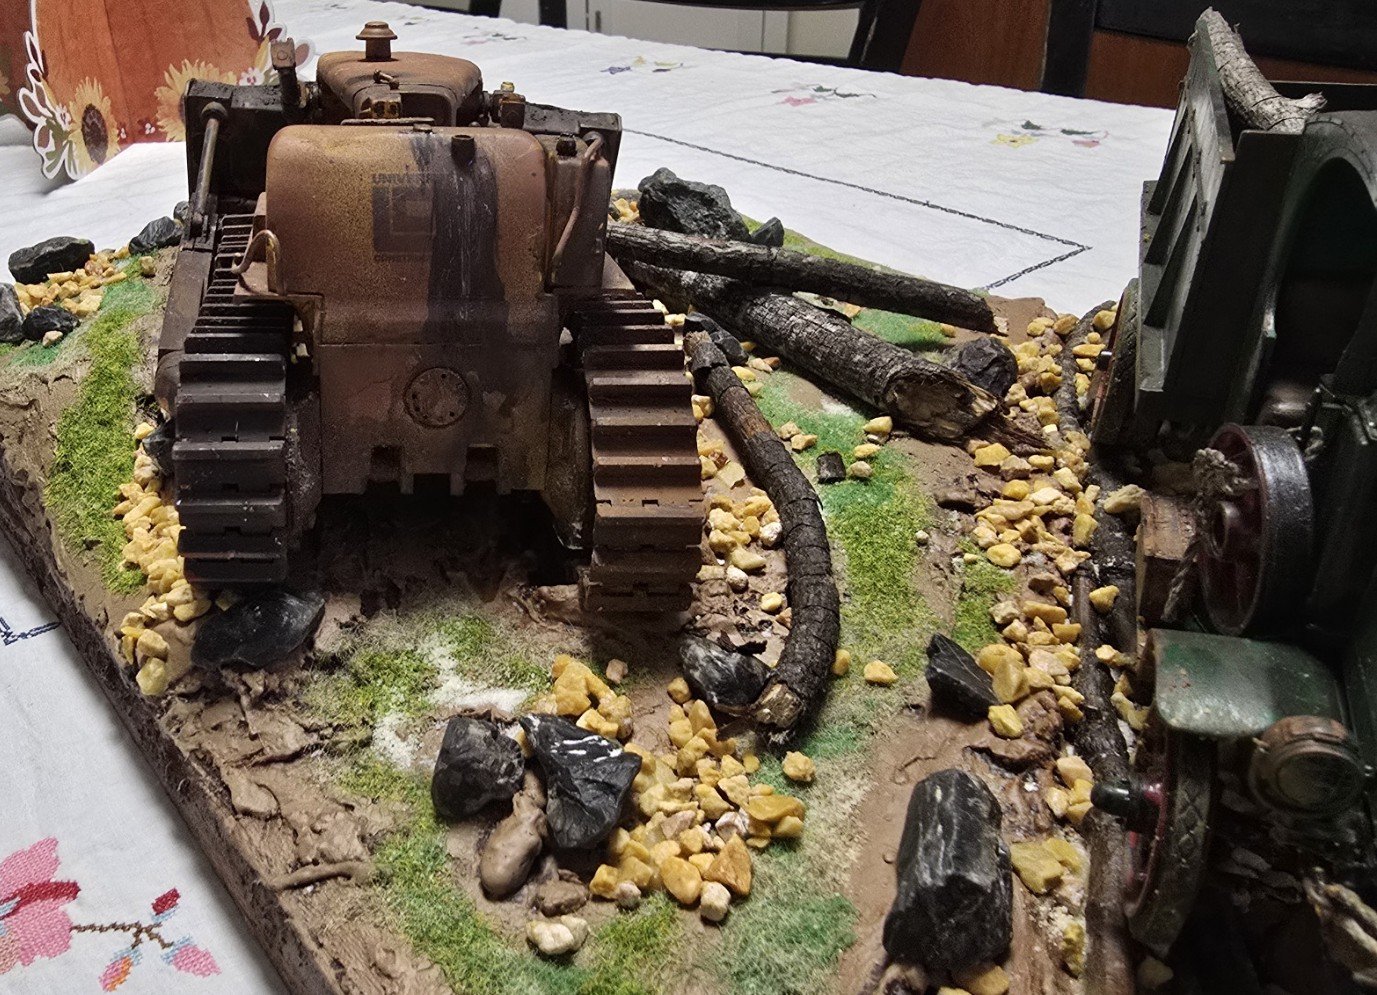
So the following pictures show the finished thing with all the grass, the sticks, the rocks, the big boulder that apparently led to the demise of the dozer, and lots of glue and clear coat and….

Most of all, imagination!

Enjoy

1.jpg


These are mostly random, no set order, just the ones i liked the best.

Oh, looky there, must be Fall from the looks of the decorations in the back...so now my secret is out, I completed this thing 6 months ago. (took me that long to get around to posting this, sorry for being so lazy)


2.jpg


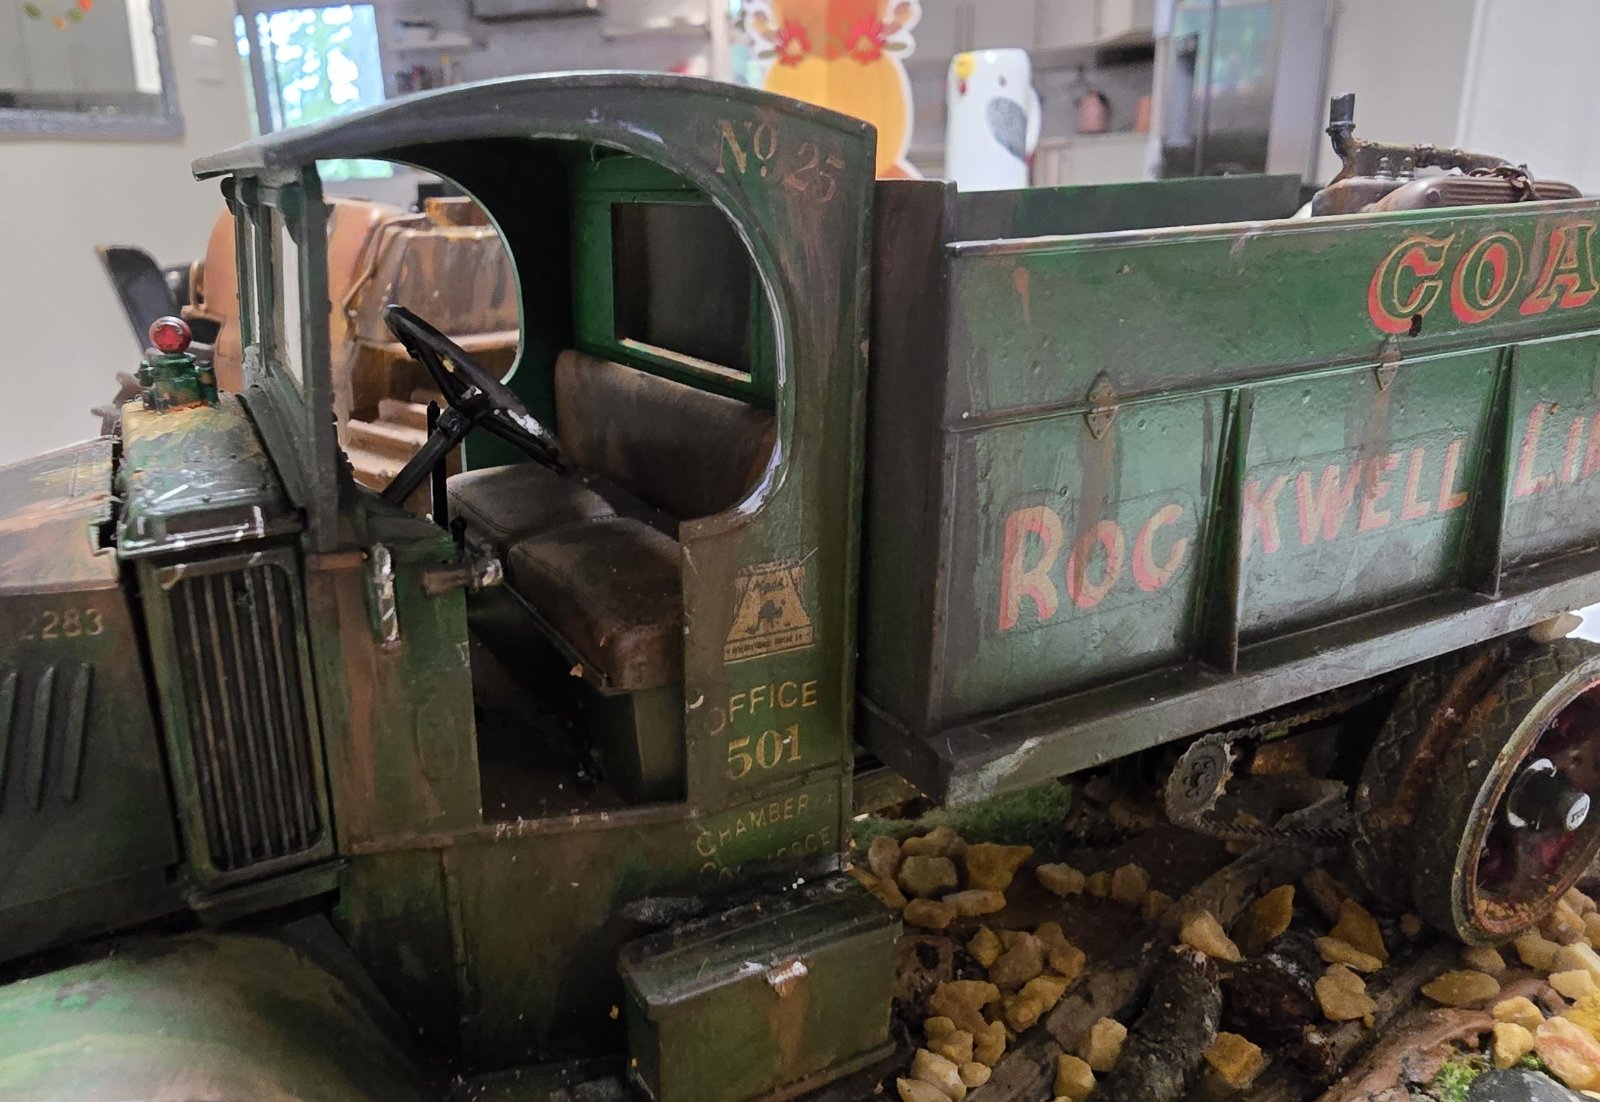
I am sort of proud of the detail on the truck. Hope you all like it also. This is my first time to seriously waether a vehcicle to this level.


3.jpg


@BarleyBop, here is the dozer in its forever resting place. in retrospect, I should have added on some grafitti, I may some day in the future. If I do, you wil be the first to know.


4.jpg


Sticks and stones may break my bones, but please use kind words ... this is my first diorama : )


5.jpg


If you're like me, you probably don't like those little tan stones everywhere. Or at least dont like the way they look. I used them because I paid for them. If I were to do something like this again, i would just scavange from outside or maybe from the stone aisle in the building store (if they let me)


6.jpg


Wonder whats been leaking from that tank, hopefully the environmental police don't catch on....


7.jpg


The driverless truck driving by....


8.jpg


9.jpg


There's that mouse pad again


10.jpg


The next post will be just some pictures. I will keep my mouth shut.
 
Last edited:
As I said, just the pictures.

Although, I am open to hear what you have to say: please let me know what went right, what went wrong and what I can do to improve the next one!

13.jpg


14.jpg


16.jpg


17.jpg


18.jpg


19.jpg


21.jpg


22.jpg


And thats it for now.

I have a few more completed models in the wing that I will at some point post the pictures of the final build. No in-progress photos as I never did that sort of thing until I became active on this forum.

By!
 

Attachments

  • 15.jpg
    15.jpg
    264.2 KB
  • 20.jpg
    20.jpg
    390.4 KB
As I said, just the pictures.

Although, I am open to hear what you have to say: please let me know what went right, what went wrong and what I can do to improve the next one!

View attachment 181771


View attachment 181772


View attachment 181774


View attachment 181775


View attachment 181776


View attachment 181777


View attachment 181779


View attachment 181780


And thats it for now.

I have a few more completed models in the wing that I will at some point post the pictures of the final build. No in-progress photos as I never did that sort of thing until I became active on this forum.

By!
Mate you've done a great jo b with this, and just your first one. I've done a few and you learn a bit more with each one. Well done.
Cameron
 
Nice! you clearly had way too much fun!
Some great work on the vehicles, with plenty of elements in the dio to build a story.
I like wondering about the loose ends.

For next time, from what I know from landscape design, is that it helps (especially with the larger rocks) to partially bury them, and think about them as being revealed... even going so far as having them emerge at similar angles to the ground.
 
That's really good for a first diorama. I like the weathering on the models.
If you are not happy with all the tan stones. I would suggest painting some different colors. If you any of the brown paint left over you can make a wash and go over the stones as well, to help them blend in to the terrain. Weather them like you would on the models.
 
what I can do to improve the next one!
Embed the stones into the groundwork, rather than having them sit on top of it. This is easy to do by sprinkling them on while the groundwork is still wet, and pressing them down so they stick in it. Then paint them rather than leaving them in their natural colour.
 
That looks great! Well done!
Ok, heres your age test; in the picture below, who recognizes and/or remembers those cow graphics on the mouse pad?

Lol, thats the Gateway pattern if my aged memory serces correctly. 😉
I never had a Gateway, but those boxes were everywhere in the late 90's and early 2000's.
 
Well, there's a ton that went right from what I see, so just remember, this is fun, so no need to get bothered too much at the outcome. Since you asked, I will make a few suggestions. The layout works great and so does all the details, they just need to be in the proper proportion/scale from what I see. The bigger rocks around the truck should be smaller, larger ones outside of the wheel lanes, most of the time. The logs are a great idea, but would they naturally be there all up against and on that dozer? I would tone that down a bit. The grass work is fine, but could use some taller tufts here and there, and you've done an awesome job on the truck and dozer, very well done!

You should be very proud of this dio, it's pretty dang good for your first one out of the chute! Ruck On, Bby!

Cheers, Ski.
 
"If you're like me, you probably don't like those little tan stones everywhere. Or at least dont like the way they look."

Like @kevin says... either several washes to blend them into the surrounding rocks & environment or paint them with a heavy grey wash and dry brush with lighter grey or white. Also, if some of them were buried or sunk into the ground it might look a bit more natural.
I really like the dio but the tan/yellow rocks look too out of place.
Pretty nice for a first diorama.
Cheers
C.
 
Well, at long last, here is the final product!

This was also very much an on the fly type of project, I had some sketches as I noted earlier and a vision in my head.

Then finally as the dozer got placed in its final resting place and the USV (Unmanned Surface Vehicle) – recall my chagrin earlier regarding the dearth of usable 1/25 figures - is conveniently rolling past on its way from somewhere to somewhere

– with a load of who knows what –

Well I know what's in there, its scavenged parts from a partially built Mack Stake Truck that I got for nearly nothing from eBay.

You know, loading the back of that truck was another high point of this set up. I just started scavenging parts, chains, and general junk. The just loaded them up with my best efforts at rust, oil leaks and general malaise.

I liked doing that entire part, but please, we all have to suspend belief a little because who the heck lifted all that crap all the way up into that dump bed?

So the following pictures show the finished thing with all the grass, the sticks, the rocks, the big boulder that apparently led to the demise of the dozer, and lots of glue and clear coat and….

Most of all, imagination!

Enjoy

View attachment 181741

These are mostly random, no set order, just the ones i liked the best.

Oh, looky there, must be Fall from the looks of the decorations in the back...so now my secret is out, I completed this thing 6 months ago. (took me that long to get around to posting this, sorry for being so lazy)


View attachment 181742

I am sort of proud of the detail on the truck. Hope you all like it also. This is my first time to seriously waether a vehcicle to this level.


View attachment 181743

@BarleyBop, here is the dozer in its forever resting place. in retrospect, I should have added on some grafitti, I may some day in the future. If I do, you wil be the first to know.


View attachment 181744

Sticks and stones may break my bones, but please use kind words ... this is my first diorama : )


View attachment 181745

If you're like me, you probably don't like those little tan stones everywhere. Or at least dont like the way they look. I used them because I paid for them. If I were to do something like this again, i would just scavange from outside or maybe from the stone aisle in the building store (if they let me)


View attachment 181746


Wonder whats been leaking from that tank, hopefully the environmental police don't catch on....


View attachment 181747

The driverless truck driving by....


View attachment 181748


View attachment 181749


There's that mouse pad again


View attachment 181750


The next post will be just some pictures. I will keep my mouth shut.
WELL MR Beefy chicken i think your first dio looks great very realistic the way you have laid it all out

very well done sir i like a lot as i been stareing at the pics for a few mins to take in all the details brilliant so you wont have to worry about your next dio youve got it down to a T
atb
chrisb
 
Back
Top