Diorama with park Wall

FAUST

New Member
Joined
Nov 13, 2012
Messages
174
Ola Guys

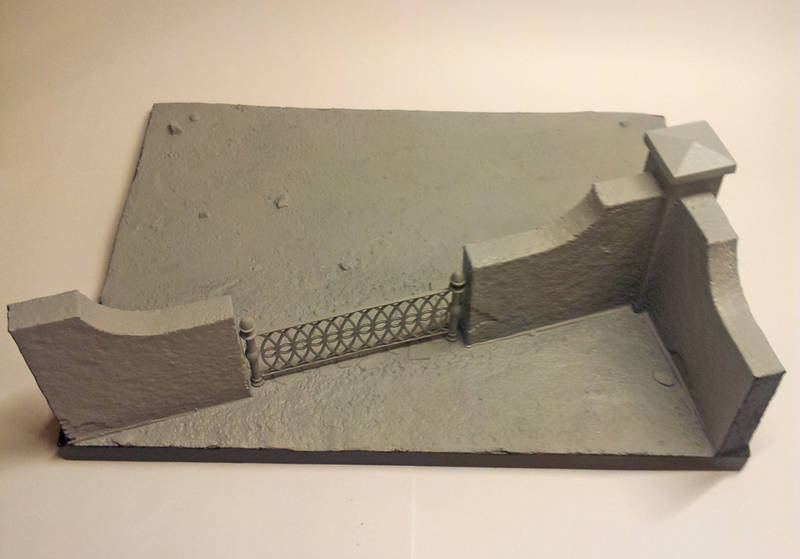
I received this kit to review for Armorama (will be online shortly) And I decided to make it a built review so people could get an idea of size. And while I was at it I decided to continue on it as a sort of inbetween project.
I really like these Miniart Diorama's. Sometimes you want a good result quick. And quicker then this you can't get.
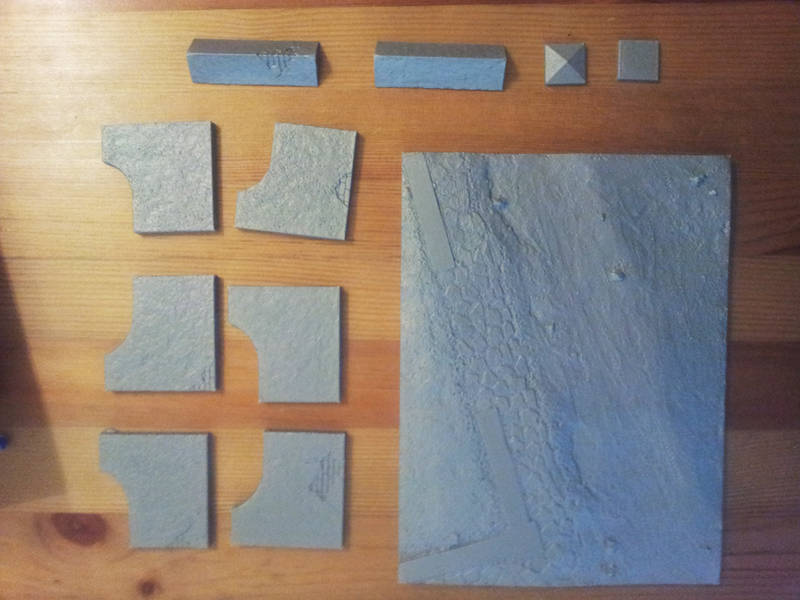
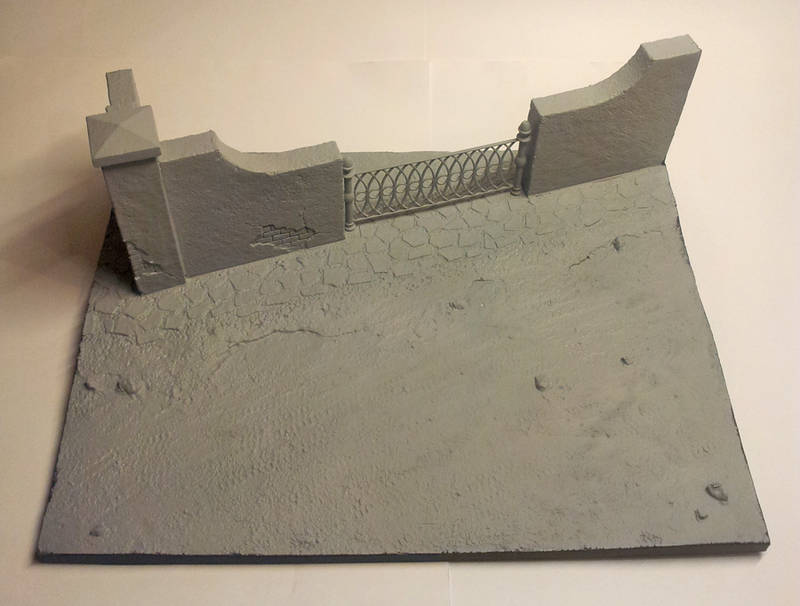
After 1,5/2 hours the diorama was ready for primer.
36051_021.jpg

36051_022.jpg

36051_023.jpg


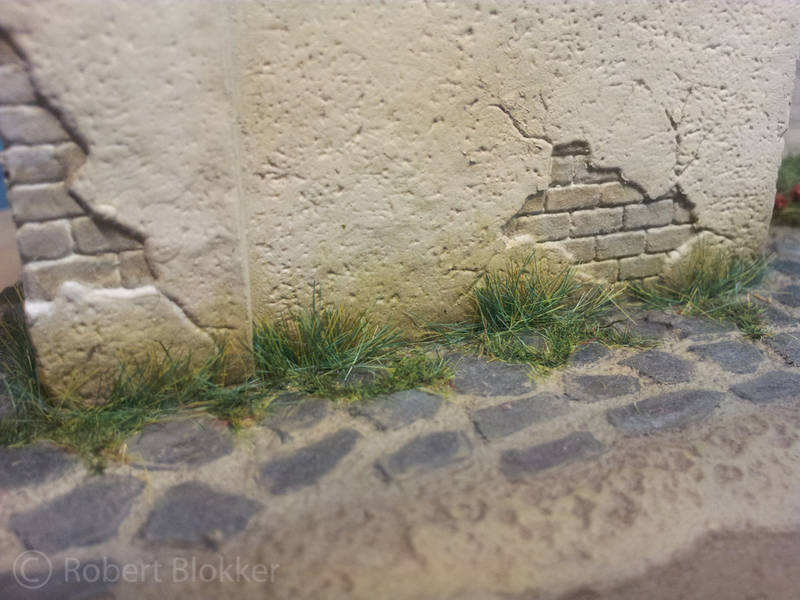
And this is where it's at after 2 evenings of hurling paint.
36051_030.jpg

36051_031.jpg

36051_032.jpg

36051_033.jpg


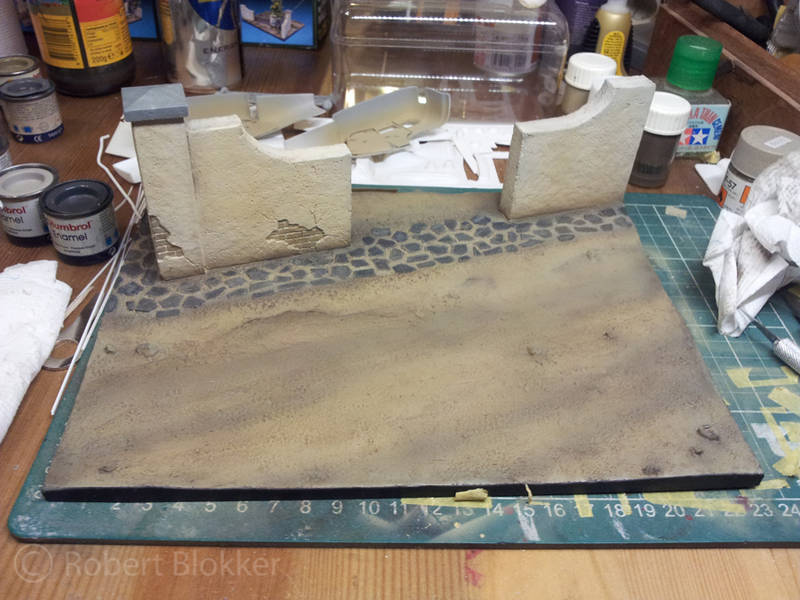
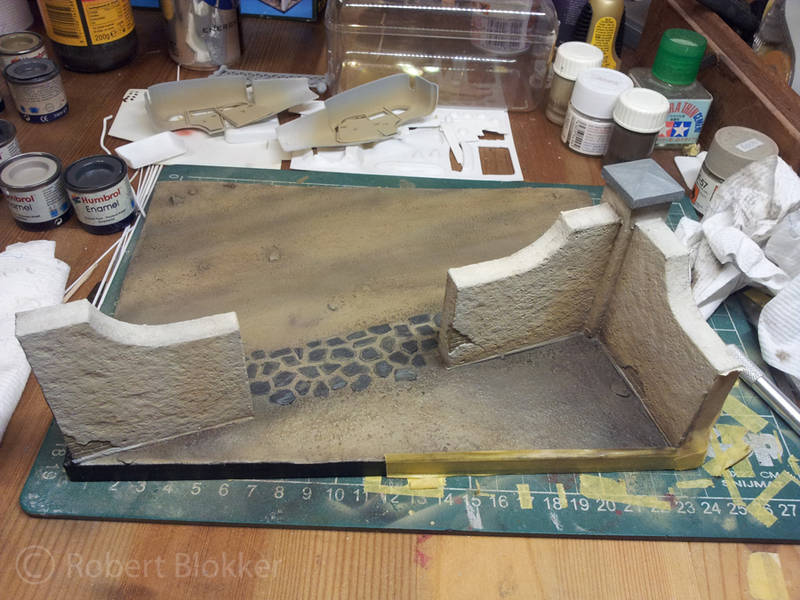
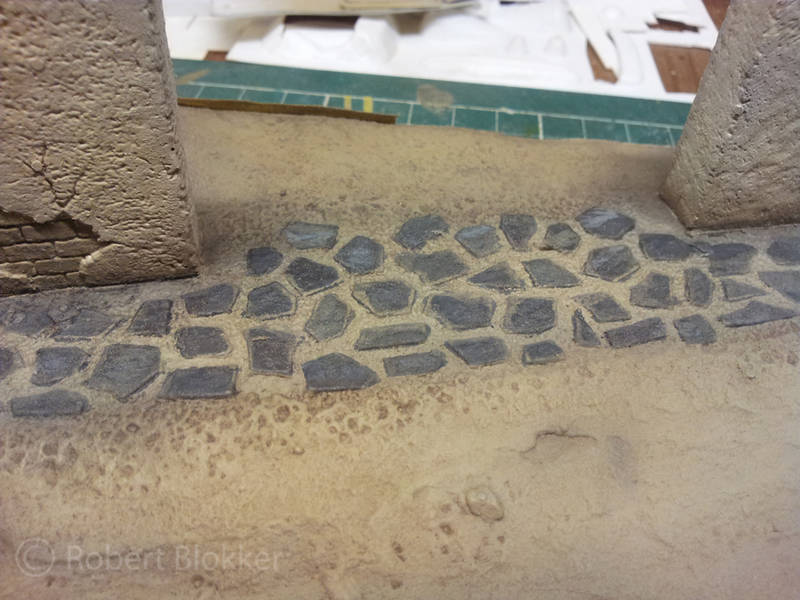
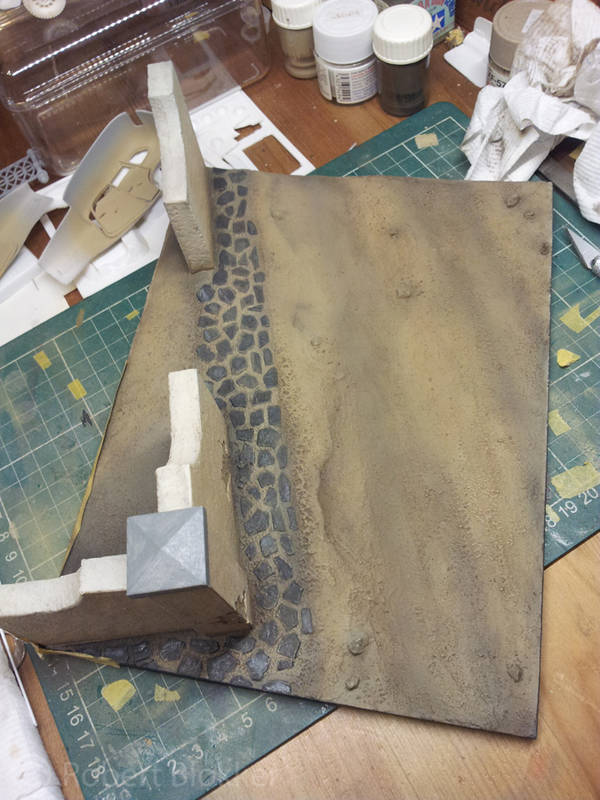
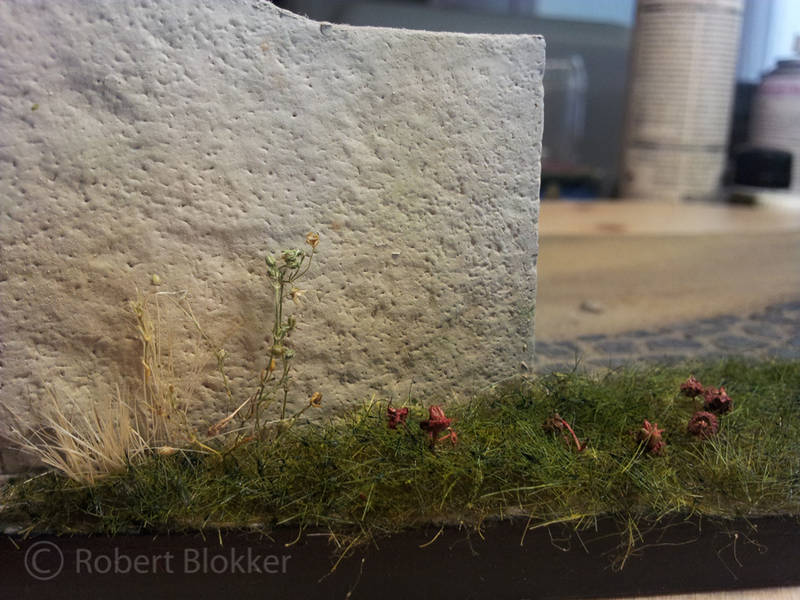
And now it is ready for some more weathering and vegetation. Going to do a first for me... I'm gonna built me a pinetree.

With friendly greetz

Robert Blokker
 
Hey there Robert,

Looking good. Have Miniart fixed the problem with all the dimples all over the faces of the parts? Or is that still prevalent. If not for having to fix all of those points, they would almost be perfect!
 
Faust, you really took care of any problems that were present, this looks great. I especially like the color spectrum you have going on there. Although I prefer to fabricate my own walls, etc., this looks like a very useful diorama wall set.

Cheers, Ski.
 
Ola Guys

Thanks for the comments

@ Geegad
Thanks for the compliments.

@ Elm City Hobbies
Nope the nubs are still there. They are placed there on purpose. Without those nubs the kits would have considerably less detail. So It is kinda a neccesary evil. I usually run it over some very coarse grade of sandingpapier a couple of times. Problem sorted out in seconds.

@ Steve
Thanks for the compliments. If you already like the colors wait till you see after the grass and other vegetation is added. I have just finished constructing the Pinetree and it looks awesome. Waiting for the hairspray to cure then I am hitting it with some Gloss coat and green.
Normally I love to create everything myself. But building a similar sized diorama with the same will take a whole lot longer then this. And with the speed I normally work it is nice to finish something every now and then. And especially with these kind of bases I feel it is not neccesary to reinvent the wheel every time.
 
I suppose it depends on the kit, I am building the Country Road dio, basically the same just a rock wall instead of the Park Wall, and all the little nubs all over the rocks....kind of detracting from the kit.


I was told that it was from the process they use to get the parts out of the molding process, instead of using pins in a traditional styrene molding production, they actually use little jets of air to push the part out of the vacuum mold, and the pins of air on the hot plastic is what causes these little nubs.
 
From what I know you really don't need a machine to pushout the sheets from the mould. Since the styrene cools down during the actually vacuum part of the proces. So you pick up a completely cooled down sheet from the masters. I always heard that those nubs were there to make sure the detail on the big flat areas get transferred to the styrene sheet before the edges are closed off between the Sheet and the edge of the master. The older Vacuform kits from Schmidt and Tonda all had them as well. And Vacuform machines were not half as sophisticated then as they are now.
 
It is weird though, because their older buildings and dio sets don't have those nubs on the parts, it is something that has only shown up in the molding process over the last year or so.
 
Hmmm you must have been very lucky.

I have built around 16 different of their buildings and diorama's both for myself as for others and I have never had one without those nubs.
 
Elm city hobbies and Faust, those nubs that you are talking about would that be a deterrent not to buy these kits?
I have never build a diorama base from miniart, but I'm seriously thinking about it.

Faust very nice work!!!

Zappa
 
Ola Zappa

Thanks for the compliments. Nope for me they are no detterent at all. On the big flat surfaces they are easily dealt with with a piece of coarse sandingpaper. On the corners you remove them with a flick of a hobbyknife. Because the styrene is a bit thinner here it often leaves a gap which you have to fill with a bit of putty (I find the Vallejo putty works well here since it has such a nice fine tip)
A little tip I would like to give you if you go down the vacuform route is make yourself a sanding board. Simply a piece of MDF roughly A4 size. Add doublesided tape and stick a coarse sandpaper on top of it.
When you cut out the Vacuform parts you sand them on the board. This way it gets a nice flat edge that makes aligning and glueing a breeze. (this also works a charm with casting blocks on resin parts and it is reusable. If the sandpaper is filled with dust simply run the Vacuumcleaner over it and it is good for use again.)
 
zappa said:
Elm city hobbies and Faust, those nubs that you are talking about would that be a deterrent not to buy these kits?
I have never build a diorama base from miniart, but I'm seriously thinking about it.

Faust very nice work!!!

Zappa

No, not at all they make very good, relatively easy and quick diorama/vignettes. I know alot of people will tell you that they are hard to build, but really they are not. The little pimples are just an extra step, and don't really take that long to take care of, I just question the need for them, when their older kits don't have them.

Lord knows I have enough of the diorama sets and buildings in my stash. They also lend to some scratch building if you want, like floors, interiors, etc, etc, to add to the realism of it all.
 
I have made the pinetree that goes in the park section behind the wall in the corner. It was a kit that provided three trunks and the branch material. Sadly the branches were very dried out and extremely fragile. Took me a bit of time to make something out of it. But I'm pretty happy with the result.
535632_337561763028419_2117284697_n.jpg
 
Yep, I had no doubt Faust. Seen your work before, always a pleasure. Keep er rollin and I got this bookmarked for further progression.

Cheers, Ski.
 
Thank you sir for the confidence.
Currently the vegetation works are in full swing. Update on that will follow soon.
 
Ola Guys

I made a few photographs of the vegetation. Far from finished but it starts to look like something.
36051_037.jpg

36051_036.jpg

36051_038.jpg


And I noticed that I forgot to fill a hole. Need to fix that.

More vegetation will follow soon
 
You weren't kiddin Faust, looks great. I kinda think if you don't get the veggies right the whole salad gets messed up. This is taking shape rather well buddy.

Cheers, Ski.
 
@ Steve
LOL... That is a rather good analogy and it is quite true as well.

@ Elm city hobbies
I have used 4 products so far. The grass in the park section is Heki Decovlies. Expensive but really awesome stuff.
The tall yellow dry grass a bristles of a cheap Brush from the DIY store
The taller grass against the wall is medium sized static grass dark green
The smaller grass between the slate tiles is short static grass light green darkened with dark slime green from AK Interactive
 

Latest posts

Back
Top