Builing Italeri's PT 109: The Last Night

Nice kit TRM, I have the matching Schnellboot and Vosper in my stash. I will be following your progress closely and looking forward to see you tackle this beast. Good luck!
 
Shane - It sure does help to have the background...sometimes though I can get caught up in the research and forget I need to build something!! ;D

Chris - Thanks!! Huge is more like it!! Have not made it to the Cove for many years...but planning one now!! Might have some local-yokels that are interested in making a trip together!! ;)

Dan - Thanks Dan!! Couple of nice kits there!! Gald to have you along for the ride!! ;)
 
TRM said:
Shane - It sure does help to have the background...sometimes though I can get caught up in the research and forget I need to build something!! ;D

I know what you mean lol spent more time researching a TET offensive dio a few years back than actually building it :p
 
Usually I take the time prior to building something to get all that stuff done....this one kind of fell in my lap and just needing building ;D There are more than one on the shelves that fell to the research bug!! ::)
 
I know what you mean bud lol

I have a stowage container of models waiting for me to finish the paper work for :p
 
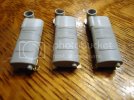
Glad to see you make Gee! ;) I hope to have some more pics tonight. Been working on the hull. Managed to get the cheeks on and clean up the 6 mufflers and some of the tiny surface pieces!
 
OK...a bit of an update!! For the past couple day I have been...well let's call it faring the hull. I managed to finish the sanding on the deck...all smooth now. So, moving forward I wanted to set the deck in place. The deck actually has 7 screws. The two in the rear just above the transom had caps that need to be installed.
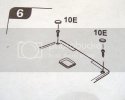
L70paint010.jpg

This is a picture taken from the "corrections page" Anyone who seen my review may remember seeing this page. Some parts on Sprue(s) E were incorrectly marked. These two caps are just two.

Since I sanded off the raised detail around the deck...and these two caps are to be installed into that raised detail, I needed to thin the caps out. I used a needle file and finished off with sandpaper on the bottom side of the plug.
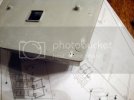
L70paint006.jpg

You can see this still is above the deck after gluing. Again with the file...taking my time I was able to bring most of it down then finishing it off with increasingly finer grade of sandpaper til it was smooth.
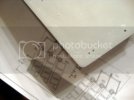
L70paint001.jpg

Next came another step that requires the use of the corrections page. The Spray Rail pieces that run fore to aft were incorrectly labeled as well. These are slightly different in thickness and will require a little sanding to smooth out. The front miter on the rails was not lining up to well, but after some prodding and a touch of Tamiya white it went together. You can see the installed rail boards in the last picture in this post.

This brings me to running the hull demarcation line. I found more often than not, if you take the time to set the ship/boat in the correct angle it will be sitting in the water, here I placed it on the supplied display stand, then you can easily mark the line with a couple of cheap tools.
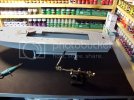
L70paint012.jpg

I happen to have one of the magnifying glass/alligator clip second hand thing (that I don't use for anything but this any more) and attach a pencil to one side of the arm. You can easily make one from a block of wood with a hole drilled for the pencil at the correct height. I have a rotor laser too....used it...it works but it's just as easy to do this. Keen eyed individuals will see I am using a pen....because round one (thinking I should try something different when this works) failed.
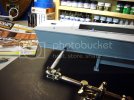
L70paint013.jpg

The instructions call for a 25mm space between the keel and the demarcation line. The easiest place to start your line is on the transom. Then simply transfer the line around. This is what you set the height of you magical-pencil-holding waterline marking tool to.
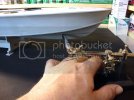
L70paint014.jpg

Simply slide the tool with your hand along the bench and the line is transfer to the boat. Since these PT's sit nose up and the water is level the line stays straight. The PT is just a little different from other ship that I have done. The curve to the bow comes out almost flat to the Spray rail. From the side the line will look straight but from underneath, it's not.
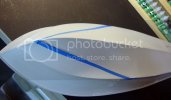
L70paint018.jpg

I placed the tape here for a visual as this will need to be primed first and then taped off to paint the Copperoyd ...redish-brown color of the hull.

That its that for the moment other than a couple of add-on fixtures to the hull which you can just about make out in the pictures above and I have begun cleaning the mufflers and the linkage up. To ease the painting, the mufflers will not go on until the hull is painted.

Hope to have some more soon...thanks for tuning in!!
 
Hi T

wow it really is a monster of a model :eek:

really nice work on the hull, it will all pay off mate :)


keep up the great work,


shane.
 
Thanks Shane!! LOL...I keep laughing at the size of this!! I have build meeting to attend tomorrow, so I just packed up the sprue with some deck fixtures to cut and clean up while I am there. THis will give me a jump I hope to getting the deck stuff on!! ;)
 
After working for a bit on a project to help out a good friend...yes, model related too!! ;) I did finally sit with the Big Girls here. My problem was the brackets that held the mufflers off the transom. There is one on the kit and this is "post" style. I needed to make up some U-shaped brackets from what I seen a picture.

With some leftover PE I made an attempt.

015.jpg

My apologies for the table shot...too late to run down and snap something clean.

017.jpg

You can see a small silver washer type item up at the top of these.....well, it's a washer...LOL!! Where the exhaust pipe connect to the Transom, there appeared to be a cover plate around the pipe...think this will work out!

Thanks for having a peek!!!
 
And why not a washer if a washer works well ;D ....Top work my man ;)

Chris.
 
T- the epic journey continues ;D

looking very good !


cant wait to see more


cheers,


shane.
 
Thanks Shane!! The journey is always FUN!! I hope to be on this tonight. I am close to painting the hull. I have ordered some paints and should arrive by next week. In the meantime I have the topside to clean up and get together next!! ;)
 
T - cant wait to the paint man, these monsters always look amazing when a lick of paint is on, any options for the paint scheme for pt 109 ?
 
Well at this time she would have had the Tropical green deck and a standard grey below...with "copperoid" (fancy way of saying hull red) below the water line. I wanted to go another route with camo but I am happy with my decision. The weathering will be fun! Used boat, height of the war...loads of potential!!! ;)
 
Sorry I havnt looked in T! This is looking great, I love how you make complicated problems so easy like the anti foul line. Great ;D
 
Thanks John!! No worries on the "checking in" we all seem to be a bit busy at the moment!! ;)
 

Latest posts

Back
Top