You are using an out of date browser. It may not display this or other websites correctly.
You should upgrade or use an alternative browser.
You should upgrade or use an alternative browser.
BSC 1/48 Harrier.
- Thread starter Aeroteto
- Start date
hilld
New Member
- Joined
- Dec 26, 2010
- Messages
- 227
Aeroteto great detailing. That seat absolutely rocks. Keep the photos coming!
NecronautDrummer
Member
- Joined
- Sep 25, 2011
- Messages
- 804
Excellent WIP!
Grendels
Active Member
- Joined
- Nov 24, 2009
- Messages
- 9,092
Agreed!
wyoroy
New Member
- Joined
- Dec 31, 2011
- Messages
- 799
Very nice work. The resin really kicks the kit into highgear, nice.
thanks guys. 
I find this is not an easy model, so advance is a little more slow than my average building.
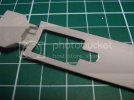
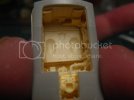
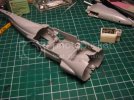
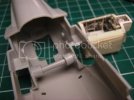
Ok. I close the cockpit halves, but the resin wheel bay is a bit wider than the space inside the halves, even after been sanded almost translucent. :-\
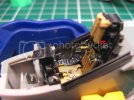
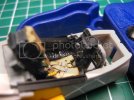
The resin wheel bay was glued unpainted, in order to fill and sand some voids where the piece don't fits well.
This is the first time I do this way, so wish me luck!
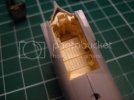
I find this is not an easy model, so advance is a little more slow than my average building.
Ok. I close the cockpit halves, but the resin wheel bay is a bit wider than the space inside the halves, even after been sanded almost translucent. :-\


The resin wheel bay was glued unpainted, in order to fill and sand some voids where the piece don't fits well.
This is the first time I do this way, so wish me luck!

FlipFlop
I like my planes like my women - dirty!
- Joined
- Jan 31, 2012
- Messages
- 138
Too bad you had to use kits tub, but it doesn't matter - the office looks great nevertheless! To my eyes at least... 
Cheers!
Cheers!
wyoroy
New Member
- Joined
- Dec 31, 2011
- Messages
- 799
I'm sure you will get everything to fit, looks good so far.
Glorfindel
Active Member
- Joined
- May 2, 2011
- Messages
- 1,502
Judges chamber looks great.
I can´t finish my entry to 2012 BSC......... I suck! :'(
So, I decided to finish this kit ASAP.
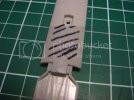
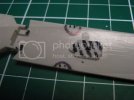
I corrected the rear fuselage drain hole in both sides, Hasegawa molded them backwards.
Then open the molded grille and added fine steel wire mesh, I think it looks much better.
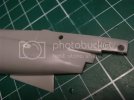
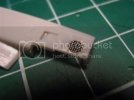
Paint the wheel bays.
I painted in a mix of MM Camouflage Gray and White, but don´t have a clue wich color are those bottles in the main wheel bay, please somebody help! ???
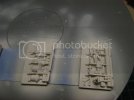
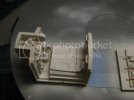
So, I decided to finish this kit ASAP.
I corrected the rear fuselage drain hole in both sides, Hasegawa molded them backwards.
Then open the molded grille and added fine steel wire mesh, I think it looks much better.


Paint the wheel bays.
I painted in a mix of MM Camouflage Gray and White, but don´t have a clue wich color are those bottles in the main wheel bay, please somebody help! ???


Quaralane
Well-Known Member
- Joined
- May 22, 2009
- Messages
- 11,262
Looks like your starting to shape this thing up
I paint the wheel bays.
I know they are not 100% right, but still looks good to my eye.
I follow the same technique as for the cockpit.
I think pure white is a bit too harsh, so I mix MM enamel camouflage gray and flat white 50-50, and think this mix looks very good.
This is not a big up date, but I´m still on the build ;D
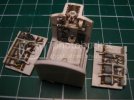
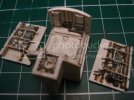
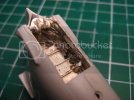


PANZERMAN
My Karma ran over my Dogma.
- Joined
- Dec 23, 2011
- Messages
- 437
The details you've added has the Harrier looking sweet. The cockpit looks great. Nice inclusion
of resin parts and painting. Very realistic. Keep up the good work. Bill
of resin parts and painting. Very realistic. Keep up the good work. Bill
Grendels
Active Member
- Joined
- Nov 24, 2009
- Messages
- 9,092
Looks good!
Quaralane
Well-Known Member
- Joined
- May 22, 2009
- Messages
- 11,262
Definitely looking good.
Never was fond of the look of the Harrier, but you're detailing her up nicely
Never was fond of the look of the Harrier, but you're detailing her up nicely
Thanks guys!! ;D
I really appreciate your words!
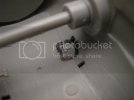
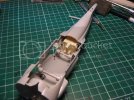
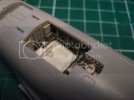
To glue the main wheel bay in place, you need to shave the aft locating tabs.
I didn´t take a photo, but mark in a circle the front tabs, so you get the idea.
Shave the rear tabs, they will interfere in the fit.
I glue the resin bay with thin CA, by capillarity it seals the piece and fix it in place.


Quaralane
Well-Known Member
- Joined
- May 22, 2009
- Messages
- 11,262
Bay looks good
thanks Quaralane.
To glue the front fuselage piece to the rear one, I need to temporally tape the upper aft piece of the cockpit.
It needs to be align in the rear so the wings can fit in place without any trouble.
Carefully align the bottom where the front fuselage meets with the rear and glue it.
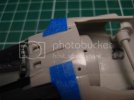
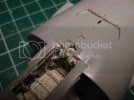
When the glue is still soft, check the aling of the front piece.
When you´re happy with it, put more glue in the upper side and where the front piece meets with the fan face.
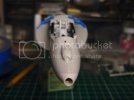
Now, I have a question:
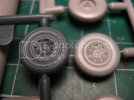
I have the Monogram tires and obviously the Hasegawa ones.
I like the Monogram tires the most, but I don´t know if the Dunlop brand lettering is correct.
I can´t find a good picture to check this out.
So, I can use the Monogram tires or should I use the Hasegawa ones?
To glue the front fuselage piece to the rear one, I need to temporally tape the upper aft piece of the cockpit.
It needs to be align in the rear so the wings can fit in place without any trouble.
Carefully align the bottom where the front fuselage meets with the rear and glue it.


When the glue is still soft, check the aling of the front piece.
When you´re happy with it, put more glue in the upper side and where the front piece meets with the fan face.

Now, I have a question:
I have the Monogram tires and obviously the Hasegawa ones.
I like the Monogram tires the most, but I don´t know if the Dunlop brand lettering is correct.
I can´t find a good picture to check this out.
So, I can use the Monogram tires or should I use the Hasegawa ones?


