Bandai's 1:20 scale Nausicaa with glider

stevethefish

My name's actually not Steve
Joined
Jun 12, 2015
Messages
295
In the '80s, Tsukuda made a line of Nausicaa models. About 10 years or so ago, Bandai retooled these old kits, making them semi-snap fit , resculpted the faces, provided eye decals, and injected the parts in colored plastic. I have all of them, and I'm working on Nausicaa's glider kit.

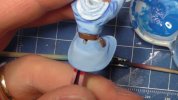
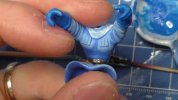
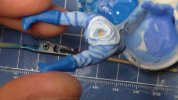
I've finished the glider and since last weekend, I have begun painting the Nausicaa figure. I airbrushed her face Mr. Color 51 Flesh (with just a tiny bit of white added in). The rest has been hand-painted. I used Mr. Hobby Aqueous paints for her trousers, and Delta Ceramcoat paints for her tunic, gloves, and boots.
nausicaa01.jpg
nausicaa02.jpg
nausicaa03.jpg
The Delta Ceramcoat paint I used is called Blue Jay. I added a darker blue to it to paint the creases, and added some white to it to paint highlights. It's rather contrast-y.
nausicaa04.jpg
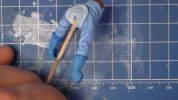
I watered down Blue Jay to glaze over everything and blended it in.
nausicaa05.jpg
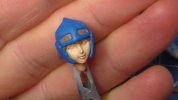
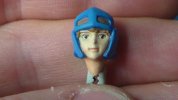
I used Delta Ceramcoat Mediterranean Blue for her cowl, gloves, and boots. It was a bit dark, so I added some white to it.
nausicaa06.jpg
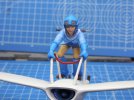
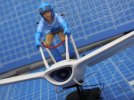
Here is the lighted color (the original darker color preserved for shading) as well as eye decals in place. Oh look, I have a hangnail.
nausicaa07.jpg
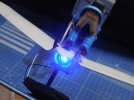
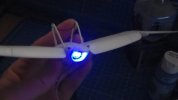
The engine is lighted. The central part of the engine was the exact diameter of a 5mm LED, so I replaced it with a flickering blue LED and ran wires down the bottom.

I now need to airbrush a flat coat over the parts, go over the silver and gold again, and assemble. Nausicaa is shaped to be crouching on the glider, rather than lying like plank as she does at high speed.
 
In the '80s, Tsukuda made a line of Nausicaa models. About 10 years or so ago, Bandai retooled these old kits, making them semi-snap fit , resculpted the faces, provided eye decals, and injected the parts in colored plastic. I have all of them, and I'm working on Nausicaa's glider kit.

View attachment 90865
Here is the lighted color (the original darker color preserved for shading) as well as eye decals in place. Oh look, I have a hangnail.

View attachment 90866
The engine is lighted. The central part of the engine was the exact diameter of a 5mm LED, so I replaced it with a flickering blue LED and ran wires down the bottom.
This is awesome. I'm excited to see it fold out, and hope you post the rest of the line when you get to them as well!
 
Thanks. I had started the old Tsukuda kit of Nausicaa with the Ohmu larva. I started it over 10 years ago. I wanted to make it my first diorama, but things didn't go well. I was given the advice to use styrofoam for a base, but the clay I put onto it contracted as it dried and warped the styrofoam. I want to add clear resin for water in one corner, too. I ended up throwing most of it out and bought the retooled Bandai version.

Bandai revamped that kit and vastly improved it. The Ohmu looks mostly the same. The belt-fed machine gun is far better. Nausicaa's face is better sculpted, and with the inclusion of eye decals it's going to be much nicer. I plan to make the Ohmu's eyes lighted red if I can. The problem with the Bandai kit is that the eyes are not just simple lenses, but have a back side to them to make them pressure fit parts. So... if I can managed to get the old clear parts off, I can remove the paint and use them since they are simple lenses.
I'm glad you have the old kit to try and pull pieces from still.


I do love using foam bases, but I try to steer clear of clay, I've had really good luck putting plaster of paris down on foam in the rough shape I want it, sanding a little to refine, and then blasting with clear acrylic. As log as your epoxy won't react to acrylic, that should be a light sturdy base. Plaster on a small wood board is my go to if I want even more sturdiness.
 
I've run across some warping on kits that I have no idea what to do about, this isn't really a form that you can add putty or epoxy too easily of cohesively.

I'm definitely staying tuned to see what you do, or what other knowledge comes rushing through. My only thought is when adding it to a base mount it like she's turning at such an aggressive angle so it makes sense one foot might be lifting?

It looks really good besides that though! Like really good.
 
I just had the idea that perhaps I could use my wife's hair dryer to soften her arms enough to re-pose them. I'll try it this weekend. I have no hair, but fortunately my wife and daughter do and they have one of those.
 
I just had the idea that perhaps I could use my wife's hair dryer to soften her arms enough to re-pose them. I'll try it this weekend. I have no hair, but fortunately my wife and daughter do and they have one of those.
I was going to suggest heat... but I didn't know how that would react with paint and glue you've already used
 
I ended up just popping her arm off, re-puttying it, and re-painting it. The hot water idea didn't work. What I ended up doing worked out well enough, with little effort. Her feet are now properly planted on the glider. I'll have the final photoset done this weekend to share.
 

Latest posts

Back
Top