fubar
New Member
- Joined
- Nov 10, 2011
- Messages
- 502
Hello all, this is the first model i have built in a long while but i recently decided to get back into scale modelling again and thought i'd also try my hand at a WIP post, hope it's ok and let me know if anything needs changing!
I'm going to be starting this hobby again from scratch, i even need to buy tools and paints again so any tips on which paints/tools are best for this type of model will be greatly appreciated, in the past i have mostly used acrylics because of the large numbers of WH40K models i used to paint so i'm guessing that's what I'll go with again for this little project.
After a rummage in my 'vault' i have decided to 'cut my teeth' on an A-Wing model made by ERTL that I've had for a number of years. The aim of this is to refresh my skills and make a nice clean build so again any pointers from the pros are more than welcome.
First thoughts on the model.
It seems a fairly straight forward kit, it contains two sprues with the parts, a canopy, a clear stand for display and what could well be the worlds most basic instruction sheet.
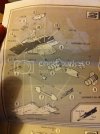
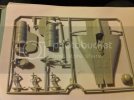
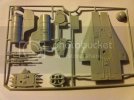
The body of the ship seems nicely detailed with lots of little rivets and cables, they'll be a nice chance for me to practice weathering and ink washes again! I have a couple of nit picks with it so far, I'm a bit of a detail freak and i have to say that the model of the pilot is awful....i really don't see me keeping him which means that i either need to find some sort of replacement for him or paint the cockpit canopy black to hide the inside.
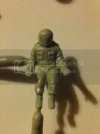
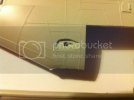
Another thing that's going to need attention is the underside, i don't plan on using the landing gear that the model comes with which means i now have three odd shaped holes on the underside that will need repairing and detailing, i think my nice simple build is already getting more complex ;D still that's half the fun isn't it.
The main problem i have at the moment is reference material for painting it accurately, the Instructions just say use (red brick, white and black). I have a mass of Star Wars books but there are hardly any pics of the A-Wing studio model that are usable, where do you guys get your reference material from? I have looked online and its seems to be mostly the same images i have already or its fan made art which is excellent but is it canon? The one site i have found so far which is very useful is Starship Modeler, are there other similar sites about?
Well thats enough rambling from me, have a good weekend all.
TTFN Matt
I'm going to be starting this hobby again from scratch, i even need to buy tools and paints again so any tips on which paints/tools are best for this type of model will be greatly appreciated, in the past i have mostly used acrylics because of the large numbers of WH40K models i used to paint so i'm guessing that's what I'll go with again for this little project.
After a rummage in my 'vault' i have decided to 'cut my teeth' on an A-Wing model made by ERTL that I've had for a number of years. The aim of this is to refresh my skills and make a nice clean build so again any pointers from the pros are more than welcome.
First thoughts on the model.
It seems a fairly straight forward kit, it contains two sprues with the parts, a canopy, a clear stand for display and what could well be the worlds most basic instruction sheet.


The body of the ship seems nicely detailed with lots of little rivets and cables, they'll be a nice chance for me to practice weathering and ink washes again! I have a couple of nit picks with it so far, I'm a bit of a detail freak and i have to say that the model of the pilot is awful....i really don't see me keeping him which means that i either need to find some sort of replacement for him or paint the cockpit canopy black to hide the inside.

Another thing that's going to need attention is the underside, i don't plan on using the landing gear that the model comes with which means i now have three odd shaped holes on the underside that will need repairing and detailing, i think my nice simple build is already getting more complex ;D still that's half the fun isn't it.

The main problem i have at the moment is reference material for painting it accurately, the Instructions just say use (red brick, white and black). I have a mass of Star Wars books but there are hardly any pics of the A-Wing studio model that are usable, where do you guys get your reference material from? I have looked online and its seems to be mostly the same images i have already or its fan made art which is excellent but is it canon? The one site i have found so far which is very useful is Starship Modeler, are there other similar sites about?
Well thats enough rambling from me, have a good weekend all.
TTFN Matt
