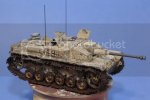
A Carentan 1/35 WW2 Diorama

stellarb

New Member
Joined
Mar 25, 2012
Messages
17
Hello all! I am fairly new to SMA but have been on Armorama for quite some time. Just found this place and wanted to share my first ever dio build currently in progress. I originally started this back in September and had pretty much no skills at all. Now, after a few months and a little layoff, I am returning to work on it here and there as time permits and wanted to share the journey with you. All input, criticism and questions are welcomed. I hope someone learns something from this as I too hope to learn in return. Here we go!

The idea is based on Easy Company of the 506th Parachute Regiment in World War Two. I have been a huge fan of the Band of Brothers series for many years and deeply respect what all the units did in the war. I wanted to depict a very specific scene from Part 3 of the series where E Co is asked to take the town of Carentan. It was a very valuable piece of land during D Day and the days following as it connected both Utah and Omaha beaches together, linking Allied resources with a central axis point to funnel men and supplies up inland to continue the rush into Nazi territory. Carentan was taken with a few causalities by E Co and the Germans had stationed their own Parachute regiment there to hold the town, the 6th Fallschirmjager unit. The enemy was prepared and held E Co down with machine gun fire from a 3 story building at the end of the only access point to E Co: a road that ran Northbound into the town.

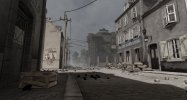
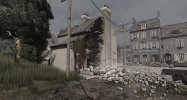
I found these awesome renderings somewhere on the internet and have been using them as a resource:
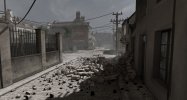
carentan03.jpg

carentan01.jpg

carentan05.jpg

I am building the Cafe, the half destroyed house and a building that is not really known, making it a music shop.

This was my original layout:
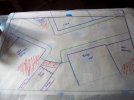
100_3717.jpg

But a layoff from looking at this stuff got me thinking and I have finalized this layout instead:
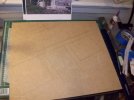
100_4011.jpg

Using MDF board as a base, I will work with it.

Roads and sidewalks laid down, just need to get some buildings done!
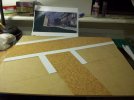
100_4017.jpg

I ordered these a long time ago, and finally got to use one of the signs!
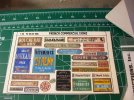
100_4019.jpg

This will the hanging sign for the cafe/hotel:
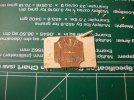
100_4020.jpg

Waiting for the house to dry. Had some trouble pulling it off the plastic while the plaster was sticking to it. Glued it together tonight, all is well now.
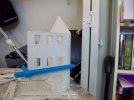
100_4021.jpg

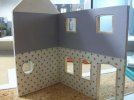
Got the inside of the music shoppe wallpapered and done. It won't be an open building, so I'm not concerned with doing as much detail. Still doing 2 floors and whatnot.
100_4022.jpg

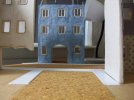
Here's an eye level shot of the cafe coming from the road where the E Co. figs will be laid out
100_4024.jpg

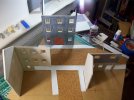
And here's a birds eye of the new layout with the buildings set up so I could get an idea of how everything is working together. I am very pleased!
100_4027.jpg

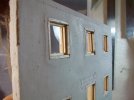
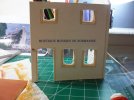
And lastly, the music shoppe getting its sign. Can't wait to get my new Harder and Steenbeck AB and spray it with some awesome green! Exciting. Get to make a door for it tomorrow, I think. Have never built a door before so it should be fun. the white stuff in the window frames is Krystal Klear..was trying to see if it will dry clear. Guess I will find out in the morning. I am wondering if I will regret this little experiment...

That's all for tonight. More tomorrow. Thanks for watching!
100_4029.jpg
 
Those renderings are pretty wicked, look forward to seeing you do them justice! A very good start
 
those renderings are from a game called Company of Heroes an outstanding game with buckets of replay value atached to it and a huge moding comunity.

This will be an awsome Dio really looking forward to this,
 
An interesting project , of to a good start too :)

Chris.
 
Quite the project you have there my friend !!!

I wish you luck ! and lots of dedication ! you'll get her done !!! it may take some time but we will be here watching each and every step you take !!!

its' going to be quite Awesome to see it all together...

My hat to you if you pull it off !!!

Of course you will !!!

Giddy up !
 
Great start to your diorama. Those photos should help in the process. Looking forward to the updates. Bill
 
This diorama is going to be impressive! It's inspiring me to do a diorama! Awesome!
 
Hi guys!
Sorry it's been so long. School takes me away for months at a time, so I work on this when I can! Here is a giant update for you all.

I had a LOT of trouble with the cafe...so much so, I redid it. Here's what I got done:

100_4067.jpg

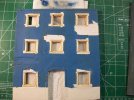
I scribed in some brick work on the front, sort of like the photos above of the cafe. Once painted, I think it will look pretty cool.

Used some 0.7MM clear plastic sheeting for the windows:

100_4073.jpg

And got some paint on it:
100_4077.jpg

Now, some other fun stuff:

Here's some figgies ready for paint. I have primed them since this photo, and they only need a little bit of work. And lots of paint. Nervous about that, but it will be fun!
100_4060.JPG


And I redid the base:
100_4033.JPG


Here's with the sidewalk laid down. I just used air dry clay, worked like a charm! Even got some cracks and stuff, too.
100_4035.JPG


Painted preliminary ground work:
100_4041.JPG


that will not be the final ground work. I'm chatting with a buddy of mine (more like mentor) about how to do the groundwork and make it realistic, so that's something that will come later.

I am, however, redoing the road. I just don't LOVE it, so I'm gonna lay down some clay and imprint some cobblestones or bricks with a paintbrush. We'll see how that goes.

And just to show you sort of what it might look like:
100_4042.JPG


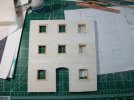
Here's the cafe wall re-done before painting: I use plaster.
100_4056.JPG


The music shop isn't a music shop without instruments! I am scratchbuilding a standing double bass:

100_4055.JPG


Painted, with small wire that will be used for strings:
100_4063.JPG


And a piano I bought from Plus Models, not quite finished:
100_4062.JPG


And that's what I've been up to! Thanks to everyone for all the compliments and everything! I really appreciate it. This is my first REAL attempt at a good dio, and it will take a long time to do, but I'm having a lot of fun. glad you guys like it!

I'll post another update in about a week or so.

Til then!
 
Small update...

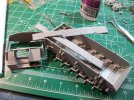
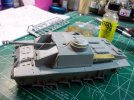
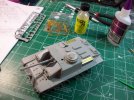
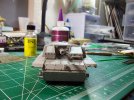
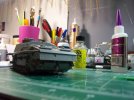
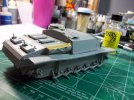
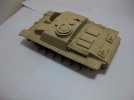
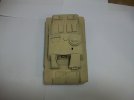
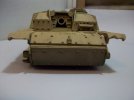
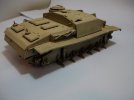
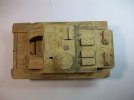
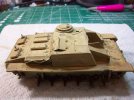
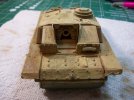
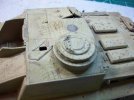
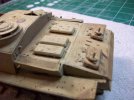
I built the StuG III and man, did it take FOREVER! I have never built a tank before now, so it took me quite some time. The fenders were a real PITA to get on, but I finally got them. Here's some photos. Anything you see I need to fix, please let me know.

This tank will be abandoned and somewhat ruined, so I will probably only do 1 side of half track, and the other side no tracks at all. None of the equipment is on it yet, waiting to paint it first.

100_4081.jpg

100_4082.jpg

100_4083.jpg


100_4084.jpg

100_4085.jpg

100_4086.jpg

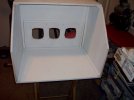
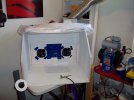
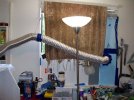
And, didn't get a lot of modelling done this weekend because I was working with my dad finishing my airbrush booth! Finally got it done and jerry rigged in my tiny craft room :D

100_4087.jpg


100_4090.jpg

100_4091.jpg

Now time to go play with it, since I have yet to use my brand new Harder and Steenbeck 2 in 1 Evolution AB I bought like 6 months ago!

Back soon with more!
 
them fenders are a pain to do on all dragon panzer hulls they all seem to be the same :(

your spray booth Looks great well done :)

don't take so lone for the next update :D
 
Hi Spud, yeah they were no fun!

Here's the progress on the StuG:

Before shadows:
100_4118.jpg

With shadows:
100_4116.jpg

And some chipping/rusting:
1st layer, after hairspraying and chipping away at the paint:
100_4100.jpg

With some mid tones:
100_4122.jpg

100_4120.jpg

And how it is right now, still a lot to do:

100_4129.jpg

100_4124.jpg

100_4125.jpg

100_4127.jpg

100_4128.jpg

Trying my hand at some decals tomorrow, then probably some light washes and filters and weathering. Color Modulation is pretty cool. :D I am happy with the tank, especially it being my first one ever! yay!
 
If you put hair spray on before the scratched you would be able to wear down the paint if that's the look you are after.

Color modulation you should do before you start the wear and tear and the decals too.. but you can still work with the decals,

and are you missing the Big block that fits in the front where the Gun is mounted??
 
Stellarb,
This is one of the 1st WIP I started to follow when I first
signed up.
Looking good so far. I am liking where it is going.
A question or two if I may?
Are those figures resin? What kind are they? Anymore
close ups of them?
Do you build molds of the buildings and pour, or are you
using blocks and strips of the stuff and putting them
together that way? Plaster right?
 
Hi guys!

Spud: I will look through the instructions again as I see what you're saying. I sucked at putting this thing together. Lost so many pieces, lol. I'll dig around and finish it off...I need to put all the equipment on, or what I will actually have on there, because it's going to be abandoned.

Gonna mess with it some more today.

Hi Peppylepugh: Awesome! thanks for following! As to your questions:

Yes, all of these figs are resin. I bought some plastic kit ones, too, but overall, just really liked the resin ones better. I can get more close-ups of them, sure. They are from Nemrod and Verlinden, mostly. The Germans are from CyberHobby.

For the buildings, here's how I build them from art plaster (the crap you get at the art store, it's about 6 bucks for a box of it or so here....it's stronger than regular plaster and doesn't dry as quickly)

I use a thick clear plastic sheet (from an old poster frame). I have my blueprints drafted up and taped down to the table, then I place the plastic sheet over that. I tape the sheet down and cut some wood (I like to use 1/4"x1/4") and glue them with some quick tack.

The glue seals the edges so the plaster doesn't seep out. So glue it up real good! On the inside of the frame is where I put it.

I mix up my plaster while the glue is drying a bit, to a nice smooth pancake batter consistency. I pour it in the frames and use another 1/4"x1/4" piece of wood to smooth it out and into all the corners.

If you have windows and doors, the best thing to do is the following: (so they are all nice and square)

Get some balsa that's more than 1/4", so when you place that into the frame, it sticks out. This helps to ensure the plaster grabs all around, but your windows will be nice and straight (build them off the plan of your building before placing them into the frame of wood). Then, you just make the windows, and it's much easier. Found this out the hard way!

Then, once the plaster is in, let it sit for about a minute and take both your hands and pound on the table to get the air bubbles to rise to the top. This smooths out the plaster as well as makes those bubbles rise and it looks really cool.

Give 'em about 2-4 hours to totally dry (longer if you make thicker walls) and then take a small tool (I use my putty tools) with a slender "scraper" sort of end and very CAREFULLY go under the plaster and glue and loosen it up. The building should pop right off, but be careful. It is really easy to snap a smaller wall/piece in half before you even knew you were gonna do it...that sucks! If this happens, super glue is the only way, but getting the piece flat again takes some work.

I hope that paints a clear enough picture for you. If you have more questions, please let me know. I'm no pro, but will help where I can!

Thanks for reading, guys!
 
here is a pic of my Stug.
_MG_2756.jpg
you see that big bloky thing the gun is in. thats teh part im on about :)
 

Latest posts

Back
Top