8 is Enuff (Ma.K. Build)
- Thread starter Junkie
- Start date
Elm City Hobbies
Active Member
- Joined
- May 7, 2009
- Messages
- 3,239
Maknifiso
Member
- Joined
- May 5, 2010
- Messages
- 265
Great video's Scott! Ur such a goober ;D Don’t worry your not the only one :
Actually it's quite refreshing to see someone just being themselves, very cool dude
Hey, great rust tech. That stuff you used is pretty realistic, didn’t work too well with the hairspray though
Awesome idea using the Tenex for texture! were did you pick that up?
I feel stupid for not thinking to try that, although I think it would best be applied before primer? :-\
Rad 30 day dude!
Rock on!
Jeep
Member
- Joined
- May 8, 2010
- Messages
- 400
You all most have me convinced to buy a Ma K kit!
Just reapply the rusting kit over what flaked off, its pretty tolerant of this. You may have to apply the second part more than once to get the effect you are after.
I have used the hair spray trick myself, but had to use Warm water to get it to flake, and used a old tooth brush to abrade the paint. I have NOT tried it over the rusting kit yet.
For more recent scratches try using a HB pencil and a PRISMA COLOR SILVER pencil, Just rub the pencil along the edges. I apply this to items of high wear like joints, and hatches
I use Tenax & for stippling cast textures myself, it a paintbrush is more controllable. But a rougher texture can be had with a soft brass bristle brush, these are usually for cleaning files, try it on a old model first though, it is easy to mess up.
Junkie
Active Member
- Joined
- Apr 24, 2009
- Messages
- 8,830
Thanks all. I appreciate the feedback and the fact that you watch the videos. I'm no expert but I'm sure having fun with this. I recommend Ma.K. to anyone. The new Wave kits are awesome.
Got the soft cast texture idea from Armorama if I recall. An article over there.
I plan on added that rust again after everything else is finished. It is real rust and looks great. The shot in the vid had such low light that I had to pump up the levels in Premiere to even show it to you. Next time I'll pay more attention to that so you can see it better.
I need to add more lights to my space. Depending on the time of day it can be really dark in there - to a camera at least.
Thanks again -
Jeep
Member
- Joined
- May 8, 2010
- Messages
- 400
Scott,
I got some OTT lights at Michaels, OTT lights ,mine were 40% off so if you shop around you may find one cheaper than listed here, I though they were still expensive but, now I recommend them as worth every penny I paid for them. Just beware than most models are viewed under incandescent or florescent lights. You should periodically check finished under normal lighting conditions. The OTT light is close to sun light in effects, I notice reduced eye strain and a MUCH easier time with fiddly bitz.
I use these: OttLite® High Definitionâ"¢ Magnifier Task Lamp and OttLite® High Definitionâ"¢ Craft Plus Floor Lamp.
Elm City Hobbies
Active Member
- Joined
- May 7, 2009
- Messages
- 3,239
Another option on lights, go to Walmart, I picked up a couple of desktop lights with the fluorescent bulbs. The ones I got have the "daylight" bulbs in them, and while not an OTT light, it is basically a No Name one, and even with your 40% off coupon from Michaels still ends up being cheaper.
I use them for both modeling and photography and work very well. Usually can pick them up for $20-$25, and the bulbs can be found on Ebay of all places, usually can get 2 bulbs for $10.
As far as the rusting solution, I think that maybe the problem stems from it not really adhering to the primer coat like a paint would, so when you put the hairspray over it, and then painted over the hairspray.....the rust solution really doesn't have that good of a hold on the primer.....which is why I think when you removed the top layer of paint it went right back to the primer. Nothing that you did wrong....just that the rust solution doesn't seem to be a paint, very similar to the Rustall system, paint on a solution that has iron in it....wait till it drys and then put on the solution to rust the iron. While it will adhere enough to the surface to stay put....the chipping to take off the top layer of paint to expose the rust was enough to take off the rust as well.
Another method for doing rust..........take a mason jar (or some other glass jar), put some steel wool in it, top with water and put the jar outside in the sun (not sure if this works by just putting it on a window sill inside...maybe....but might take longer), the sun evaporates the water, breaking the steel wool down, and what you are left with in the bottom of the jar is basically real rust. Mix with some matt varnish and use it on your kit....
Real rust, to replicate rust!
the Baron
Ich bin ja, Herr, in Deiner Macht
- Joined
- May 12, 2009
- Messages
- 2,261
I just watched the videos last night, Scott, and this is another great project! You're giving me the bug to dive into MaK kits myself. I do have to say, I was a little apprehensive to watch the Tenax method of replicating a cast surface, but it does look pretty cool when done.
I've seen the hairspray technique used, but haven't tried it myself. I think using salt crystals might work a little better in this application, but it's six of one, half dozen of another.
I really do think I have to get some of these and play around with them.
Really great, very enjoyable to follow along!
YbiC
Brad
the Baron
Ich bin ja, Herr, in Deiner Macht
- Joined
- May 12, 2009
- Messages
- 2,261
Elm City Hobbies said:
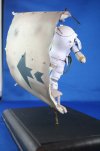
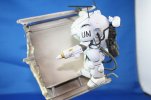
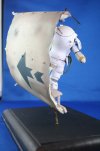
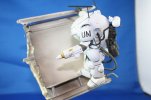
Wow, ECH, he did a fantastic job on those! I like the suit with the piece of hull especially, very well executed!
Junkie
Active Member
- Joined
- Apr 24, 2009
- Messages
- 8,830
Thanks all. Gotta say, I'm loving Ma.K.
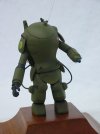
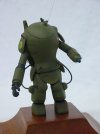
Here are some pics I took tonight. Still needs some work - dullcoat, few pigments and streaks but it's pretty much done. I put some more rust paint and now it is REALLY orange. I bit too much IMO. I'll tone it down. I added some battle damage (bullet holes and an attempt at a right front laser hit....I think I'll add hairspray to that rust and get a whiteish, burnt metal effect) and weathering damage -rusted out - on his hip plate. Fun. Ground work next.


Here are some pics I took tonight. Still needs some work - dullcoat, few pigments and streaks but it's pretty much done. I put some more rust paint and now it is REALLY orange. I bit too much IMO. I'll tone it down. I added some battle damage (bullet holes and an attempt at a right front laser hit....I think I'll add hairspray to that rust and get a whiteish, burnt metal effect) and weathering damage -rusted out - on his hip plate. Fun. Ground work next.
mariosmodelkits
New Member
- Joined
- May 7, 2010
- Messages
- 240
This build is cimming out beautiful scott, becarefull bro mak is addicting. cant wait to see this guy done, cheers. 


schweinhund227
New Member
- Joined
- Jun 24, 2009
- Messages
- 2,511
This little distraction TURNED out Pretty KEWL !!!
and you learn more tricks.... the Airspray is something I might try.... someday !!!
Too bad your Super sweet Rust... almost vanished....
That stuff I might try for sure....
Not often you find Sci Fi that connects to Canuck Land !!! Nice going on that one !!!!
I might have to challenge you on that one.... and come up with an ODD BALL !!!! LOL
Take care buddy !
Norm
OUT !
Backbreaker
Member
- Joined
- May 6, 2009
- Messages
- 314
Yet again its great to see you diving in at the deep end and finishing up with a top notch build. Superb work buddy.
BB.
BB.
Similar threads
- Replies
- 4
- Views
- 859

