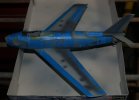
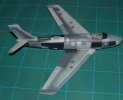
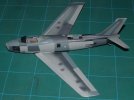
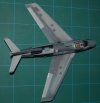
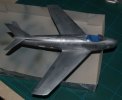
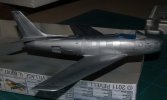
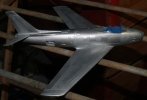
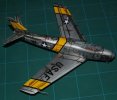
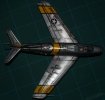
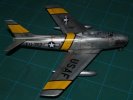
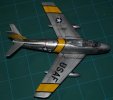
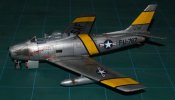
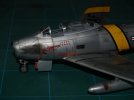
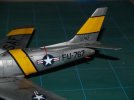
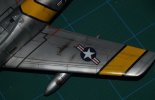
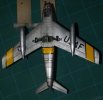
1/48 Hasag F-86 of the 4th FG

Bomber Boy

Static Grass Is The Sh!^
Joined
Sep 1, 2011
Messages
85
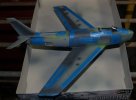
Howdy Y'all, here is the third plane I've started along with the 1/24 Stuka, Not much to the build up as it is pretty much just a shell model. I'm trying out some new techniques on this one. One new thing is the multicoloring of the fuse. prior to painting. Oh what fun I had masking this thing. It does give some difference to the texture and shine of the Buffing Metalizer(MM). the other techs I show later as the happen most have to do with decaling.

Enjoy!
861.jpg

862.jpg

863.jpg

864.jpg

865.jpg

866.jpg

867.jpg

868.jpg

Thanks For Looking!!

James
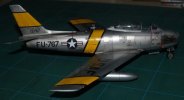
 
I saw an F-86 done in a variety of metal finishes in this month's FSM, and this looks and scales a lot better, IMHO. Theirs was just way too mirror-like. With a panel wash, this will look way better than FSM's!
 
Thanks Guys, I don't think I will ever paint another NMF without doing it this way. I will turn 46 in Jan. and have been building models for 41 of them and I still learn something new EVERY TIME I BUILD ONE!!! Now I'm just waiting on the decals to get here and then the weathering and more photos. Again thanks for the comps!!

James
 
James, thank you for sharing the part about learning something new every time. It is encouraging to a guy like me who is still at the beginning. Glad to know I have many more years of enjoyment ahead!
 
That turned out wonderful. And I agree with ND, this looks a LOT better than the one in FSM.
 
Noob question, here!

It looks to me like you masked off certain panels, then preshaded. Then, you painted some panels white, gray, or black. Were you removing successive layers to do this? Then, you painted the metal silver over the top which resulted in some panels being different shades/levels of brightness to give the effect of having different panels being touched up over time. Is this right?

It looks really cool, by the way.

Would you mind talking about the settings on your airbrush, too? Did you use a very fine setting to do the individual panels?
 
Re: 1/48 Hasag F-86 of the 4th FG (Finished)

glennonrp said:
Noob question, here!

It looks to me like you masked off certain panels, then preshaded. Then, you painted some panels white, gray, or black. Were you removing successive layers to do this? Then, you painted the metal silver over the top which resulted in some panels being different shades/levels of brightness to give the effect of having different panels being touched up over time. Is this right?

It looks really cool, by the way.

Would you mind talking about the settings on your airbrush, too? Did you use a very fine setting to do the individual panels?

Hey Glen, thanks for the comps and question.

I first mask of parts to leave molded color of light grey what you take as white, though there is no white on model, then I paint other panels a slightly darker gray not minding if I overspray other panels but not too much over, then mask those and repeat , until there are enough grays ( progressively darker) then end in black. then spray on the Aluminum Buffing Metalizer by ModelMasters, and buff with paper towel until the shine you want is achieved. Just as a side note the panel difference is not necessarily due to repair or touch up but the metal itself is different color from manufacture, age, and smelt so to see it polished is a thing for show planes not one used in peace or war, who has time to polish when bombs are dropping? After I clear coat over the silver I apply decals then Clear again to slick decals, I take a felt tip pin of a Brown/grey color from A.C. Moore. I run the pin over all recess/raised lines and let dry, now here is the trick, when you rub off with paper towel do it in a Front to Back motion so it trails of in the right direction, remember FTB. then Clear again to seal, then with this stuff I call MUCK ( a mixture of rust/black/brown/gray to taste) and on Lower psi I put on the gun blowback and leaks.

As to the airbrush settings I truly have no Idea, sometimes I use low pressure (10psi) but only to do fine line stuff such as weathering around barrel ends and fuel spill on wings to wide open for the Metalizer say 40psi which is also about what I spray most things with. Hope this helps if not ask more and I try to answer.

Now onto the finish of the build. As a whole this was a pretty fun build with attempts at new techniques and another addition to my 4th Fighter Wing collection from Seymore Johnson AFB.

Enjoy!!!!
869.jpg
8610.jpg
8611.jpg
8612.jpg
8613.jpg
8614.jpg
8615.jpg
8616.jpg
8617.jpg
8618.jpg

Thanks For Looking,
James
 
James, thank you for the comprehensive explanation. I very much appreciate you taking the time to explain and the pictures help a lot!

I am very impressed with the finish and weathering. Very well done. I even showed them to my wife next to me and she remarked that it was like art. Indeed. :)
 

Latest posts

Back
Top