Leighbo
Active Member
- Joined
- Sep 15, 2011
- Messages
- 1,033
Hi All
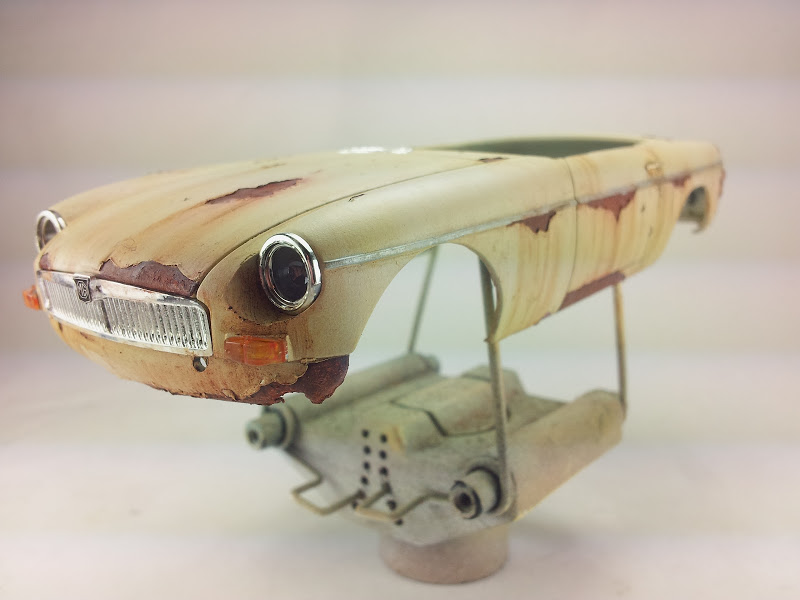
Been doing a lot of military stuff lately and fancied a change so I got this kit for a steal, its the first time i've seen an MGB in 1/24 so had to have it. I'm gonna do it on a simple base, overgrown and rusting.

So far the kits gone together quickly, there's a low parts count and there's no engine or opening doors, bonnet or boot (sorry not to use hood or trunk, but it is a British car!)
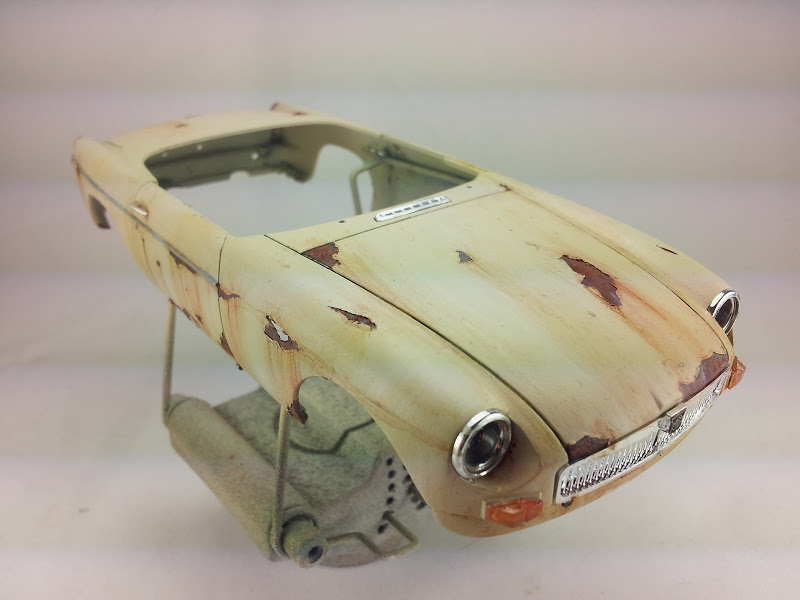
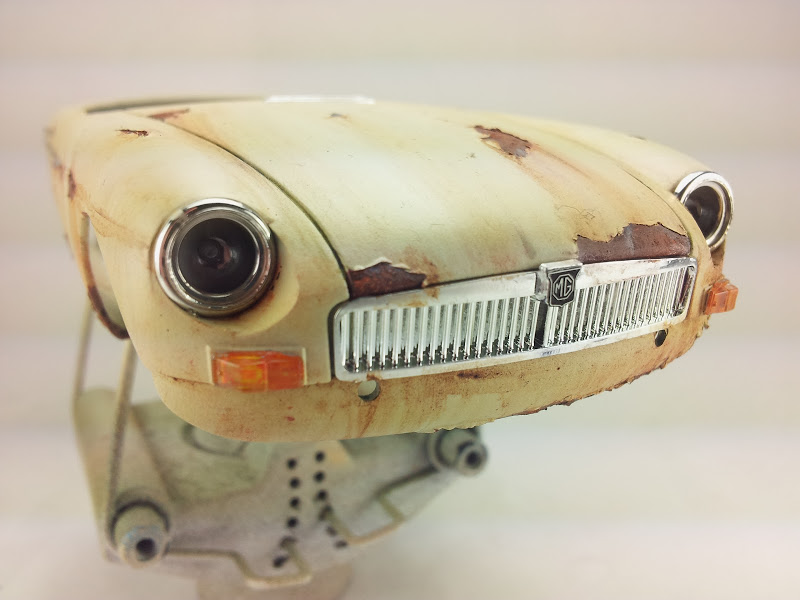
That aside the detail is excellent everything is very crisp and detailed and the MG badges are supplied photoetched and are works of art in themselves. Seems a shame to rust it up really and I did consider making it in pristine condition but the pull of the rust was to strong!
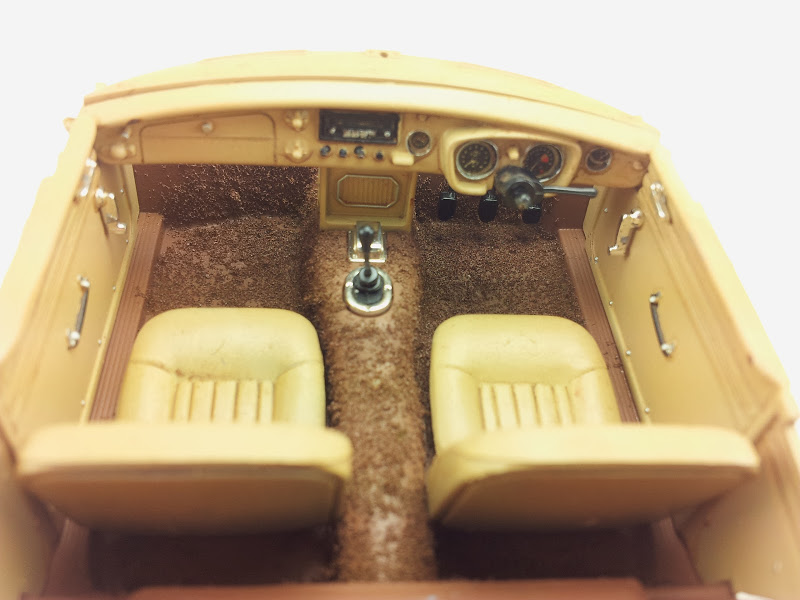
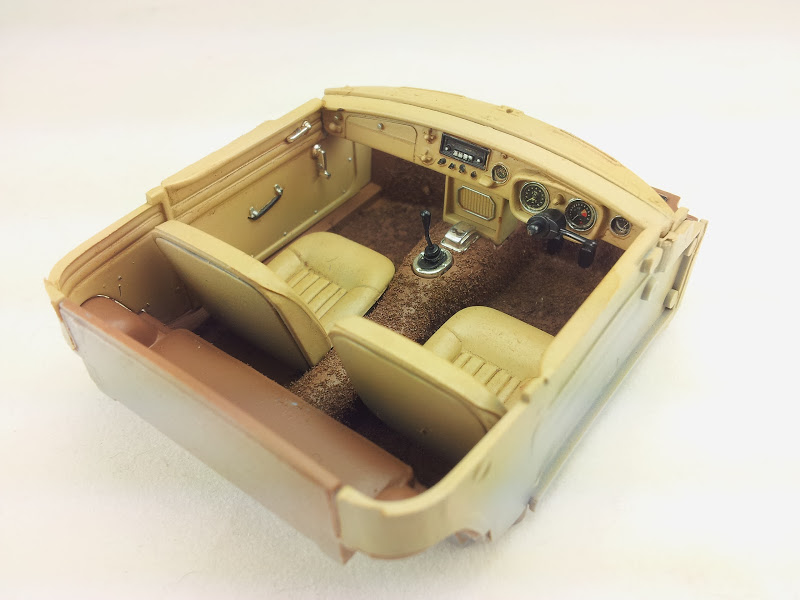
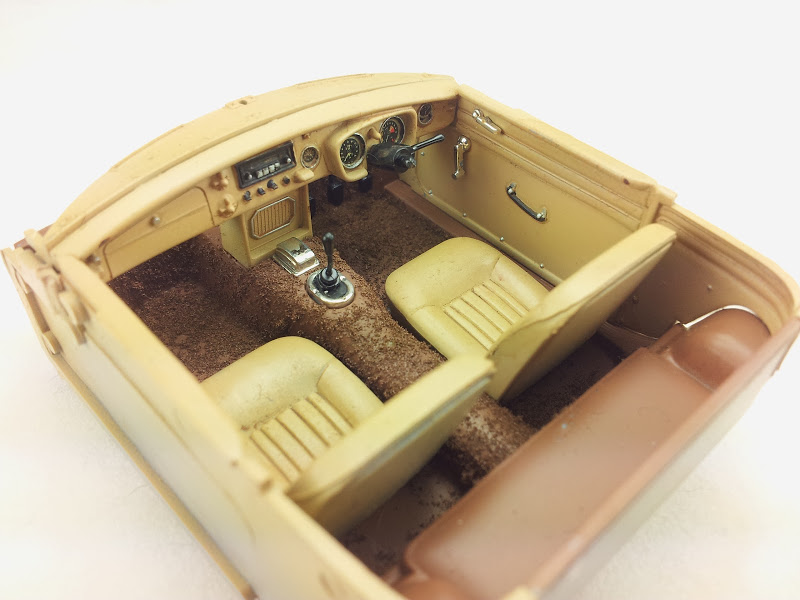
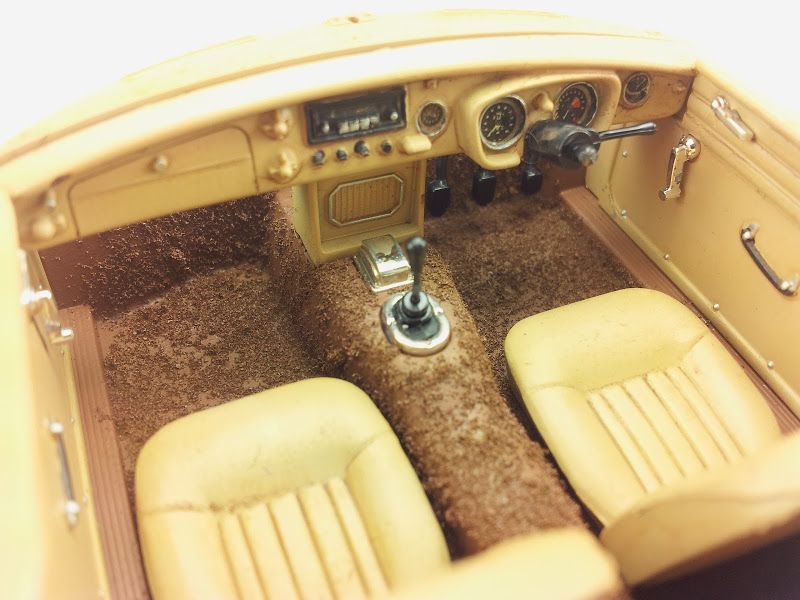
Heres the interior so far, I used some fine grass flock for the carpet as an experiment and then airbrushed it, there is plenty more weathering to come yet and there is a tonneau to cover half of the interior anyway.
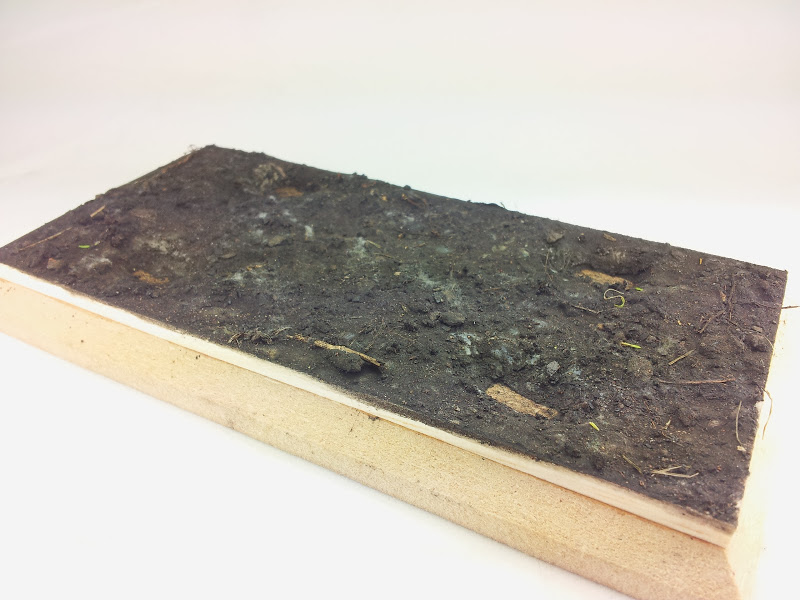
I also got started on the base which is an MDF plinth covered in paper-mache and then soil, the idea is to have it sunk into the mud over many years and then I'll get it partially covered in foliage.

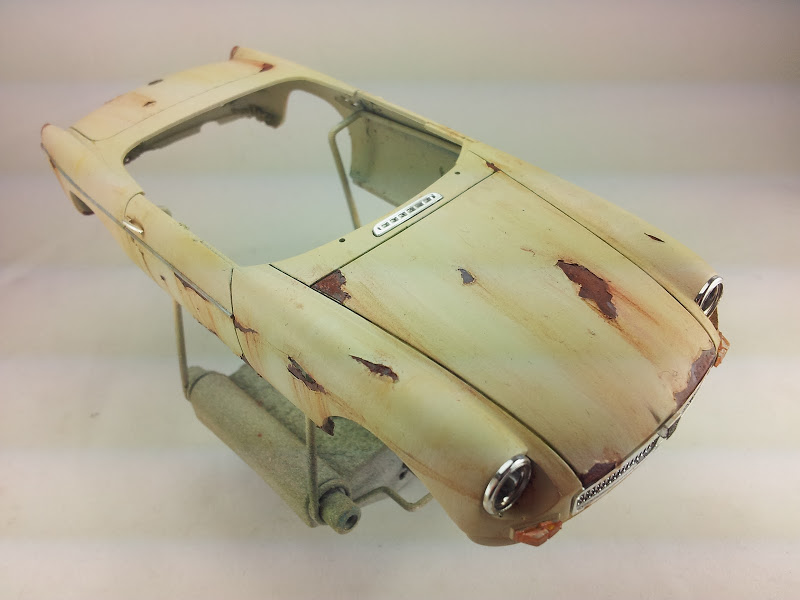
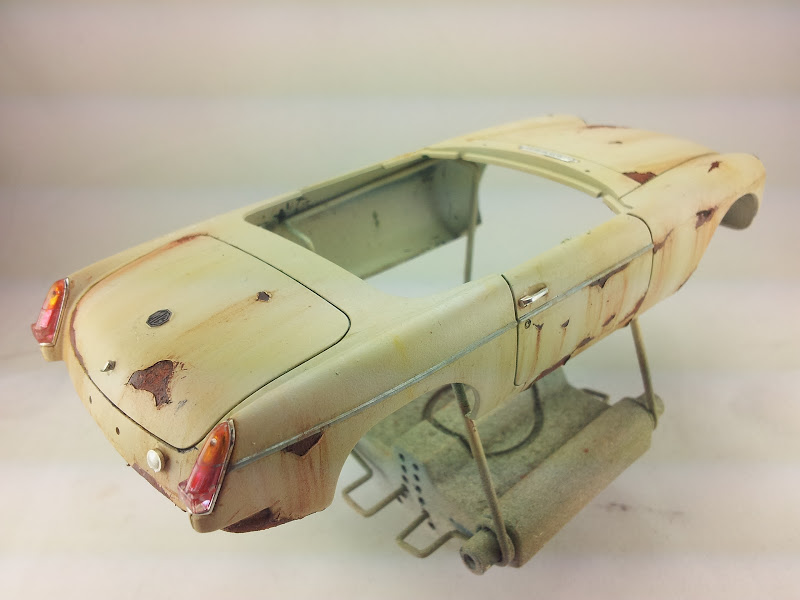
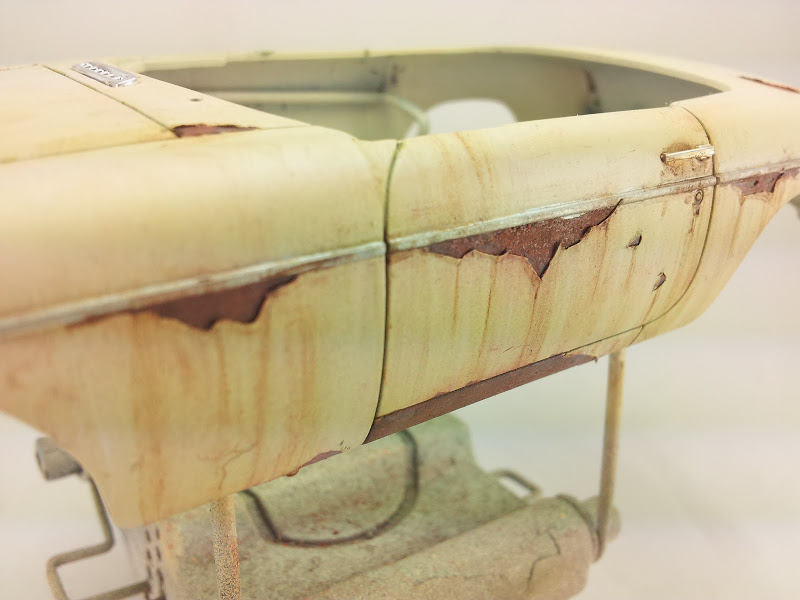
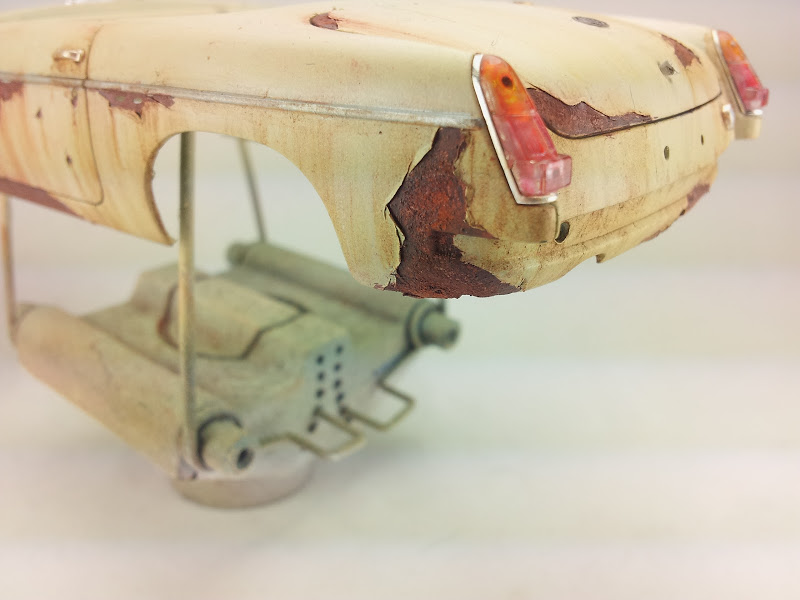
The body is one piece and I have added some of the trim and then used a dremel to make a few holes and a scalpel to peal back the plastic to look like flaking paint. The rust areas were painted with brown acrylic andthen dabbed with rusty weathering powders. Then I broke out the oils to make the rust streaks. Once dry I will add some more oil fading too.


Now i've literally just got to sit and watch paint dry!
Thanks for looking
Been doing a lot of military stuff lately and fancied a change so I got this kit for a steal, its the first time i've seen an MGB in 1/24 so had to have it. I'm gonna do it on a simple base, overgrown and rusting.
So far the kits gone together quickly, there's a low parts count and there's no engine or opening doors, bonnet or boot (sorry not to use hood or trunk, but it is a British car!)
That aside the detail is excellent everything is very crisp and detailed and the MG badges are supplied photoetched and are works of art in themselves. Seems a shame to rust it up really and I did consider making it in pristine condition but the pull of the rust was to strong!
Heres the interior so far, I used some fine grass flock for the carpet as an experiment and then airbrushed it, there is plenty more weathering to come yet and there is a tonneau to cover half of the interior anyway.
I also got started on the base which is an MDF plinth covered in paper-mache and then soil, the idea is to have it sunk into the mud over many years and then I'll get it partially covered in foliage.
The body is one piece and I have added some of the trim and then used a dremel to make a few holes and a scalpel to peal back the plastic to look like flaking paint. The rust areas were painted with brown acrylic andthen dabbed with rusty weathering powders. Then I broke out the oils to make the rust streaks. Once dry I will add some more oil fading too.
Now i've literally just got to sit and watch paint dry!
Thanks for looking


