JU88-A4 Pro-Modeler from 1999

Brave man! Both of those kits take patients and skill!
LOL!

The "Pro Modeler" series are not THAT bad, the ones from the 90s have issues, but force patience.

However, that B-25 came from "Accurate Miniatures", I bought it for 10-15 bucks at a show. It is the second and last kit from that maker I'll ever bother with.
 
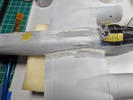
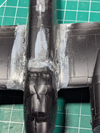
Long time with no update. Reason for that was endless rounds of sanding, sealing, sanding, putttying, sanding, primering, sanding, cursing, giving up and accepting failure as good enough. Yeah I know I just made up some words, that is just how I felt.

1744932980758.png
1744932999840.png
1744933018850.png

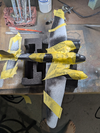
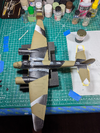
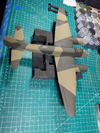
This week I have primed, painted the color-coats, and cleared the entire thing.

1744933040416.png

1744933055037.png

1744933078940.png
 
I've had my battles withy this kit for sure. Several days or weeks going by without updates is a sure sign this one is set aside.

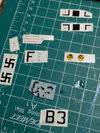
I kept pushing and made it to the sticker-stage, immediate impression is that the designers/artists were high that day. These are the underside insigs.

1746221399885.png

Sticker 4 & 5 are intended to go onto the dive-brakes, with the pair of 6s being put on the wings. Got it! but ummm...why is the white gap of the upper one not sized to match the lower one? Whatever, I'll slice it and make it match, too much white is easier than not having enough. I was able to put 6L and 6R down without a problem. But, it got worse.

1746221685908.png
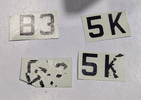
I was unable to remove B3 from the backing paper without it shattering, didn't even get close to the plastic, just disintegration. The actyual aircraft I was building was marked that way, and while I do care about historical accuracy, I also make many concessions. Nobody will notice if I replace B3 with 5K right? Do it!

1746221868432.png

Damnit! Back to the closet with you while I figure out what to do here.
 
Long time with no update. Reason for that was endless rounds of sanding, sealing, sanding, putttying, sanding, primering, sanding, cursing, giving up and accepting failure as good enough. Yeah I know I just made up some words, that is just how I felt.

View attachment 144446
View attachment 144447
View attachment 144448

This week I have primed, painted the color-coats, and cleared the entire thing.

View attachment 144449

View attachment 144450

View attachment 144451
That is a great paint job Edbert. Nice crisp lines,
 
Probably the worst part of any kit is the decals/stickers.
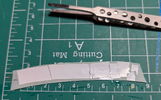
I'll never say I love that phase, but when they work well I do not mind. The Phantom I built would be an exception, I care not how well they lay down when there are ~200 of the bastids!
 
This kit is getting frustrating. No blame on the kit itself, maybe the old decals that were (apparently) stored improperly at some point in ~25 years.

I discovered that those decals that disintegrated were the single color ones. Either the lettering as shown above, or the fuselage band (was it called Reich Defense on bombers, or was that fighters only?), but the multi-colored decals seem to have survived.

1747172635163.png

At least until I put vinyl stencils on them...le sigh.

1747172305490.png
1747172332296.png

I'll never give up or throw it away, but back in the closet for now, until I learn how to make my own masks with the Cricut.
 
Ooh, that must be some kinda frustrating.
Good on you not to toss it, though.
 
Nice airbrush work too.
Thanks!

I'm not all that happy with it, too much splatter, I can do better. But this caused me to do a full breakdown and cleaning.

1747173122236.png

I'm suspecting some invisible damage on the nozzle, think I'll put it in the electronic/sonic cleaner before assembly.
 
I am DEFINITELY in on this build Ed. I love these aircraft and from what I remember......these are awesome kits.
 
Getting started on the old kit I bought used at the model show last fall for $20. Been fiddling with all sorts of things and realized how little I know about bombers in general. So doing lots of research to catch up a bit. In the course of that I found this "model", you'll want to translate from German...

https://www.fob-scale.com/junkers-cockpit/

I did build up the landing gear, I must say it is nice to have something so sturdy for a change.

View attachment 140050

The ejector pin mark on the actuator will be hidden, but not the one on the front (left) in this picture. I also have some seams to deal with for sure.

While some time spent sanding might fix the tires, I realized they look like balloons (seriously Revell?), so I ordered some weighted resin ones. The ones in this kit remind me of this short film...

View attachment 140053
Sorry, off topic, but: Oh, man—I loved that episode and the whole series. I hadn't thought of it in ages but that still brought me right back.

In case anyone is curious, the show is Amazing Stories. This particular episode, "The Mission," was directed by Stephen Spielberg.
 
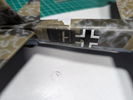
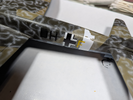
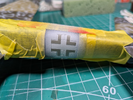
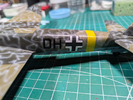
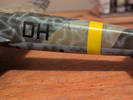
The decal damage I showed earlier were quite easily removed with high tack masking tape. The "D H" is painted on, due to location it is fine on this side but FUBART on the other,

1747788344339.png
The parts of the decals that did not come off have perimeters that are still vaguely visible

1747791592149.png
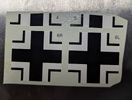
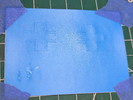
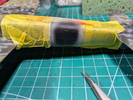
Here's my mask from my recent Cricut purchase.
 
For the Balkenkreuz, I am thinking this calls for some enamel. Terrified and maybe scarred from tape on top of acrylic.

Maybe a white cross in model master "insignia white", with XF-1 or NATO Black details on top? I do not want to try and put opaque white on top of black.
 
The picture above of the vinyl mask, that is trash. Note there's no exterior cut all the way around?

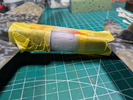
So I made new ones and went to work.

1749130716007.png
This is what I meant about a cut that went all the way around. The paint is straight XF-2 with alcohol thinner so it would dry fast and not bleed as easily.

1749130729970.png
Getting these 8 tiny masks in perfect alignment was a little hard, any imperfections WILL be visible.

1749130741616.png
I used LP-3 for the black, didn't want to risk the black and white messing with each other.

1749130753509.png
I have to say I am pretty happy with the result.

So now this kit is back on the front burner of my in-progress kits. I'm really trying to knock out the list of ones that are within their final phases. There's kits in the stash that are starting to cry out for attention.


Write your reply...

Latest posts

Back
Top