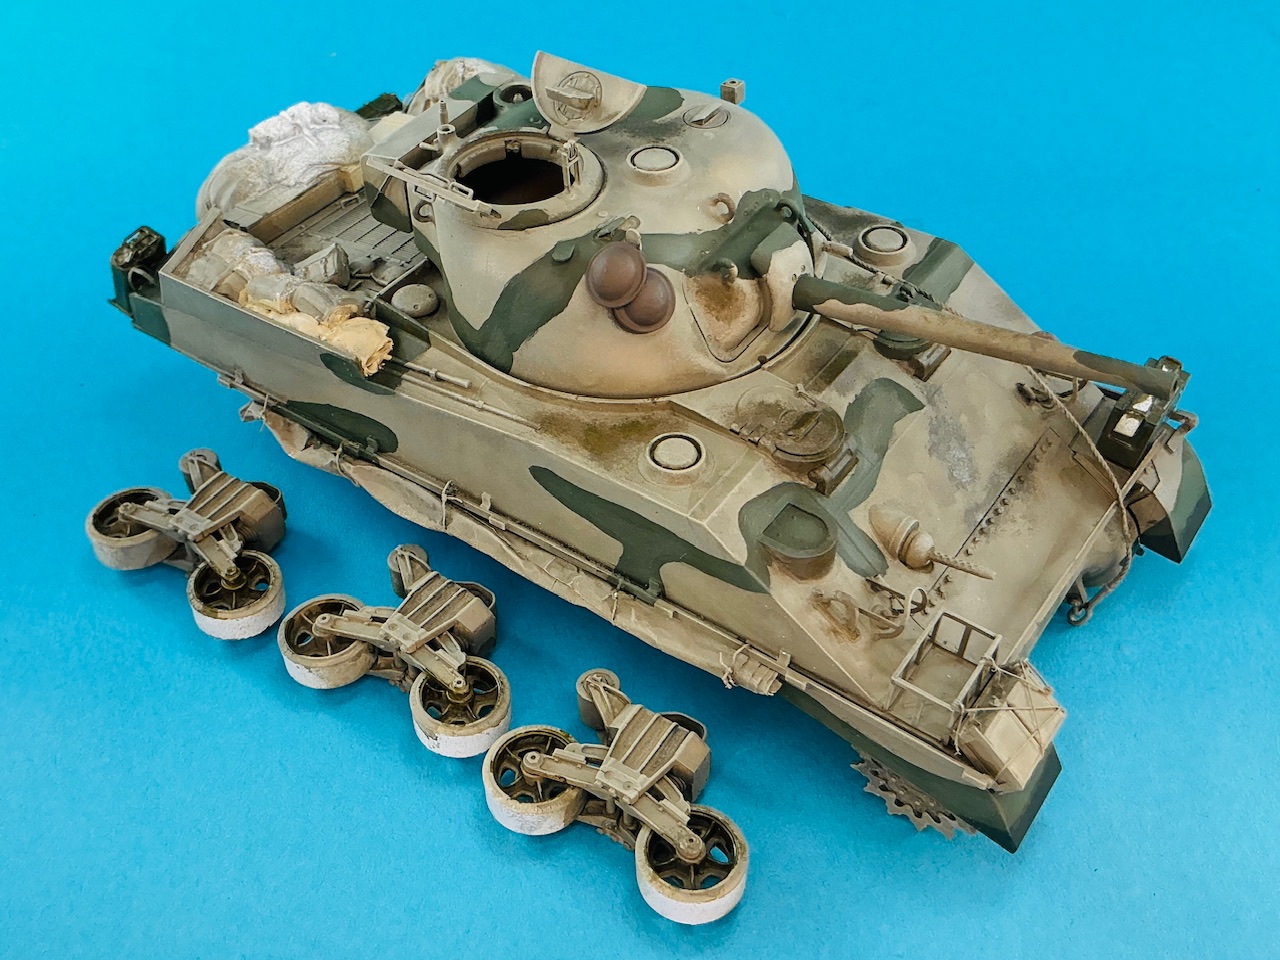
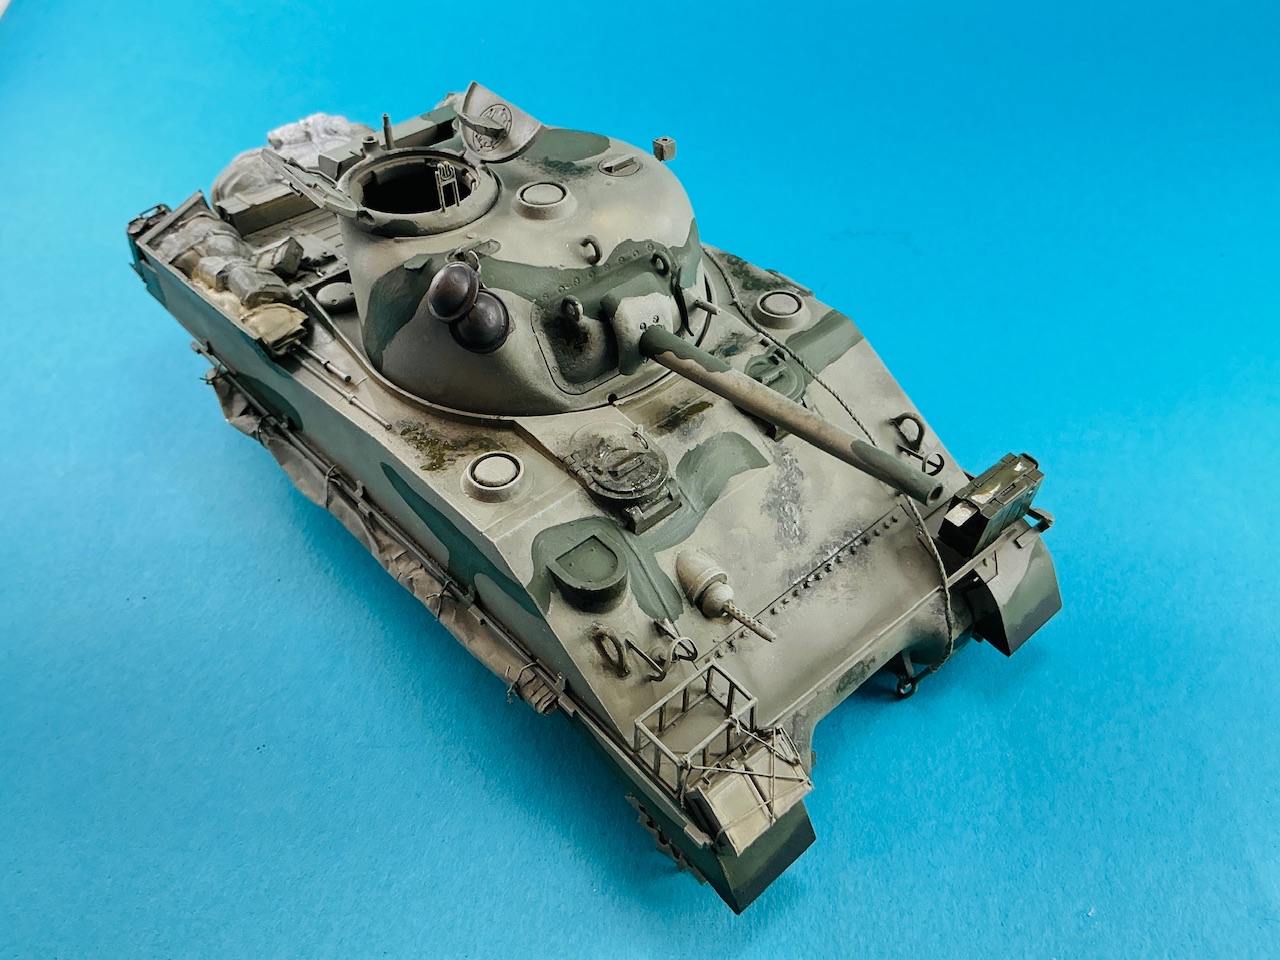
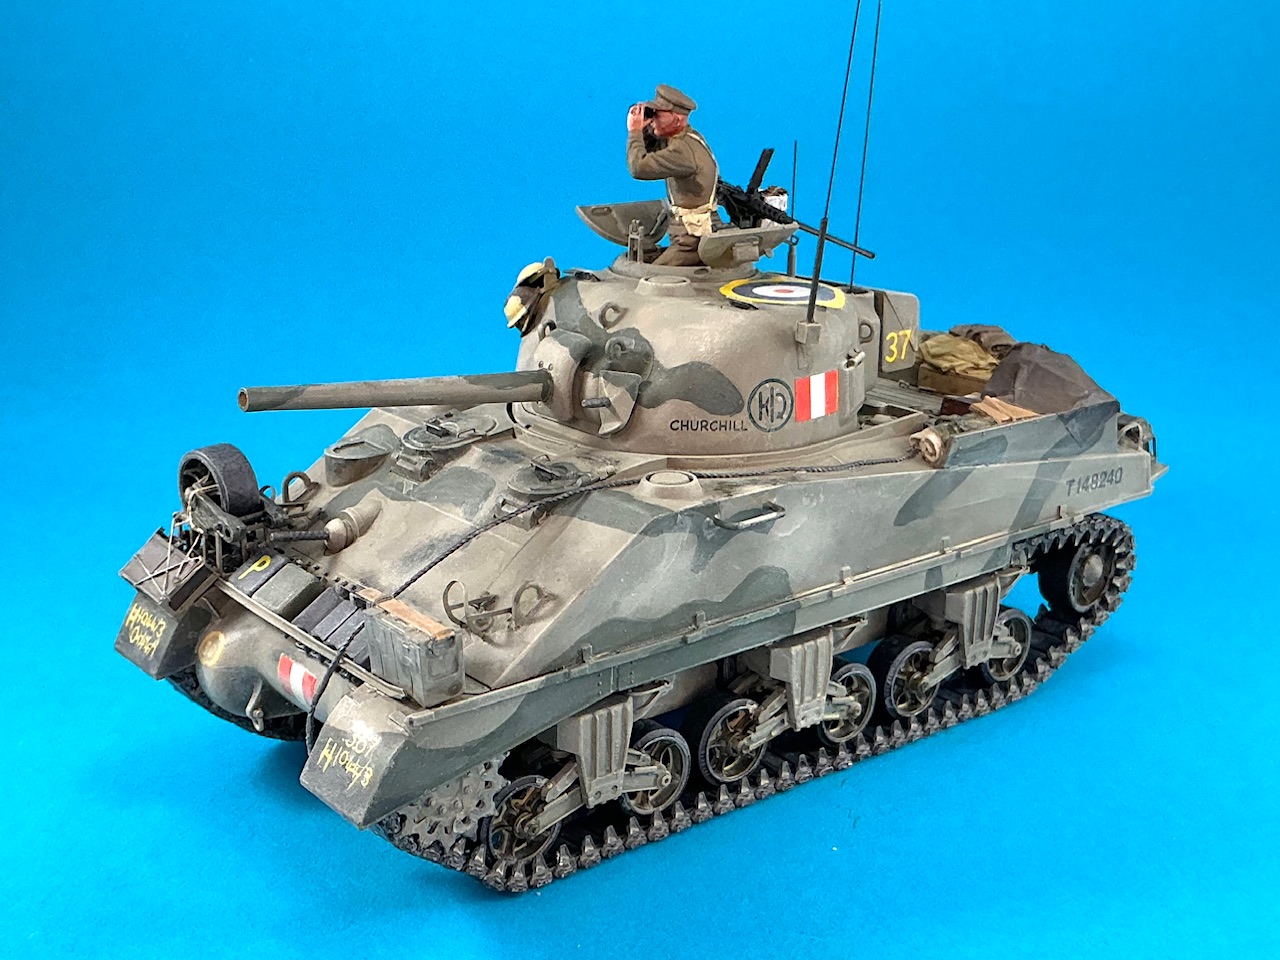
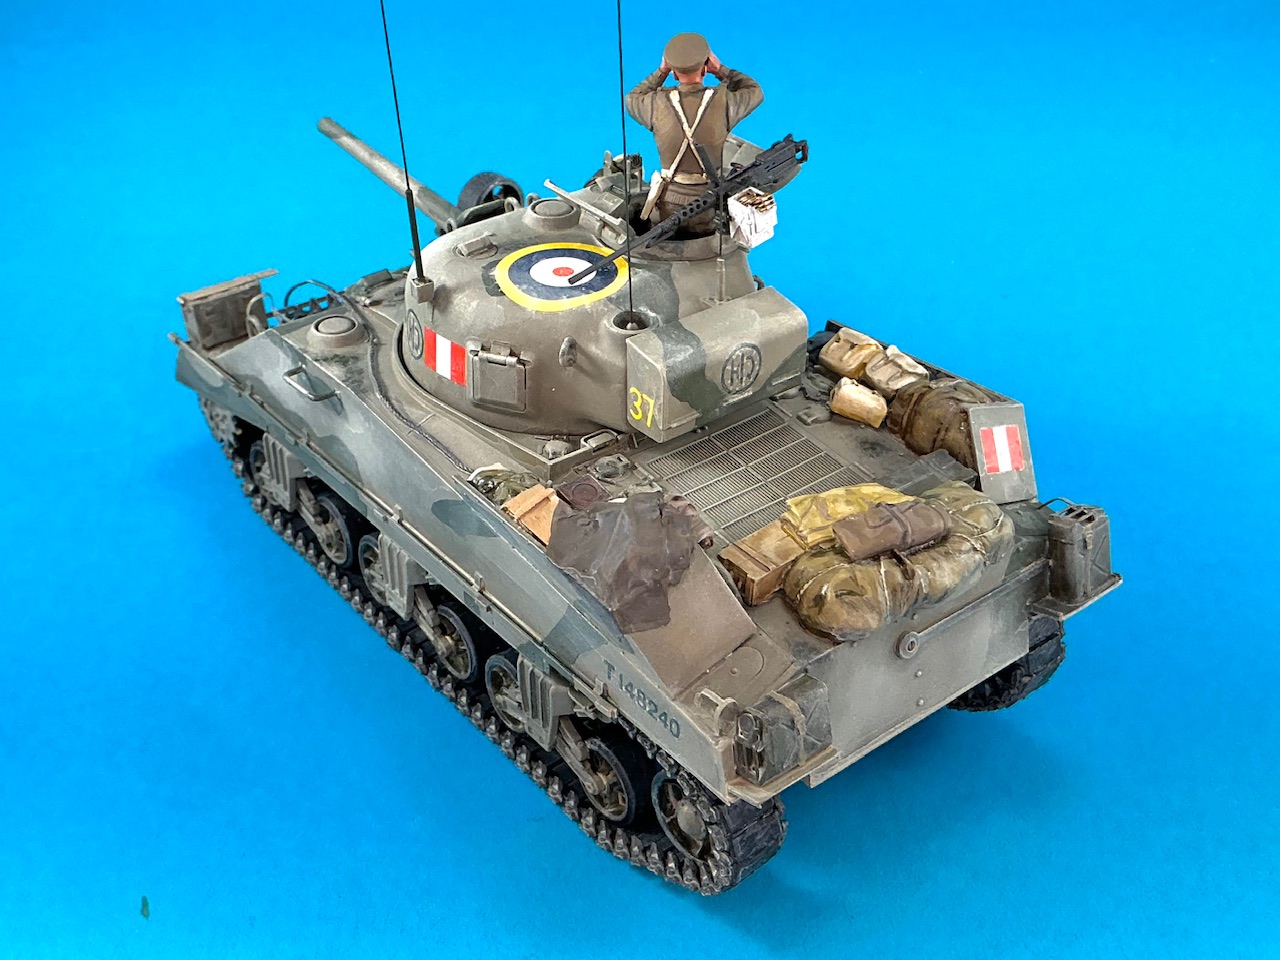
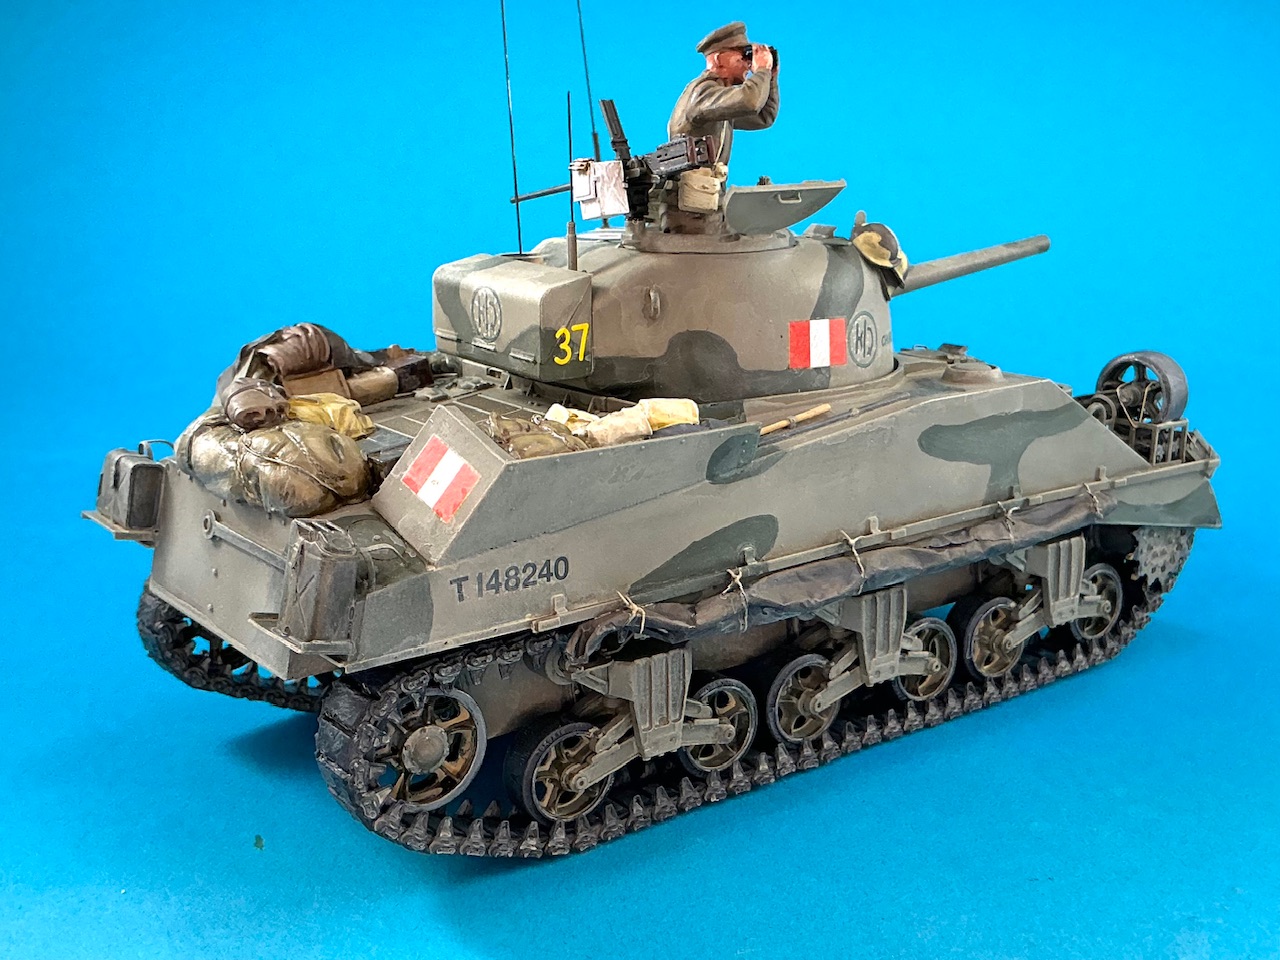
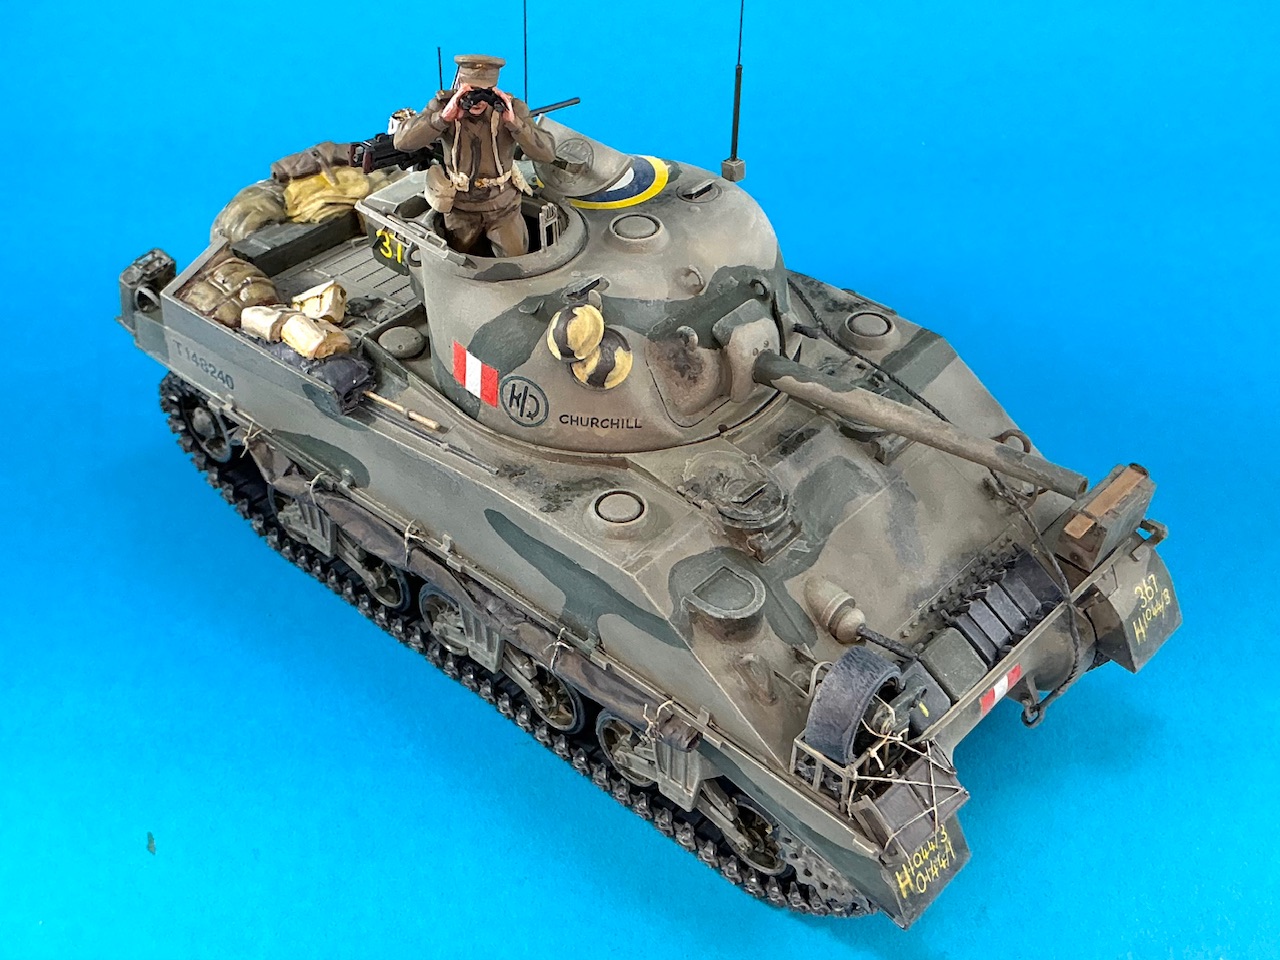
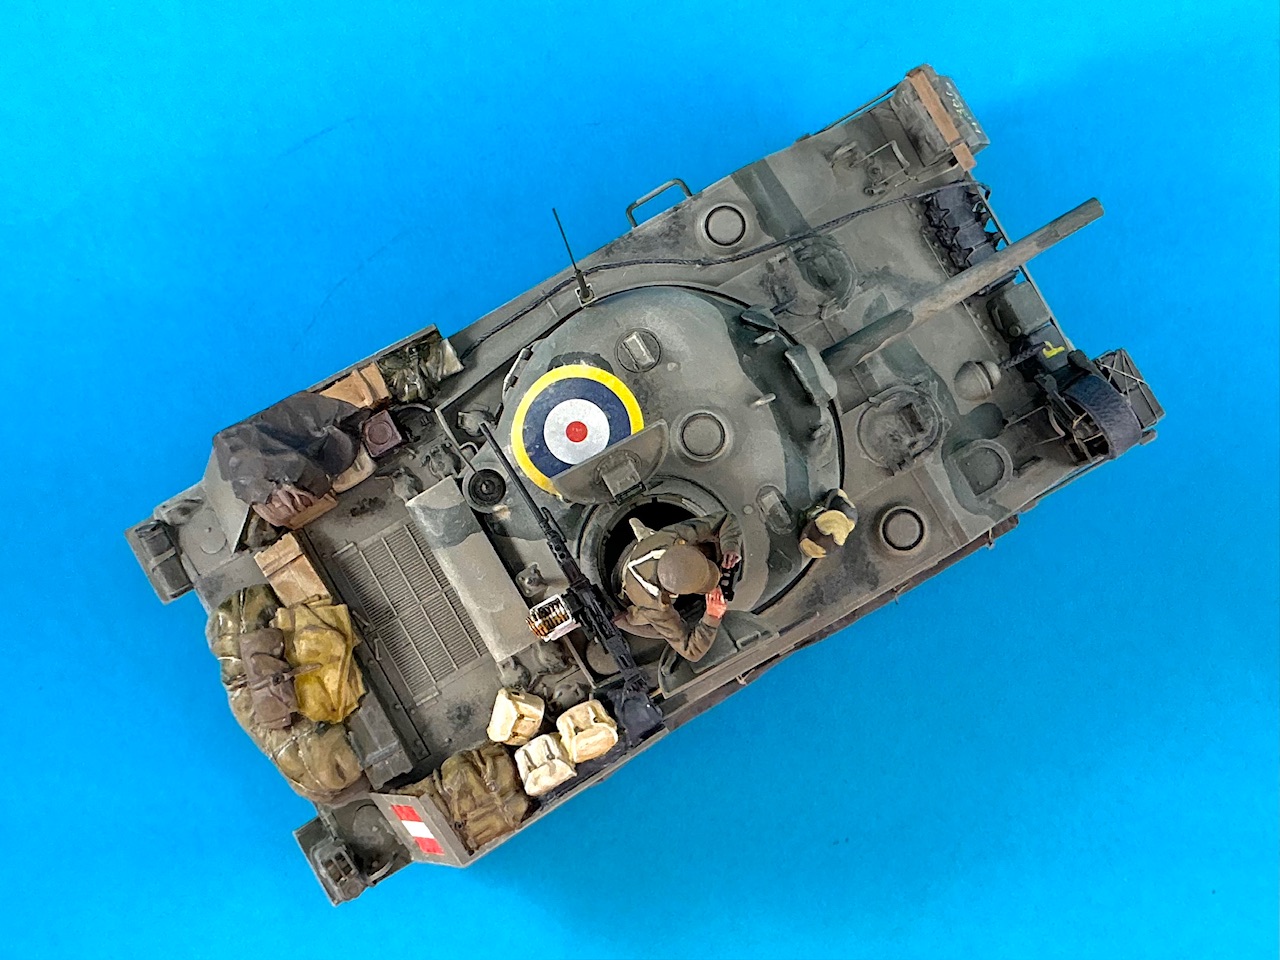
Sherman III of 3 County of London Yeomanry, Sicily

Scale Model Addict - Model Tips, Guides, Tools & Tech, Tutorials, and Community

Help Support Scale Model Addict:

Though theater makeup can be over the top, it does share some aspects with our builds, in that in isolation, bits can seem odd, but taken all together at the expected viewing distance, seem quite realistic and natural.
And like Kabuki it is a visual language that the audience understands and is expecting to see 😳
 
First steps to replicate the flaked-off paint on the tank:

IMG_4158.jpeg


With a very old and worn brush, I "stabbed" two colours of olive drab onto the model, referring to the photos of the real tank to see where to "remove" the paint. I think I need to add a little more paint to make the effect stronger but without overpowering the whole model with it. I also started painting the stowage.
 
As an Amazon Associate we earn from qualifying purchases. Product prices and availability are accurate as of the date/time indicated and are subject to change.
IMG_4161.jpeg


Two more shades of OD applied, this time by using a fine, good-quality brush to make little, random shapes. It's a little glossy because one of the two wasn't dry yet when I took the photo, and is also by Mr. Aqueous (and therefore semigloss).

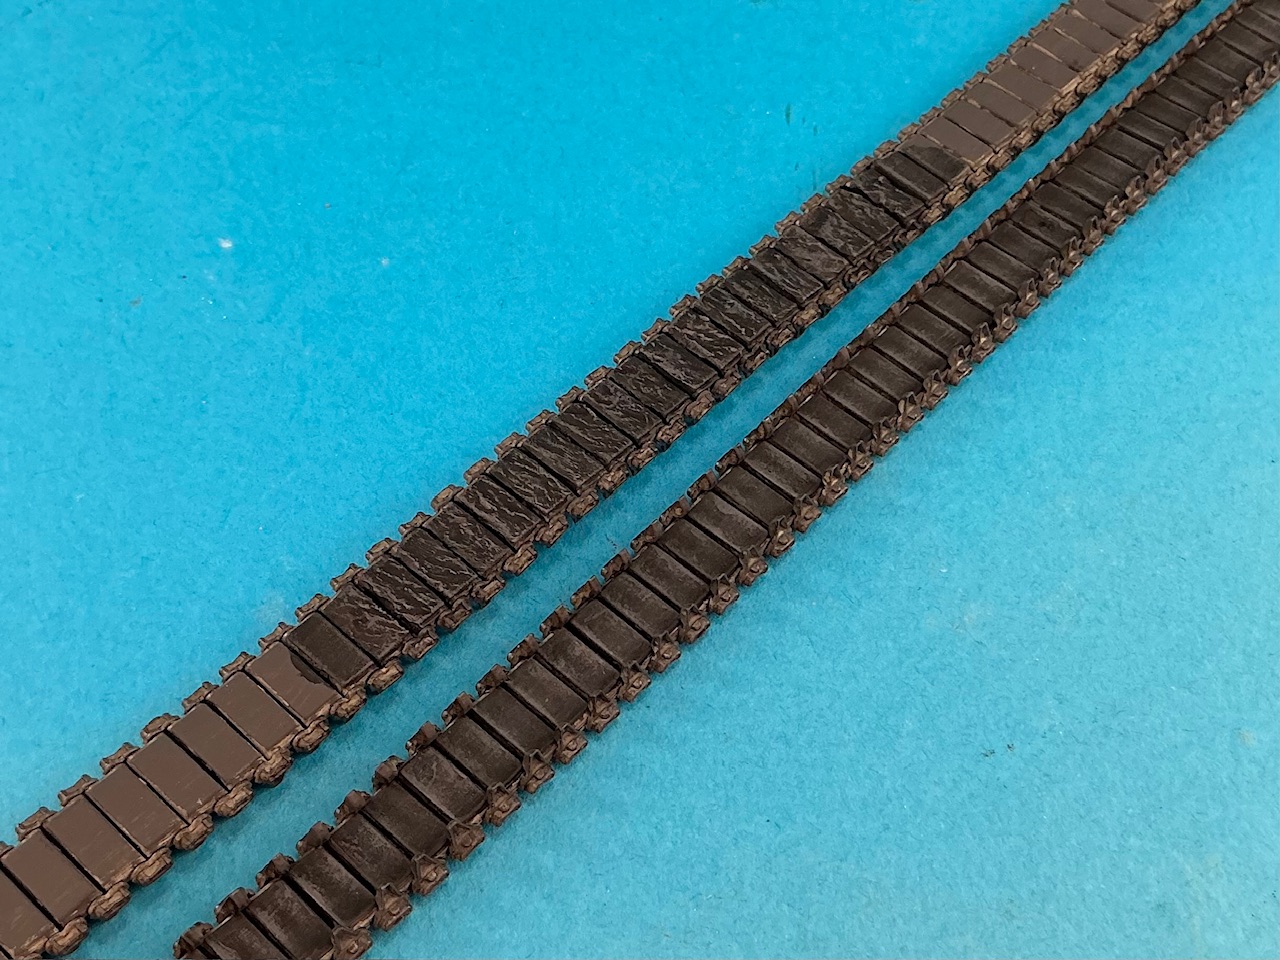
I also painted the tracks:

IMG_4160.jpeg


The first step was to airbrush them light grey, though that proved to be too light later on. I then gave the metal parts two washes of thinned Army Painter Strong Tone — two because the first one was too pale, both by thinning it a bit too much and by the too-light base coat. Once dry, I drybrushed the metal bits with Humbrol Polished Steel and buffed that, though the paint from the fairly recent tin I used is a lot less shiny than in the Olden Days™ (30+ years ago, my tins of that vintage having gone off last year :( ).

Next, I gave the rubber blocks a coat of dark grey, Italeri Flat Rubber, followed by two washes of Tamiya XF-1 Flat Black — again two because the first turned out to have been too thin :) When dry, I drybrushed it with three shades of grey, from dark to medium.
 
...the only thing you didn't do was smudge the workspace and put up an offering to the Almighty TESTOR, guardian of modelers everywhere!

Seriously though, I'm always impressed by your stepwise approach, especially at this stage, because I don't have enough experience to foresee the net effect of each of these steps!!
 
I've painted enough tracks that I pretty much know what to expect by now ;) But that's kind of also why I don't just show the end result but explain how I got there. I'm certainly not trying to say this is the best way to do it, or that my results are the best you'll ever see, but I am trying to show how I got things to look the way I did :)

Aside from that, this kind of returns to something I said earlier: painting in layers that complement each other makes it look better than just in a single colour. I could have painted the rubber blocks in a darker shade of grey and skipped the black wash, for example, to arrive at much the same shade of dark grey as I got now. However with the wash, the colour is a bit uneven, which creates interest.
 
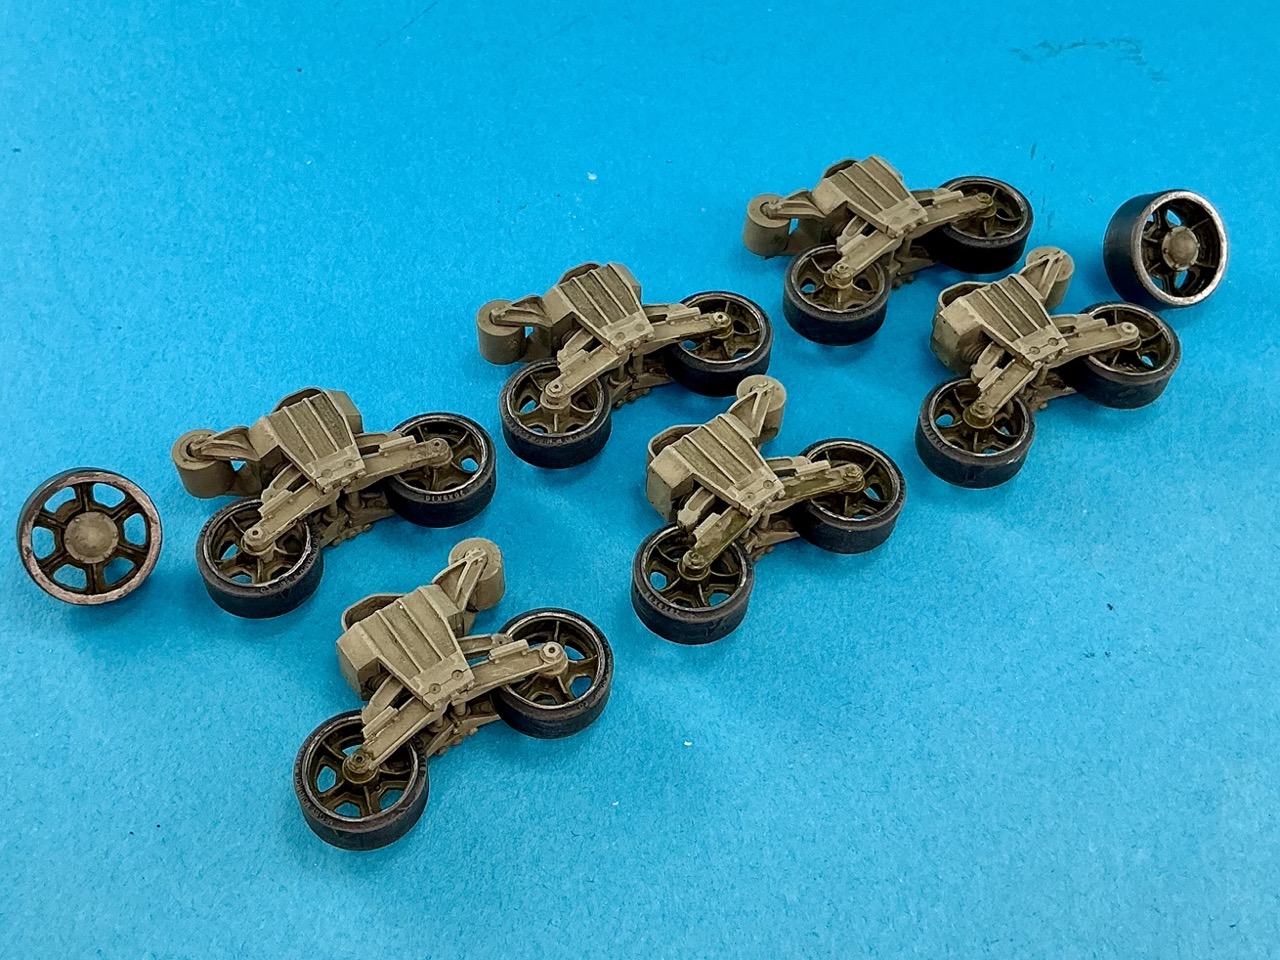
I've also finished the bogies and idler wheels:

IMG_4165.jpeg


The rubber tyres were painted the same way as the tracks. The running surface of the idler wheels are Humbrol Polished Steel, while the bright rims to all of the wheels is Games Workshop Boltgun Metal.

Next, I started painting the stowage:

IMG_4167.jpeg
 
The stowage on the back deck is now painted:

IMG_4183.jpeg


The photo isn't particularly good, the contrast between the colours is much too great but I couldn't get it more accurate without making the photo look even worse :( I'm still painting the stowage for the hull front.

When the rear deck was done, I applied the decals:

IMG_4184.jpeg
IMG_4186.jpeg


Before doing that, I first repainted the circles of the squadron markings (on the turret) dark green with a fine brush, because the pictures of the real tank show that it was lighter in tone than the letters "HQ" inside, and Mike Starmer said the circles were probably green.

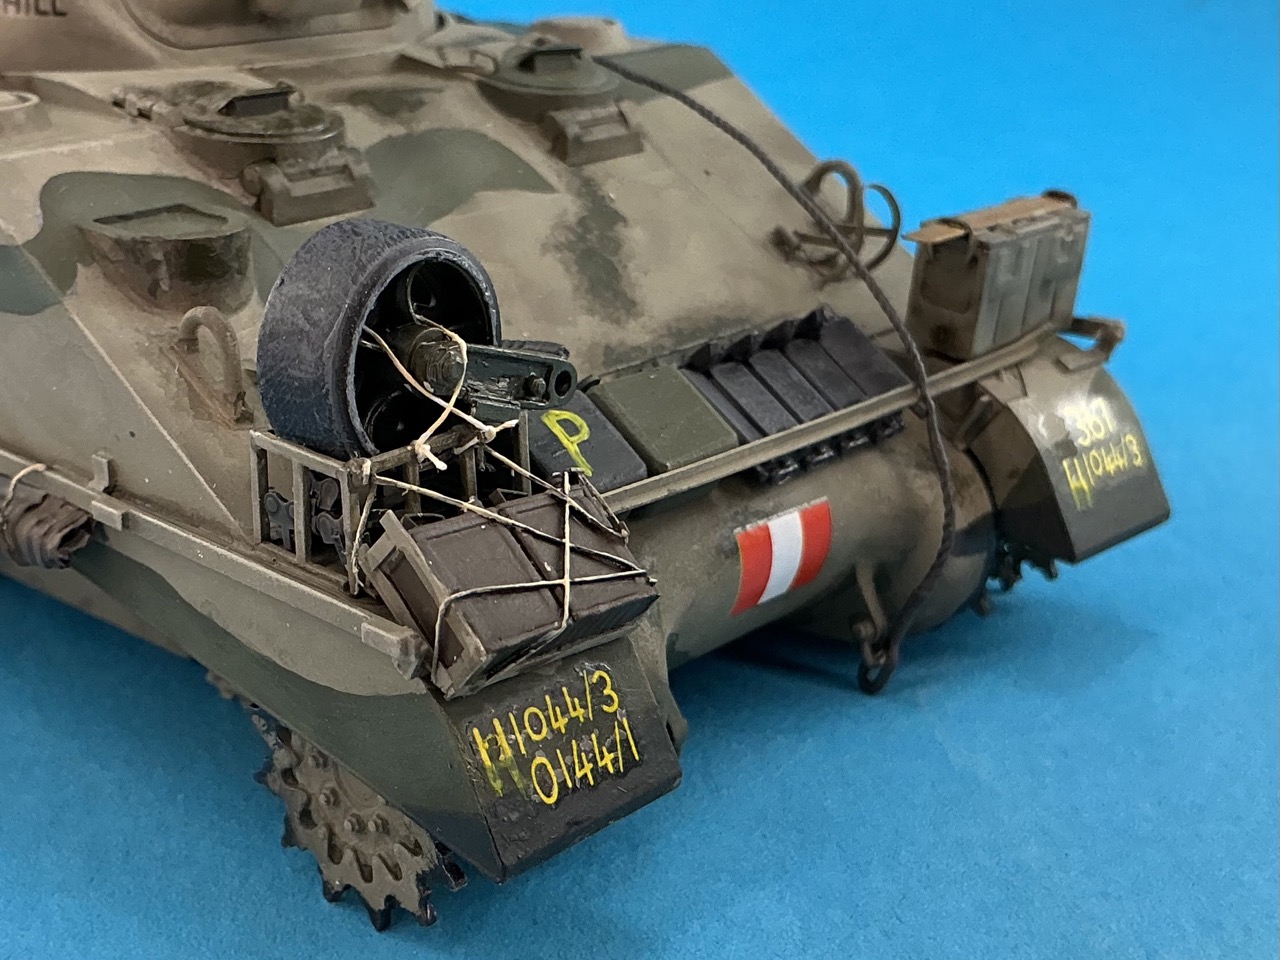
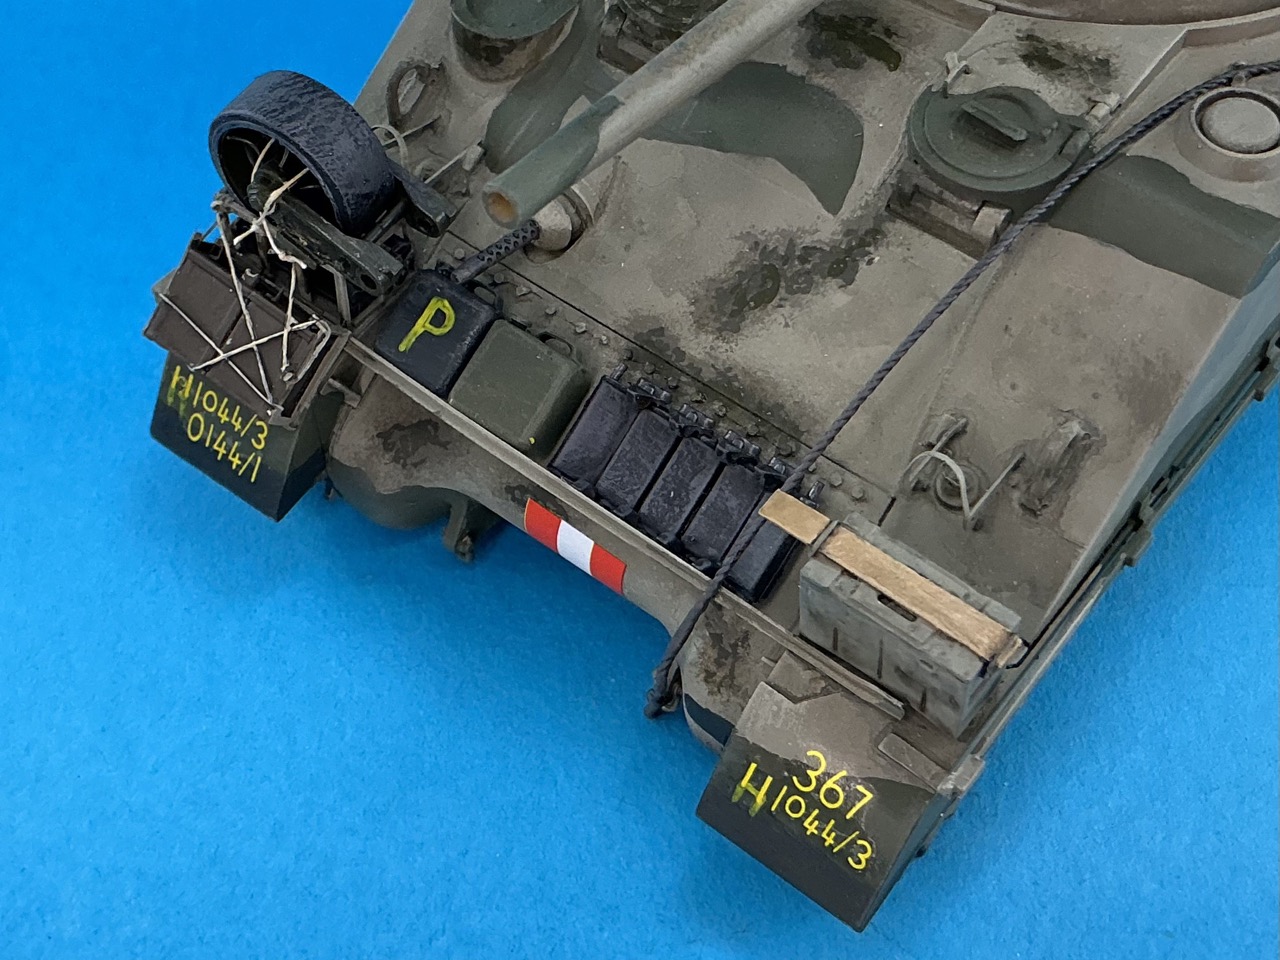
Some of the kit's decals aren't historically correct. In the yellow text on the right front sand shield, the H is too large (it should only be in front of the first line), the name Churchill is in a wrong typeface (MS Comic Sans, if I'm not mistaken …) and the same goes for the War Department census number (that's in Helvetica, which didn't exist yet in 1943) so I cut the hook off the 1 to make it resemble what was on the real tank a little better.

On the lower hull, I painted matt black over the bolts for the bogies, idler wheel, etc. because the photos of the real tank show it had black stuff there to waterproof the seams. Once dry, I drybrushed it with Light Mud to make it look like it's beginning to wear off.
 
...leave it to Jakko to comment on the typography! Also reminds me how I closed that door after retirement. Well, not completely... 🤭


Oh, and:


:)

But yes, it's something I notice, and don't like when I see it :) It's laziness on the part of the decal designers, IMO, and even worse when you see it on a restored military vehicle.
 
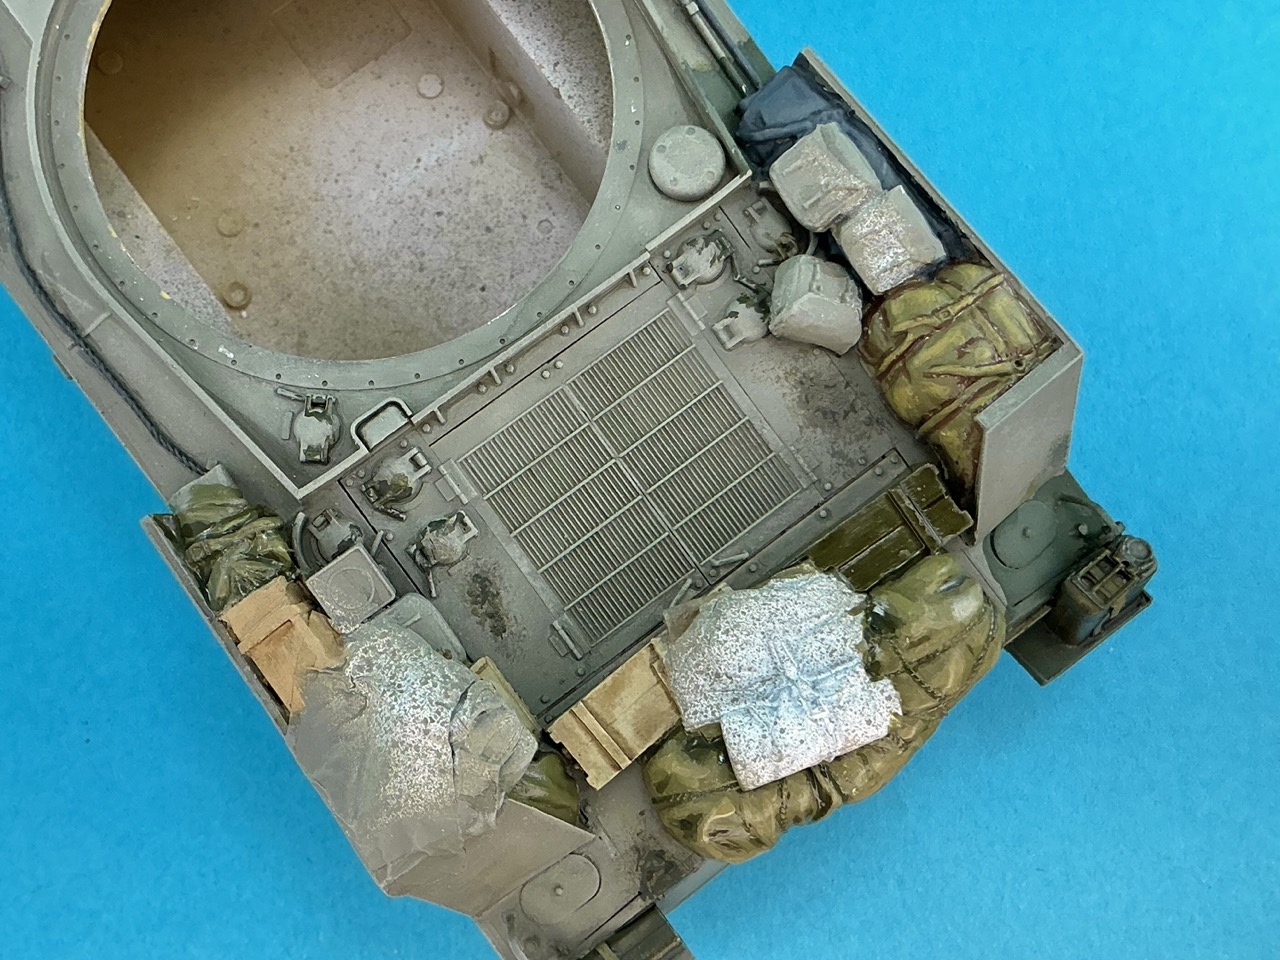
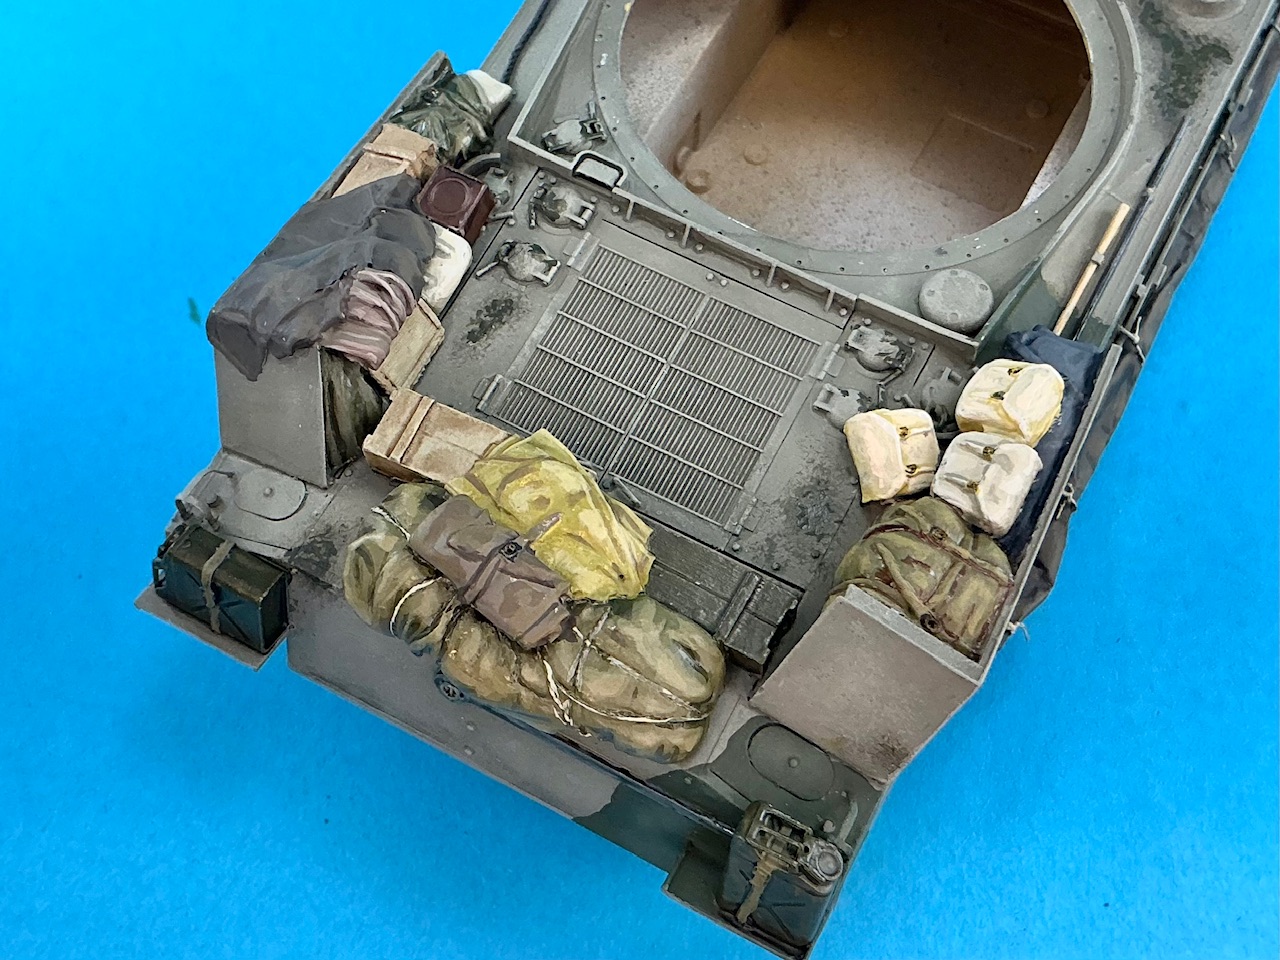
Finally, the stowage on the front is done, too:

IMG_4188.jpeg
IMG_4189.jpeg


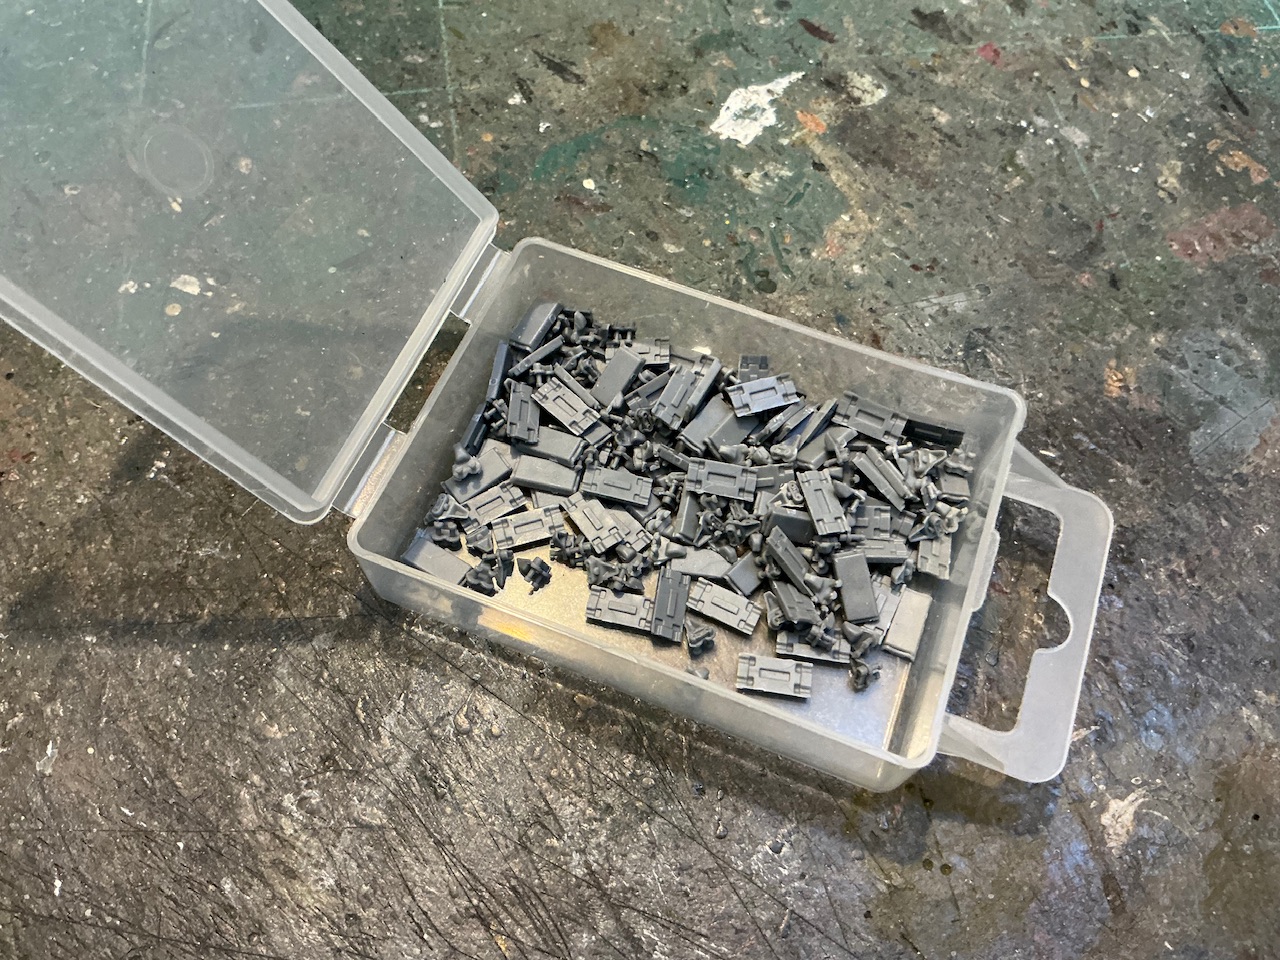
Inside the rack under the spare wheel are four track grousers, which could be installed on the track for better traction. I don't know if that's what was in the rack on the real tank, but whatever it was it kind of looks like grousers in the photo so lacking more information, this is what I settled on. They're from a set of T48 track by RFM, which gives you 102 of the things when IRL, thirteen were to be fitted per track :)

I also altered the markings a little to make the Hs appear more like they were on the real thing, by first painting over parts of them with the camouflage colours underneath and then altering the letters with yellow. Except yellow is always so damned transparent that I'll have to add another layer at least :(
 
The paint I used was Army Painter Demon Yellow, and TBH, I wouldn't recommend it — nor their gold paints, for that matter, as they both cover really poorly. I used Tamiya XF-3 yellow for the second attempt (no photos yet), and it covers a lot better.
 
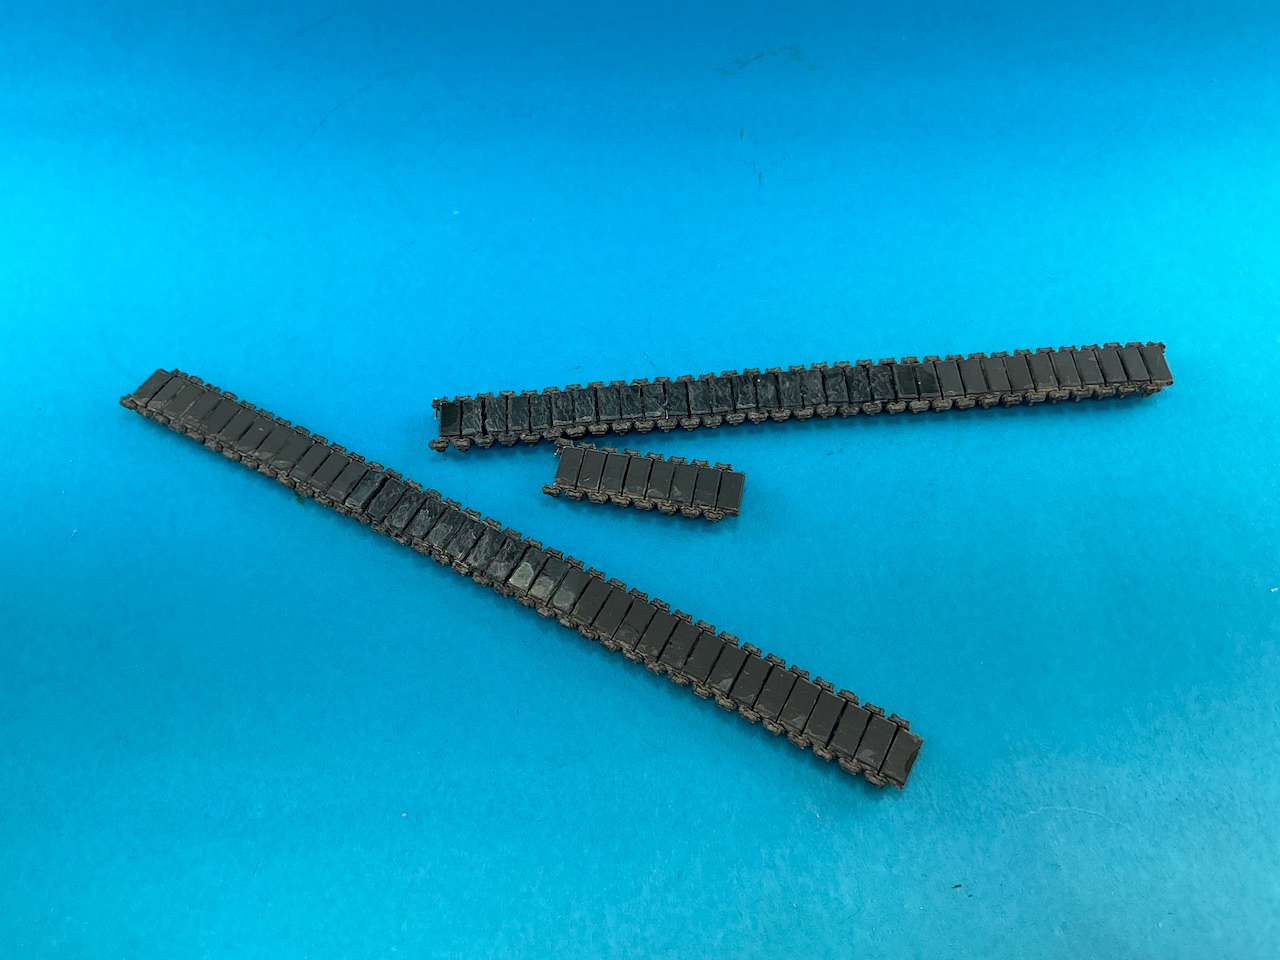
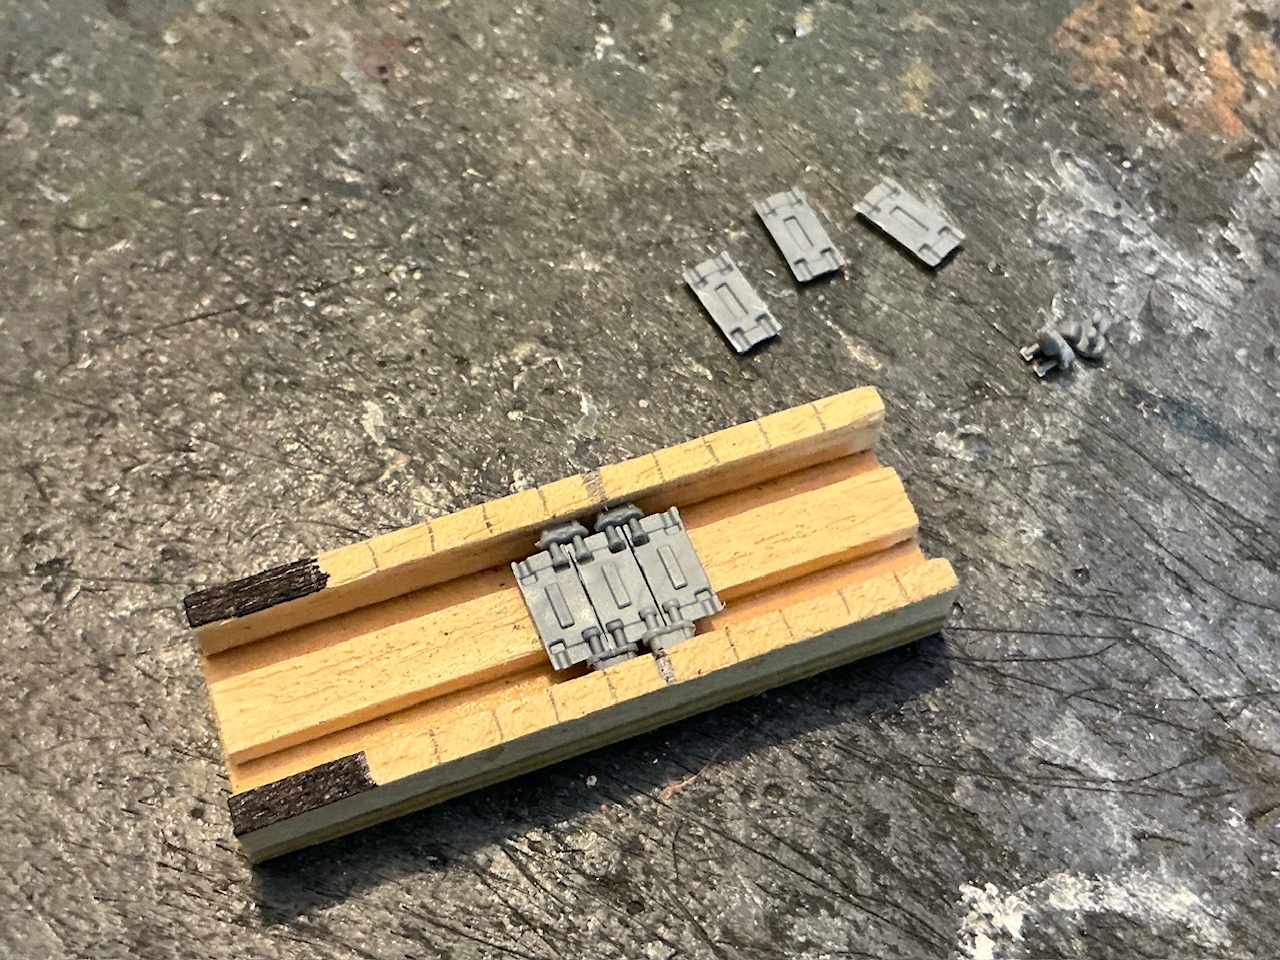
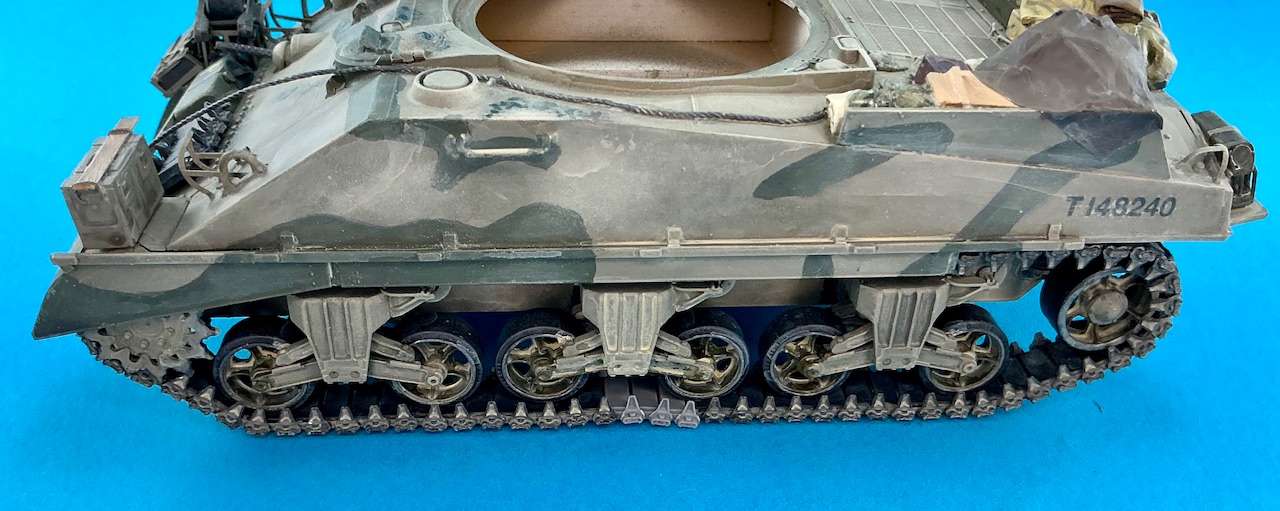
Here's something to quicken the hearts of any tank modeller: when you discover you miscounted something for the tracks … I had distressed some blocks to make them look damaged, but only enough for what would be on show, and then worked out where they should go. And now it turns out that I was about eight links out with the number of blocks between the damaged sections. So:

IMG_4192.jpeg


Remove eight blocks from the underside, then split the top run and splice those eight blocks into the track again. This is where I really would have liked to have Panda Plastic tracks instead of MiniArt, with which I could just have pulled a few end connectors off — but that's not possible here, so I had to cut through track pins and make a couple of new ones from brass rod.

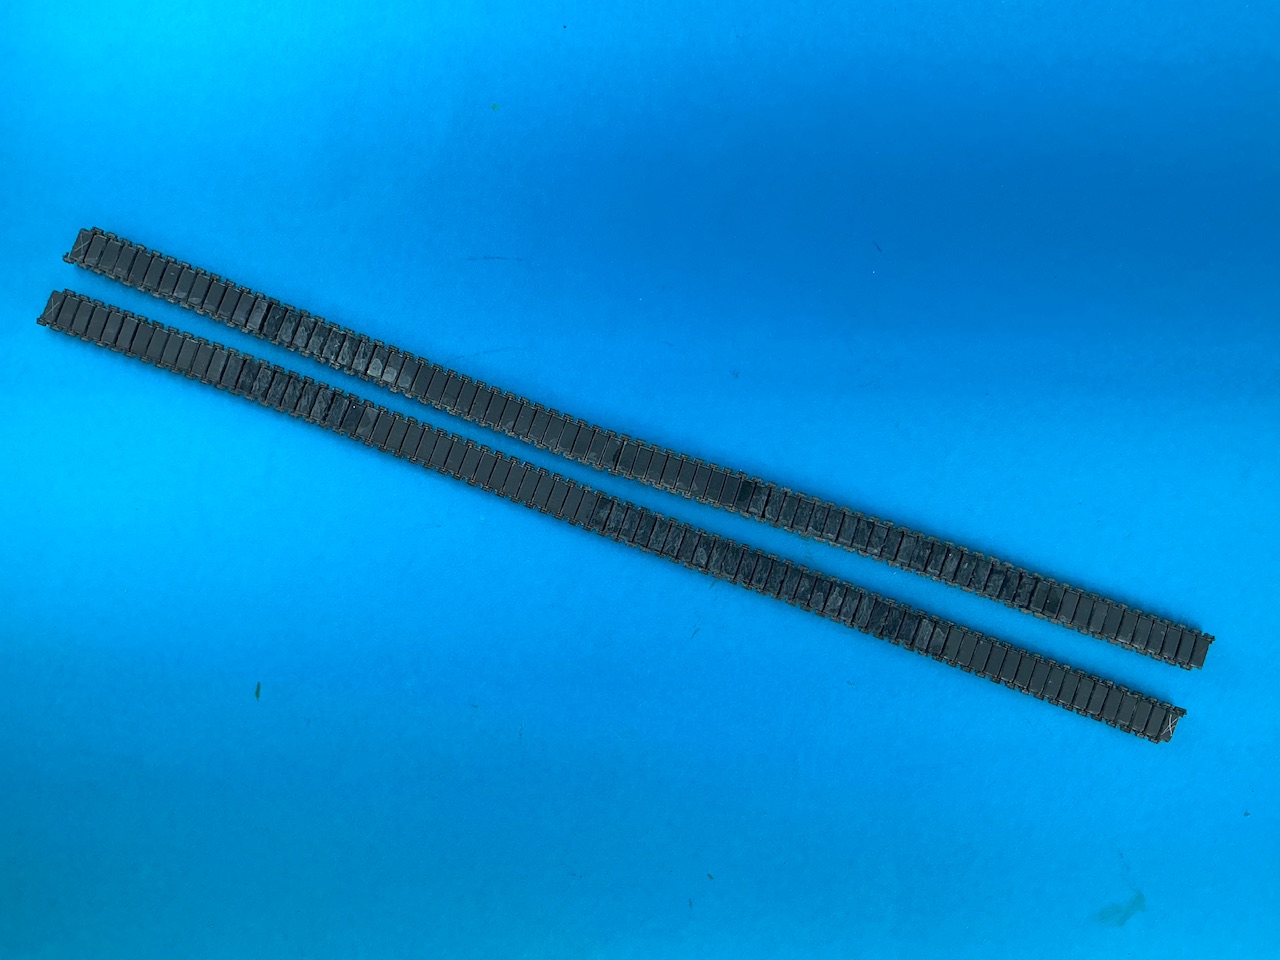
Spot the differences:

IMG_4193.jpeg


Top is the modified track, bottom one with the count wrong.

Now I'm hoping that it's not going to break when I put it onto the model …
 
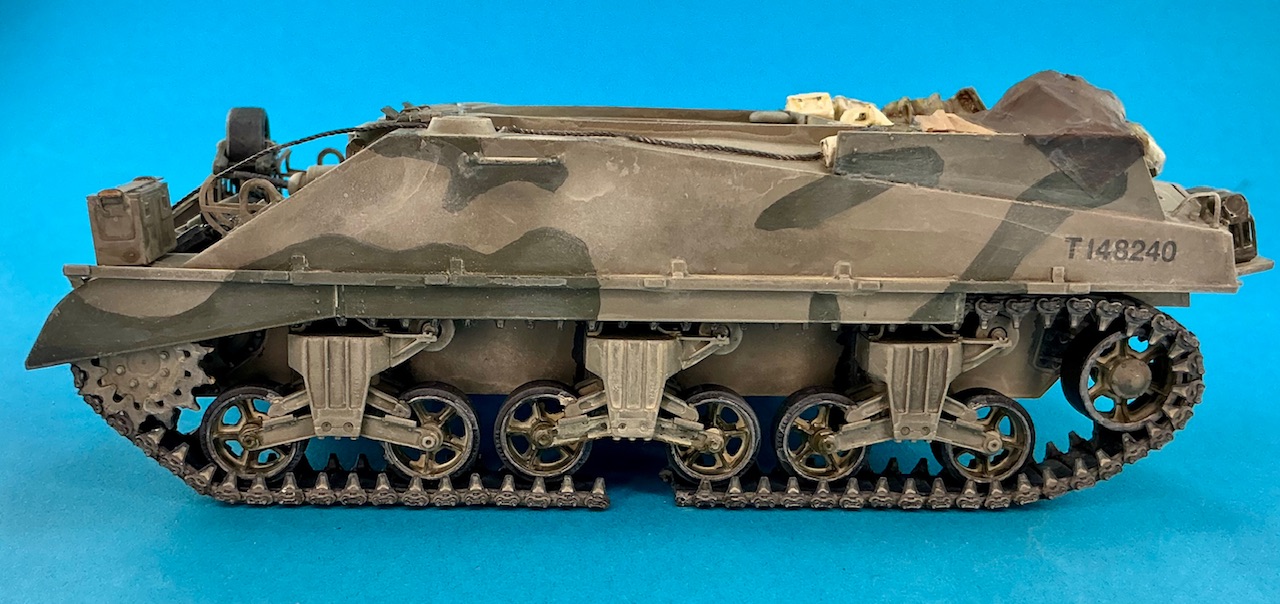
Aside from fitting the tracks, which even after the above still kept struggling against me but eventually did end up on the tank, I gave the model an overall wash of a pale sand colour, followed by drybrushing with the same paint. This gave, I think, quite a decent effect of dust.

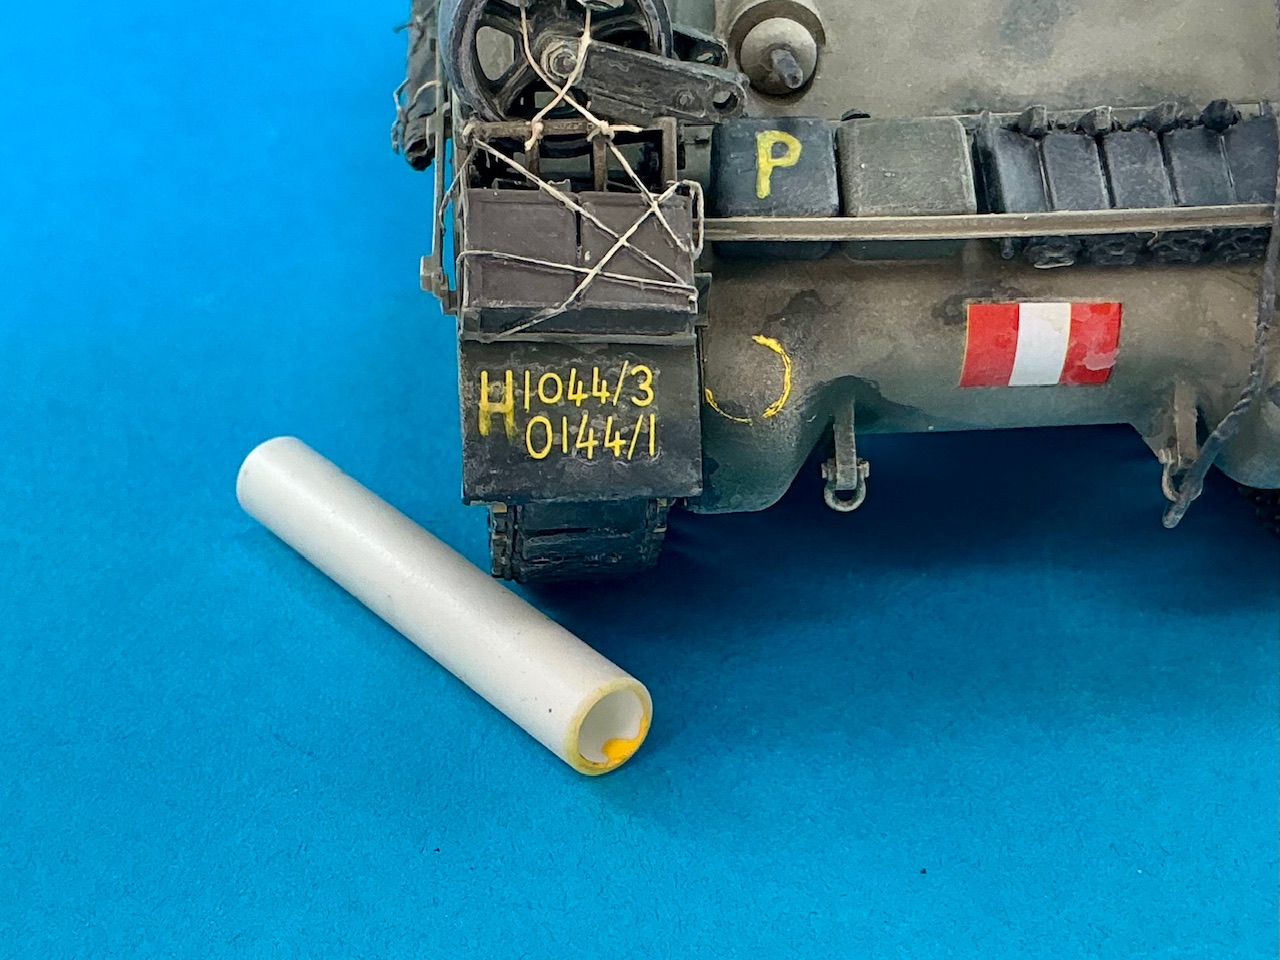
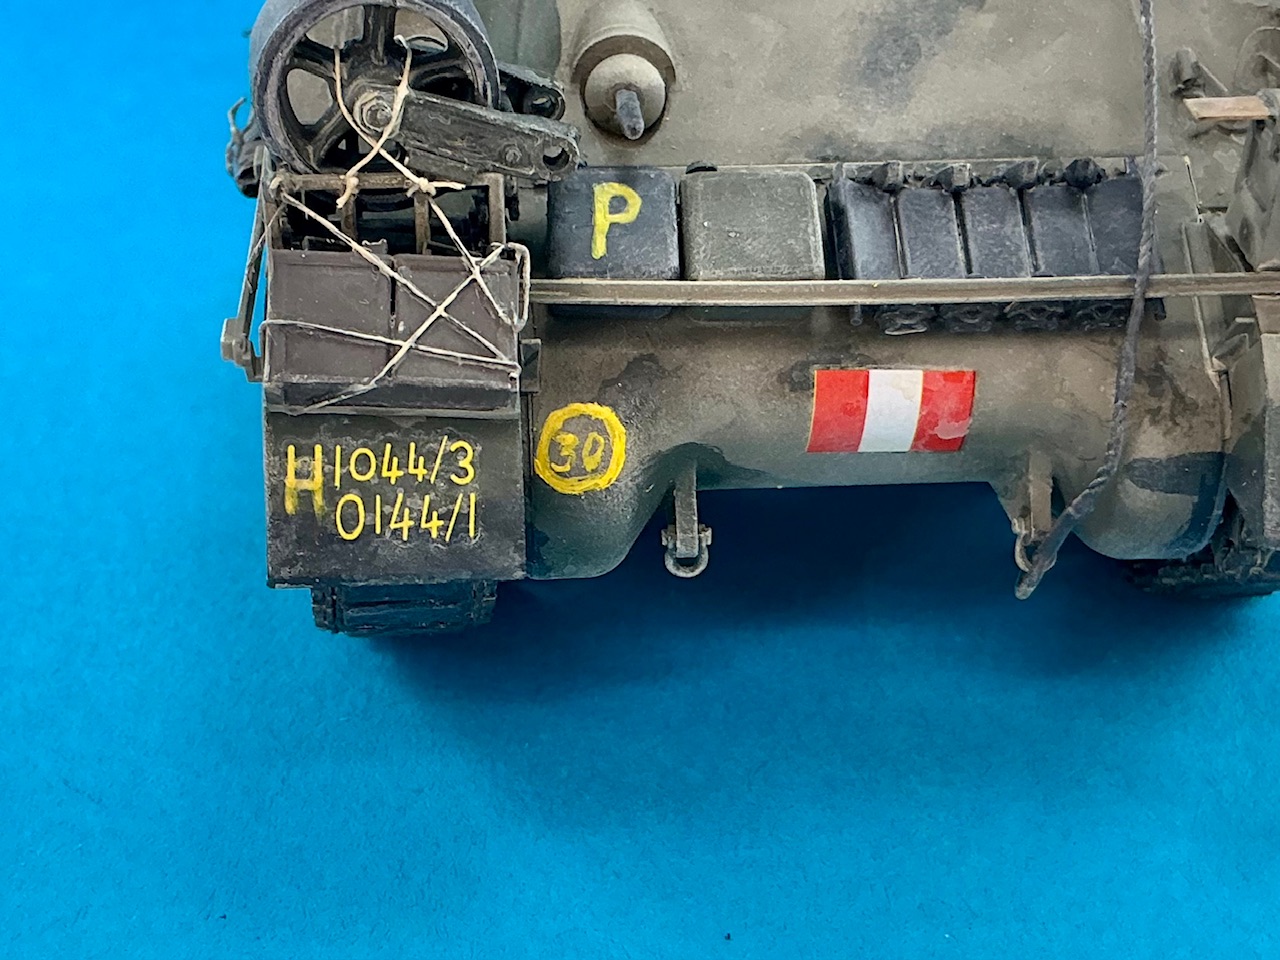
Then I discovered that there was a number in a circle on the nose, but it's not really clear what it was, exactly (and it was totally missed by the decal designers at Asuka). I suspect it's a bridge classification of 30, all in yellow, so I painted that on. Making a neat circle isn't that easy, until I hit on the idea of using a piece of plastic tube as a stamp:

IMG_4218.jpeg


And then some work with a brush:

IMG_4219.jpeg


It doesn't look that great, I admit, but I next added a fairly thick layer of dust (as above) and it was nowhere near as obvious anymore :)

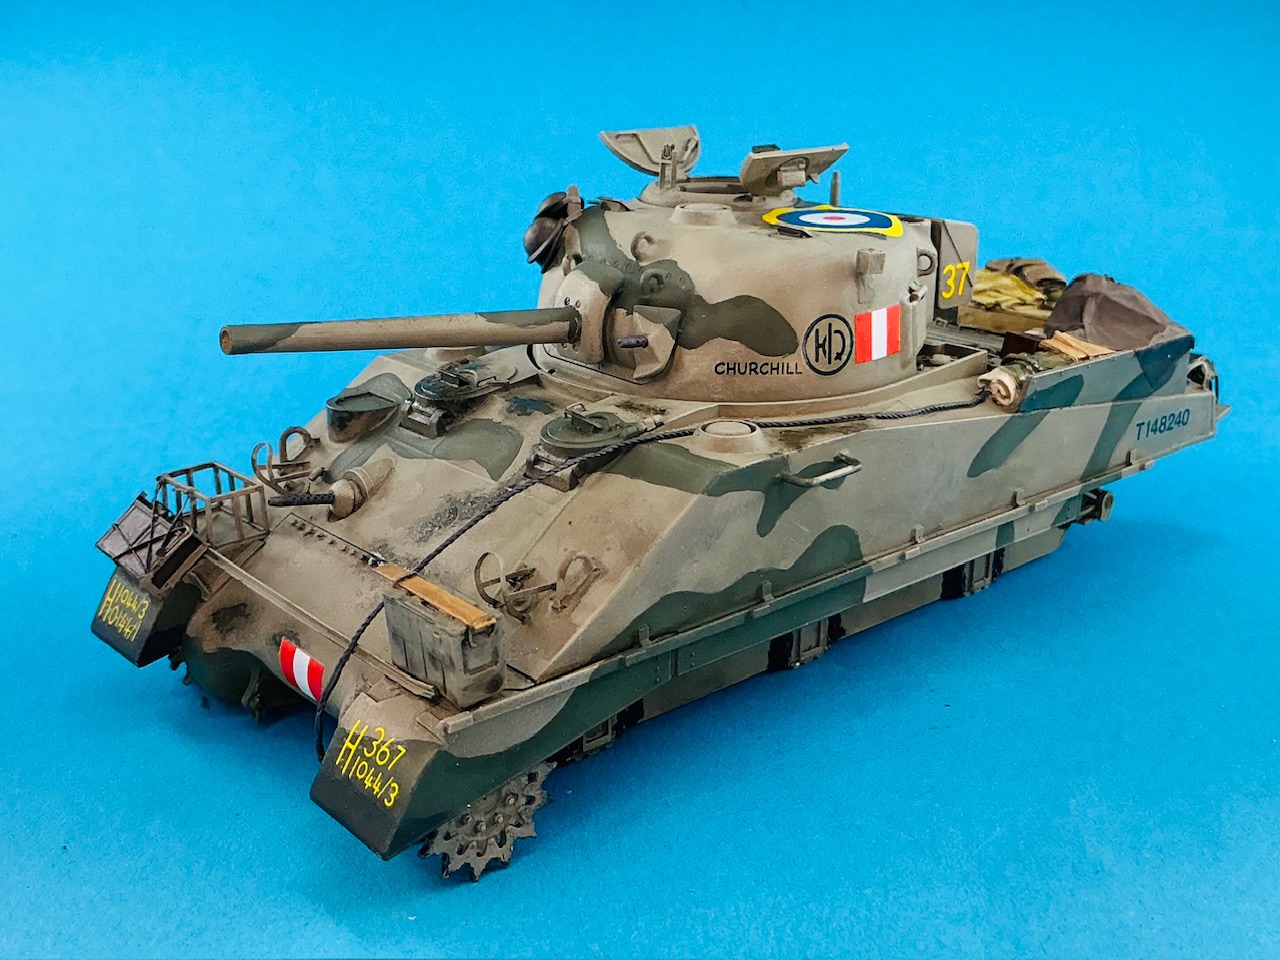
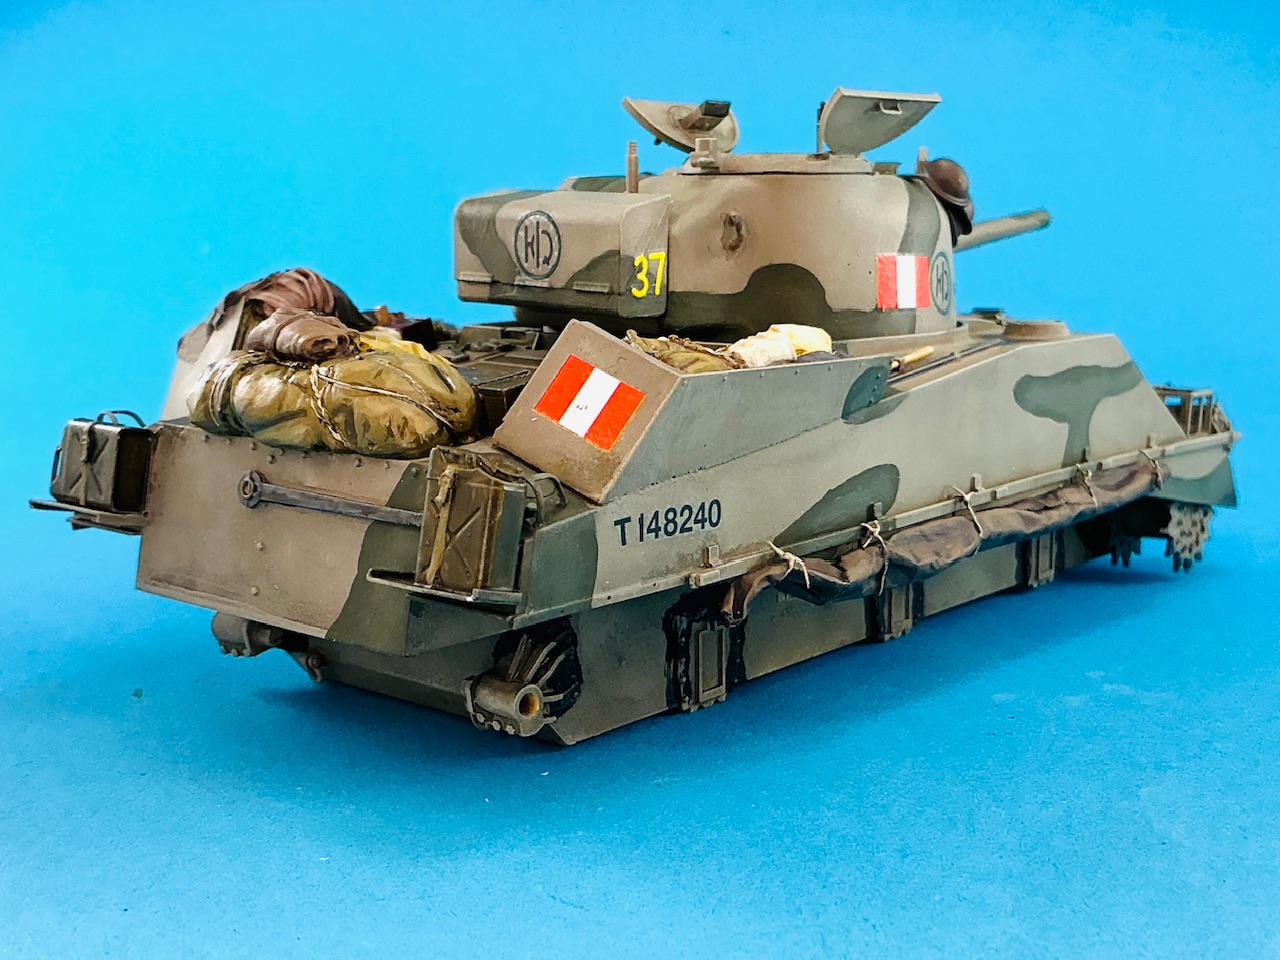
After also painting the commander (not very well) and stippling some matt varnish over the worn paint, which didn't really want to lose its shine until now, I think I'm done …

IMG_4220.jpeg
IMG_4221.jpeg
IMG_4222.jpeg
IMG_4223.jpeg
IMG_4224.jpeg
 
It is a very interesting looking Sherman, especially the circular marking on the top of the turret. I'm assuming that is for aerial recognition.
I like how this one came out. :)
 

Latest posts

Back
Top