Zoukei Mura 1/32 Ki 45Toryu (Nick)

BarryW

Active Member
Joined
Apr 17, 2025
Messages
60
I see that there are several members here that are familiar with Zoukei Mura but nevertheless these kits are new to a lot of people, specially those who don't (yet) build 32 scale. Therefore I will give my 'take' on what can be a controversial brand and explain my take on these.

First of all after finishing my Hurricane build I cleaned up my build area as I always do between projects.20250527_071127223_iOS.jpg
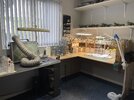
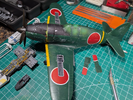
Above you can see my cleaned up build and airbrushing areas with the Ki45 out on the bench ready to start.

In the middle of the picture you can see the sprues out and ready, all with labels to help easy identification.

The box lid
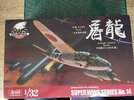
20250526_134339267_iOS.jpg

Zoukei Mura produce the most detailed aircraft kits you can get in plastic without turning to etch and metal parts. They are designed to help modellers understand how the actual aircraft was built which means they provide a very different style of engineering to other manufacturers. They design their kits so you can have, if you wish, all the panels open to display all the internal details. Personally I like my kits 'buttoned up' to appreciated the clean lines of the aircraft though, where appropriate, I do like an open canopy to display a detailed cockpit.

For this build I will take my usual approach with these in building up the interior details but only painting those internal details that will be seen.

Some people accuse Zoukei Mura (ZM) of over-engineering but I disagree. I enjoy learning how the aircraft were constructed, love the detail even though I wont paint what's not seen. Also remember there are a lot of people who love to build them with all hatches open. ZM provides the options to display the model how you want.

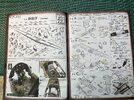
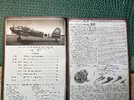
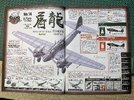
I contend that ZM instructions are the best that you can get. Lets look through a few pages of what is a comprehensive manual. What I will say is that more than any other brand it is best to actually read and examine the instructions while following them closely during the build. Like Tamiya, if you have a problem its because of something you did.
20250526_141701019_iOS.jpg
20250526_141715256_iOS.jpg
As you can see below, they provide Vallejo Model Air colour call outs. On the right you can see an exploded view of all the parts used in the first stage along with photos of how the sub-assembly will look at the end of the stage (if fully painted, of course)
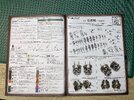
20250526_141731996_iOS.jpg

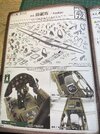
Below are the first pages of the first stage of the build. At first it looks terribly complex and crowded. But it is not if you look at it closely. Each part refers to only a few parts of the model and the various pictures show the assembly from every angle so you can see exactly how you need to fit them together with no ambiguity. Detailed diagrams are supported with photos. At the bottom of the pages all the colours needed on that page are listed. There are warnings and explanations as you go.
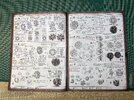
20250526_141748855_iOS 1.jpg
20250526_141813862_iOS 1.jpg

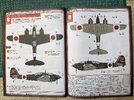
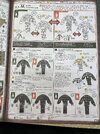
Here are the two schemes provided below for two versions of this aircraft. You have to select which of the two you are building fairly early on.
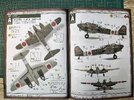
20250526_141833386_iOS 1.jpg
20250526_141844384_iOS 1.jpg
As you can see both versions offer some real painting challenges. I will be building version A,

As an aside, I got an early edition of this kit from when it was released, bought at Telford. This release includes a lot of transparent sprues to enable you to to build the model showing off internal detail with hatches closed. If you want to do this then, because the surfaces are textured, you will need to sand and polish up the areas that you want to be transparent. It would be a nice project but not one that I will take on. Its a nice thought though that I have a lot of spare kit parts if I make a big boo-boo. You can almost build a second aircraft from these transparent sprues, almost!!!!

This is what's in the box after removing the sprues that I will be using.
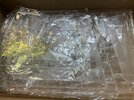
20250526_141933740_iOS 1.jpg

to be continued.....
 
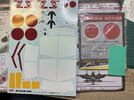
In my experience ZM decals are very good but I plan to paint the meatballs and other details and have a very good generic masking set which will be the only aftermarket I will use. ZM also provide a decent canopy masking set.
20250527_080348303_iOS 1.jpg

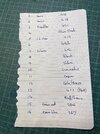
After my clean up and labelling the sprues I examine the paints required, make my own list and translate them to my MRP colours where needed. With Japanese WW2 aircraft this is not easy. MRP provide a full selection of Japanese, IJN and IJA colours but the kit was produced before Vallejo released their Japanese colours. I spent some time working out what colours were needed and you can see below what I call my 'painting plan', the number on the left cross references to the colour number in the instructions, I put a note if needed and then either the MRP colour number for easy reference or the colour being referenced.20250527_075706384_iOS.jpg

So, on with the build....
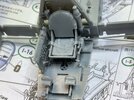
Starting with the beautifully detailed engines.
Look at this, its ZMs signature, all the pistons in the right place. This will never be seen of course and this is one reason some claim the kits are over engineered. I just think that this is a nice 'quirk' that underlines the detail and attention ZM put into their kits.
20250527_081921523_iOS.jpg

Here is where i got to in my first session.
The engines are not quite finished yet. The fit has been faultless but, as I said, check and double check the instructions as you go. I have just one mild criticism, the plastic is a little too soft for my taste, the sort of almost 'rubbery' softness and not the powdery softness Airfix used to have. But it does hold the detail really well.
20250527_101636861_iOS.jpg
When they are finished, I will paint them up, at least where they will be seen in the completed model.
 
I have two kits from ZM, both 1/32nd scale. A late-war 109 and the rare J2M3 Raiden.

I agree with pretty much everything you stated here. I did have some trouble with mating wings to fuselage on both, but that is probably on me not them. Neither one is finished, the Raiden is getting close, the Messerschmitt I dropped and broke, so it is in the closet until I can heal myself mentally/emotionally :)

I painted my insignia on the Japanese one, also beat the paintjob up really hard since paint/primer were known to be in poor condition on most Jap warplanes of the later years.

One thing I would change with what you wrote, there is another maker that rivals ZM in the quality/engineering/details version...Kotare. I'm in the early stages of a Spit 5a from them and it is very much like a ZM kit minus the details that will not be visible, Kotare did not do that. But the casting and engineering as well as the manual (I would not call them instructions) is off the chart good, just like ZM.

I've never touched or seen a GWH kit, but looking at the instructions on Scalemates makes me think they might be in the league with Kotare/ZM, but that is just from looking at pictures and PDFs. I am thinking of buying this kit, but would prefer a later version of the P0 not the Curtis Hawk, but DANG, look at this...https://www.scalemates.com/products/img/8/9/6/1169896-77-instructions.pdf
I agree Kotare are superb kits, but their philosophy is different to ZM and have far fewer parts, pretty much as you said. To me there are three premium brands in the 1/32 scale aircraft space, Kotare, ZM and Tamiya, all very different to each other but top notch quality.

I also have not built the GWH 1/32 Curtiss Hawk and it does look like a nice kit but that's their only 32 scale release. I may well get one soon.

I have the ZM 109 (and 190) in my stash, not yet touched. They look great kits. I did build the Raiden. I decided to do some extensive chipping but in a more conventional stye than the 'peeled off' look many Japanese aircraft had of that period. I have to say that I had no issues at all with the build, it went together like a dream. IMG_6740.JPG
IMG_6748.JPG
IMG_6759.JPG
 
those who don't (yet) build 32 scale
Great walkthrough!

I'm bookmarking but have no illusions of ever building something like this until I have many aircraft under my belt.

Right now I have none. :rolleyes:

In the short time I've been active here, watching all manner of builds, including aircraft, it is fascinating to see the differences in pain points and challenges for the different model genres, as well as the variations of skills required.

And now I'm developing a better appreciation of the kits from this particular manufacturer. Thanks!

Cheers
 
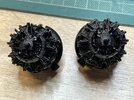
I finished the engines and sprayed a black primer coat. Very, very little of these will be seen so all I will do is a little hand brushing then I will drybrush metal powders over the black in areas that might be seen. These went together like a dream.

20250528_153431321_iOS.jpg

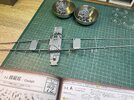
This page shows the parts involved in the next stage, the cockpit area being built up on a wing spar
20250528_122241022_iOS.jpg

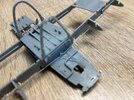
Does anyone else get satisfaction from parts just clicking perfectly together. That's just what happened below.

20250528_125416438_iOS 1.jpg

20250528_153400183_iOS.jpg

Thats it for now....
 
Starting on the interior detail.

Unlike some companies that use etch for small details (something I am not a fan of) ZM use plastic and there are a lot of small pieces, levers etc to fit.
IMG_8428.jpeg
It was tricky but I find it a lot easier than etch.
IMG_8430.jpeg

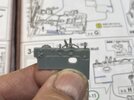
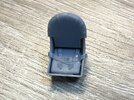
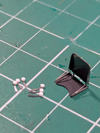
The seat has well moulded seat belts that should paint up nicely.

IMG_8431.jpeg

I test fitted it, which is important because I had to find the best way to get it into the right postition
IMG_8432.jpeg
As you can see I cannot fit much more there without painting, certainly not the right side cockpit wall.

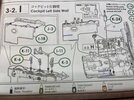
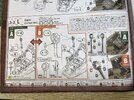
Here we see a great example of how good the instruction are. These will need to be painted before fitting.

IMG_8433.jpeg
The above is the section that just deals with the control column of which there are two options. Option A is the one in need.
IMG_8434.jpeg
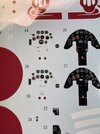
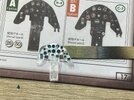
Above a full page dealing with the instrument panel. They provide excellent instructions for detailing them two ways with two options available.
IMG_8435.jpeg
Above the instrument panel decals.
IMG_8436.jpeg
I have decided to try one option while leaving the other available to use if I mess up. Above you can see that I have masked instruments with liquid mask by 'dropping' it in with a cocktail stick.

That as far as I got today.
 
etch for small details
Ya, I find PE most useful for parts that need to be thin enough for scale, but I regularly forego other small etched parts because they lack that three dimensionality of the plastic. And the plastic much easier to glue into place, paint and sometimes, to handle as well.
 
For things like throttle levers there's a catch-22 though. The PE is too thin to have a "knob" on the end, I have seen it where the manufacturer wants a triple thick (double folded to sandwich the center) bit on the end but there's alignment issues and seams created by this method. Similar but different with the plastic ones, they nail the knob part, but the shaft of the lever is never thin enough, even in 1/32. What I do to get around these problems is use the PE for the lever and make by own knobs from evergreen.

1748532763313.png
 
I have been getting on well with the internals. Gone together with no real issues at all thanks to the excellent instructions.

I got a bit carried away enjoying the build so much I forgot to take pictures….. but here I am now with where I got to.
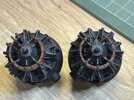
I did a Matt coat on the engines and then dry brushed with Uschi Metal Powder, chrome effect.
IMG_8440.jpeg

As so little of these will be seen I am quite happy with the above.

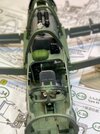
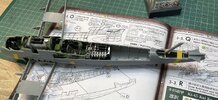
Here are the internal sections
IMG_8441.jpeg

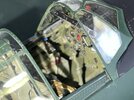
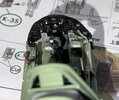
The 'pit showing the instrument panel.
IMG_8446.jpeg
Rear gunner/navigator position.
IMG_8448.jpeg
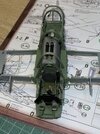
An overall look
IMG_8449.jpeg

Still more internals to build up.
 
Some more progress to report.

I sprayed the fuselage sides and painted the detail along with some other internal subs

I then did an enamel pin wash using the DSPAE tool (which is like a fountain pen tip). Previously I always used a fine brush but I find the DSPAE tool far more precise.

IMG_8450.jpeg

After removing the surplus with a dry cotton bud and allowing it to dry over night. I am left with a nice patina over the fresh paint that helps tone down the finish. The wash was a deep brown one.

Then for highlights I dry brushed with the chrome effect Uschi metal powders. This is brilliant stuff, really effective giving a worn painted metal effect and bringing out the detail.
IMG_8452.jpeg

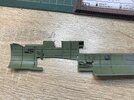
I then cemented the fuselage side into position. This I did after a dry fit and checking that the other three fuselage sections fit OK.
IMG_8453.jpeg

This I will leave overnight before fitting more internal parts.
 
There are four main fuselage sections that fit around these internal parts and given the amount of gubbins inside the model and complex engineering these sections fit perfectly. I had to do only the smallest amount of trimming and will need a couple of 'smidgens' of filler which given the complexity is quite amazing. Few companies could pull off such complex engineering.

The trick is to take your time, fit one side section making sure it's in exactly the right place and dry fit and go slowly with the rest. I had a few more parts to add to the inside with one side panel in place.
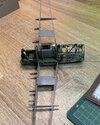
IMG_8454.jpeg

IMG_8455.jpeg
IMG_8456.jpeg
IMG_8457.jpeg
There is also the nose section to fit on the front.

A little bit of finishing work on this stage and then it's on to the wing sections.
 
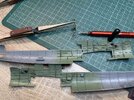
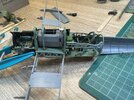
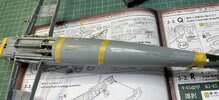
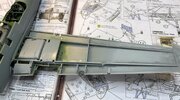
Started wing construction. The fuselage, or what you might want to call the 'skin' is very thin to help keep a more in-scale appearance. For this reason, even if it won't be seen it is best to install most of the insides to help with the structural integrity.

IMG_8458.jpeg

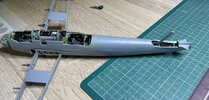
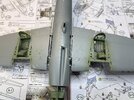
Above you can see some fuel tanks installed and the lower wing 'skin' cemented in place. Fit was simply perfect.

IMG_8459.jpeg
Above the underside. Note that the gun barrel is missing. I will deal with that after painting.

IMG_8460.jpeg
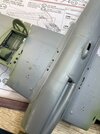
Above you can see the bottom wing fillets dry fitted and they fit perfectly.

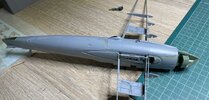
Below you can see the beautiful sleek and clean lines of this aircraft starting to take shape IMG_8461.jpeg
 
What he said.

Dang Barry, you're really showing the ZM quality very well, love the updates and in-progress shots.
 
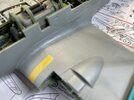
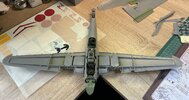
I have fitted the Port wing and fillet (which I cemented to the wing before fitting) it went on well with a little fiddling around, some tape and a clamp to hold it. No gaps at all and no filler will be needed

IMG_8462.jpeg


Write your reply...

Latest posts

Back
Top