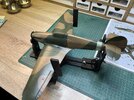
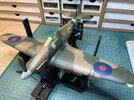
Hawker Hurricane IIB, Revell 1/32

LOOKS BRILLIANT Barry an i dint know that the hurricane had extra guns on the outer wings but loveley modeling
chrisb
Hi Chris. This was just really on the MkIIb as far as I know. They certainly were not there on the Mk1.
 
Hi Chris. This was just really on the MkIIb as far as I know. They certainly were not there on the Mk1.
oh thanks Barry thats something ive learnt today cheers for you reply an as you are still on the old sit could you tell me if its got all its pics back to full size as im thinkin of jioning again when i get my windows 11 laptop an i want to be on this site an the old one if possible
chrisb
 
oh thanks Barry thats something ive learnt today cheers for you reply an as you are still on the old sit could you tell me if its got all its pics back to full size as im thinkin of jioning again when i get my windows 11 laptop an i want to be on this site an the old one if possible
chrisb
When signed in I find the pictures come up full size.
 
Hi Chris. This was just really on the MkIIb as far as I know. They certainly were not there on the Mk1.
I always like flying the IIC in my simulators. Quad Hispanos give all opponents a bad day!
 
Painting done and a semi-gloss varnish applied.

An important note. MRP's varnishes are as good as their paint but you do need to take care when using them. Whatever you do apply slowly with plentiful mist coats don't go in with a heavy wet coat. The risk if you go in heavy is that it reactivates the paint. It's easy enough to resolve but a real paint in the neck of it happens.

IMG_8361.jpeg

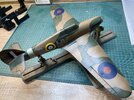
Now using my new Flory Models jig. I consider this to be my detailing jig and I won't be using it for painting. It is he's quite firmly as in the picture above.

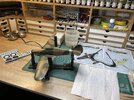
Below I am all ready to star decalling with the tools and material ready. Note the cup warmer, it keeps water at the perfect temperature for decals.
IMG_8362.jpeg
 
Wow, sharp work! I need to get me one of them jigamathingys too, they seem to be necessary:rolleyes:

P.S. That work bench looks too sterile, what gives, Barry?
 
Wow, sharp work! I need to get me one of them jigamathingys too, they seem to be necessary:rolleyes:
They help a ton when aligning or squaring wings and stabilizers as well as landing gear and ordinance. But I find it harder to work on the model while in the jig, perhaps large decals would be okay, and it could just be me. But even painting, I like to keep the airbrush close to horizontal and move the subject around with one hand. Spraying a subject while in the jig would require skills I do not have.

I have the files for a 3-D printable version, I've not recommended it here before because it is VERY fragile. I have broken the vertical parts more than once, but I have glue of course. I'm kinda hoping it is the plastic used by the fellow I paid (a co-worker who I reimbursed his cost only) and that stronger materials could be used. But I know nothing about 3D printing.

If anyone wants those files shoot me a DM, there's no copyright concerns.

Edit to add: a shot of the jig in action. All 4 posts can be adjusted in two dimensions.
1747765396102.png
 
Last edited:
LOOKS avery nice build now with the decals on Barry very well done sir only hope my phantom comes up a good an whats next build ? the tornado ???????????? hopefully
chrisb
 
LOOKS avery nice build now with the decals on Barry very well done sir only hope my phantom comes up a good an whats next build ? the tornado ???????????? hopefully
chrisb
No Chris, not the Tornado. I am likely to build the Zoukei Mura Ki-45 'Jack' next.
 
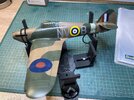
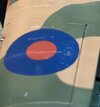
Great job with those dee-cals! They are very congruent with the paint colours. Do aircraft modelers consider that when preparing paint?
Especially with those huge roundels.

I see the paper towel... are you of the quick soak and let them ripen on the towel school? I've tried that recently, and though armor decals tend to be much smaller, they seem to keep their integrity better.
 
They are but no, given the processes adopted with varnish layers they end up with the same finish. Not sure what you mean by paint preparation. MRP lacquers are airbrush ready so no thinning for normal work and they have the full range of authentic colours for WW2 main combatants.

Decals I dip into warm water for a few seconds then let it rest until it moves easily on the backing paper.
 
... referring to the actual colour mix... the hue, intensity, go very well with the decal colours. For example, if the decals had been slightly faded, would you have adjusted the paint so they paired well?
In this case, decals and paint have very similar saturation, and look great together!

20250522_130435.jpg
 
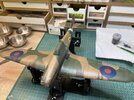
I have done several mist semi-matt coats and I am ready to do some weathering.

IMG_8369.jpeg

I have already done a dark brown panel line wash before I applied the semi-matt. The surplus wash I removed with a cotton bud wiping in the direction of airflow. This removes the 'newly painted' look and sets it up for weathering.

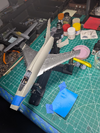
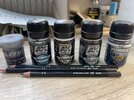
These are the materials that I will use on the process.
IMG_8371.jpeg

On the left are the Uschi Metal Powders, I love these for chipping work and dry brushing over what represents painted metal.

Below I have done some chipping, dry brushed smoke pigment and done some oil and kerosene leaks.

IMG_8372.jpeg

I am leaving it there for now. It needs a little more work and the underside still needs doing.


Write your reply...
Back
Top