AKRoast
Member
- Joined
- Oct 14, 2024
- Messages
- 73
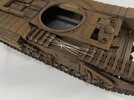
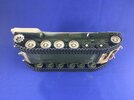
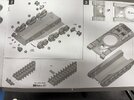
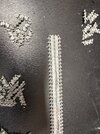
I am working on the 1/32 Chieftain kit. See attached photo of the extent of their link style track instructions. It basically just says "make 97 each side" and then shows them installed. What a joke.
I have done a Tiger I kit with link tracks that at least had a little bit of hints and was designed with rotating wheels and drive gear sprockets to ease installing it. It also had pins connecting the links. Still was a PITA, and became a super glued mess in the end (thank goodness for weathering!)
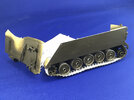
Also did a Leopard 2 kit with link-length, and a Bradley with rubber tracks. That is my extent of tank models since I just started up in November.
The rubber tracks are by far the way to go in my opinion. I know some people don't like them, but better than a mess that takes way too long to make and install.
Anyway - this Takom kit is the worst so far.
a) The links friction fit together, with no pins, and don't even really "snap" together. That means that even the slightest movement makes pieces fall apart.
b) None of the wheels/sprockets are designed to rotate, so you can try and leave them loose for track install but they easily fall off unless glued on.
c) no instructions on how many links for each main section (top, bottom, front, back) and no diagram of sequence of installation.
My track building solution so far was to do ten pieces at a time (about as many links as I could keep together before links fell off when trying to install additional links), then applying two strips of foil tape along the track. Seems to work ok for now, but not sure how I am going to install then get the tape off, and I need to paint tracks before installing. I know one solution is to measure the top and bottom lengths and then glue those into the equivalent of "lengths" in the link and length method, but the curved front and back parts I am dreading doing. I am thinking I can leave the strip of tape on the back part and only remove the front one, after I measure and test fit. and once front and back parts are in place, glue them all solid.
There is no conceivable way I have the ability to paint, then install these tracks, without them falling to pieces, unless I have something like the tape in place. Any hints?


