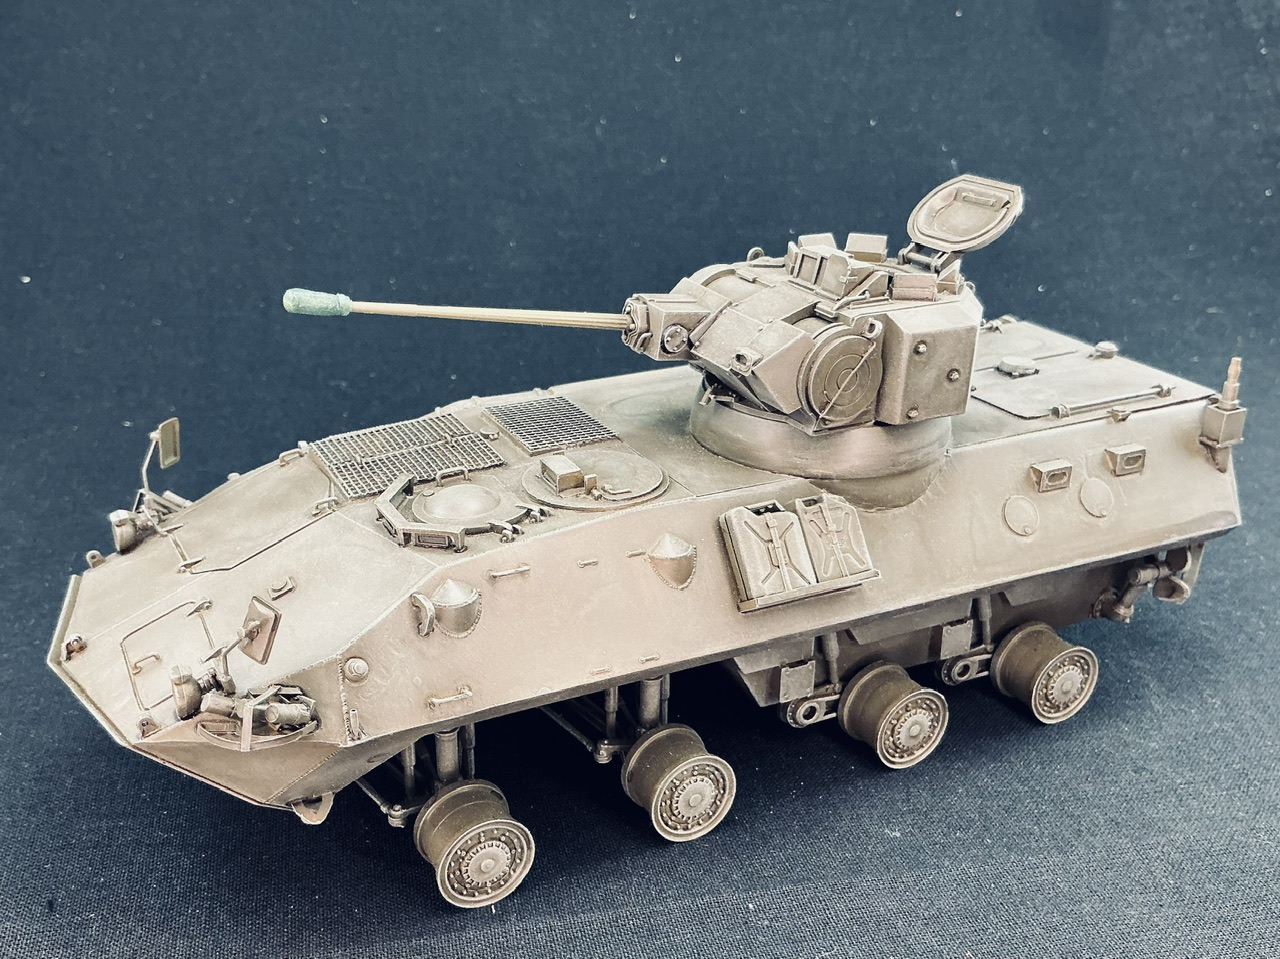
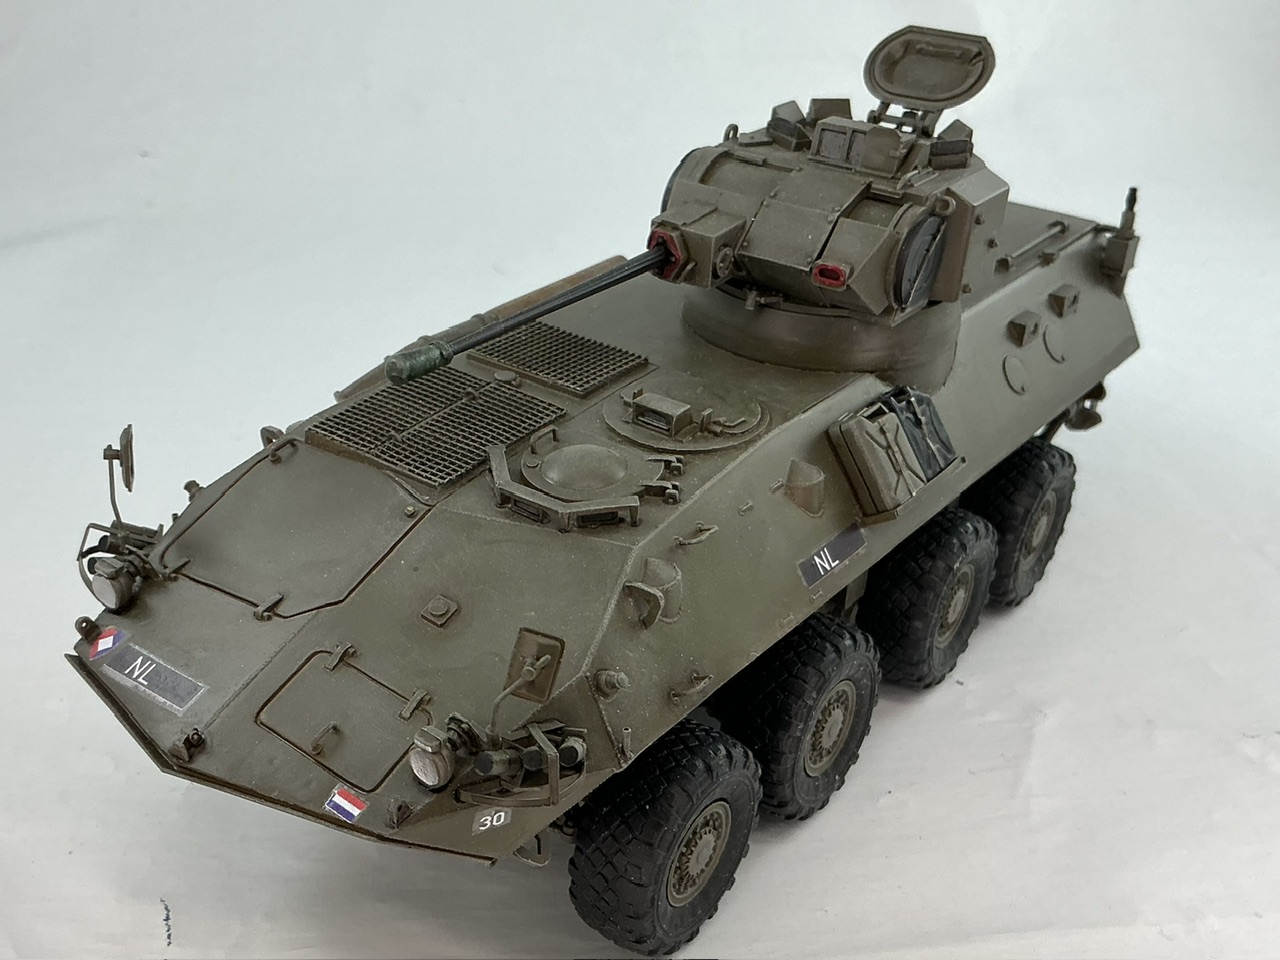
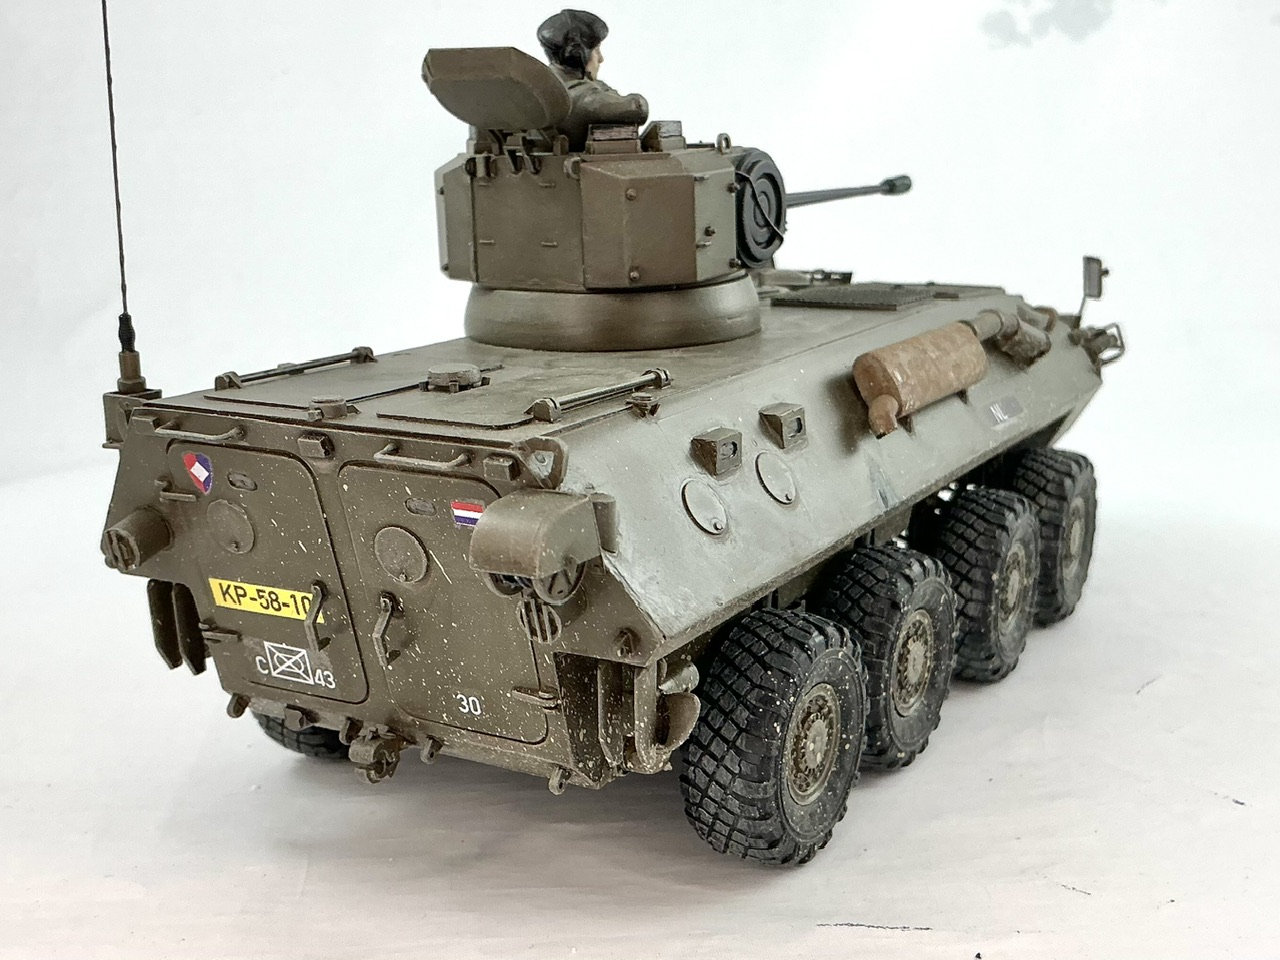
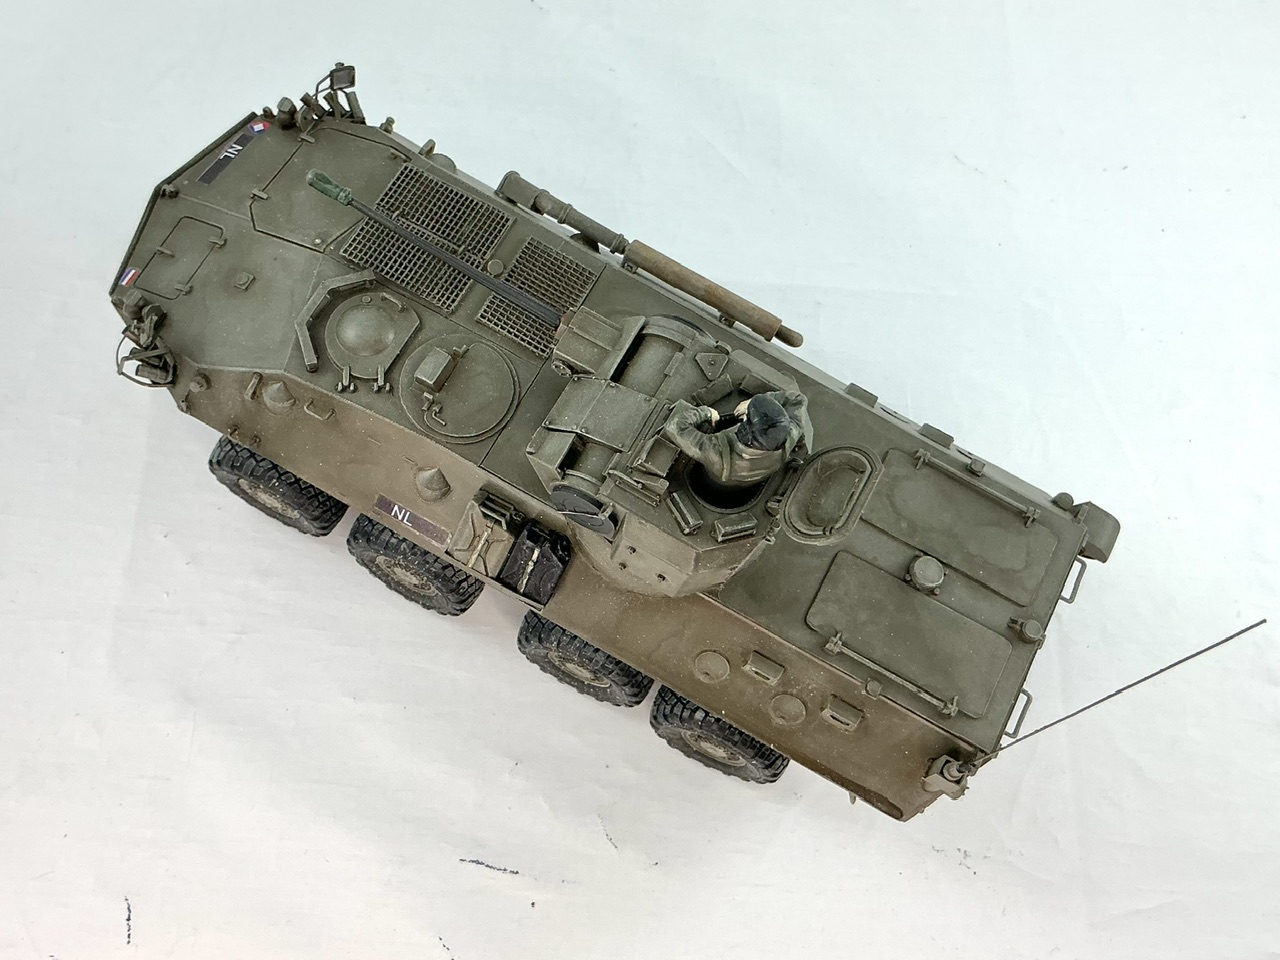
Piranha PWI-GR

Scale Model Addict - Model Tips, Guides, Tools & Tech, Tutorials, and Community

Help Support Scale Model Addict:

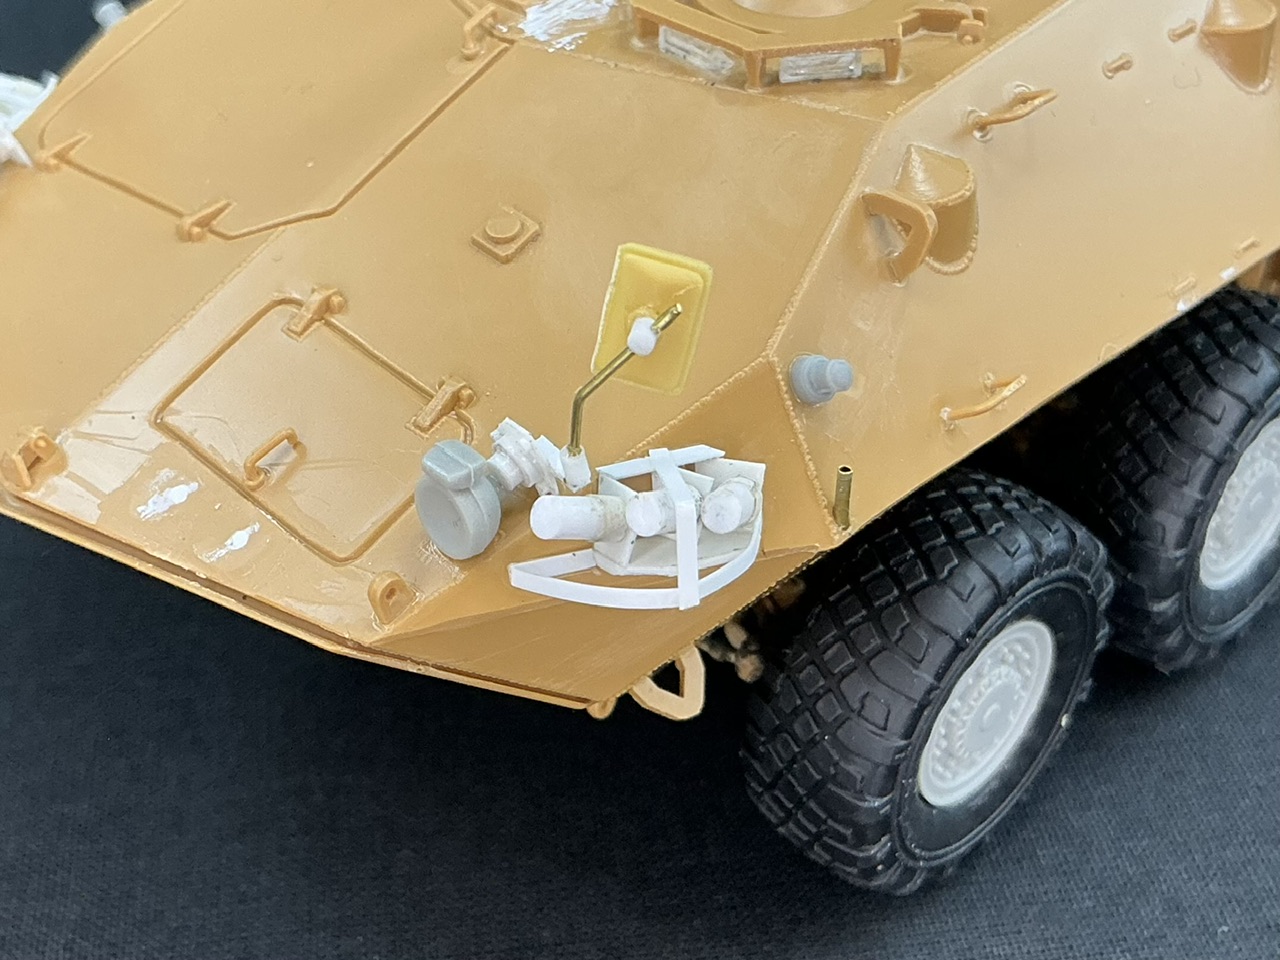
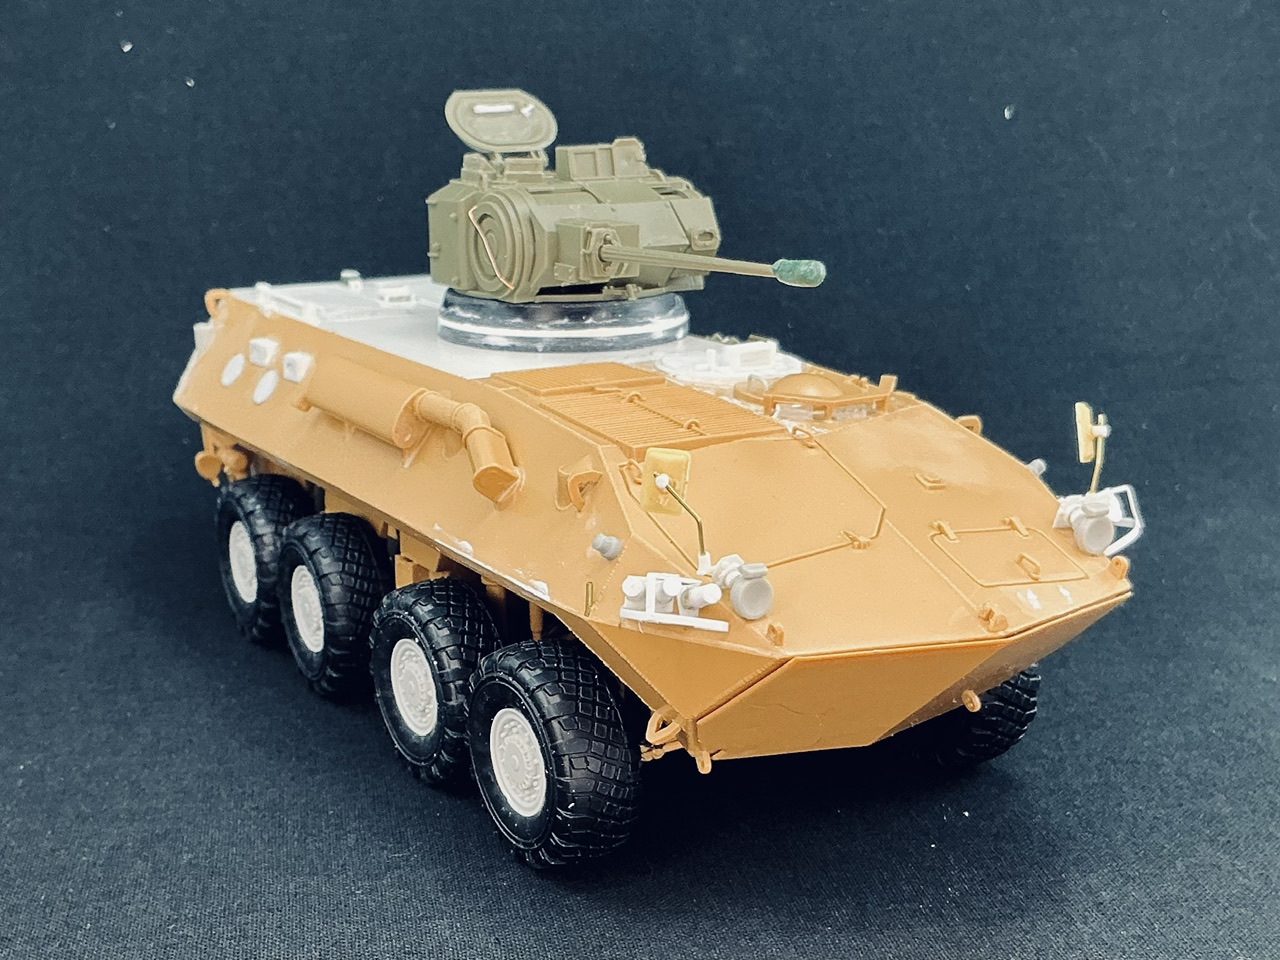
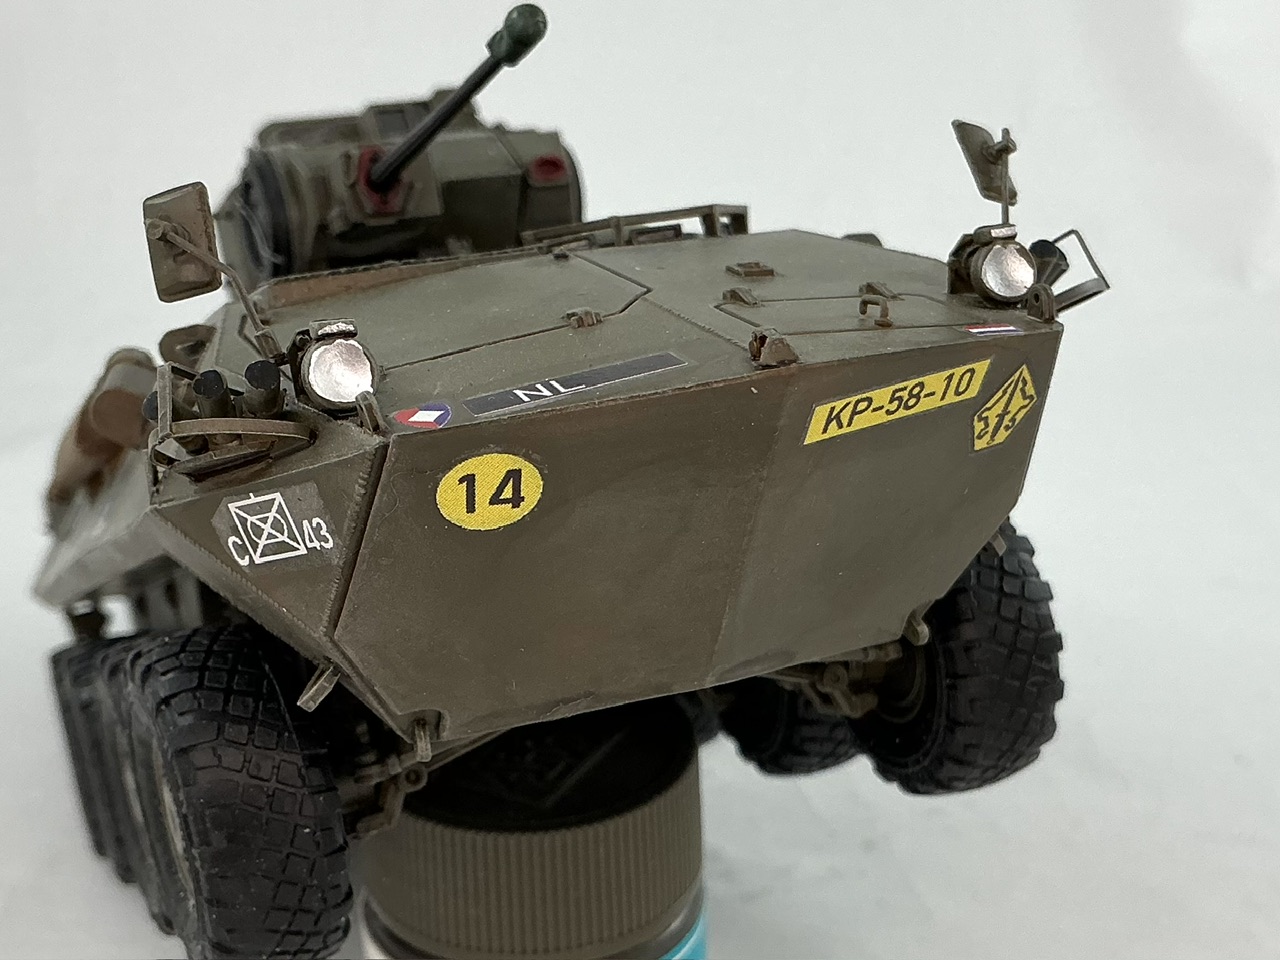
I spent a good deal of time today scratchbuilding smoke grenade launchers on the hull front:
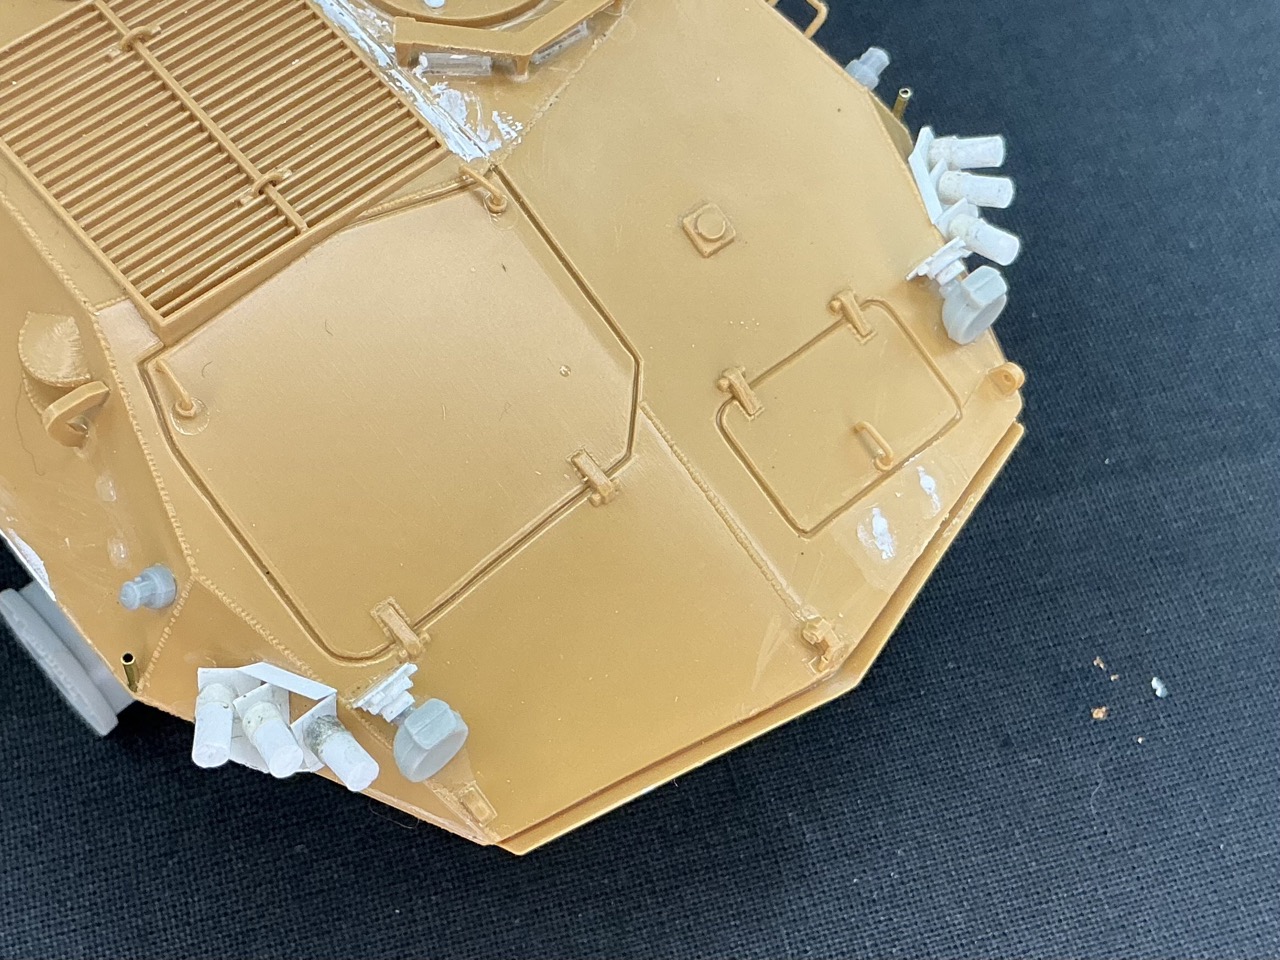
IMG_1792.jpeg


The base is plastic card and strip, which took a fair degree of tinkering to get it to look reasonable despite only being five pieces. The launch tubes are 2 mm plastic rod with some very thin plastic card wrapped around the rear, because of the peculiar construction of the unique Dutch Army type of launchers: the whole tube is expendable, and clicks onto the base with a bayonet fitting. I want to add a brush guard over it, but I'm not sure yet whether to make that horizontal or vertical.

I also added some details to the turret hatch that AFV Club missed:
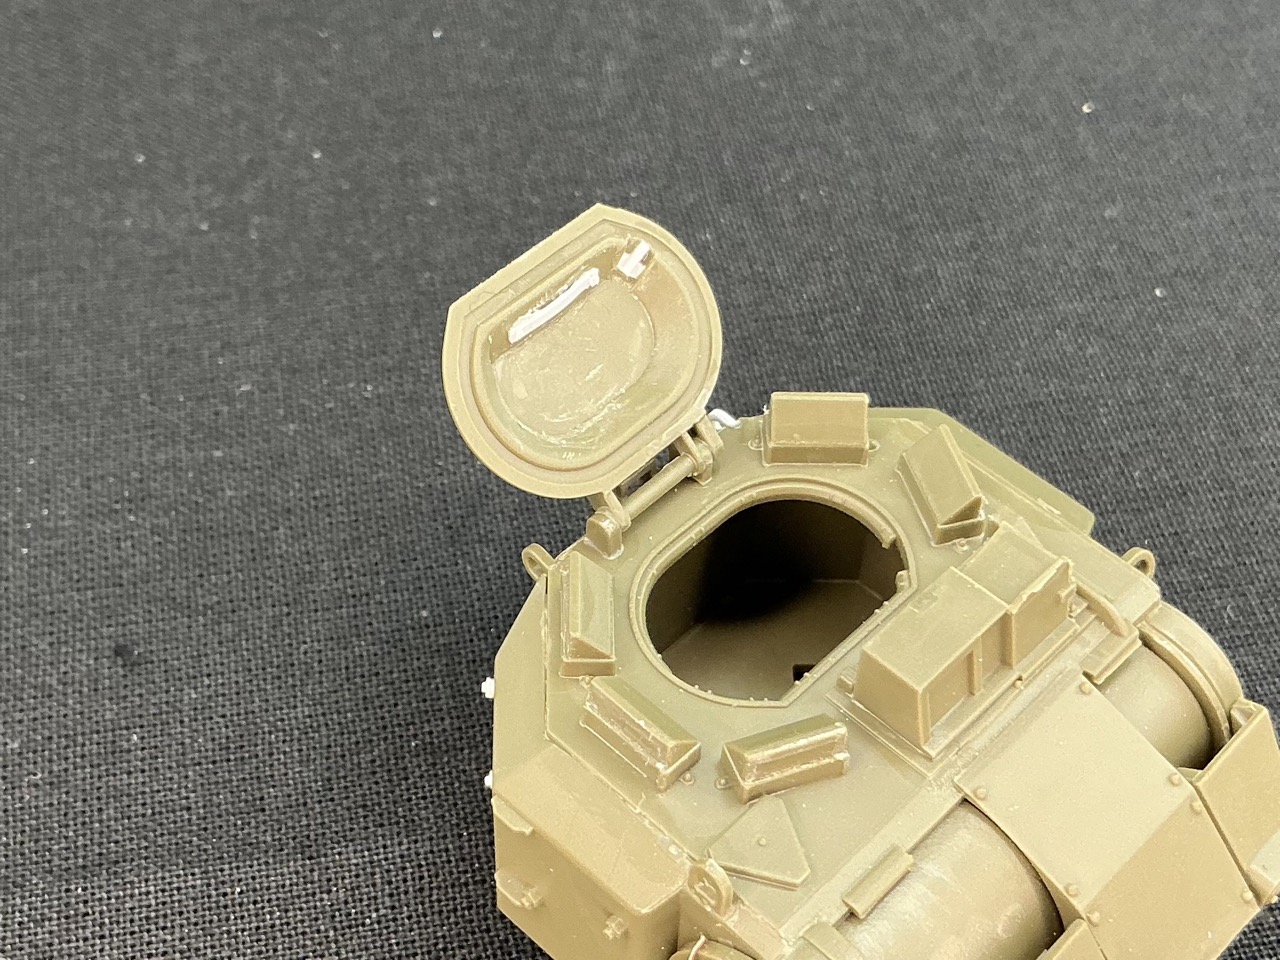
IMG_1793.jpeg
 
It ended up as a mainly horizontal brushguard with a smaller vertical part :)

IMG_1794.jpeg


The mirrors are from the Mowag Piranha 4×4 by Verlinden (that includes four, I think, because I had two of them left) on supports from brass wire and plastic — the trickiest job in all of this model, and now my biggest hope is that they'll stay on :)

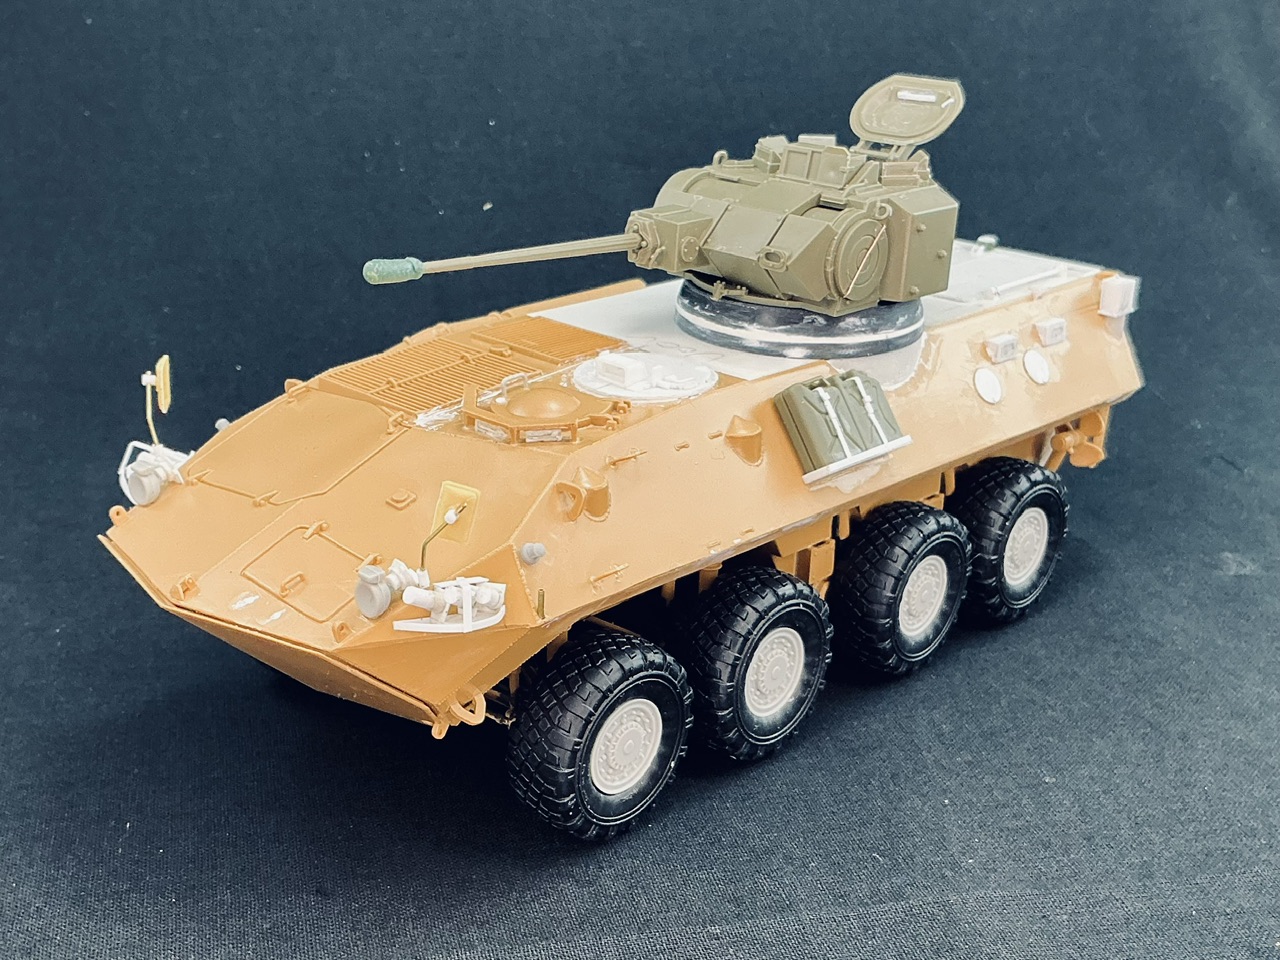
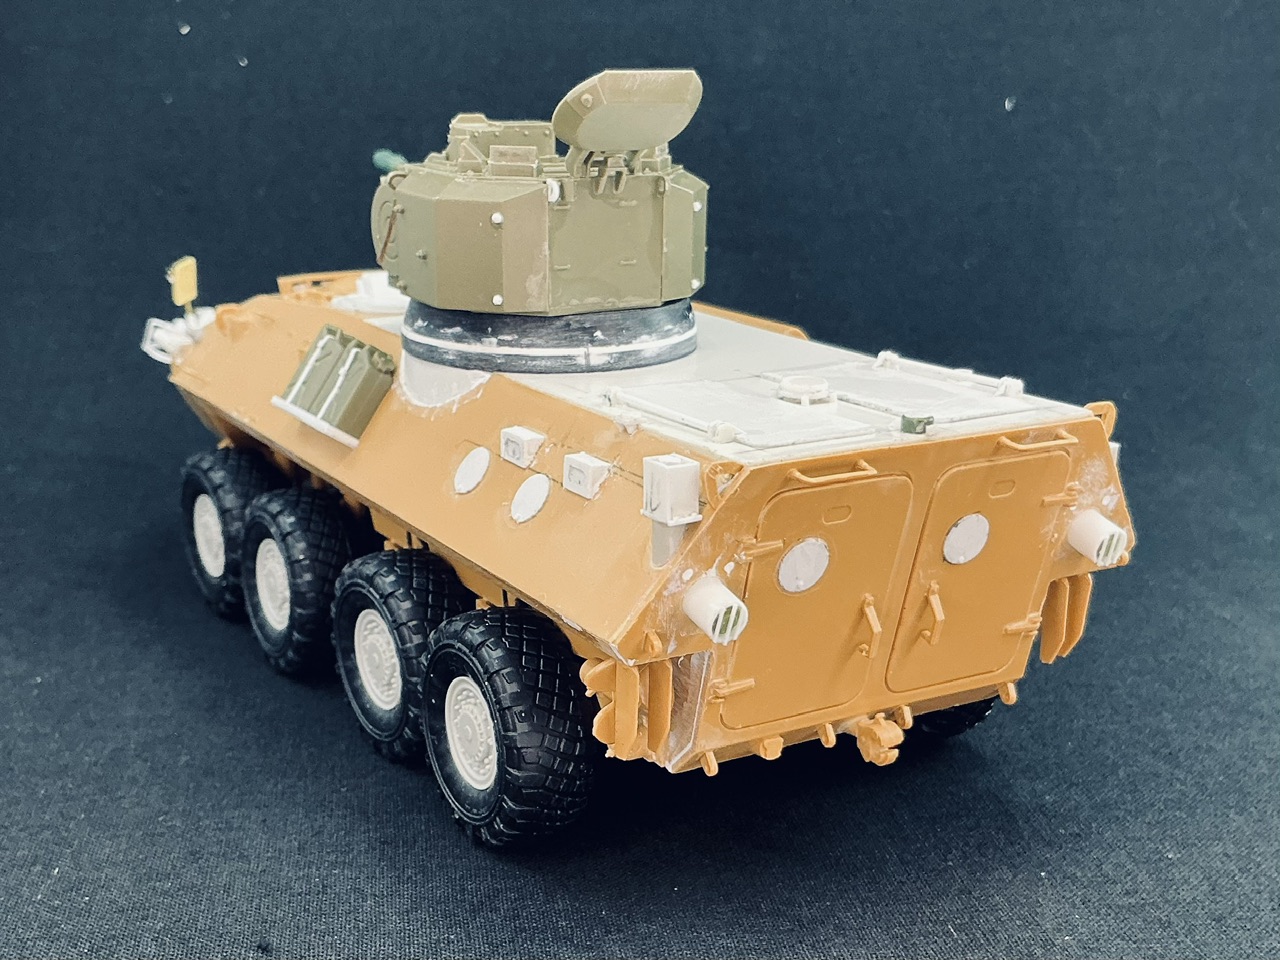
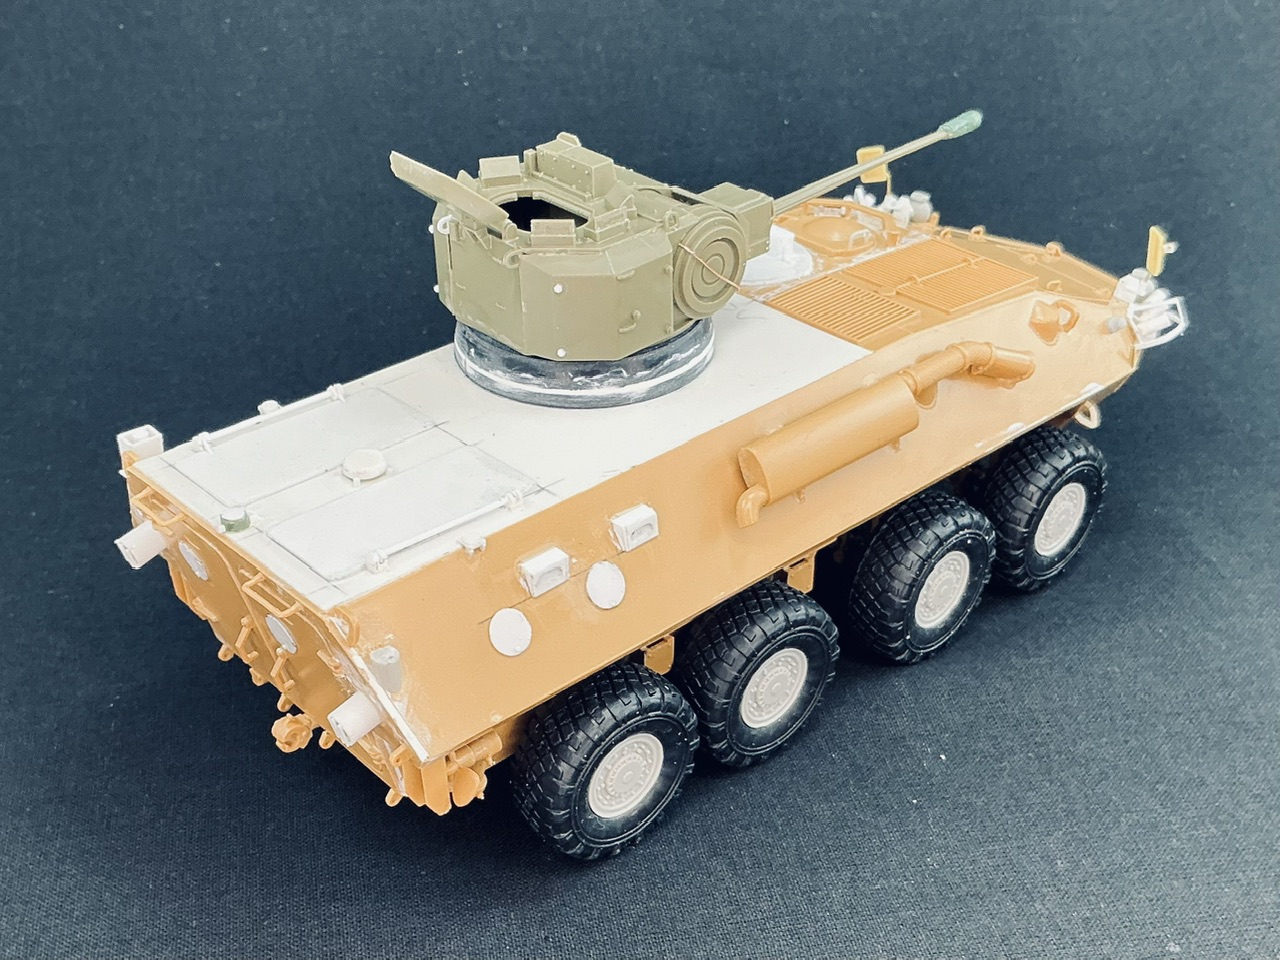
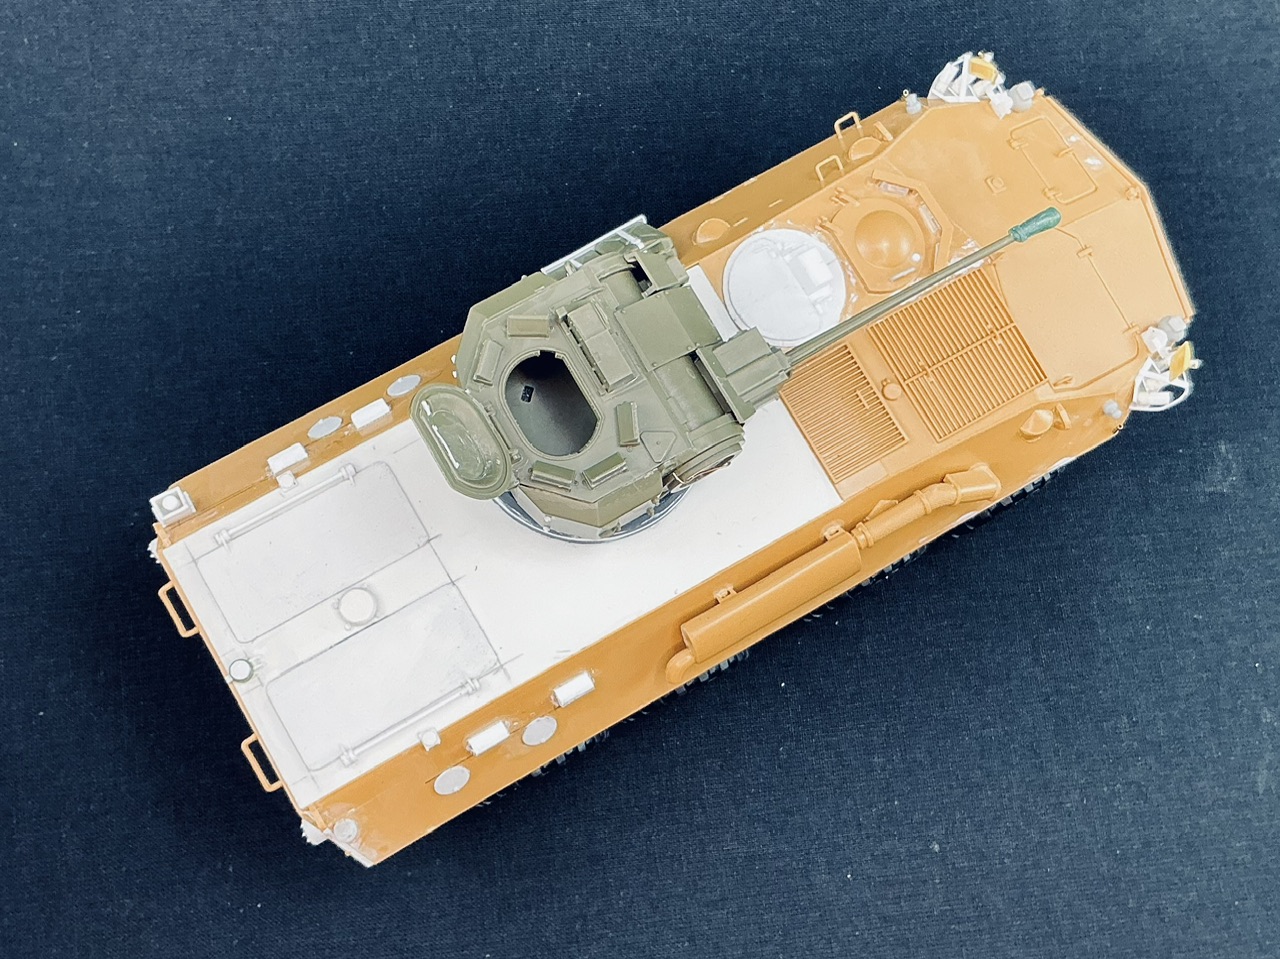
After also building a rack on the side for two jerrycans from AFV Club's YPR kit, I'm done building this thing:

IMG_1795.jpeg
IMG_1796.jpeg
IMG_1797.jpeg
IMG_1798.jpeg
IMG_1799.jpeg


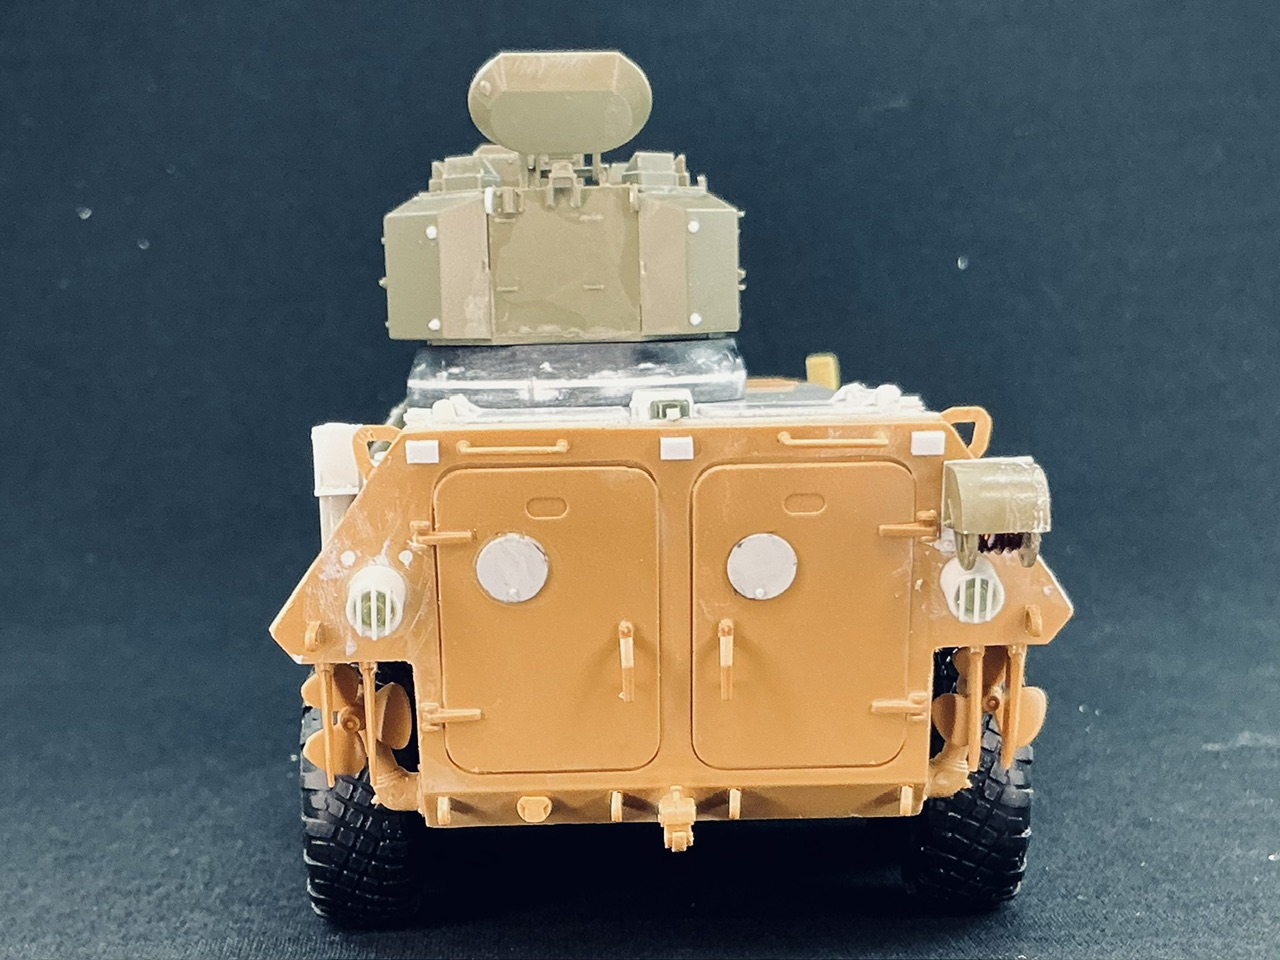
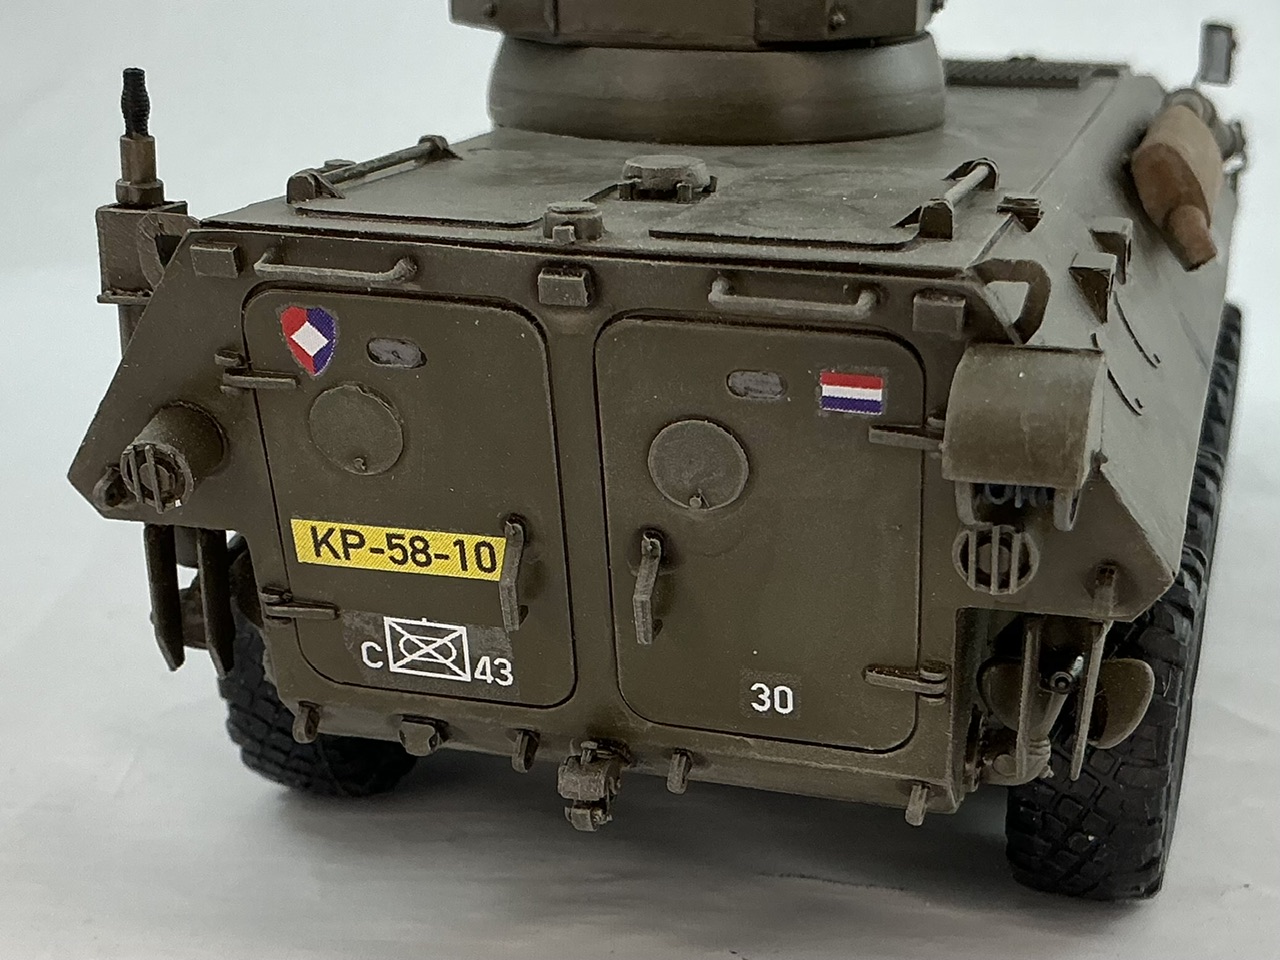
A few things I didn't mention yet are the tubes for convoy flags on the front corners of the hull (brass tube glued into holes I drilled) and the tail lights (leftover parts from an Airfix 1:76 Churchill and thin plastic rod). I could add a great deal of detail that Italeri left out, but I would need better references than the Tankograd book about the Piranha (tip: leave that in the shop, it's basically a glorified Mowag advertisement) and, more importantly, much more motivation to actually add all of them :)
 
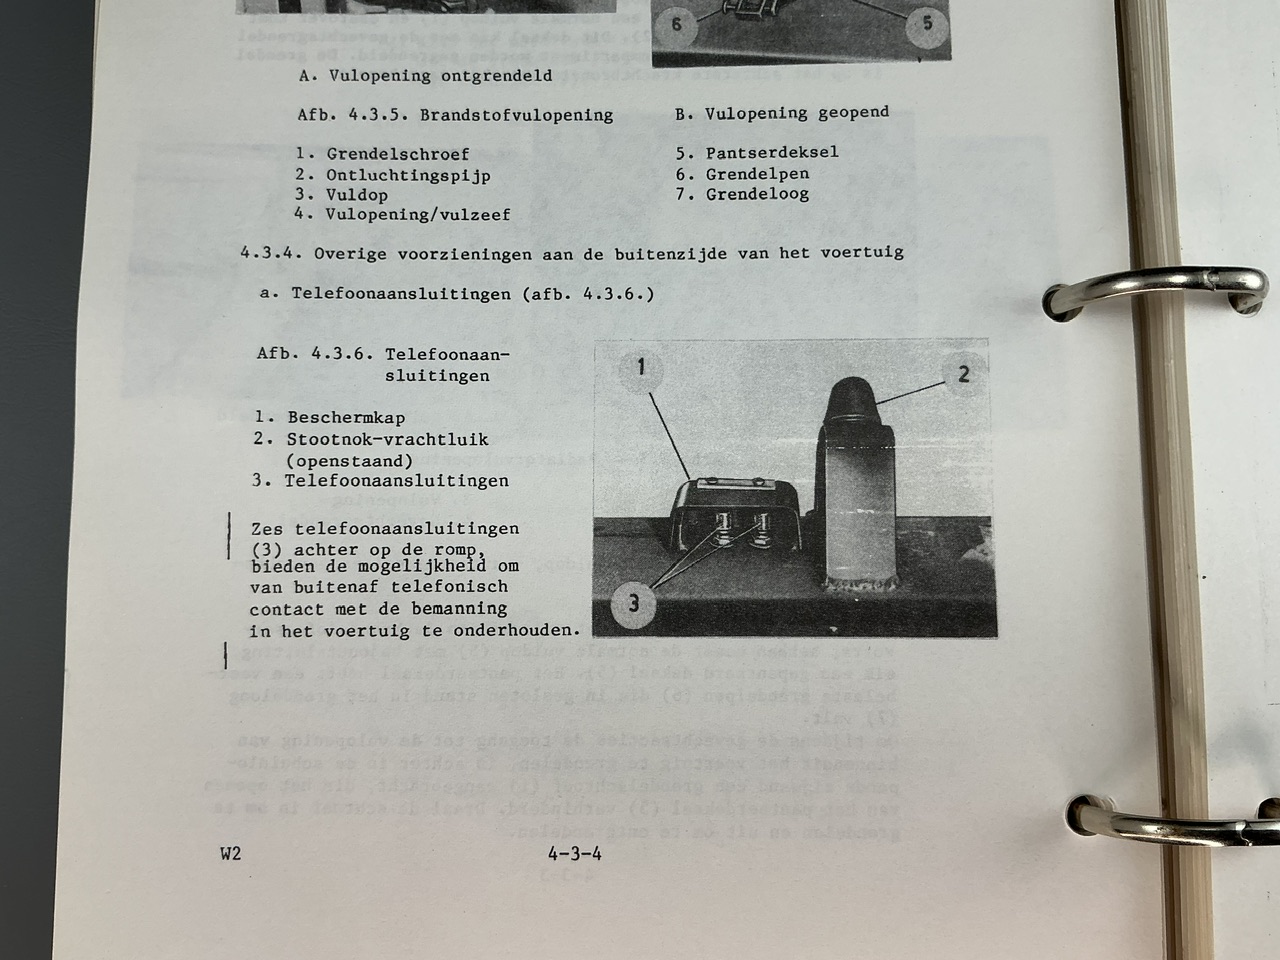
One more build photo to go before that, though :) Somebody pointed out that it would have had a cable reel and connecting points for field telephone wire on the back, so I really had to add those too. The AFV Club YPR kit includes a reel, so that was easy, but I had no idea what the phone connectors look like. Luckily, though, I happen to own the 1983 edition of the YPR 765's technical manual, and that includes a section about them:

IMG_1801.jpeg


They're really just three sheet metal covers over two connectors each (telefoonaansluitingen means "telephone connectors"), and once I knew that, I could look at the parts in the YPR kit I've been using for the turret and some other bits, and found the ones that represent these things. I measured them up and then just cuts three bits of plastic strip to the right size, without bothering to add any more details because those would be on the underside to keep them out of the rain. On the YPR those are sort of visible because they're on a sloping armour plate, but on my Piranha they would be on the backward-sloping rear plate, so I didn't see a need to add the connectors. Also, I put a back plate on the AFV Club cable reel holder so it fits above the right tail light:

IMG_1800.jpeg


And with that I'm really done building this vehicle :) Tomorrow, I'll be going to a modelling show/meet at a local museum, and will of course be taking this one along.
 
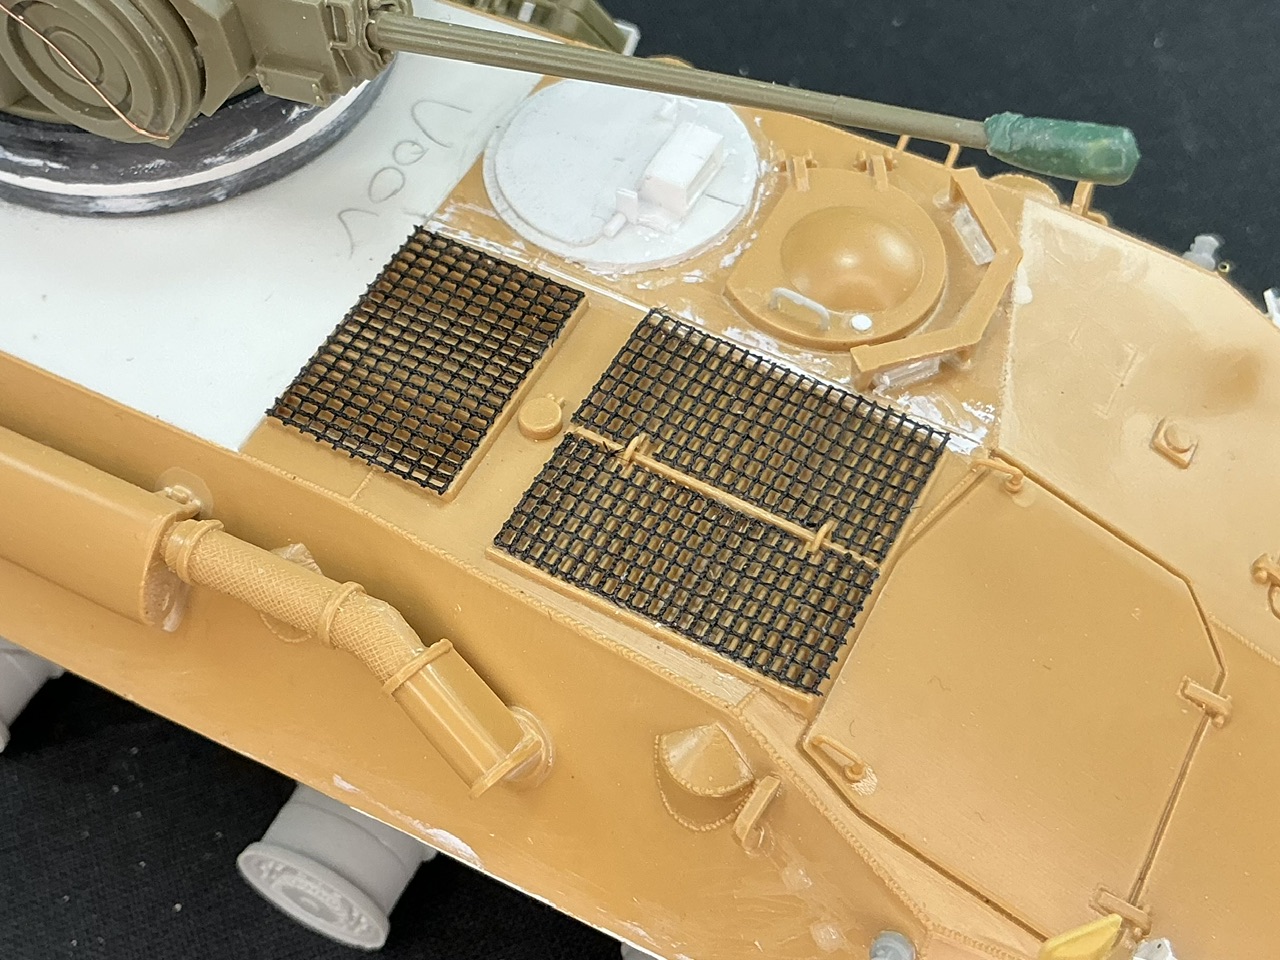
On the advice of someone more knowledgeable about Dutch armoured vehicles than I am, I added mesh over the grilles on the engine deck, because this was a feature of all Dutch troop carriers. I used mesh from Tamiya kits I built in times of yore:

IMG_1833.jpeg


It may appear that they're a bit wavy, but that's an optical illusion caused by interference between the lines of the grilles and the grid of the mesh.

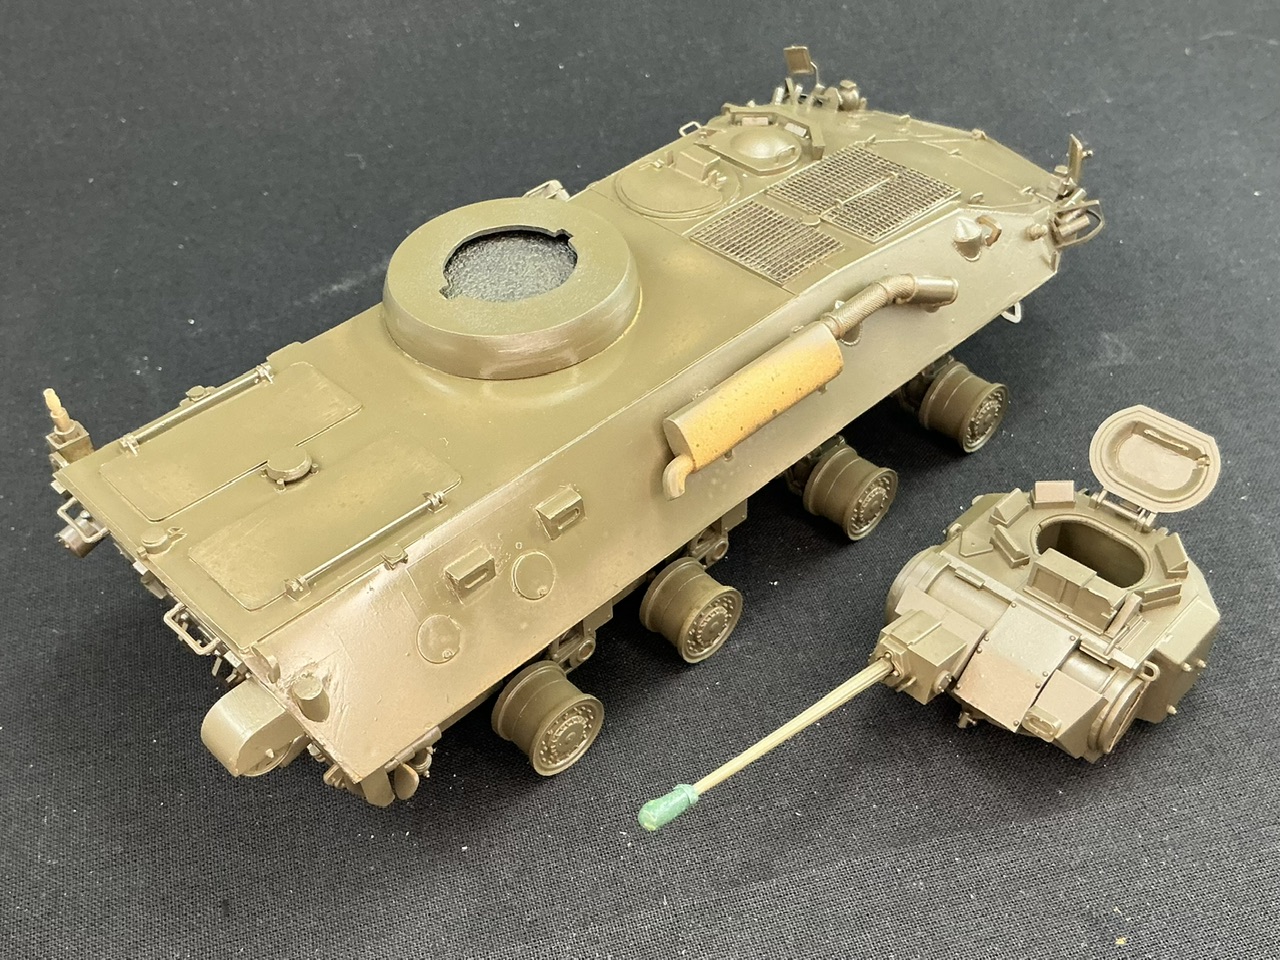
When that had dried, I sprayed the whole model Mr. Aqueous H78 Olive Drab (1), which is a near-perfect match for RAL 6014 with which the Dutch Army painted its vehicles:

IMG_1834.jpeg


The paint is still a bit wet in this picture, and maybe a little thin on the roof because the airbrush was running on fumes by the time I was done, but I'll fix that later where it needs to be. It has reminded me why I prefer tracked to wheeled vehicles, though :) Getting paint into all the nooks and crannies of the suspension was a lot of work.
 
As an Amazon Associate we earn from qualifying purchases. Product prices and availability are accurate as of the date/time indicated and are subject to change.
Thanks :) I'll need to do some touchups where the airbrush didn't reach, and then start spraying highlights and all the rest …
 
I finally did something about this model again :)

IMG_1922.jpeg


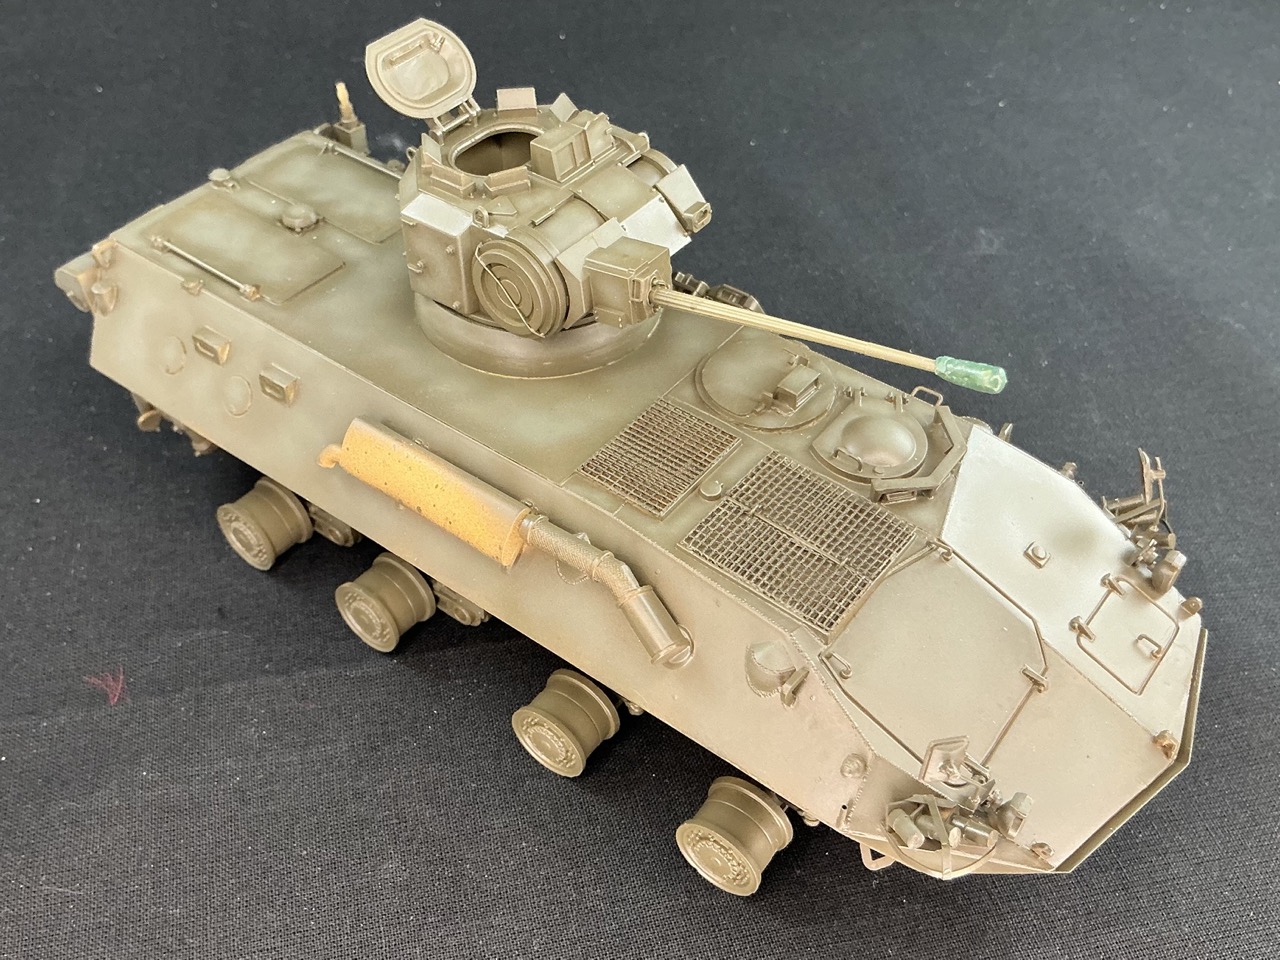
After the lighter patches had dried, I applied a wash of thinned Army Painter Strong Tone, and then did nothing for weeks … Tonight, I drydbrushed the whole model with Revell Light Olive. I really need to finish painting it completely.
 
It took another fair while, but I finally had some decals printed, which arrived last week. I put them on the model yesterday evening:

IMG_2528.jpeg
IMG_2529.jpeg
IMG_2530.jpeg


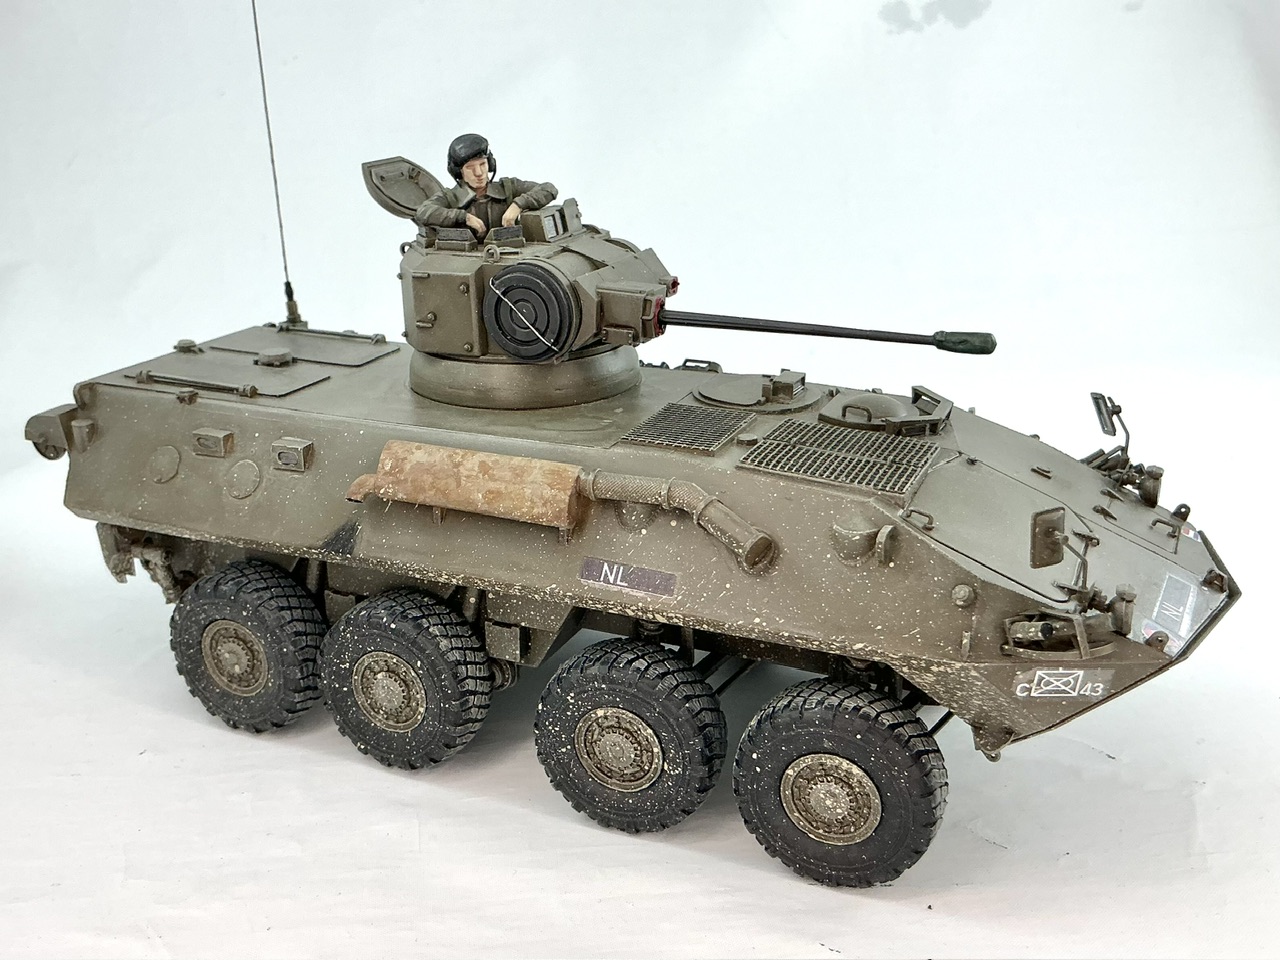
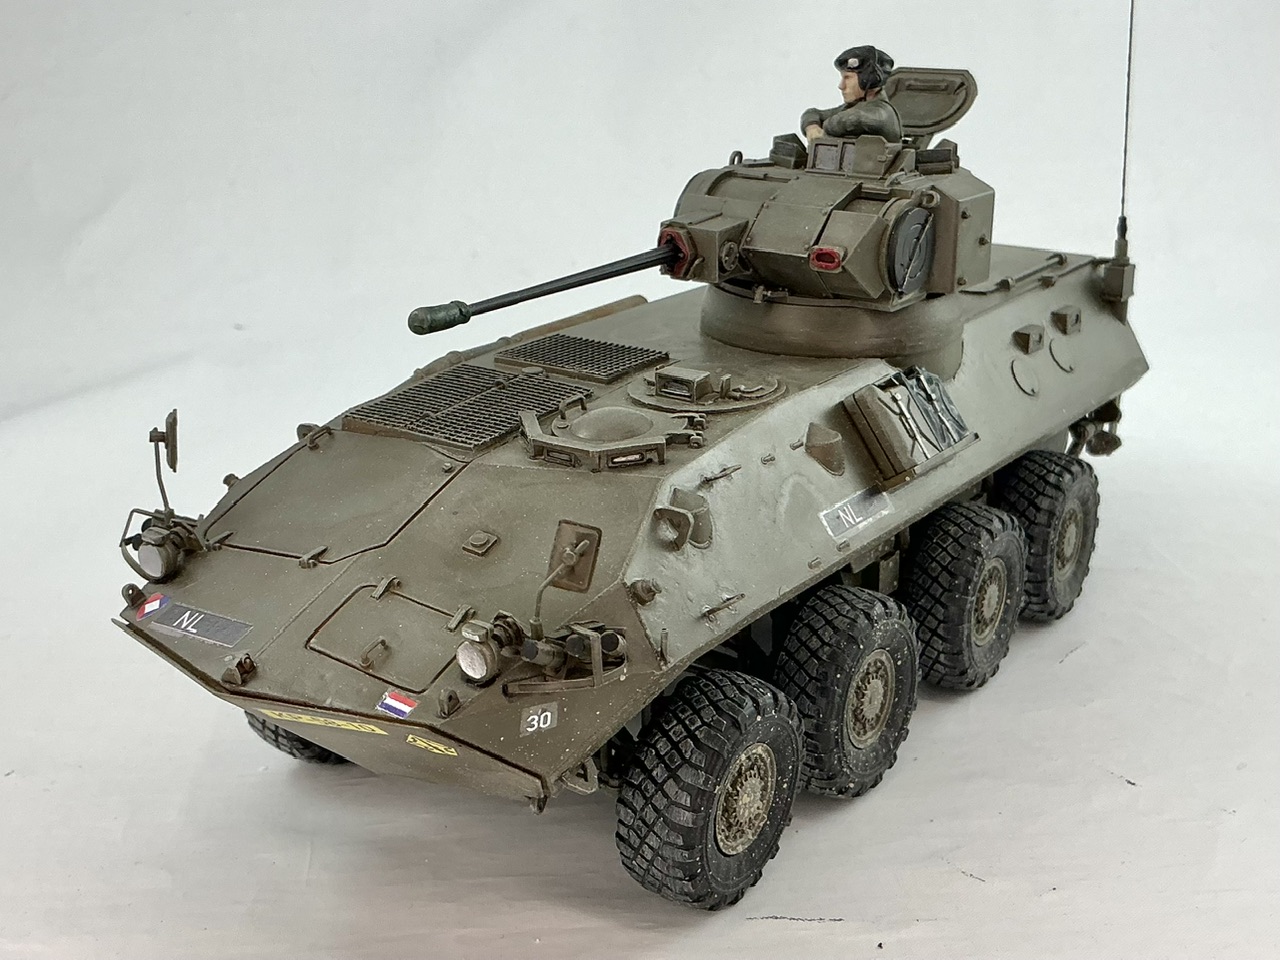
Vehicle No. 30 of C Company, 43 Armoured Infantry Battalion (43 pantserinfanteriebataljon, "43 painfbat" in Dutch Army jargon), "Chassé" infantry regiment. These markings are pretty much entirely fictitious, but taken from YP 408 APCs that this battalion was equipped with in the 1970s–80s. The registration, KP-58-10, is also entirely made up from whole cloth, as the KP series was never used, but it's plausible seeing as how many YPR 765s were numbered in the KY series, so I figured KP might have been chosen for Piranhas.

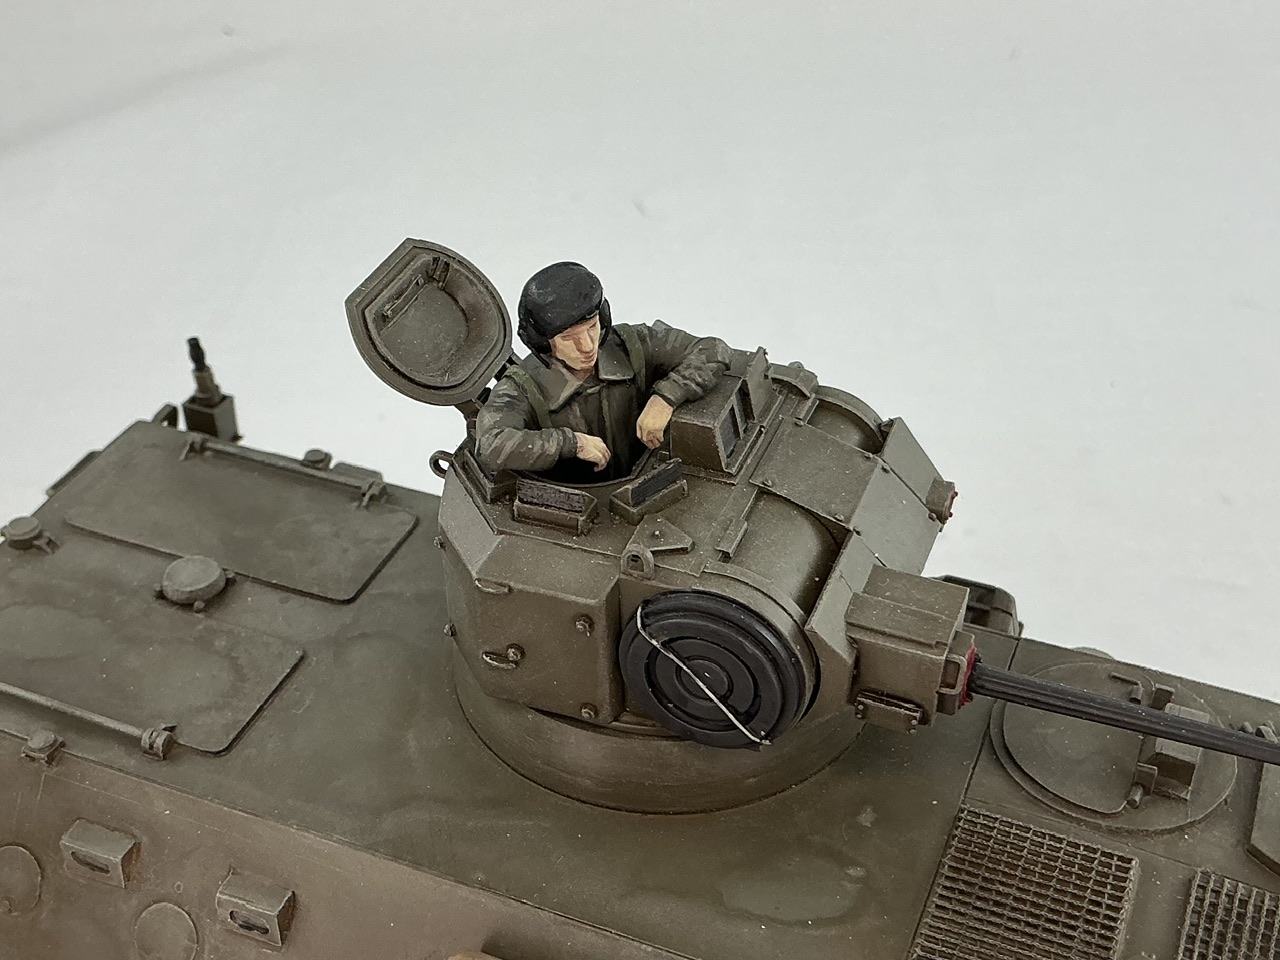
For in the turret hatch, I got a figure from Sylly's Mini Models a few months back, though I had to saw off his legs to get him to fit in the hatch:

IMG_2531.jpeg


I think I will only add a small amount of dirt to represent a Piranha PWI on exercise somewhere in Germany in the late 80s.
 
had some decals printed
... really? How does that work? Guess I've not encountered that (or just forgot). I've printed my own, so I guess it makes sense as a service.

drydbrushed the whole model with Revell Light Olive
I wouldn't have thought of doing that over a lighter base. Please edify me as to the rationale, and specifics of the technique!
Finish looks good, but I haven't enough experience to recognize how the drybrushing contributed.

Cheers, Brian
 
... really? How does that work?
It's in essence somebody who owns a printer that can also print white, and who uses it to print decal sets he sells commercially, and also to order (once he's got enough to fill a sheet of A4, which is why it took about four weeks before I received my order).

I wouldn't have thought of doing that over a lighter base. Please edify me as to the rationale, and specifics of the technique!
It highlights the model, nothing more than that :) My painting technique boils down to four steps: a base colour over everything, followed by a lighter version of it sprayed as patches in the centres of panels, then a darker wash over everything, and finally a lighter drybrush over everything too. (For multicoloured camouflage, I do step 1 and 2 for each colour, then 3 generally for the whole model at once, though perhaps with different colours of wash over different base colours applied wet-on-wet, and then 4 per colour again.) The lighter patches break the monotony, and also serve to highlight the parts of the model that are turned towards the light, while the wash and drybrush create shadows and highlights that will make the model look more "alive" especially when displayed in fairly even lighting conditions.

The only thing that requires a fair degree of skill here is spraying the lighter patches, because you need an airbrush capable of fine work and a certain amount of practice with it to make it do that reliably. Which is where I occasionally fail :)
 
I used to just paint models in the base colour, but when I tried highlighting them I soon decided they simply look a lot better that way. Yes, it's somewhat artsy, but if you don't overdo it (as some people do), it helps the look rather than make the model look artificial.
 
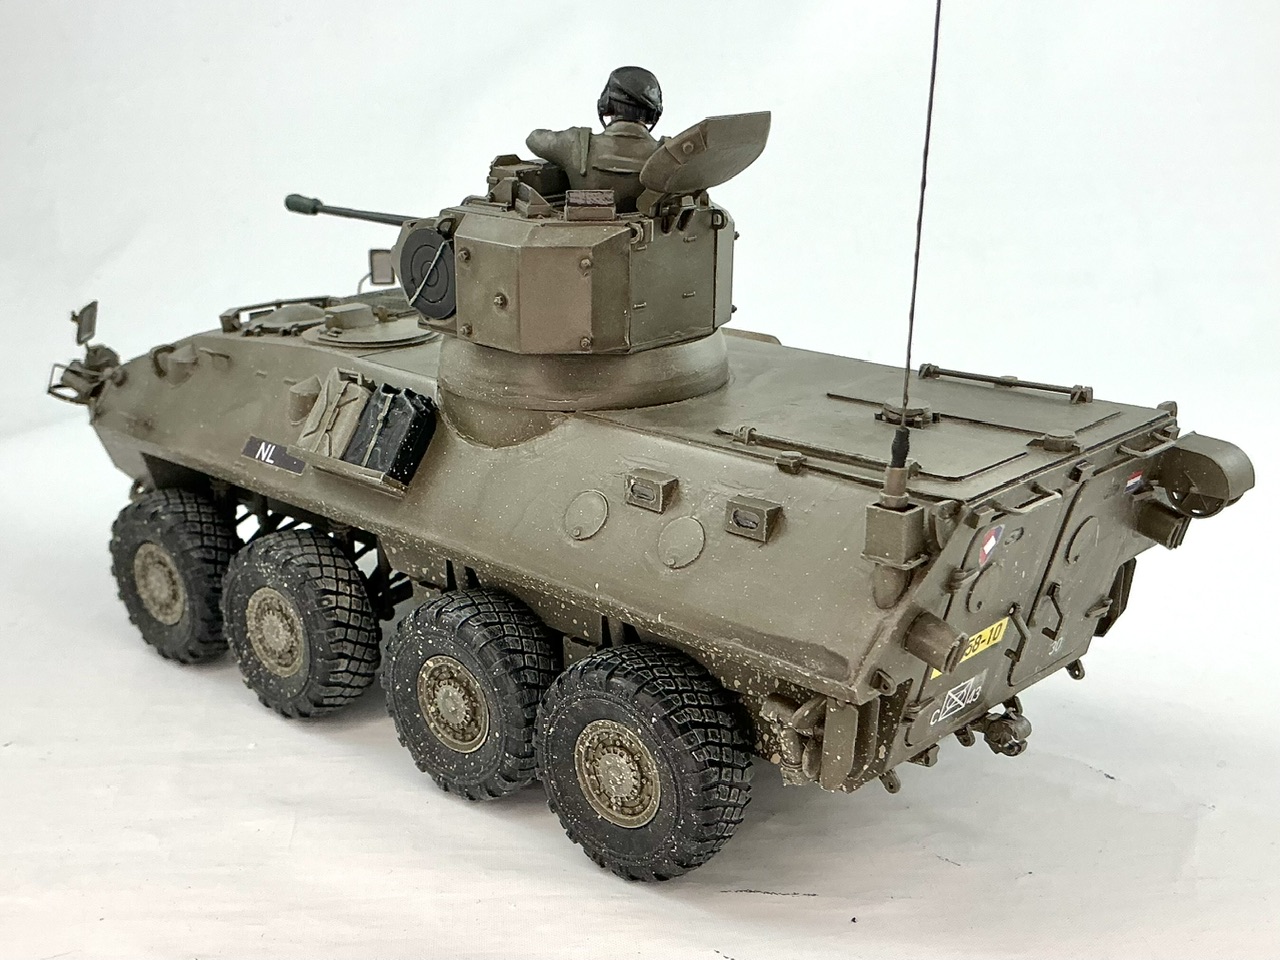
With some dirt on the tyres and the underside of the hull, plus an antenna on the rear, I feel this one is finished:

IMG_2543.jpeg
IMG_2544.jpeg
IMG_2545.jpeg
IMG_2546.jpeg
IMG_2547.jpeg


I took the tyres off, drybrushed a light mud colour over the running surfaces, and spattered that same paint over the lower hull as well as a little over the sides of the tyres. The antenna is 0.3 mm spring steel that I painted OD after glueing it in place.
 
Nice! Treatment gives it presence and weight, crossing that illusive threshold that takes it from being a plastic model to something more real.

And the turret mounting, as well as all the extra details you researched and built/added turned out great.

My wife has often commented after work we've done on our old house, that when something looks like it has always been that way, and doesn't really stand out, we must have done a good job!

So, with that in mind, good job!
 
Thanks, guys :)

when something looks like it has always been that way, and doesn't really stand out, we must have done a good job!
IMHO, that's one of the most important things about what-if models: having it look like it's supposed to be like that. If it looks disjointed, you probably wouldn't suspend disbelief for it, but I don't think this model suffers from that — even if the turret looks too big for the vehicle, but then, it did that on the single real-world prototype too :)
 
Quite the build Jakko. Very good.
I was surprised at the history of this vehicle and
it's relationship to US vehicles of the same design. I always assumed US built in house. Or
used designs that were home grown.
 
Thanks, and nope, they're Swiss in origin, and in the US LAV's case, came via Canada — though still without 25% tariffs added, I guess …

The evolution is fairly interesting: the Mowag Piranha in its original form was not widely adopted, but Canada took a licence to build the Piranha II 6×6 and then decided to offer the 8×8 to the US Army and Marine Corps, which in turn evolved into the ASLAV for Australia. Meanwhile Mowag improved the design into the Piranha III and there was all kinds of cross-pollination between the two lines.

My fictional Piranha PWI would basically be a Piranha II, so parallel to, and contemporary with, the LAV.
 

Latest posts

Back
Top