Tamiya 1/35 M51 Super Sherman Early

Elm City Hobbies

Active Member
Joined
May 7, 2009
Messages
3,239
Alrighty.....I know I should be building on my DANA, but when this came in I couldn't resist.
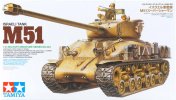
001BoxTop-vi.jpg

For a complete in-box review of the kit, please go to the review I did here on SMA:

http://www.scalemodeladdict.com/sprue_view/tamiya-1-35-m51-super-sherman-early

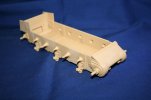
Lower hull, a multi-part assembly which is very unlike Tamiya as you usually have the lower hull tub as one piece. No fear though, it all falls together. A few injector pin marks on the lower hull sides though....not really sure why these were on the facing side and not the inside where they wouldn't have been seen.
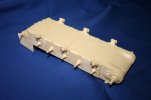
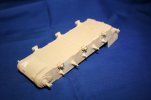
IMG_7630-vi.jpg

IMG_7631-vi.jpg

IMG_7633-vi.jpg

Rear lower deck, good detail, but most of it ends up hidden once the upper hull is installed.
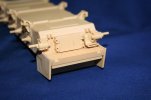
IMG_7632-vi.jpg

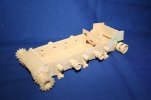
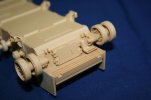
Very little putty is needed on the kit. The seam where the 2 side pieces attach to each other, and some on the 2 part fuel cans and holders (which you will see later), and that is really about it. And the lower hull with the return rollers installed. The front drive sprocket and rear idler are held on with poly caps, and will be removed to make painting easier.
IMG_7634-vi.jpg

IMG_7635-vi.jpg

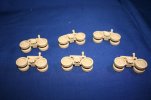
The HVSS suspension in all it's glory, again will be left off until painted. Makes it easier to paint the rubber on the wheels.
IMG_7636-vi.jpg

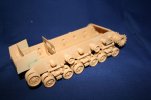
This is just a shot of the suspension sitting on the hull attachment points....you can see why I want to leave them off until they are painted!
IMG_7637-vi.jpg

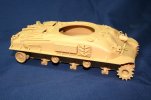
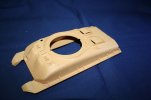
Upper hull with the engine deck installed. The way Tamiya has this kit laid out, makes me thing they are going to do multiple versions of the M51, otherwise, why bother to mold a separate engine deck?
IMG_7638-vi.jpg

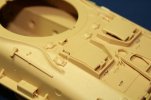
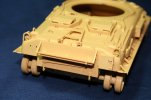
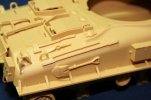
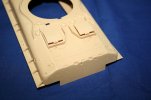
You can see some of the molded on handles, which need to be replaced with some copper wire, this is one improvement to the kit that Tamiya should have done right out of the gate. 20, even 10yrs ago, it may have been acceptable....but not with the kits being released today.
IMG_7639-vi.jpg

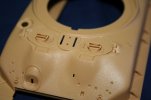
Shot of the front of the upper hull, good texture to the hull, but again, the blasted "blocks" of styrene where handles should be....they gotta go!
IMG_7640-vi.jpg


I am farther along on the kit than the pictures show...as I am actually onto the turret and the lower hull is finished. More pics to follow!!
 
awsome. ill get to see two of these being done, one by scratchmod in well burnt out and an intact one, Im very interested in this kit so im glad to see one being done here,

And a great start scott, i hope you will stick with it and finish it up soon ;D looking forward to youtr next update
 
OK...took the rest of the photos, so now your are caught up to where the kit is.

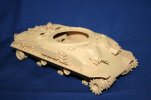
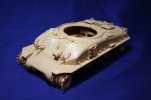
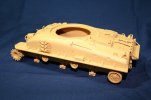
Upper hull finished (minus the installation of the fuel and water cans, as they will wait until almost final assembly)

IMG_7642-vi.jpg

IMG_7643-vi.jpg

Close up of the wire hatch handles replacing the plastic blocks Tamiya had put on.

IMG_7646-vi.jpg

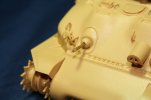
Close up of the RB Models .30cal barrel I used to replace the kit barrel. Nothing really wrong with the kit barrel, so don't think you need to run out and get a replacement. I had the metal one on hand....and it looks awesome IMO.

IMG_7648-vi.jpg

Left Side

IMG_7649-vi.jpg

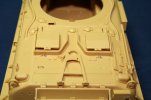
Engine deck with all the handles replaced. Have to make a new one for the back right, as it popped out when I put the upper and lower hulls together.

IMG_7650-vi.jpg

IMG_7651-vi.jpg

The rear with the handle replaced on the phone box (at least that is what I think it is)

IMG_7652-vi.jpg

Right side

IMG_7653-vi.jpg

Close up of most of the tools on the rear. Few people ask me why I put the tools on before painting....doesn't it make them hard to paint afterwards? Well...yes and no....just a really fine brush and lots of patients! LOL

IMG_7654-vi.jpg

The business end of the M51!

IMG_7655-vi.jpg

Close up of the unique muzzle break.

IMG_7656-vi.jpg

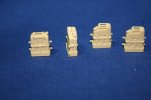
Fuel and Water cans...

IMG_7657-vi.jpg

And as you can see, since they were halves in the kit, while a small seam on the fuel cans are ok, that same seam isn't OK on the holders, so all of them will have to be filled and sanded. But considering there is very little of that overall on this kit....I am OK with it.

IMG_7658-vi.jpg

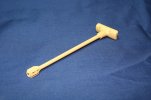
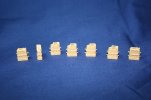
And these are the fender holders. Tamiya is nice enough to give you lots of extras in case you loose a few to the carpet monster!

IMG_7659-vi.jpg


And there you have it....up to date as to where the kit is today. Going to start on the turret and hope to have most of it wrapped up today (maybe). Undecided if I am going to use the figures or not. They aren't bad, typical Tamiya quality. Maybe replace the heads and call it a day. Also the smoke canister launchers are a little on the weak side....not 100% sure what I am going to do there, open to ideas.

This started out to be a quick OOB build...LOL...obviously I can't leave well enough alone!
 
Awsome update Scott you are Flying on this. The Rbmodels replacment is sweet.
 
was just wondering how many parts make up the kit, i remember having the academy version and it was just a whole box of bits that i ended up giving away. Tamiya seem to have less part generally compared to most kits these day.

its just a personal choice i'm more of a painter than a builder so i'd be interested in the number of parts that make this baby up and i migh have a go at it.
 
Elm City Hobbies said:
Hey Jimi,

Click the link in the first post to take you to the kit review. All the info you seek is there.

if you need reference shots i think i have some from when i visited israel a few years back
 
SCOTT ,

Good deal ! I like th Gun on this. Nice Muzzle break !! Keep onna rollin' ..... & Get back on that Dana ! ;D
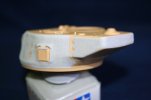
 
Looking awesome Scott!

Thanks for posting the great pictures of this kit. Wasn’t sure if I would pick one up, but after seeing this thread I guess it will be inevitable. ::) Looking forward to seeing more….please!
 
That looks like a really nice kit, I must get up the nerve to attack the M3 in my stash, i'm wary as I want to make a nice kit of it and haven't made any armour yet.
I love the Sherman and all it's variants, so this could be a potential second kit if the first goes well.
 
Great start, ECH! It looks to be a "shake-n-Bake" kit, do you forsee any build
difficulties with this one?
 
None at all really, few knock out marks in places that are easily fixed (but really could have been put in a place you wouldn't have to worry about), couple of seams that need a slight bit of putty.

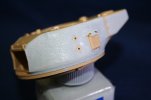
Now that I have the turret halves together, the seam where they meet will have to be cleaned up, and in the process the fine casting texture on the turret around the seam will have to be replicated (Mr Surfacer 500 to the rescue).

Otherwise not much needs to be done.

Open box, insert glue, close box, and shake.
 
Paint it on, let it set up for a bit, and then take a stiff brush and stipple the Mr. Surfacer.

Depending on how thick you apply the Mr. Surfacer, you may have to go back once it is all dried and knock down the high points of the stippling.

My luck though I will do the seam, and it will look much different than the rest of the turret. Might just do the entire turret and get it over with.
 
SPUD ,

DSC07602.jpg
DSC07604.jpg
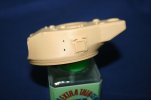
Behold th Power of Mr. Surfacer 500 !! I did this on Tmaiya's 1/25th scale Jagd-Panther. In th top pic you can see whats left of one of My older Drybrushes ... it's now a stipple brush ;D​

SCOTT ,

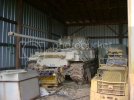
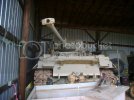
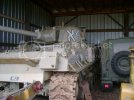
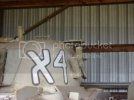
Rock-On with th Mr.Surfacer. I'm lookin forward to this build ! Here's a picture of an Authentic Israeli Sherman. Here in V.A. @ th Tank Farm in Nokesville ! Soon to be restored !

DSC06809.jpg
DSC06810.jpg
DSC06811.jpg
DSC06813.jpg
DSC06814.jpg
That's as close as I could get ....... for now .... ;D
 
Looking Sharp, ECH :)

Erik right no update on the Dana? and how about the tiny Ozelot? ;D
 
ahh vert nice, i forgot i asked about that :p. somthing ill need to try get
 
Very cool Erik....wonder how one of those made it out of Israel??

That is the earlier M50 Sherman they used before the M51s. VVSS Suspension, smaller gun and built off of M4A4 chassis.

Both the DANA and Wiesel are sitting here. This came in and I just "had" to start building it. That and the idea for a diorama I had for the DANA showed up in the latest Tamiya Military Modeler magazine done by someone else. Literally the exact diorama, even down to the blue porta potty!

They will both get finished, just needed a break!

I was going to use Mr. Surfacer, but I got a new product in at the shop and decided to give it a try...stay tuned for pics!
 
Alrighty....on to the turret.

Turret comes in 2 halves (typical armor kit of course). On most tanks it doesn't matter, but on this one the seam between the 2 halves runs through the side of the turret in some spots (as opposed to just the bottom plate).

Problem being, that since this is a Sherman, and the turrets are sandcasted as one one piece...this means there is no seam on the turret of the real thing. Soooooo....


Here we see the 2 halves glued together and the resulting seam.

IMG_7660-vi.jpg


IMG_7661-vi.jpg


And here is the seam cleaned up

IMG_7662-vi.jpg

IMG_7663-vi.jpg

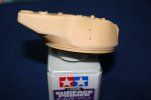
And to finish off the seam, an application of Tamiya Liquid Primer. I just got this new in the shop, so I thought I would try it out.

IMG_7664-vi.jpg

IMG_7665-vi.jpg

It is much thinner than Mr. Surfacer, and I just used a disposable Micro Brush to paint it on the seam. Here is the one big difference I found with it though....it doesn't shrink nearly as much I find as the Mr. Surfacer does. I had one small part that the parts didn't fit together properly, leaving a small hole...I find that even Mr. Surfacer 500 would shrink to the point that I would have to do a 2nd application, but this stuff doesn't seem to do that, and covered the hole nicely.

IMG_7666-vi.jpg

IMG_7667-vi.jpg


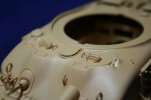
Now...this kit has a fine sandcast texture to the turret, but as a result of cleaning up the seam around the turret, you pretty much end up sanding the fine texture away.

So...what to do, but re-apply the texture. Again, I had planned on using my Mr. Surfacer 500, but when I opened it...it was really thick, and I didn't have any lacquer thinner handy to thin it out. So...lets try the Tamiya Liquid Primer again.

First time I have done this...so it was a learning process, but fairly simple to do. This is by no means the "only" way to do it...just something I tried, and seems to have turned out well.

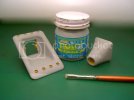
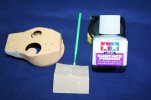
Here are the tools you need:

IMG_7668-vi.jpg

Micro Brush
Tamiya Liquid Surface Primer
Some small pieces of sandpaper (I used 220 grit)

As you can see in the picture above, I have already done the back of the turret...this was the smallest area that needed to be done, and since this was a trial run, figured if it FUBARed, then I would only have a small portion to fix, instead of the whole turret.

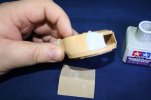
So...first up...lay down a thin coat of the liquid primer. Do this in small sections, as the stuff dries pretty quickly, and once it starts to set up, it is hard to make an imprint of the sandpaper on it. I basically broke each side into 3 sections and did them separately.

IMG_7669-vi.jpg

Section complete (sorry, picture is a little blurry).
Let it dry for maybe a minute at the most.

IMG_7670-vi.jpg

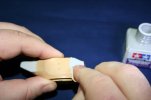
Then dab the sand paper onto the section you just applied the surface primer onto.

IMG_7671-vi.jpg

Keep dabbing to impart the sandpaper pattern into the surface primer, and you end up with....

IMG_7674-vi.jpg

And the completed side of the tank. If you find you have some barer spots, you can repeat the process on the bare spots.

IMG_7675-vi.jpg

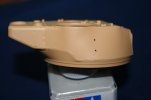
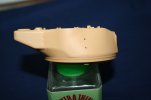
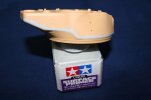
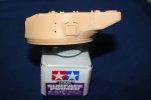
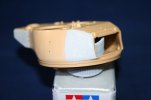
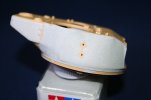
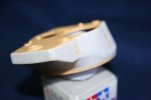
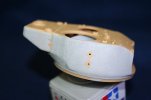
And the completed turret........

IMG_7676-vi.jpg

IMG_7677-vi.jpg

IMG_7678-vi.jpg

IMG_7679-vi.jpg

I did end up with some thicker ridges on the border of the sections, and basically I just went back in and added more surface primer to the ridge, and then feathered the primer out evening it out some. Once it started to set up...hit it with the sandpaper again to give the texture.

Don't worry if the texture is too stark. Let the whole thing dry overnight, and then you can lightly sand the texture, knocking the high points from it. I liked how this turned out...not too much different than the molded in texture, and I am sure that under a coat of primer and paint, it will just be a nice subtle texture to the whole turret.
 
Back
Top