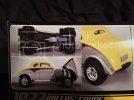
Willys Coupe 1993 AMT (FIRST EVER PLATIC MODEL BUILD - NEED ASSISTANCE)

Fr0zen

New Member
Joined
Feb 9, 2013
Messages
5
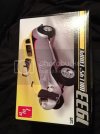
So this is going to be first Foray into Plastic Model building and decided to start of with something basic AMT`s Willy 1933 Coupe.

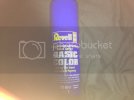
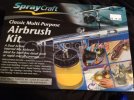
i got myself an Spraycraft Classic Airbrush kit and some Primer (photos below) will need some assistance for a newbie here on what to paint etc and what supplies you guys would recommend !!
IMG_0056.jpg

IMG_0060.jpg

IMG_0057.jpg

10256857-523f-47ea-8400-2d4133069772.jpg

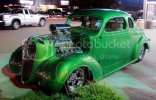
The color i would like for this build is like a sparkly Green (see pic below) and chrome of course
greencar.jpg
 
Welcome.

I'm ready to start on the '33 Willys of Ohio George Montgomery that was recently re-released by AMT so Ill tell you what I do to get started.

The plastic comes out of the mold with a coating on it to help the parts release from it and I like to wash that off by soaking it in warm dish soap and scrubbing it with a brush. When everything is dry, I spray all of the parts with primer to make sure they will take paint well (chrome excluded except for purists, but that's another issue).

Seperate all of the body parts and go over the edges with a razor knife to remove any flashing or defects where the parts connected to the tree (sprue). A stiff cardboard nail file or sanding board is good. too. Prepare the body parts with sandpaper to help the paint go on smoothly. I use 600, 1200 and 2000 grit sandpaper. I like dry but some swear by wet sanding.

Doing the body first and working in stages like this will give you a head start on the most difficult part (painting) and give you something to come back to while parts dry or glue sets up.

Stuff to get cheap:

Masking tape. I like painter's tape like Frog tape. The yellow is better than the green.
Shish kebob skewers. Wooden sticks from the grocery store to tape or stick parts to for painting.
Small alligator clips. Mine are from Radio Shack. Press them onto the ends of the sticks and they hold parts while you work on them.
Wire cutters. Some guys use "sprue cutters" from the hobby store to cut parts from the tree but I like a good pair of dedicated wire cutters. They are also handy in cutting the sticks down to size.
Spring cloths pins. Hold parts together while they set.
Cups to put parts in. Some of these things have very small parts that have to be painted before assembly. after I cut them off and trim them, I like to put them in cups so I don't lose them.

In terms of process, I like to work one unit at a time. I paint all of the engine parts first and then assemble it. If I need to wait for a part to dry or set up, I look to the next unit like the suspension and trim and paint those parts. Some take a color and paint everything in the kit while they have a wet brush or have the airbrush out. That's up to you.

In regards to the airbrush, the one you have is like the Badger I got to get started. It works good, but you might find that a gravity feed brush with the cup on the top is better. Don't blow cash on airbrush stuff until you are sure you want to get back into this. Canned air is OK but it didn't take me long to go looking for a compressor.

Good luck and keep up posted.

FYI I'm retired and just got back into modeling as a winter hobby.

Dale
 
Thanks mate
I have masking tape,wire cutters etc
just need to get to the supply store for more materials
a few Questions
why do you have to sand down the primer after you put it on ???
how do i put sparkle into the green paint im planning on using ?
do i gloss the Paint job with the airbrush when finished?
 
Fr0zen said:
why do you have to sand down the primer after you put it on ???
The smoother the undercoat the better the overcoat. Sanding will make sure the undercoat is smooth and gas a bit of a bite to it to make the overcoat go on evenly.

how do i put sparkle into the green paint im planning on using ?
do i gloss the Paint job with the airbrush when finished?

This is where polishing comes in. It's easier for me to give you a link to a video:
CLINIC: WAXING & POLISHING

Note: People use sandpaper of 3000, 6000 and 12000 grit to get the finish that some of these show cars have.

Dale
 
As far as the sparkle goes, the picture of the car you show is likely done in a 2 step process, usually a metallic base, of usually silver, copper, gold, etc, etc, and then a candy overcoat. Candy paint is basically just a transparent color, and when applied over the metallic base, shows the metallic through it. More coats of candy, the deeper the color will be.
 
Stick to the polishing methods used in the first video that is posted in the replys from the users of this forum as its done by none other then the great Dr. Cranky who is known for his candy finishes. He produces some great eye candy and is well known in the model world. I will tell you from watching his prior videos of the Willys builds he has done that when you start shooting your base coat color you will want to paint the recessed areas first as they are very hard to get too after you start the process. So hit them first and then continue with your basic painting processes. Enjoy the build and welcome to the styrene world. If you run into problems goto You Tube and search for Dr. Cranky666 he will answer any question you may have and is always very warm and welcoming to new model builders in the styrene world. He has helped me quite a bit and is a great person. Everyone on this forum are great people and very open and willing to help anyone with anything they may need help with. I was told when I first joined that if you have a question please do ask. They cant help unless you ask. Looking forward to watching your progress with this build.
 

Latest posts

Back
Top