Edbert
Well-Known Member
- Joined
- May 16, 2024
- Messages
- 1,596
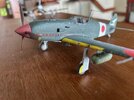
I grabbed this kit on sale months ago, always want to have a 1/48 Tamiya kit in the stash as a pallet-cleaner. Current stash item is a P-47D25.
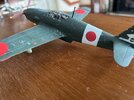
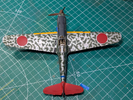
Since I used this kit to fill in the gaps and have a stress-free perfectly fitting kit, I kind of sped through it, not taking a whole lot of pictures. Some things I am proud of it eliminating some of my mistakes on previous builds, primary among them would be painting on the "field-applied" camo around the national insignias instead of under them. The worst painting by me is the no-skid spots by the wing roots, could kick myself for being so sloppy, but oh well. The worst assembly by me is the little black horn looking thing mounted to the fuselage near the supercharger intake, I put a dab of CA on the shaft, and while aligning it with the model it rocketed off the tweezers into oblivion. I might find it somewhere later, but for now there's a strange little hole drilled there :-(
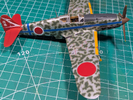
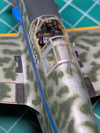
I'd swear I took in-progress pics of the cockpit, but cannot find them.
I need to paint the landing/marker lights, and maybe some tan around the window frames (inside of the frames it is tan) but this is one more WIP cleared from my (too large) in-progress list.
Since I used this kit to fill in the gaps and have a stress-free perfectly fitting kit, I kind of sped through it, not taking a whole lot of pictures. Some things I am proud of it eliminating some of my mistakes on previous builds, primary among them would be painting on the "field-applied" camo around the national insignias instead of under them. The worst painting by me is the no-skid spots by the wing roots, could kick myself for being so sloppy, but oh well. The worst assembly by me is the little black horn looking thing mounted to the fuselage near the supercharger intake, I put a dab of CA on the shaft, and while aligning it with the model it rocketed off the tweezers into oblivion. I might find it somewhere later, but for now there's a strange little hole drilled there :-(


I'd swear I took in-progress pics of the cockpit, but cannot find them.
I need to paint the landing/marker lights, and maybe some tan around the window frames (inside of the frames it is tan) but this is one more WIP cleared from my (too large) in-progress list.

