Revell Voyager - slow progress!

custardchris

New Member
Joined
Oct 4, 2011
Messages
22
I've not made a model since I was a kid (mid 30s now) but started to feel the need to made a Federation starship after catching Enterprise and Next Gen reruns a few years back. In the UK, the Voyager is the easiest to get hold of, so for Xmas 2011 I got one from my wife. She thought it would be built by Boxing day...

It turns out I'm a bit slower than that - I don't have the time to put into it, with my job, my wife's home business (that I help with) the garden, the kids...

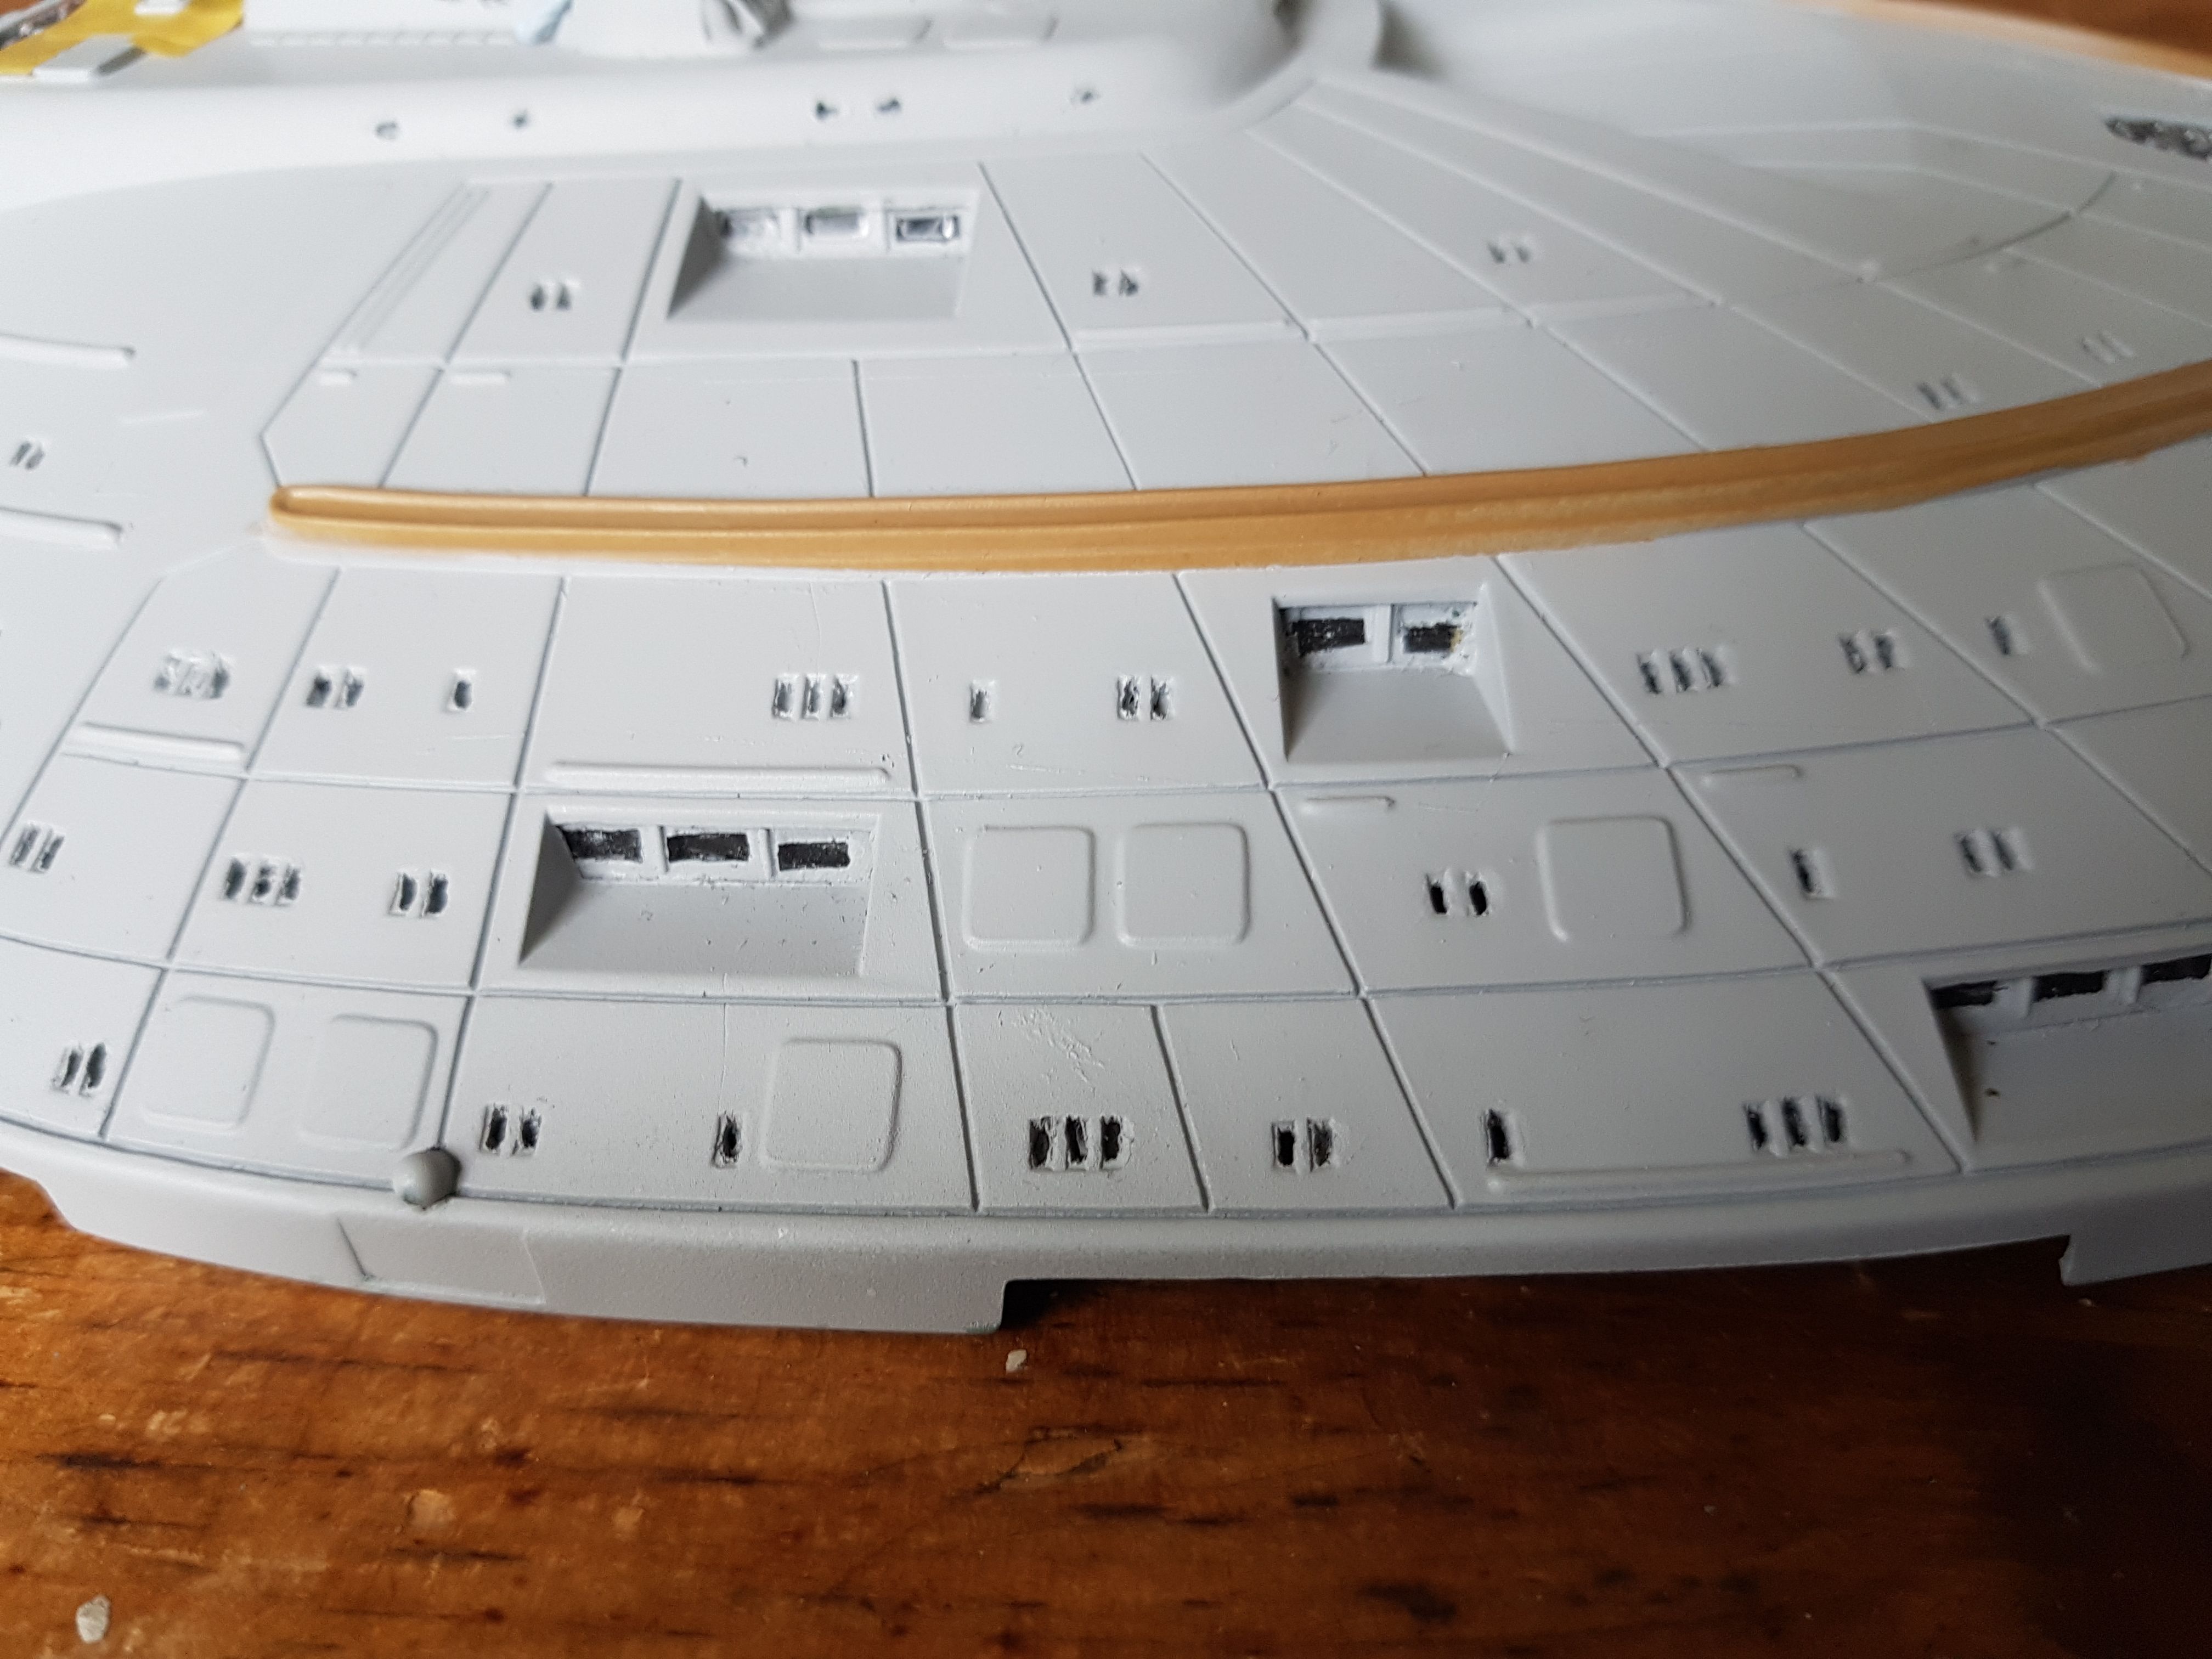
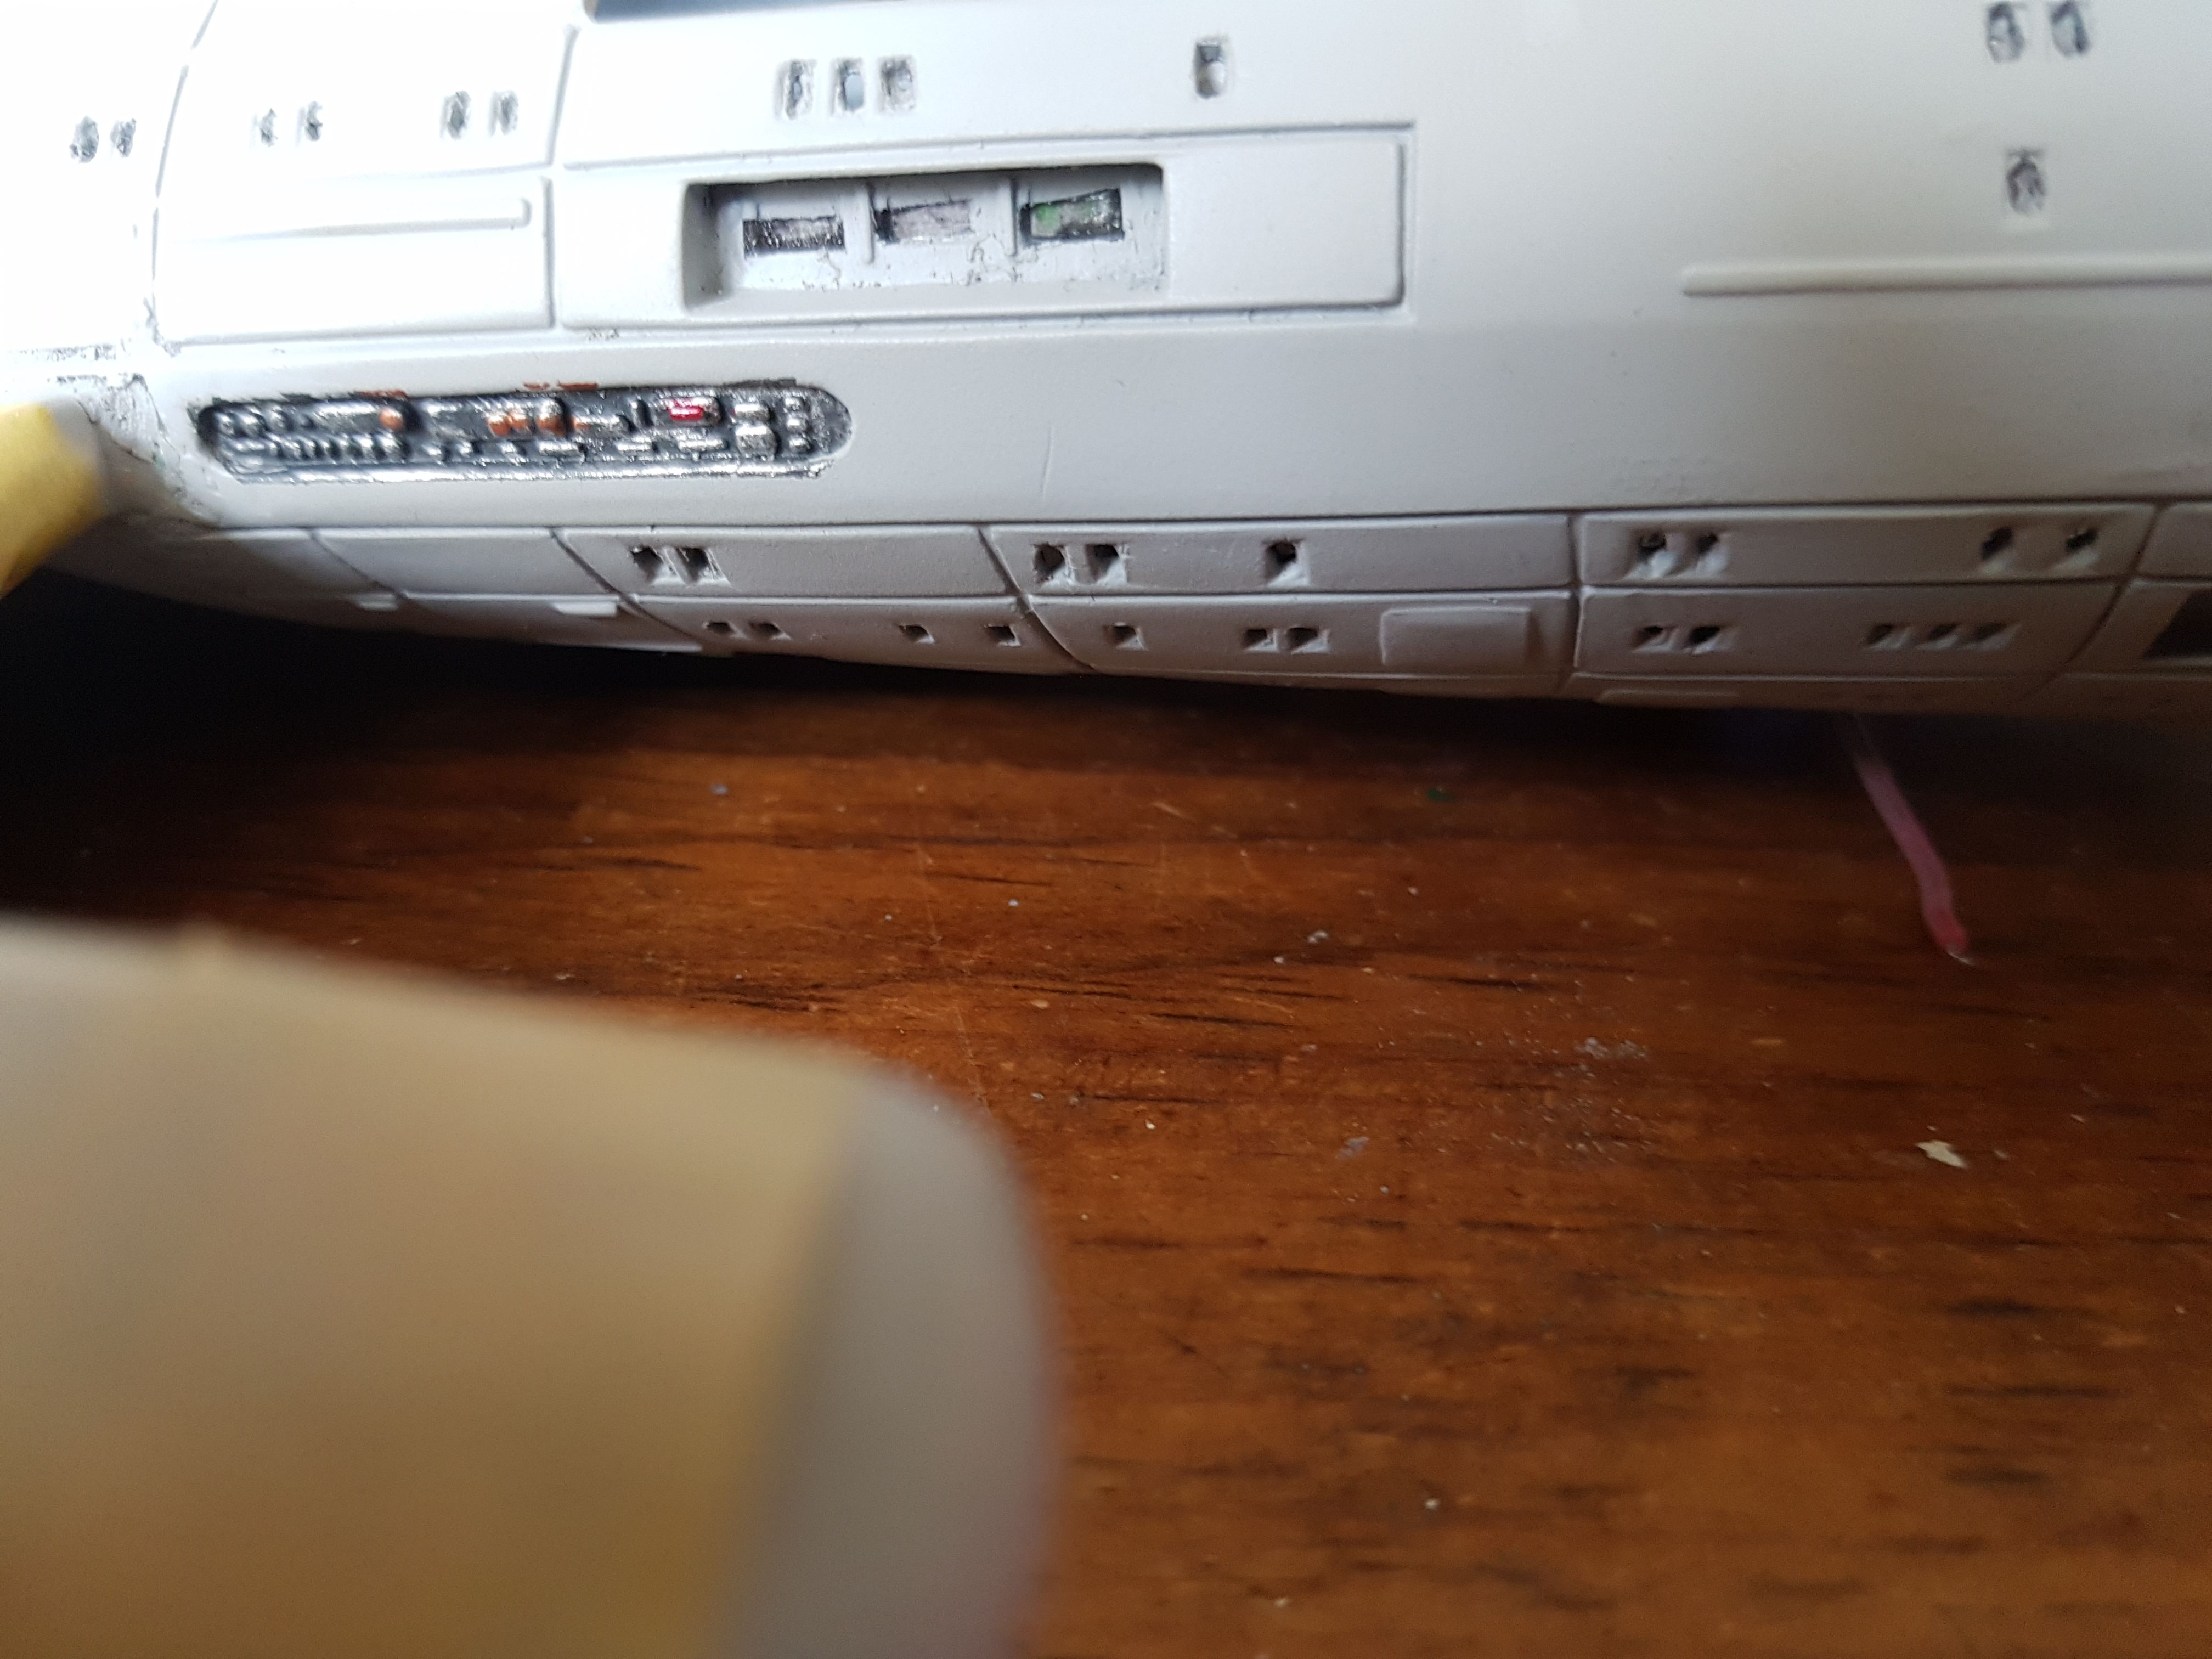
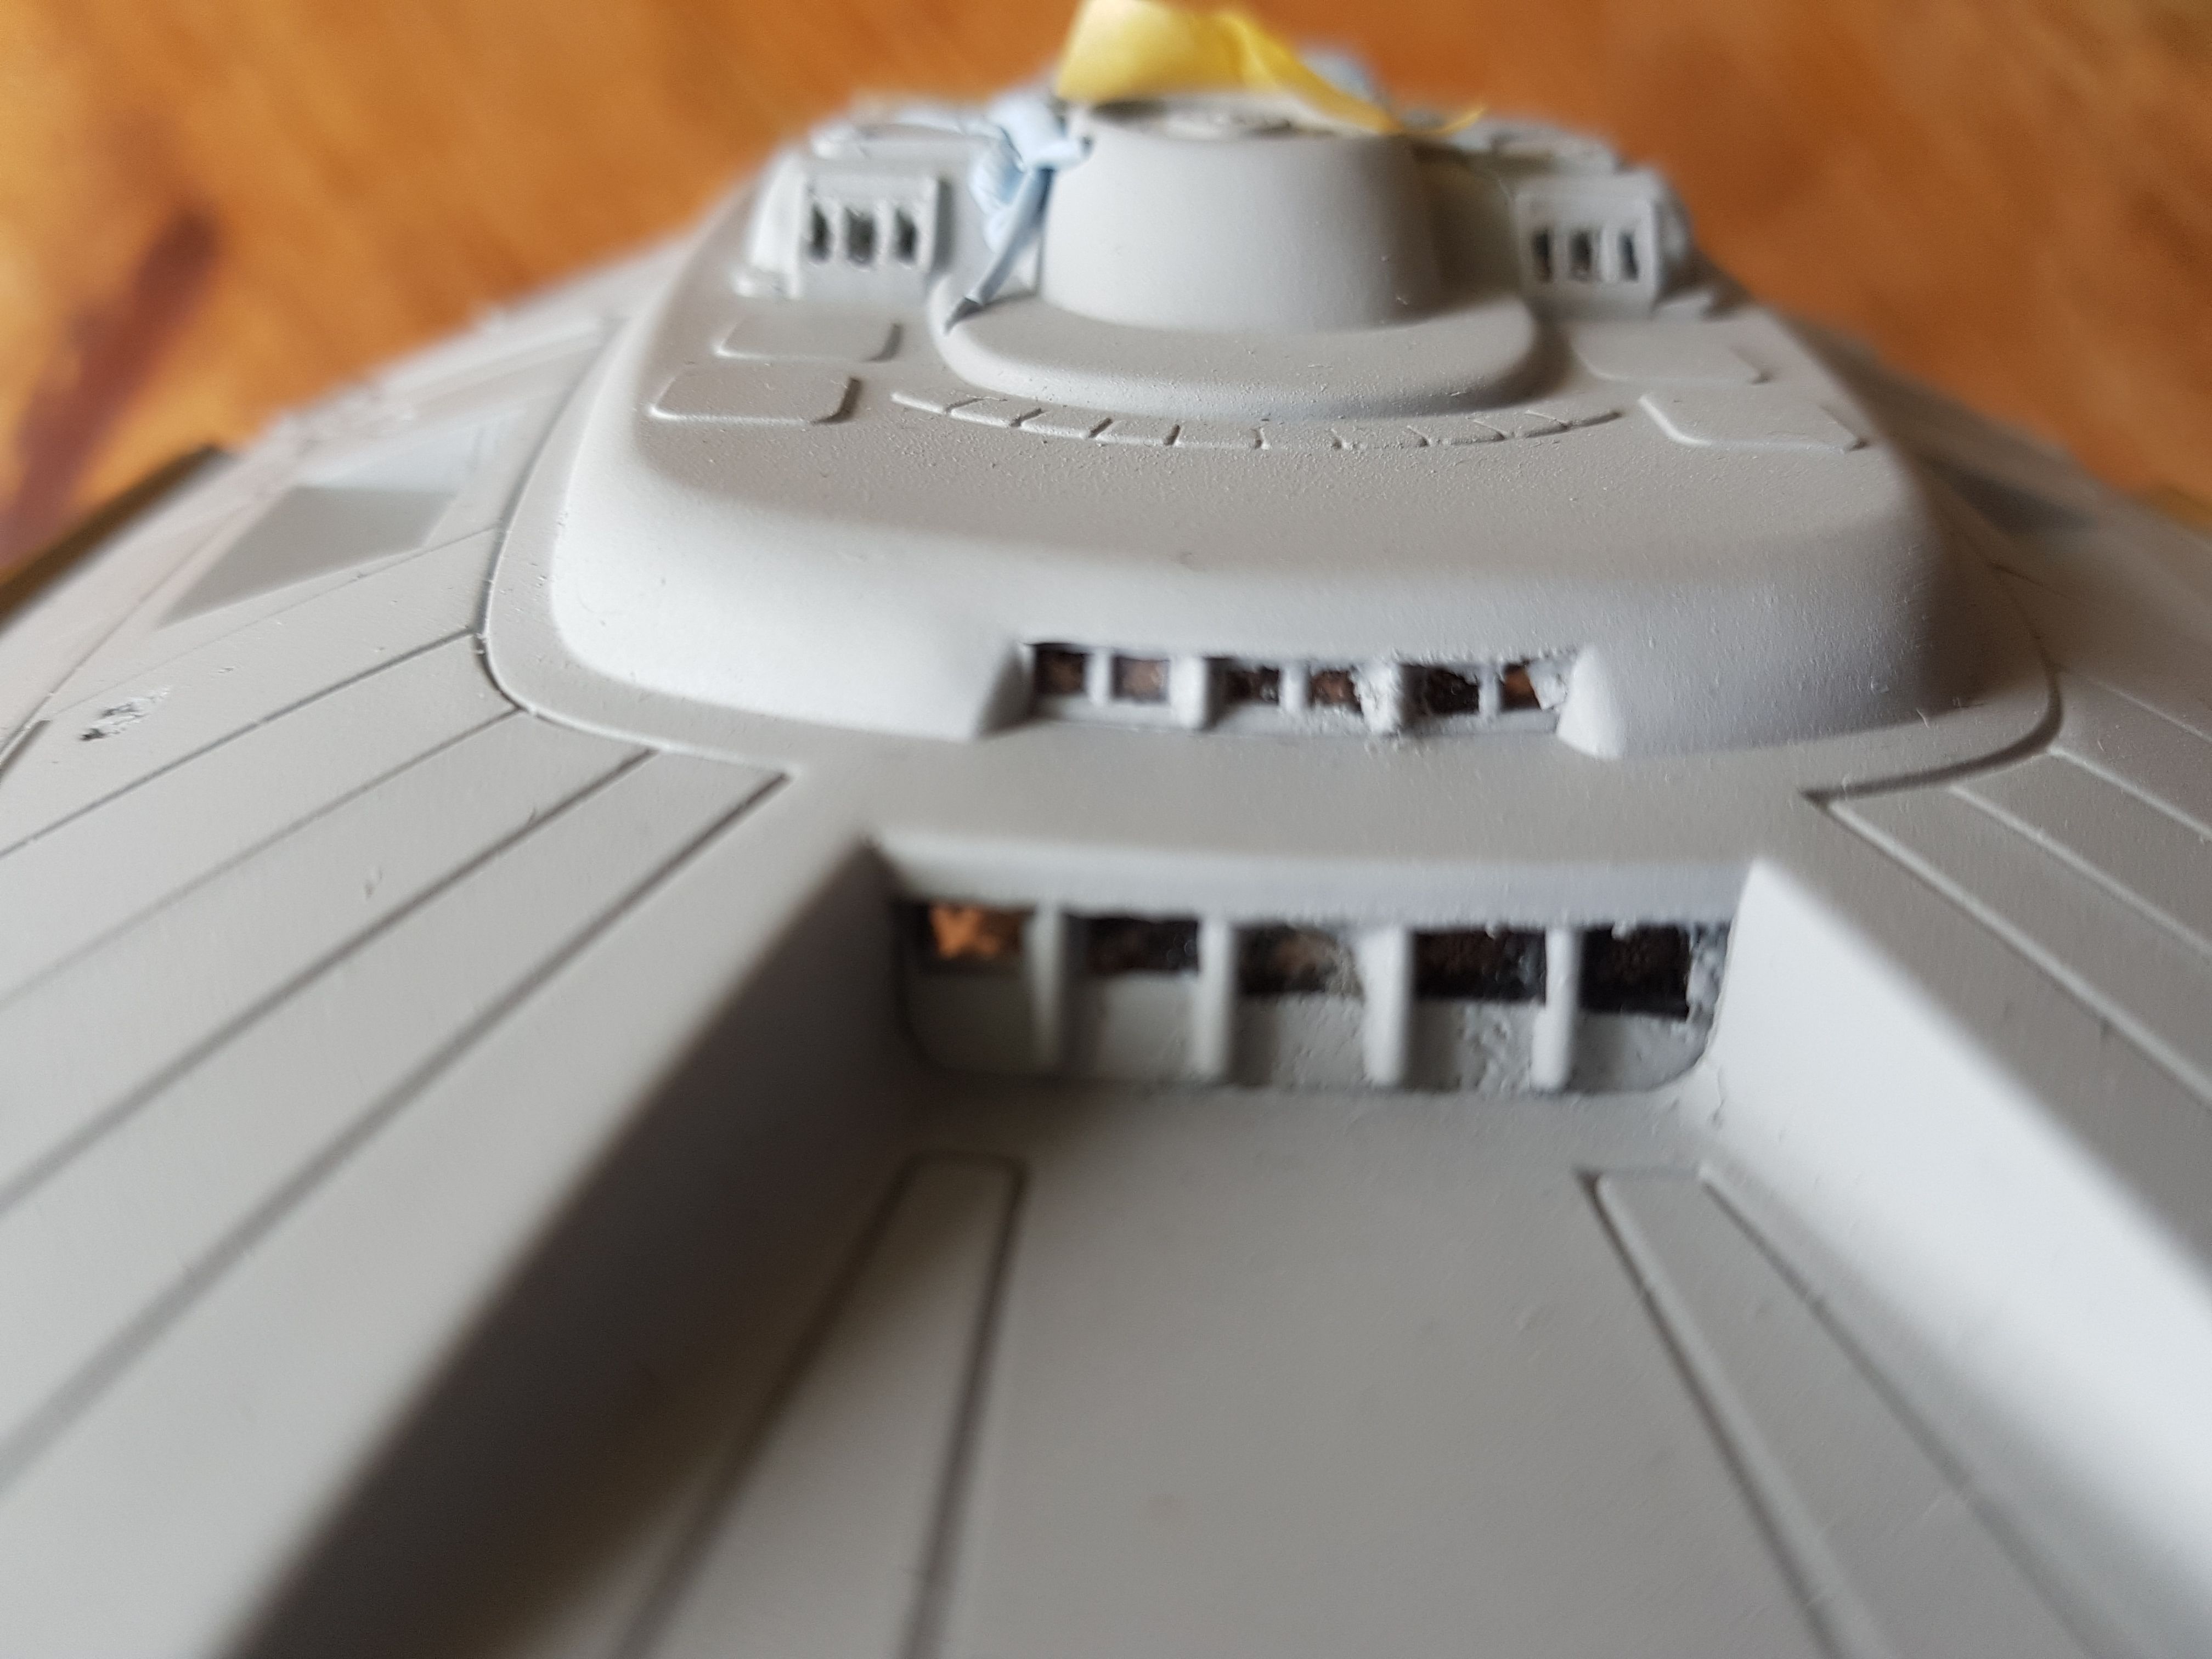
So 18 moths later here's the state of play. All the windows were drilled out by hand with an Archimedean drill (that took ages!). I've sprayed the insides with black paint (a Halfords spray can), and filled in the windows with Kristal Klear. I've put reflective tape in the insides of the saucer and engineering hull, too, and put in some LED tape into the saucer.


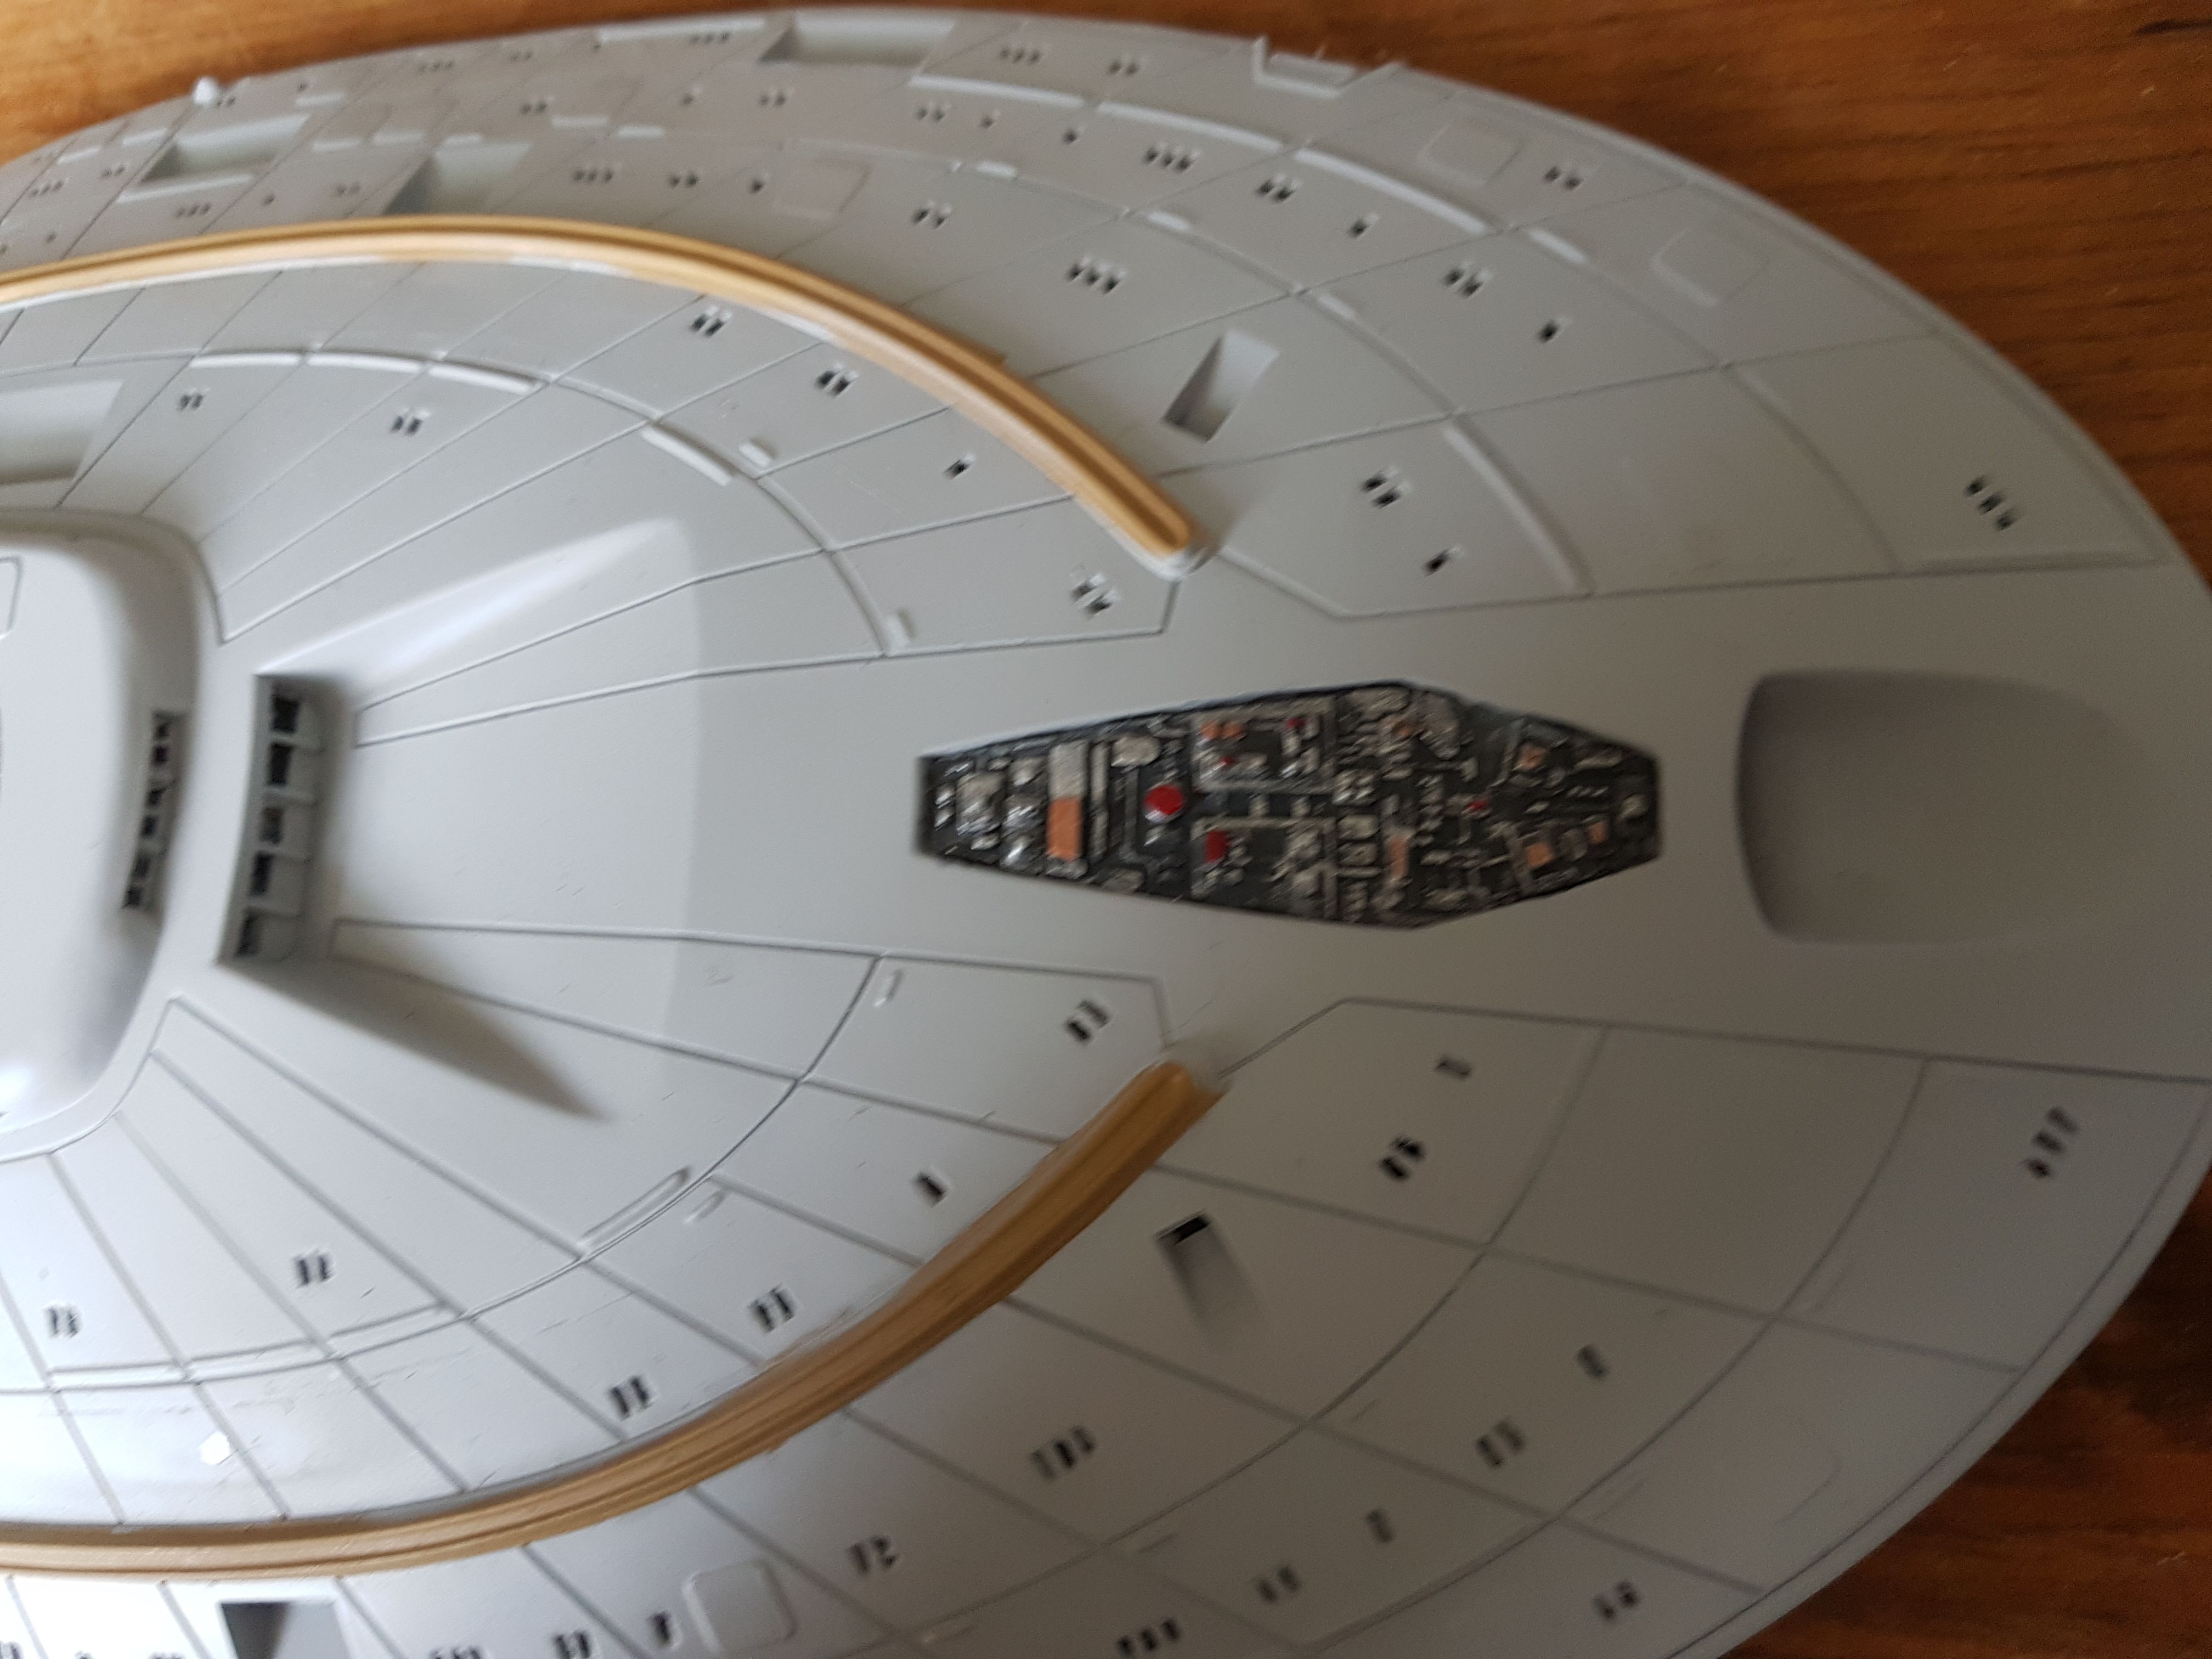
Also, I've expanded the slot on the bottom where the stand would have attached, and added in a 3 pin micro DIN socket. The plan is to be able to remove it from the stand if necessary, and have different circuits for engines/deflector, interior lights and Nav lights.

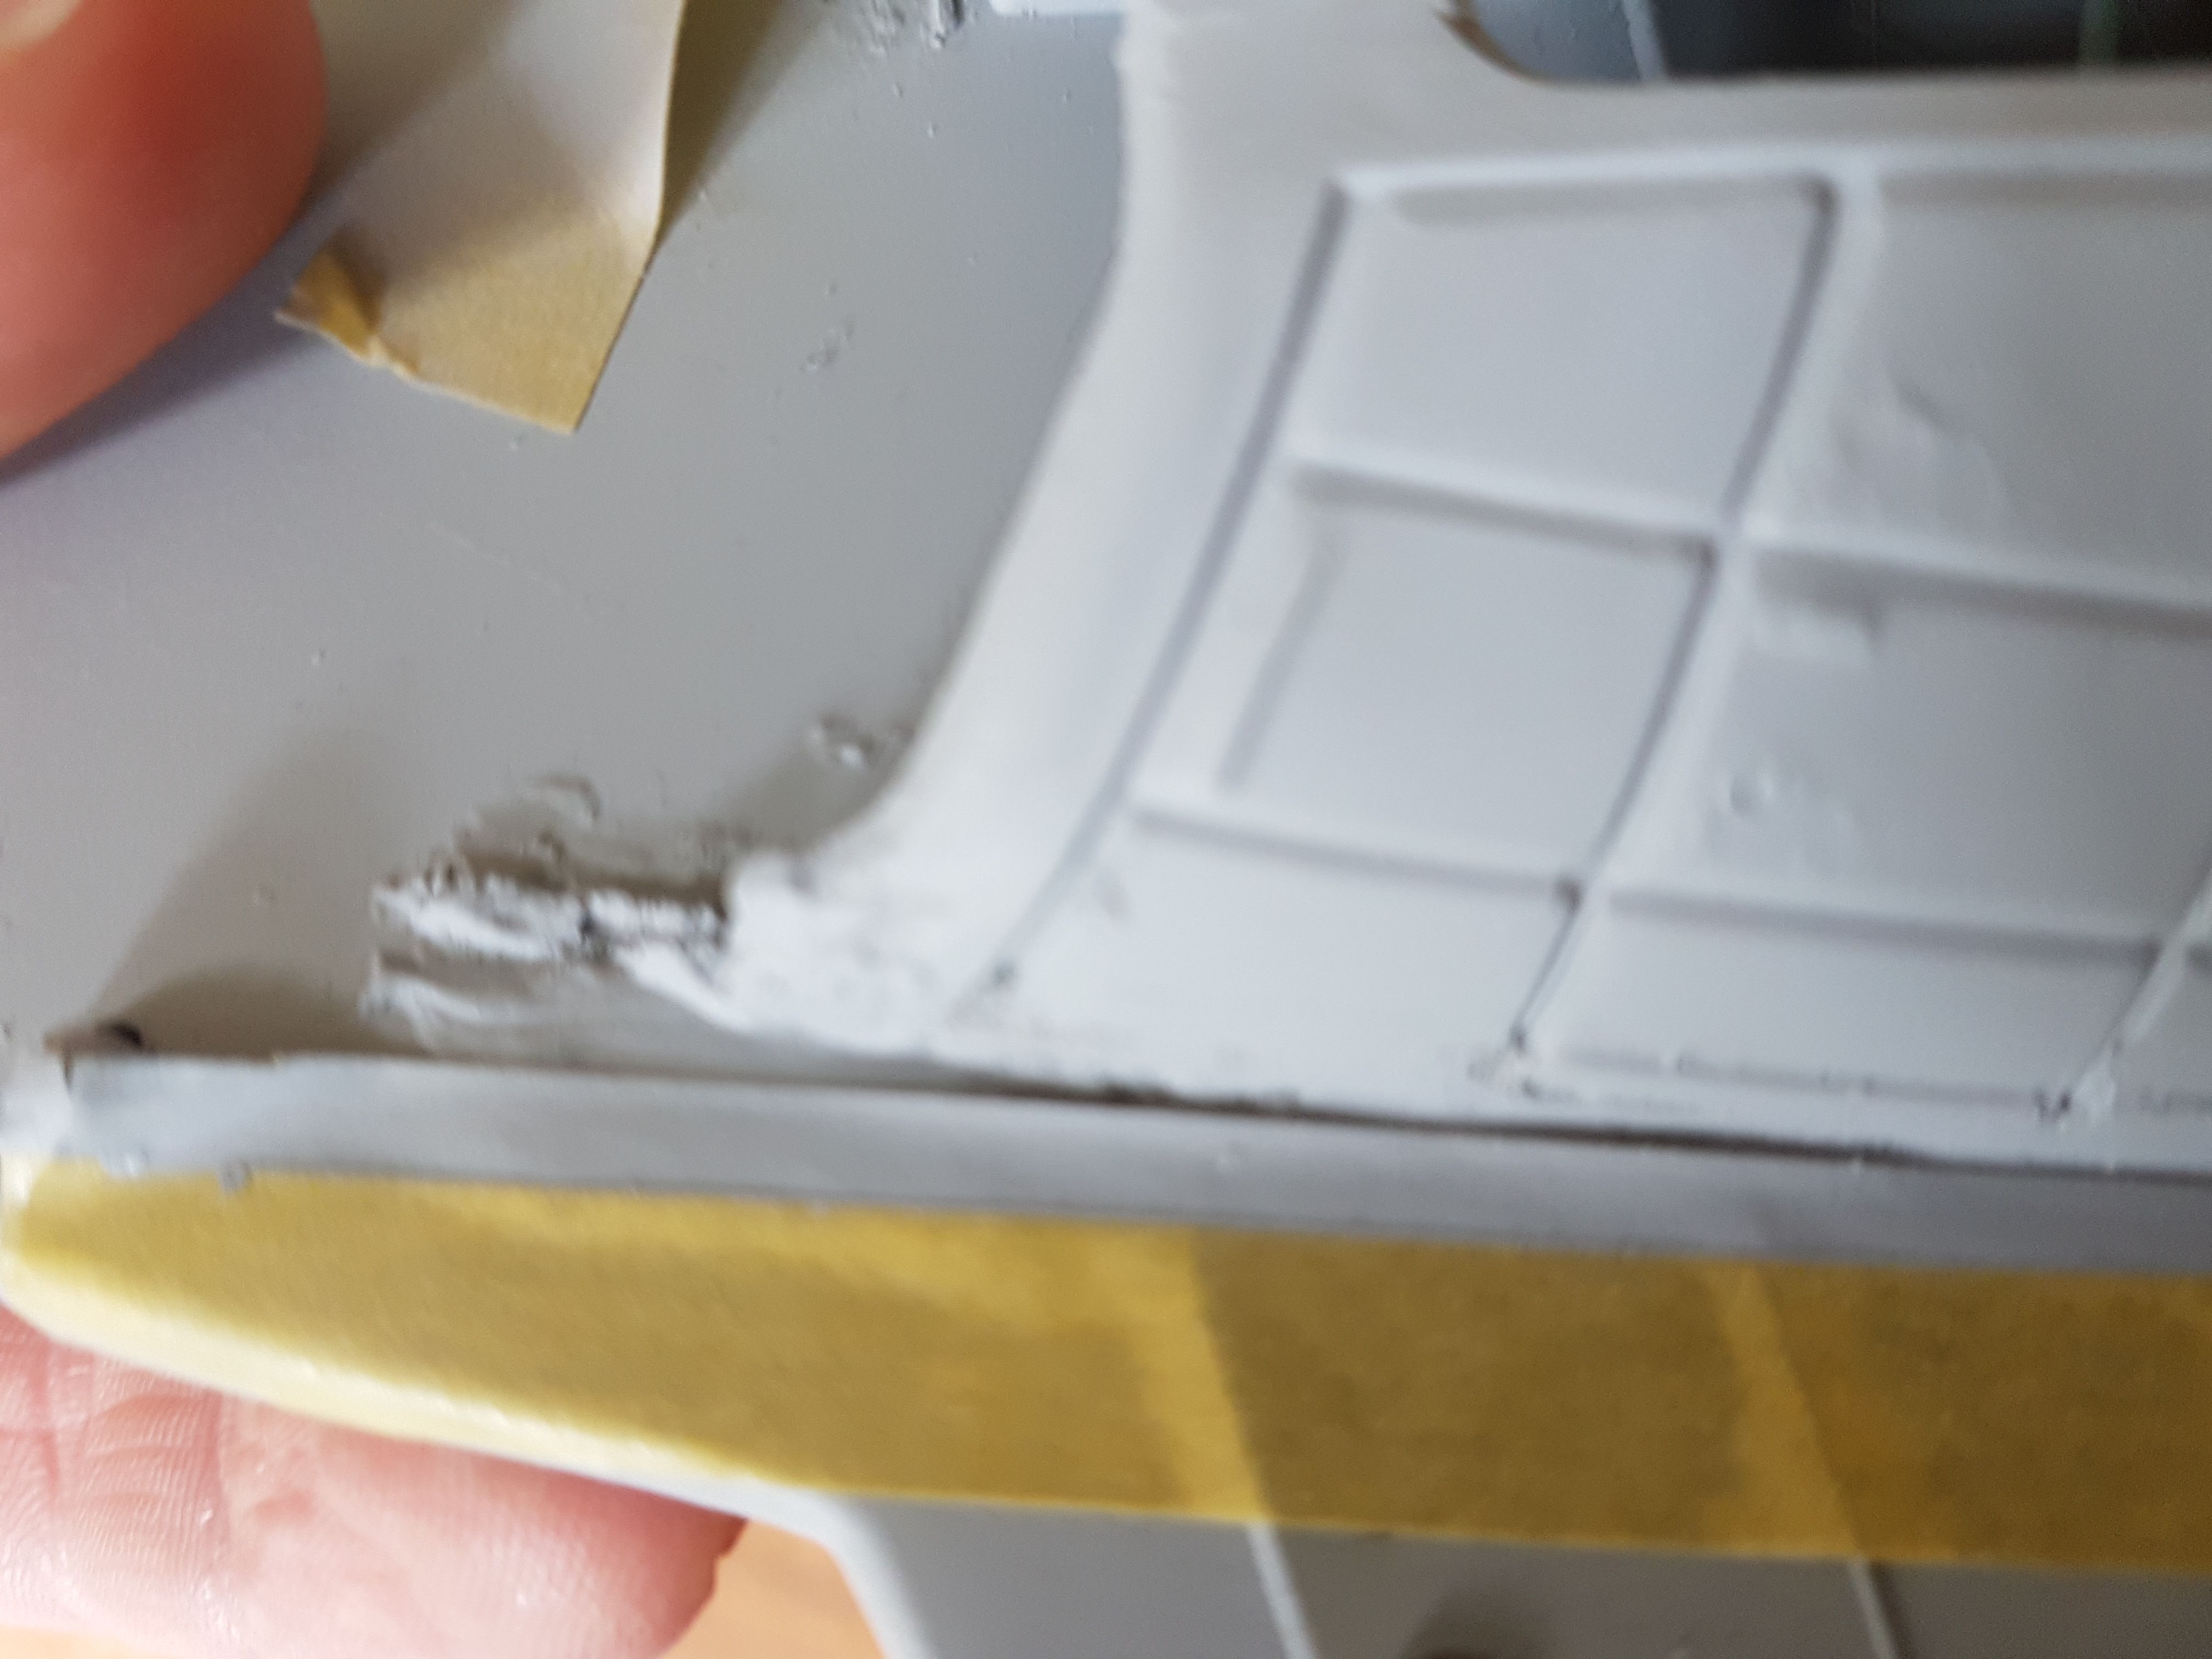
The flash ran out before this photo:-


I thought I'd done a reasonable job on the seam before I saw the photo, looks like I'll have to fill it some more.

I've sealed the saucer up now, haven't taken a photo of that yet.

I've also painted the insides of the clear warp and deflector parts clear blue, and I tried to put a thin coat of copper over the outside, but I really overdid it. Not sure whether to scrape that off or if there's something that strips it. No photo of that yet.

Anyway, more to come, at quite a slow rate though. I'd like to have it done before this Xmas though!
 
What's going to be the best way to mask the Kristal Klear windows when I paint the outside? I read on another forum somewhere that you can get away without masking them, which doesn't sound right to me...
 
IF you haven't put the crystal clear in yet then dont, just paint the model and add the windows as one of the last steps. Otherwise i think your options are A LOT of masking as i did on voyager, or using liquid mask.
 
greyphantom1000 said:
IF you haven't put the crystal clear in yet then dont, just paint the model and add the windows as one of the last steps. Otherwise i think your options are A LOT of masking as i did on voyager, or using liquid mask.
I'll second this. Makes things a LOT easier if you don't have to worry about the masking. The holes are small enough that you shouldn't get a lot of bleed-in to your light circuits.
Now, on the other hand, you will need to mask the nacelle inserts before painting the rest of the shil.

Just talking from what I did with my own version
 
I have filled it in already, but could drill them through again, I guess. Can I fill it in from the outside though?
 
It was tricky, but I did all of mine from the outside.

But, if you've already filled them, go ahead and leave them.
Don't want to see hard work wasted
 
So I've managed to get some more done on this.

First up, sealed the saucer after opening it up for more light blocking, and given it some puttying and sanding. Not happy with the seams yet though, bit I don't seem to be able to get them any better.


Also, deflector fitted along with lighting. The deflector is clear bue inside and copper on the outside, it kinda works


LED tape fitted in the nacelles


This is the monstrosity I was going to use for the nacelles before I found out how cheap LED tape was:-


And finally for this update, repainted the Bussard collectors red again, think this coat is actually red all the wy though, the previous few have had clear spots once light was shining through them.


Question - Is Maskol any good for masking the windows? Going to need to start on that soon.
 
Quick update:-


I've got the engine section wired up and sealed up, with a nest of wires coming out. But I must have bashed or pulled a wire as now one set of the formation lights in the nacelle don't work. They did yesterday:( So I'll have to prise it open and work out what I've done. Very disheartening.

I've also acquired some Maskol to cover the windows up before painting, and I am getting an idea for the stand together, which will be impressive (to me!) if it works. The fact I've not seen one like it before makes me think it's not going to work though.
 
Massive bump here, as I just haven't had the time for ages to get anything done on this. Since last update, I've attached the engines to the hull, and got most of the way through the wiring.


The wiring is really a mess, but I can work out what's supposed to go where, just about. Hopefully will have the chance to finish the wiring tonight, and attach the saucer to the main hull
 
Just caught up with your build. Truly great work, especially for someone just returning to the hobby. I'll be labeled a heretic, but Voyager was my favorite Trek show. Though I like all the shows, that Voyager ship just floors me.
 
Thanks for the compliment JamesInNC, really good to have positive feedback. I've not managed to get much else done, as I tried to finish the wiring last week, and discovered that there's a now loose connection somewhere in the nacelle/rear assembly that I've glued closed, which is very disheartening. I'm going to have to spend a while prying it open and fixing it instead of moving on with the next stage :(
 
Really big bump here. I had stalled on this for a few years, but have brought it back out because of the lockdown. If it doesn't get finished now it never will! It's completely rewired

I've sprayed the whole thing in Tamiya light gray, which I was going to use as just the primer, but thought it looks pretty decent, so am sticking with that. I've done some of the darker areas in Medium Gray, and some of the panels down the back in Tamiya Gray spray. The sensors are dry brushed, and are probably the bit that I'm happiest with! I have a real problem by the hangar bay though, where one of the bits next to it has snapped off. No idea where it is either. I've tried to rebuild it out of putty, but it hasn't stayed together, so I'm not sure how to proeed there.

I can't get quite a few f the seams filled tidily either.

Finally, I've removed the masks I had over the windows, and most of them weren't on straight, and they don't look great. Not sure how to proceed here either, can I fix them somehow, or should I just carry on and put it down to experience?
xnjuQVP.jpg

yNYMNPz.jpg

3Rj3Cem.jpg

fO9VJpr.jpg


gOJmS3J.jpg


rVqfaM7.jpg
 
Ha ha ! Welcome Back !
I saw the date on this and initially figured it was someone responding to an old thread --- good to see it's the OP getting back into it .
Groovy to see more lighting projects .
 
I think it'll end up looking just fine, despite the crooked placement on the masks.
The only way it'd really be apparent is if you got within a couple of inches of the model.
Had the same problem on one I did a few years back. Only reason I'd consider tackling it again would be to redo the running lights with larger fibers
 
If the windows are really off I’d just drill them out again and then do a little touch up with some thinned paint and a brush. Then refill the window with Krystal Klear.
 

Latest posts

Back
Top