BlackSheepTwoOneFour
Well-Known Member
- Joined
- Jun 9, 2013
- Messages
- 1,026
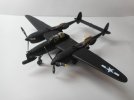
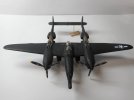
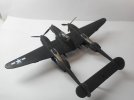
This is a kit I bought at the recent IPMS Syrcon Scale Model Show 2021 back in October 17th of this year. Progress pics forthcoming...

Last edited:


") )
)I hadn't realized there even 'was' a two-seat P-38
Nice progress on this one