P-47D Razorback in progress

the Baron

Ich bin ja, Herr, in Deiner Macht
Joined
May 12, 2009
Messages
2,026
Hi, all!

I saw the call for content, to combat the summer modeling doldrums, so here is the first of three current in-progress builds I have going right now.

This is one of my resolution builds for the year, 12 kits I'd started in the past 2 or 3 years, but then put aside. I resolved to work only on these kits, and not start any new ones, in 2009.

This is Monogram's P-47D razorback in 1/48; my buddy Brian Spruyt won it in our club raffle and gave it to me, because he painted figures. I was going to finish it and give it back to him, but two months later, he passed away suddenly. It's always bothered me that I didn't work on it before he passed, so it was a special item in the list.

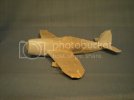
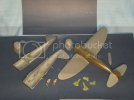
So, here's how it looked, when I swore my oath:
2MonogramP-47Dsunfin.jpg

As you can see, I had assembled the fuselage and attached the wings and the elevators, and then stopped. The kit is a decent one, typical of the better quality Monogram kits. Fit was generally good, with some minor seam work required. This shot shows the underside seam:
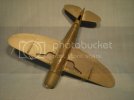
1undersideseamwork.jpg

Just a little bit of puttying required along the belly seam and forward of the leading edge of the wing. There was also a little puttying required on the razorback, too. I used my usual method of putty 'n' acetone: I applied Squadron white with a small sculpting spatula, then used a cotton swab dipped in acetone to smooth the putty into the seam and remove the excess. That helps cut down on the amount of sanding later.

One small problem with this particular kit-the cockpit dropped on one side. There are two pins molded into the right half of the fuselage, and one of them had broken off before the kit ever made it to our monthly raffle. So, the cockpit tub lists just a hair to port. For now, I'll let the masking cover that up.

More to come...
 
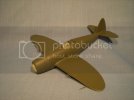
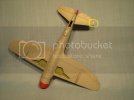
Here is a shot of the model with the upper surface color applied:

1uppersideODcoat1.jpg

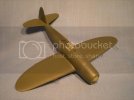
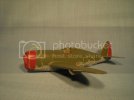
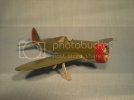
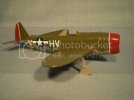
I'm building this as Lt. Frank Klibbe's last version of his mount, "Little Chief", from March 1944, so it's OD over neutral gray.

A view from the other side:

1uppersideODcoat2.jpg

I'm using Tamiya's aircraft colors, the "AS" series.

Since I took these pictures, I've since removed the molded-on blast tubes. I should have done it in the first place, and as I expected, I broke on one twice. As I was preparing to glue it back on, that voice in my head that sounds like one of my uncles said, "Hey-smart guy, whaddya doin'? Yer just gonna break it off again! Cut them off and drill out the holes, you idiot!" And so I did. I have a stock of fine steel tubing just for this purpose, anyway. I have another P-47D going (see the next thread), and I'll tackle that detail properly.

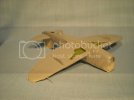
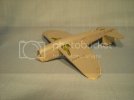
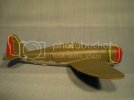
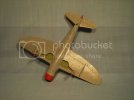
These next two shots show the underside with its base color:

2lowersideneutralgray1.jpg

I've also cut in the wheel wells in an interior green

2lowersideneutralgray2.jpg

Right now, I've got the underside masked, and am adjusting the masking to paint the nose and the rudder. Little Chief had a red nose and rudder.

More will follow, thanks for looking!
 
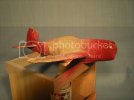
Here's the next installment, applying the color for the red nose and rudder that Lt. Klibbe's "Little Chief" wore.

After adjusting the masking, I shot the nose and rudder with white:

3unitmarkings1primedwithwhite.jpg

Thanks to Ken (icekj) for the tip to use white as an undercoat. I hadn't thought of doing that. But it really did turn out nicely:

3unitmarkings2finishcolorred.jpg

The red is "Dull Red". Without the white undercoat, it would have been too dark, I think.

Now it's on to removing the masking, checking for touch-ups, and then applying the deckles ;D
 
Great lookin T Bolt Baron keep posting your progress , Cant wait to see this one finished . Im a big T Bolt fan. thanks Paul..
 
speedster said:
Great lookin T Bolt Baron keep posting your progress , Cant wait to see this one finished . Im a big T Bolt fan. thanks Paul..

Thanks, Paul! Next update, coming up!
 
Hi, all! Here's a quick update on the razorback.

I took the masking off last week, and found some areas that needed touching up, where paint had seeped under the masking.

Here's a shot from the left side:

4areastotouchup1.jpg

I've circled the most visible areas. First, the border of the nose colors has a bit of a ragged edge, where the white crept under, but the red didn't. Not too bad, because there is a decal that will cover this border between the colors. There is a little bit of a built-up ridge, though, in spots, which I will have to smooth out.

Also, I cut the demarcation between the OD and the neutral gray a little too high on the port side wing fillet. And somehow, I masked over the vent, too. Those areas I will touch up with the brush.

Here's a shot from the right side. More of the same:

4areastotouchup2.jpg

The border of the rudder colors will also be covered by a decal. There's a spot of white on the rudder, which can be touched up with a brush, too.

Here's a shot of the underside:

4areastotouchup3.jpg

There was some seepage at the tip of the one horizontal stabilizer, D'OH! That will have to be sprayed, because I don't have a bottle color to match.

All in all, though, I'm happy with the way the colors have come out. After touch-up, I'll apply a gloss coat and then apply the decals.

Thanks for looking, tips/comments/criticisms welcomed!
 
Hey Bud, Shes coming along great, Those few areas where decals arn't going to help you could get out the Ol' silver paint pen & give her a bit of wear & tear as these Ol' Girls got knocked around a bit! Paul......
 
speedster said:
Hey Bud, Shes coming along great, Those few areas where decals arn't going to help you could get out the Ol' silver paint pen & give her a bit of wear & tear as these Ol' Girls got knocked around a bit! Paul......

Hi, Paul, thanks! Weathering is one of my more favorite parts of finishing a model, too! I'm thinking of using a modifed dot-filter technique, after I get the deckles on and a matte coat down.

"Little Chief" will get more fading and shading, though, that a lot of scuffing. From the pictures I have, it looks like her crew chief paid special attention to her. There's even a bit of a semi-gloss, like she was waxed at some point.

An update coming up next...
 
Hi, everyone, here's an update on my razorback Jug:

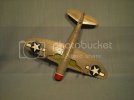
All touch-ups are done, plus some details I missed as I went through the process. "Little Chief" had the aft panels, under the rear of the canopy, painted gray; from the pictures, it looks close to the neutral gray used on the underside. Also, I had some OD overspray on the underside. More masking, those were cleaned up, and then I applied a gloss coat, in preparation for the decals.

Here's what she looks like now:

5glosscoat1.jpg

and from the underside:

5glosscoat2.jpg

This build is going more smoothly (so far) than the Eduard P-39, but there are some tricky spots coming up. One is the vacuform canopy; I've never used one before, so this is a trial by fire. No, I know not to use fire on it ;D But it's a good thing that they come 2 to a pack. I'll also use clear tape to mask and spray the canopy. I've been meaning to try that method, and my experience with the kit masks from the Eduard kit gives me extra impetus to test it.

Also, the decals might get tricky, too. There are some multi-piece decals, like the "Little Chief" mascot, which has a white underlayment, then the mascot in color. And I'll see how good the Mk 1 eyeball was at estimating just where to put the line between the red on the cowl. If I judged it right, I'll have a little more decal on that white stripe, than circumference of the cowling, which will be OK by me.

Thanks for looking, and comments/criticism/tips are welcome, as always!

God bless!
Brad
 
Thanks, Shark! This is a fun build (maybe more fun because it's coming together with no real problems, so far ;) )

Next post will show some progress on the decals...
 
I thought I'd post some in-progress pics of the decals, since I'm taking my time with them, trying to be careful and not rush.

The decals are by Eagle Cal, and they are very good. The colors appear in register, there's very little carrier film surround to deal with, and they settle down nicely, though they seem a little thick at first.

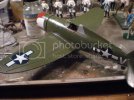
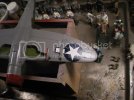
Here is a shot from the left side, with the national insignia in place on the upper wing surface and on the fuselage:

6Applyingdecals1.jpg

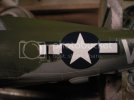
The three-part insignia for the fuselage side worked very well, though you do need to check for fit. There's more decal than the surface area of the vent doors--some oops! room, perhaps? I cut the pieces as close to the color as possible, then measured them against the vent doors, and cut them as close to size as possible. That was particularly the case for the door that recedes into the fuselage. Here's a close-up of that area:

6Applyingdecals3.jpg

I will have to touch up just a little, because I got that piece a little out of true, it's not quite level. Some white paint along the top edge will help fool the eye.

Looking at this area of the model, I did learn a lesson that the vent doors need to be thinned, they're too thick for the scale. I'll carry that forward to the bubbletop.

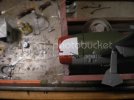
Here's a shot of the white underlay for the nose art:

6Applyingdecals2-noseart1.jpg

It has since settled down relatively nicely, with the exception of two small bubbles at the cowling seam, where the front nose plate met the rest of the cowling on the real aircraft. I'll cut those a little, and they'll be hidden by the nose art color piece.

And here is a shot of the national insignia on the underside of the starboard wing:

6Applyingdecals4.jpg

It was still settling down and curing at this point. This decal was three pieces, the main area, the bar that extended past the weapons pylon, and a small sliver of the roundel that extended to the leading edge of the aileron. I had to cut that, to fit around the aileron hinge, but a little slit with a #11 blade, and some Solvaset, and it melted around the hinge nicely.

More to come on this, in stages. Thanks for looking, and as always, comments/tips/criticisms are always welcome!

YbiC
Brad
 
Hey Brad, Bud the Ol' girls coming along great cant wait to see her on her feet, Keep the pics coming. ya might get me back working on mine! Paul...
 
Amazing. While I admit I am not a big Bolt fan, this baby looks sweet. You make it seem easy to turn out beautiful work.

Gary
 
Thanks, guys! Here's a quick update on applying the decals to Lt. Klibbe's "Little Chief"...

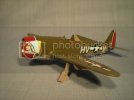
I've been taking my time, trying not to rush, because the decals are of good quality, and I don't want to make a slip due to hurrying. So, I've worked on one area at a time. Here is a shot from the left side:

7Decalprogressleftside.jpg

For as good as the decals are, there were still some problems, albeit minor ones, and maybe of my own doing. The "Little Chief" nose art has some wrinkles. It looked at first like it would not settle along the curves of the cowling, and I applied Solvaset. I tried to apply it sparingly, but I got a tip from Joe Wagner at my club (our group leader in the P-39 build). He suggested that I should have worked from one side to another, that as the decal dissolved and then dried out, it literally pulled itself in all directions, but that you can control that by working on one spot, as a sort of anchor, and working across, controlling the way it settles. There was similar wrinkling on some of the other decals, but I tried to follow that advice, not to apply setting solution over the whole decal, but on one spot at a time. I think the rest came out pretty nicely.

Here is a shot from the right:

7Decalprogressrightside.jpg

Had to do a little recovery tonight, before taking these pictures to share with you. When I took the model off the little stand I use, I noticed something white on the bottom of the stand. Here, the piece of the white bar on the starboard vent door hadn't adhered, and it fell off. I used Future to stick it back on, a little brushed on the surface of the model, and then some more brushed over the deckle to seal it. It should look OK, under the eventual matte coat.

And finally, a shot of the underside, with the oversized ETO recognition markings:

7Decalprogresslowerside.jpg

On the port wing underside marking, I used almost no setting solution, but exercised patience, and it snuggled down better than the first one on the other side. I'm learning that with this, as with so many other things, patience and subtlety work wonders (same thing with spices when you cook, generally speaking).

Next pass will be to apply the stencils that came with the decal sheet, and one last piece of the white stripe on the bottom of the rudder.

As always, comments/criticisms/tips are welcome, and I am

Your brother in Christ,

Brad
 
That is apsolutley beautiful work Brad. Thankyou pal, for posting these wonderful shots, it looks just great!

You have some real talent my friend

Best Regards and God Bless you Sir, You have made my day.

-Spencer :)
 
Thanks, Spencer! Believe me, it's coming out much nicer than expected, I'm surprising myself! And thanks everyone for the kind comments! Update to follow...
 
Hi, all! A quick update on "Little Chief"...

Decaling is still in progress, but it's all stencils. It's tedious work, but when finished, they'll look great. But it's really not worth taking a progress picture, when you probably won't be able to see them. However, I have reached a point in the decaling, where I have stencils for the canopy. That means it's time to start work on the canopy, because it needs to be removed from its carrier, dipped in Future, masked and painted, all before I can apply the stencils. So, here are some progress pics of Canopy, Phase 1: Removing it from the carrier plastic.

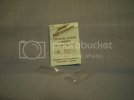
As you may recall, this was a second-hand kit, and the clear sprue was missing. So, I bought a vacuform replacement from Squadron:

8-1Vacuformcanopy.jpg

There are 2 canopies, in case you mess one up, or, if you're super-careful and super-skillful, maybe you're building 2 Monogram P-47D razorbacks at the same time, and you need two, anyway :D In any case, they're nicely done, the frame lines are well defined, and if this works, I think it'll look pretty nice on my model.

Now, preparing to cut, or more precisely, scribe. The problem is, how to provide a solid base to support the thin plastic? I've seen a lot of guys use putties like Blu-Tac or Silly Putty, and that's what I chose:

8-2SillyPuttytotherescue.jpg

I wanted Sensible Putty, but they were all out. Seriously, you can see how I packed the canopy with the putty, and it worked beautifully! It's flexible enough to yield when it has to, but provides the backing that lets you scribe, scribe, scribe.

And scribing it is, not cutting. And I kept telling myself to be patient and go slowly, and it paid off. I used a brand-new Nr. 11 X-Acto blade, and that made quick work of it. With the jeweler's loupe deployed on my OptiVisor, it was really simple. Here is my result:

8-3Canopyremovedfromthecarrier.jpg

I hope you can see it well enough in this picture. There are a couple of stray scribe marks, and I'll need to sand the edges a little, but it came out pretty well, I think. I think I was worried the most when it came time to separate the windshield from the sliding canopy. I had already removed all of the carrier, and I could have stopped there. But I'd like to display the canopy open. But there, too, with the putty, and a little care, and it was simple.

Here the last picture, and this one is a cautionary tale for all of you:

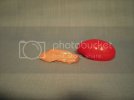
8-4Nr11bladesaresharp.jpg

Please remember that brand-new Nr. 11 X-Acto blades are very sharp! :D Yes, I slipped once, and after all, that was only Silly Putty underneath. Oh, well, we must suffer for our hobby. "Offer it up, Brad, offer it up", as the nuns used to say!

Thanks for looking, as always, comments/criticisms/tips are welcome!

YbiC
Brad
 

Latest posts

Back
Top