My second Klingon Bird of Prey

YOULI

That which does not kill us makes us stronger !
Joined
Nov 28, 2011
Messages
947
As i Previously a number of times, thanks to Quaralane and his BOP, I was inspired to build another Bird of Prey, the old model from AMT with a Flight Display.
Since I've already done one in attack mode (Wings down) it was the perfect opportunity to do it with the wings Up. In fact I wouldn't have to care much about that kind of thing since the model I've got, a gift from a friend, was already built a glued. All I have to care about was detailing, some lighting and most of all painting.

A bit of Teasing with some pictures. :)


Actually, while glueing some ultimate detailing (weapons, piece of plastic here and there) and painting the engine, I tried to glue the wing since it was almost all done (some washes, maybe some dry brushing to blend it all, decals ?).
To my surprise, They don't want to stay put, they broke a dozen of times and I need to find a way to fix it, a way to have a stronger bond, or this BoP won't be able to stay on his clear disk in a flight position. That will break every time.

Checking the parts it appears that the very small plastic parts that guide you to put the articulation in place on the wings have broken. The glue may have melt it too...

I may have a solution but that will have to wait until I return from a trip to Paris. Next week then...

Until then I may have the time to post the WIP as promised. Even post my very first Youtube Video :D
 
YEP ! :)

That to show the glowing effect in the engine.

The wings are fixed. I put a large piece of styrene in the "articulation" (they are hollow you know) and, with that done, I had the surface to superglue the wings on the articulations.

Pictures next tuesday ;) ANd a Youtube Video too (my first uploading :D ).
 
Here is my first attempt to light with a simple light bycycle reflector.


I've opened it since I broke it, and use only the electronic device for the pulsing effect, but eventually the red plastic too to diffuse the light too.


I used some plastic plate to simulate the yellow glow


Here is the result with the white glue drying...


The device in place, a test photo...


My first "video" on Youtube and Photobucket.

http://s50.photobucket.com/user/yeuweuleu/media/MOV06876_zps7cf7aee5.mp4.html

th_MOV06876_zps7cf7aee5.jpg


BOP Engine
 
Since then I painted the engine, solved the unproperly glued wings, and pretty much done every thing possible to finish it...

The WIP and the pictures soon. :D
 
Thanks every one :D

Now that you've seen the engine, let's go back in time for the very begeiining of this building process.

As you may know, the old BoP AMT kit propose 2


Here is how I received the kit, already built for the most part, the clear disk still protected with some cardboard.
Since it was in the other position than the first BoP i've built ( http://www.scalemodeladdict.com/SMF/index.php/topic,4494.msg64102.html#msg64102 ) it was the perfect opportunity to do a quick "build" but essentially check about my new abilities in paint job. Plus, I wanted to do some lighting in the engine with a bycycle reflector...


The engine part was already glued, I had to break it to fullfill my lighting project. The part was frost, most likely because of the glue, but nothing that can't be deal with some clear red and yellow from Tamiya.


The entire ship only need attention for gaps, incorrect details, but here she is...


After masking the clear parts (the front torpedo launcher) I began to paint it with Chaos Black (Citadel Spray can).


After that one or two white coat to suggest some pre-shading with the green and red colors. The articulation grills are dry brushed with steel paint. Mostly I use here the dry brush technic with the green and red "base".


The citadel paints I used.


The green may seem very flashy but used with a dry brush technic on a more darker paint base, it's just the perfect combinaison here for this Bird of Prey.
 
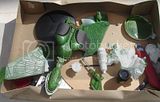
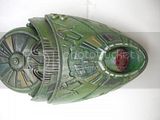
The fun part may begin with different green colors painted here and there, the red too for the feathers, and the red and yellow clear colors for the clear parts. but first I need to apply some old INK green color form Citadel to blend the base color. The green seems more vivid that way, and it's OK since the Wash phase will darken all this ultimately.


I couldn't resist to add some details here and there.
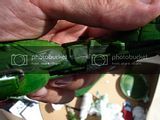
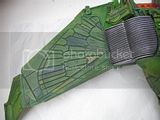
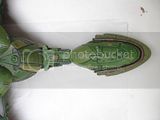
Some Q-tip stick on the front barr.


And I will add something to hide the hideous gaps on the neck. In the mean time Mastic Plastic from Prince August help me to fill the gaps all other the ship (the white matter).


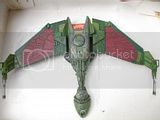
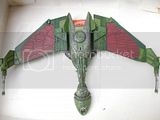
Here is the result so far.


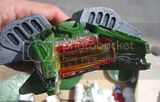
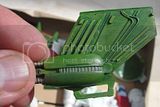
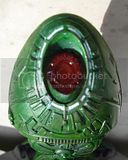
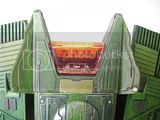
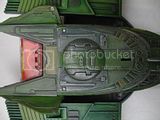
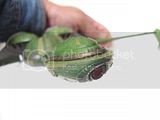
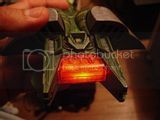
Now some details attention. The white strips are painted around the torpedo launcher, I removed the excess paint with a wet finger... Once dried it will be painted with Tamiya Clear red to simulate the glow.


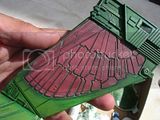
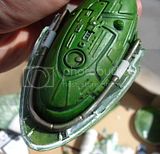
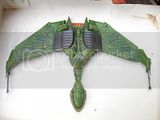
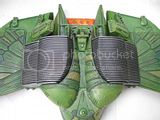
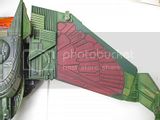
The different greens are painted on various location on the wings and main ship... I try to do it randomely but with a kind of logic, with a symetrical pattern.


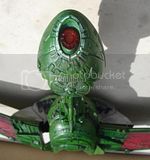
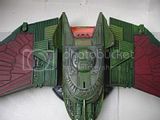
Even though I'm weel documented, I try not to pay too much attention for accuracie since the Model kit is not 100% screen correct especially for the engine part. Concerning the panels colors, I was inspired by the many illustrations of the third movie and some screenings of Deep Space 9. That's why some panels are more brown greenish colors, others are more blueish etc.
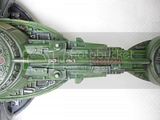
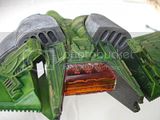
On that color base I put a first metallic dry brush especially under the ship, on its belly, since it's supposed to land and to have some "scars" when landing and stuff...


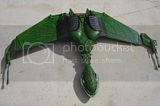
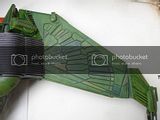
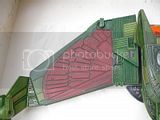
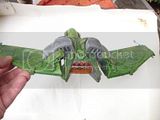
The wings are painted Gore Red or a Foundation color equivalent. The problem here was to spot the surface that needed to be painted green and not red. Painting each feather would have been time consuming so it's dry brush first, details then, always with a fine brush with the right green color. Every excess is erased with fingers or a clean brush.


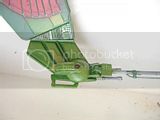
The engine part is clear red and clear yellow for the moment.


The frond barr is done with copper...


You already know about the lighting process.

 
Checking for plastic and metal parts to hide gaps, add details, I ended up with this...

A metal circle for the bridge area. Done with a metal grill bend to fit this kind of circumference.


Tank tracks part for the neck. Plastic grills from boat model kits. Various details on and around the bridge.


There is a lot of gribblies under the shoulders. I added parts and antennaes...


The engine areas is really poor on details and the gaps are enormous. Even though I placed Mastic Plastic, I glued on differents parts here too...


The lights on the wing are replaced with jewelry, I'll decided later to add some plastic card to hide the horrible gap near it...


Same thing for other "lights" here and there...


I've got a big problem with the wings that won't stay put even glued on the articulation. No matter what, it broke.
So I solved the problem with a big plastic card part inserted IN the articulation to raise the glueing surface. It's not only on the edges anymore, it's one inch large. THe glueing problem was soled. ANd it's pretty solid now.
Please note that I also solved the gap problem, the void in the articulation with a coffee spoon sticker thing (the steel painted part).


The torpedo launcher is painted clear red on white. I didn't painted the green edges on the weapon but it's done now (simply dry brush some green, or paint it with a very fine brush, wait until it's dry and then, with a toothpick, remove the excess paint... Fast and easy).


The canon on the wings were ugly, I didn't replace all of it but drilled some holes and remove small parts to replace it with electronic connectors. It works pretty well !


Glad you like it.

I check for the clear disk fiting, and I'm a little disappointed since it's not perfectly balanced.
I need to find a way to add weight to the stand. Roughly with screws and metal stuff of even stones ?

I'll let my imagination decide tonight.
 

Latest posts

Back
Top