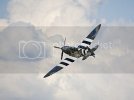
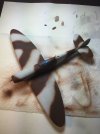
My first build (Spitfire MkII)
- Thread starter RKrebs
- Start date
RKrebs
I, for one, like Roman Numerals.
- Joined
- Nov 26, 2015
- Messages
- 98
RKrebs
I, for one, like Roman Numerals.
- Joined
- Nov 26, 2015
- Messages
- 98
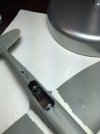
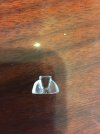
So here is the inside seat of my cockpit. I know there literally could be a TON more detail, but 1- this is my first plane, how nice do I think it is going to be and 2- this is my first plane, how nice do I think it is going to be? ;D
I also puttied all of the cracks and tomorrow I will go get some superfine sand paper and clean it up.
I will say that I am a little disappointed that I spent .00010 large on this model and it didn't even come with a seat cushion. I mean really?
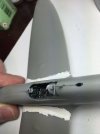
Cockpit dash. Man I will tell you after looking at this closeup, I have already learned a lot. Details details details. Oh well live and learn.
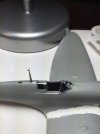
Ok, so the glass looks better. Looks great here but the sliding canopy is not on it either.
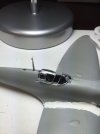
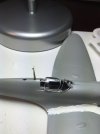
Perhaps this is the problem....crappy moulding.
RKrebs
I, for one, like Roman Numerals.
- Joined
- Nov 26, 2015
- Messages
- 98
urumomo
Well-Known Member
- Joined
- Mar 18, 2013
- Messages
- 7,516
LOL ;D
I don't know any tricks to getting the paint on right without a steady hand .
You can mask it . Might take a little bit but re-positioning tape is easier than continuously cleaning up over-paint .
-- You can use a second , moist brush or the tip of a paper towel to clean up mistakes as you go if you don't mask --
Try resting your brush hand different ways , like on your other hand or wrist , a book etc till you find a style that gives you the most control .
I can't believe that I know a guy that's gonna have work in the Smithsonian !
Crazy ;D
RKrebs
I, for one, like Roman Numerals.
- Joined
- Nov 26, 2015
- Messages
- 98
urumomo said:I can't believe that I know a guy that's gonna have work in the Smithsonian !
Crazy ;D
I know right? I wonder how much I will get paid!?!?!?!?
I am going the tape the crap out of it with little micro bits of tape. The Smithsonian may have to wait just a little longer. ;D ;D
urumomo
Well-Known Member
- Joined
- Mar 18, 2013
- Messages
- 7,516
Yeah
the pattern looks zehr good .
I zoomed in to checkout the paint and check on those wing-root seems ;D.
You have successfully obfuscated those well in that pic
Have you played with the air pressure ?
These colors are Vallejo Air ? .. just wondering if you're thinning or not
Cheers
the Uru
the pattern looks zehr good .
I zoomed in to checkout the paint and check on those wing-root seems ;D.
You have successfully obfuscated those well in that pic
Have you played with the air pressure ?
These colors are Vallejo Air ? .. just wondering if you're thinning or not
Cheers
the Uru
RKrebs
I, for one, like Roman Numerals.
- Joined
- Nov 26, 2015
- Messages
- 98
The root seams suck. Really bad job on them. Huge learning moment there. I think it is probably all in the application of the putty. I am going to go with a different putty other than Tamiya. I am sure it will find its place, but I don't care for it.
The paint is Tamiya acrylic. The pressure is at around 15psi. Think I should drop it?
The paint is Tamiya acrylic. The pressure is at around 15psi. Think I should drop it?
urumomo
Well-Known Member
- Joined
- Mar 18, 2013
- Messages
- 7,516
I figured that was Tamiya White .
It's really good stuff but it's high solvent --- so it drys fast but lots of shrinkage .
Best for shallow / fine repairs but you can build it up .
Try Squadron Products " Green Putty " for a putty with more solids than solvent .
15 psi is pretty nominal -- never hurts to experiment though . Seems to be OK ?
... you generally want to spray at the lowest pressure you can .. but it will vary from paint to paint
El MoMo ;D
RKrebs
I, for one, like Roman Numerals.
- Joined
- Nov 26, 2015
- Messages
- 98
Yeah, well there was some over spray here and there which I attribute to an unsteady hand. Some of it may be the air pressure. I will play around with it a bit.
As far as the putty, I put it on with a q-tip not anticipating it drying so fast. I already have the green on my order list. Oh well, as I said, live and learn. ;D
As far as the putty, I put it on with a q-tip not anticipating it drying so fast. I already have the green on my order list. Oh well, as I said, live and learn. ;D
RKrebs
I, for one, like Roman Numerals.
- Joined
- Nov 26, 2015
- Messages
- 98
Quaralane said:Definitely looking good so far
And your camo's off to a very good start
Thanks....first time I have ever used an airbrush let alone painting camo.
urumomo
Well-Known Member
- Joined
- Mar 18, 2013
- Messages
- 7,516
" As far as the putty, I put it on with a q-tip not anticipating it drying so fast. "

A Q-tip ?
:
You need a putty knife of sort . A palette knife is helpful ( the small diamond shape ) ... I often just slice a flat on a round toothpick ,, , you can use all sorts of stuff ... your finger tip would be better than a cotton ball ;D
LOL
A Q-tip ?
:
You need a putty knife of sort . A palette knife is helpful ( the small diamond shape ) ... I often just slice a flat on a round toothpick ,, , you can use all sorts of stuff ... your finger tip would be better than a cotton ball ;D
LOL
RKrebs
I, for one, like Roman Numerals.
- Joined
- Nov 26, 2015
- Messages
- 98
urumomo said:" your finger tip would be better than a cotton ball ;D
LOL
Yeah, not so much. Like I said, I didn't think it would dry so fast. It really sets up quick and not a lot of time to wipe of the excess. I only used it on the wing roots, but never again.
RKrebs
I, for one, like Roman Numerals.
- Joined
- Nov 26, 2015
- Messages
- 98
Belugawrx said:you thinned that putty with something ...no?
Looking good so far Krebs
Keep it going, I'll try mine next
Cheers
Nope. That putty is really thin as it is. I just used it straight. I will work just fine on really small details where you can apply it with the very tip of a toothpick or something, but wing roots I was not impressed. I really would prefer not to do a ton of sanding if possible. I ended up having to sand way more than I wanted to.
Oh well, all part of the learning process.
Ron
Similar threads
- Replies
- 15
- Views
- 873

