the Baron
Ich bin ja, Herr, in Deiner Macht
- Joined
- May 12, 2009
- Messages
- 2,026
Hi, all!
I'd like to share some pics of a kit I built as part of a group build in my modeling club, the Delaware Valley Scale Modelers.
One of our members, Joe Wagner, came up with the idea. It was a step-by-step build, in which we all built the same kit, and Joe ran it as a seminar on building techniques. Joe has a lot of experience, and a lot of awards, and the goal was to improve our work, and then enter as a group in the IPMS Region II show, Jerseycon, which went off last weekend in Runnymede, New Jersey.
Starting in January, we worked on a different step each month, and compared notes at the monthly meetings. We went from reviewing the instructions and the kit parts, to identify any problem areas that there might be, and plan to address them, to interior assembly and detailing, to assembling parts to minimize or eliminate seams, to painting exteriors, decaling and weathering.
I think I learned some things, with the most important lesson being: Don't rush and miss things. Taking time and being careful doesn't necessarily mean that things take longer, because time spent up front in planning reduces time spent fixing mistakes later. I should have known that, since I work in IT, and that is a formula that is shown time and time again (10% increase in testing software can reduce fixing bugs in production by 70%, according to one formula we use).
Anyway, it was a fun kit to build. There are some fit problems, but not something modelers with even moderate experience can't overcome.
For one, the fuselage halves tend not to mate correctly. The place to true them up is at the cockpit. If you start at the nose or the tail, depending on the tree you have in the box, you can wind up with a serious mismatch at the nose or at the tail. As it was with mine, I lined up the halves at the cockpit, and had a minimum of correction in both places.
Another seam problem is on the under side of the fuselage, where the lower wing part meets the fuselage. It forms a T-shaped seam (trailing edge of the wing part, capping the stem formed by the fuselage seam). That required filling with putty and sanding until hidden. (I did pretty well with this one, they tell me.)
A similar fit problem exists at the nose, on the upper side. The piece that holds the nozzles and trenches for the nose guns doesn't quite fit, and a little shaving before gluing will reduce puttying afterwards. (I didn't do so well with that one, I have some visible puttying on the nose.)
Another fit problem is with the canopy and the cockpit doors. First, it takes some fitting of the canopy, to ensure it fits all the way around, and to eliminate seams. Second, the doors may not fit in the closed position. The simplest way to deal with that is to show them open--who would want to seal up the fine cockpit details, anyway? (I was very happy with the way mine came out.)
Of course, dealing with fit problems wasn't something new to me. But I think I never paid as much attention to it as I did on this build.
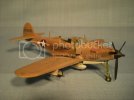
Well, enough background, here are the pictures. From the front, ride side:
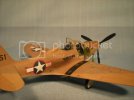
and from the rear, right side, with a bit of a view into the cockpit:
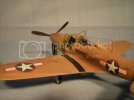
From the rear and to the left:
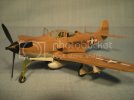
and from the front and left side:
I had one major problem with the build, and that was the discovery I made when I took off the canopy masks and removed the tissue paper I used to mask the cockpit while painting.
First, the masks that Eduard supplied were of their earlier type, a sort of vinyl, and they didn't fit well around compound curves. They've since replaced that material with a material much like Tamiya tape; in fact, in our group, some had the older masks, others the newer ones. Well, as soon as I had gotten the first coat of dark tan down on the upper surfaces, I noticed that some of the masking had curled at the edges. I didn't think it would be so bad to remove the paint that crept under the masks, but that was compounded by the next problem.
The second problem was that my tissue paper masking wasn't tight enough, and paint blew into the cockpit, to the inside of the canopy. I first realized this, as I set about scraping paint off the outside with a toothpick. I saw spots in the middle of the masked areas, where I knew that the masks had not lifted. It hit me right away that paint got in the inside. A much closer look back at my inprogress shots confirmed this. So, I was stuck. I tried using mineral spirits, lacquer thinner, and finally, even toothpaste, but nothing worked, and I didn't want to damage the canopy part. So, I decided to live with it and chalk it up as a lesson.
There was one technique I thought of but did not want to try, because of time constraints, and that would have been to pop the canopy, clean it with oven cleaner, then re-install and repaint it. But even though there was a month to go before the contest, I decided that was too drastic and too risky. Besides, I'm not a contest builder. It was fun to enter with our club, of course, but I enjoyed the fellowship of building, and I really wanted to improve my skills.
Another problem that I hit, also of my own doing, was in installing the aerial. I started out to use fine nylon line (fishing line). The problem was in the attachments. I drilled a tiny hole in the verticle stabilizer, and another in the side of the canopy's rollbar arch. I used 2-part epoxy to attach the line to the vertical stab, let it cure overnight, then tried to thread the other end into the canopy hole. But the slightest pull while working on it yanked the line out of the tail. I repeated the process in the other direction, with the same result. I then shifted--this, with a couple of days till Jerseycon--to using stretched sprue from the kit trees. That way, I was able to weld the pieces, like plastic to like. I also capped the end at the canopy with a completely made-up attachment, to make a better anchor. I haven't given up on nylon fishing line, but in this case, it would have been better to have anchored it before assembling the fuselage halves, or inside the canopy, before attaching it.
As to the finish, it's all rattle-can and handwork, including pastels and filters for weathering and shading. I have an airbrush, but I still have never fired it in anger (Don't worry, Badger backers, Paasche proponents and Aztec adherants, it's a resolution for this year to start learning how to use it.)
Now, to the goal of our build, Jerseycon. We learned that the group build category had been dropped from the competition categories, so we were faced with the decision-show as a group, in an exhibition room in another part of the Holiday Inn, or enter as individuals and compete. We'd all come too far not to compete, to see how we'd do, so we entered the competition individually. Here's my P-39Q on the Single engine propellor aircraft, 1/48 table:
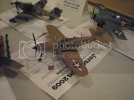
Yes, the judges knocked one of my doors off!
Here are the others from our group. My buddy Dennis Sosna's "Wahl-Eye":
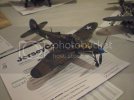
my buddy Joe Leonetti's RAF Airacobra I:
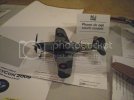
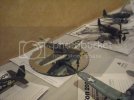
Another two from our group, but I didn't note who built them (have to wait till the next meeting to find out):
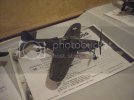
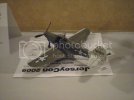
and finally, our group leader, Joe Wagner's:
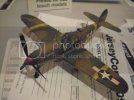
Now, the funny thing is that first place went to P-39Q, but not from our group! Here's the category winner:
Joe's credentials were saved, though, he took first in single engine propellor 1/72 for his Hawker Typhoon, and firsts in some other categories, too. Several DVSM members went home with firsts, including Bob Ciccone and Keith Bender in the Ships categories. Go team!
So, there's the story of my Eduard P-39Q. Don't let the problems I had prejudice you, though, they were of my own making. This is a nice kit, and I recommend it. It has the right amount of detail, so that out of the box, you can make a nice model, and it's not too complicated for the newer modelers.
I still will build the Monogram version, though! I have that in the stash, that will come sometime in 2010.
Thanks for looking, and as always, comments/tips/criticisms are welcome!
Brad
I'd like to share some pics of a kit I built as part of a group build in my modeling club, the Delaware Valley Scale Modelers.
One of our members, Joe Wagner, came up with the idea. It was a step-by-step build, in which we all built the same kit, and Joe ran it as a seminar on building techniques. Joe has a lot of experience, and a lot of awards, and the goal was to improve our work, and then enter as a group in the IPMS Region II show, Jerseycon, which went off last weekend in Runnymede, New Jersey.
Starting in January, we worked on a different step each month, and compared notes at the monthly meetings. We went from reviewing the instructions and the kit parts, to identify any problem areas that there might be, and plan to address them, to interior assembly and detailing, to assembling parts to minimize or eliminate seams, to painting exteriors, decaling and weathering.
I think I learned some things, with the most important lesson being: Don't rush and miss things. Taking time and being careful doesn't necessarily mean that things take longer, because time spent up front in planning reduces time spent fixing mistakes later. I should have known that, since I work in IT, and that is a formula that is shown time and time again (10% increase in testing software can reduce fixing bugs in production by 70%, according to one formula we use).
Anyway, it was a fun kit to build. There are some fit problems, but not something modelers with even moderate experience can't overcome.
For one, the fuselage halves tend not to mate correctly. The place to true them up is at the cockpit. If you start at the nose or the tail, depending on the tree you have in the box, you can wind up with a serious mismatch at the nose or at the tail. As it was with mine, I lined up the halves at the cockpit, and had a minimum of correction in both places.
Another seam problem is on the under side of the fuselage, where the lower wing part meets the fuselage. It forms a T-shaped seam (trailing edge of the wing part, capping the stem formed by the fuselage seam). That required filling with putty and sanding until hidden. (I did pretty well with this one, they tell me.)
A similar fit problem exists at the nose, on the upper side. The piece that holds the nozzles and trenches for the nose guns doesn't quite fit, and a little shaving before gluing will reduce puttying afterwards. (I didn't do so well with that one, I have some visible puttying on the nose.)
Another fit problem is with the canopy and the cockpit doors. First, it takes some fitting of the canopy, to ensure it fits all the way around, and to eliminate seams. Second, the doors may not fit in the closed position. The simplest way to deal with that is to show them open--who would want to seal up the fine cockpit details, anyway? (I was very happy with the way mine came out.)
Of course, dealing with fit problems wasn't something new to me. But I think I never paid as much attention to it as I did on this build.
Well, enough background, here are the pictures. From the front, ride side:

and from the rear, right side, with a bit of a view into the cockpit:

From the rear and to the left:

and from the front and left side:

I had one major problem with the build, and that was the discovery I made when I took off the canopy masks and removed the tissue paper I used to mask the cockpit while painting.
First, the masks that Eduard supplied were of their earlier type, a sort of vinyl, and they didn't fit well around compound curves. They've since replaced that material with a material much like Tamiya tape; in fact, in our group, some had the older masks, others the newer ones. Well, as soon as I had gotten the first coat of dark tan down on the upper surfaces, I noticed that some of the masking had curled at the edges. I didn't think it would be so bad to remove the paint that crept under the masks, but that was compounded by the next problem.
The second problem was that my tissue paper masking wasn't tight enough, and paint blew into the cockpit, to the inside of the canopy. I first realized this, as I set about scraping paint off the outside with a toothpick. I saw spots in the middle of the masked areas, where I knew that the masks had not lifted. It hit me right away that paint got in the inside. A much closer look back at my inprogress shots confirmed this. So, I was stuck. I tried using mineral spirits, lacquer thinner, and finally, even toothpaste, but nothing worked, and I didn't want to damage the canopy part. So, I decided to live with it and chalk it up as a lesson.
There was one technique I thought of but did not want to try, because of time constraints, and that would have been to pop the canopy, clean it with oven cleaner, then re-install and repaint it. But even though there was a month to go before the contest, I decided that was too drastic and too risky. Besides, I'm not a contest builder. It was fun to enter with our club, of course, but I enjoyed the fellowship of building, and I really wanted to improve my skills.
Another problem that I hit, also of my own doing, was in installing the aerial. I started out to use fine nylon line (fishing line). The problem was in the attachments. I drilled a tiny hole in the verticle stabilizer, and another in the side of the canopy's rollbar arch. I used 2-part epoxy to attach the line to the vertical stab, let it cure overnight, then tried to thread the other end into the canopy hole. But the slightest pull while working on it yanked the line out of the tail. I repeated the process in the other direction, with the same result. I then shifted--this, with a couple of days till Jerseycon--to using stretched sprue from the kit trees. That way, I was able to weld the pieces, like plastic to like. I also capped the end at the canopy with a completely made-up attachment, to make a better anchor. I haven't given up on nylon fishing line, but in this case, it would have been better to have anchored it before assembling the fuselage halves, or inside the canopy, before attaching it.
As to the finish, it's all rattle-can and handwork, including pastels and filters for weathering and shading. I have an airbrush, but I still have never fired it in anger
Now, to the goal of our build, Jerseycon. We learned that the group build category had been dropped from the competition categories, so we were faced with the decision-show as a group, in an exhibition room in another part of the Holiday Inn, or enter as individuals and compete. We'd all come too far not to compete, to see how we'd do, so we entered the competition individually. Here's my P-39Q on the Single engine propellor aircraft, 1/48 table:

Yes, the judges knocked one of my doors off!
Here are the others from our group. My buddy Dennis Sosna's "Wahl-Eye":

my buddy Joe Leonetti's RAF Airacobra I:

Another two from our group, but I didn't note who built them


and finally, our group leader, Joe Wagner's:

Now, the funny thing is that first place went to P-39Q, but not from our group! Here's the category winner:

Joe's credentials were saved, though, he took first in single engine propellor 1/72 for his Hawker Typhoon, and firsts in some other categories, too. Several DVSM members went home with firsts, including Bob Ciccone and Keith Bender in the Ships categories. Go team!
So, there's the story of my Eduard P-39Q. Don't let the problems I had prejudice you, though, they were of my own making. This is a nice kit, and I recommend it. It has the right amount of detail, so that out of the box, you can make a nice model, and it's not too complicated for the newer modelers.
I still will build the Monogram version, though!
Thanks for looking, and as always, comments/tips/criticisms are welcome!
Brad
