Doughnuts and burning rubber
- Thread starter Pantherman
- Start date
GaryG64
Well-Known Member
- Joined
- Sep 8, 2022
- Messages
- 2,545
Very nice build.Started on the decals. They are nice and even, easy to apply. Also got the clear parts masked up ready for spraying. Like the fact that the masks come with the kit, they fit perfectly. Pantherman
View attachment 150748View attachment 150749View attachment 150750View attachment 150751View attachment 150752
GaryG64
Well-Known Member
- Joined
- Sep 8, 2022
- Messages
- 2,545
That should be a fun kit.Officially throwing my hat in the ring.
Nothing like youz guyz's kits, but hopefully will be summer fun!
View attachment 150758
View attachment 150759
Good thing it includes paint colors other than sand!
Pantherman
Well-Known Member
- Joined
- Feb 10, 2022
- Messages
- 4,006
Thanks brother. PMVery nice build.
Dan the Modeler
Well-Known Member
- Joined
- Jan 8, 2025
- Messages
- 269
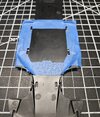
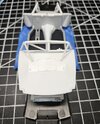
Just getting a little bit of work done. I masked off the under tray for painting, should be spraying white and on bottom frame which has been fitted with the transaxle and drive shaft casing. Did a test fit of the back deck which is two pieces and will cover everything being done on the back end. Almost all the interior work will be covered up, so I'm not going with a lot of detail work here.
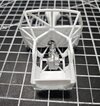
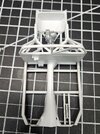
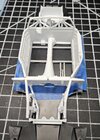
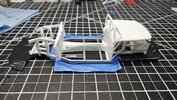


Dan the Modeler
Well-Known Member
- Joined
- Jan 8, 2025
- Messages
- 269
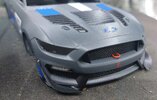
The major work will be done on the body, matching the custom color as best I can with the limited resources concerning the actual color, and of course all the livery that goes into it. I fitted the hood in place, and since this will be static, I've glued it in place and corrected all the gaps. Unfortunately there is a lot of seam lines to clean up and the fitment could be much better with this kit. Also a lot of flash, seams and pin marks throughout. However, it's great to have a base that can be fixed up to have these modern Next Gen cars.
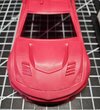
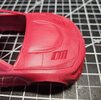
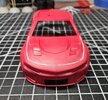
I have some final wet sanding to do and off to get it's primer coats. Here's a peek at the new tires and wheels NASCAR is sporting now.
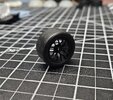
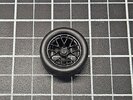
Still cleaning them up before decaling them and painting. Stay tuned for more in the next couple days.


I have some final wet sanding to do and off to get it's primer coats. Here's a peek at the new tires and wheels NASCAR is sporting now.


Still cleaning them up before decaling them and painting. Stay tuned for more in the next couple days.
- Joined
- Sep 4, 2022
- Messages
- 2,170
Tasty, as in strawberry ice cream bar!Vanilla Cream
Dan the Modeler
Well-Known Member
- Joined
- Jan 8, 2025
- Messages
- 269
@Tommergun Man that looks sweet! White and red are always a nice color combo. Great job.
Dan the Modeler
Well-Known Member
- Joined
- Jan 8, 2025
- Messages
- 269
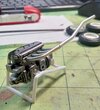
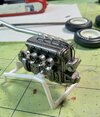
So here is where I am at with this build. I have pulled all the parts for the engine, but to my disappointment, the kit is molded in frets of color. Except for the pan (molded in black), the engine is molded in a metallic-ish silver. This normally wouldn't be a problem, but the pigments used make the plastic soft. The high pressure used to fill the molds cause the plastic settle in some thicker areas, and flash out in thinner areas. I really wanted to detail the engine with good colors and have sharp components, but that is not what you can do with this soft and flexible plastic. It doesn't sand that well and fitment of the parts are lacking.
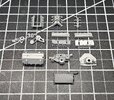
(All the major components of the engine. The block has been filed, sanded, flash removed, and glued together.)
The block of the engine lack any kind of location pins to align the two halves, so you kind of have to use the front face of the motor to align it and glue from the back, allow to dry and then remove the front and finish gluing the block together.
Now I understand that Salvino JR are actually targeting race fans and first time model enthusiasts for their kits. That's why they mold them in clear, metallic, black, white, and the main body in the color base of the team with large portions of livery in decals so that fans can put together their favorite drivers cars without the need for paints, tools and modeling experience.
The drawback is that the molding is not as crisp and stable as it could be if the kit was molded completely in white with its clear parts and tires.
I really hate to say I'm disappointed in the kit, but the truth of the matter is the kit could be so much better. The body's of the car looks the part, but the thickness of it detracts from the detail it could have. The cowl flaps on the hood are there, but they are lined out over scale and even more so on the roof. At this scale, they really shouldn't been seen, it kills the aerodynamics that these cars work so hard to achieve.
Anyway, don't mean to sound like I'm bashing the kit, but I'm just disappointed as I had higher hopes for these Next Gen cars. They are what they are (hopefully just for now and soon to be greatly improved for model builders), so I will have to make do and focus the most effort on the body and livery to really make it look the part. I can only hope they clean up the kits like the older 2000s NASCAR kits from Revell. So anyway, the build continues and hope to have more updates over the weekend.
That's looking Sharp.Started on the decals. They are nice and even, easy to apply. Also got the clear parts masked up ready for spraying. Like the fact that the masks come with the kit, they fit perfectly. Pantherman
View attachment 150748View attachment 150749View attachment 150750View attachment 150751View attachment 150752
Pantherman
Well-Known Member
- Joined
- Feb 10, 2022
- Messages
- 4,006
Thanks. PMThat's looking Sharp.
Pantherman
Well-Known Member
- Joined
- Feb 10, 2022
- Messages
- 4,006
- Joined
- Mar 6, 2023
- Messages
- 2,254
Looks great.Decals and 1 coat of gloss done. Got first coat of black on the clear. Pantherman
View attachment 151197View attachment 151198View attachment 151199View attachment 151200
Pantherman
Well-Known Member
- Joined
- Feb 10, 2022
- Messages
- 4,006
Thanks but I'm not really happy with the bodywork finish, got a little orange peel going on that I hadn't noticed (or my brain choose to ignore). PMLooks great.
- Joined
- Mar 6, 2023
- Messages
- 2,254
I see it now that you mentioned it. I had to zoom in tight to see it. Doesn't look too bad though. All n all it's very nice work.Thanks but I'm not really happy with the bodywork finish, got a little orange peel going on that I hadn't noticed (or my brain choose to ignore). PM
Edbert
Well-Known Member
- Joined
- May 16, 2024
- Messages
- 1,441
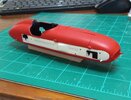
Found this older picture to share.
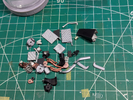
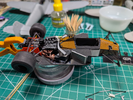
Those carbon-fiber stickers were a PITA, but at 1/24 do not think there's a good alternative.
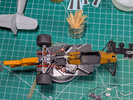
That gray bit with the yellow blow-off valve is unpainted, just dry-fitted there to ensure that the engine and sidepods/radiators/intercoolers were aligned while the glue sets up.


Those carbon-fiber stickers were a PITA, but at 1/24 do not think there's a good alternative.

That gray bit with the yellow blow-off valve is unpainted, just dry-fitted there to ensure that the engine and sidepods/radiators/intercoolers were aligned while the glue sets up.
Similar threads
- Replies
- 1
- Views
- 859

