Biskup
New Member
- Joined
- Aug 27, 2010
- Messages
- 1,876
Recently while making a model I realized I ran out of putty. So instead of making a special trip to the hobby shop just for putty I decided to make it myself and share the way how I prepared it.
In order to make putty I used pieces of old frames from models, which I cut very finely.
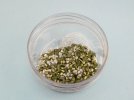
Then I prepared container for putty. A small glass jar is most suitable for this and I used old jar after Mr. Dissolved Putty which I had.
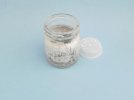
I’ve put all the previously prepared pieces of plastic in to the jar. It’s important not to fill more than half of jar.
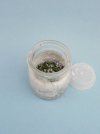
Everything was flooded Nitro solvent, but you can use any other solvent which will dissolve plastic and will thin paints. I’ve poured just enough to cover the pieces of plastic and left it for few hours to dissolve the plastic.
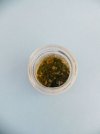
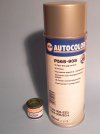
Dissolved plastic creates quite compact and homogeneous mass which already in that form may be used as putty after mixing and evaporation of excess solvent. However, in order to accelerate and facilitate this process I added a gray auto primer to fill the jar in 2/3. I very often use putty on gray plastic models and those that have already been covered in primer. So in order to diversify the color of putty to be seen exactly where it is applied, I add to jar few drops of Humbrol green paint. If you don’t mind having gray putty just don’t add paint.
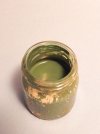
After adding all the ingredients I mix everything until I get even mass and the putty is ready.
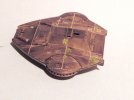
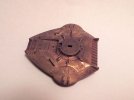
The following pictures show putty applied on to a kit before it was sanded.
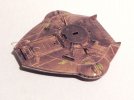
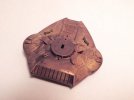
Here is the same kit after sanding.
Making this putty is not only easy but also fast and cheap. All the elements needed for its preparation you can usually find at you workbench. Due to the fact that this filler has a large amount of plastic after drying it is very easy to work with. It can cause some difficulties during application (if it’s dense) because it can very elastic and leave some fibers. But after a few uses you will easily learn a way on how to apply it without those fibers.
In order to make putty I used pieces of old frames from models, which I cut very finely.

Then I prepared container for putty. A small glass jar is most suitable for this and I used old jar after Mr. Dissolved Putty which I had.

I’ve put all the previously prepared pieces of plastic in to the jar. It’s important not to fill more than half of jar.

Everything was flooded Nitro solvent, but you can use any other solvent which will dissolve plastic and will thin paints. I’ve poured just enough to cover the pieces of plastic and left it for few hours to dissolve the plastic.

Dissolved plastic creates quite compact and homogeneous mass which already in that form may be used as putty after mixing and evaporation of excess solvent. However, in order to accelerate and facilitate this process I added a gray auto primer to fill the jar in 2/3. I very often use putty on gray plastic models and those that have already been covered in primer. So in order to diversify the color of putty to be seen exactly where it is applied, I add to jar few drops of Humbrol green paint. If you don’t mind having gray putty just don’t add paint.

After adding all the ingredients I mix everything until I get even mass and the putty is ready.

The following pictures show putty applied on to a kit before it was sanded.


Here is the same kit after sanding.


Making this putty is not only easy but also fast and cheap. All the elements needed for its preparation you can usually find at you workbench. Due to the fact that this filler has a large amount of plastic after drying it is very easy to work with. It can cause some difficulties during application (if it’s dense) because it can very elastic and leave some fibers. But after a few uses you will easily learn a way on how to apply it without those fibers.
