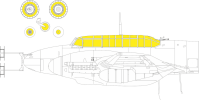
I use Eduard "masks". They are made to fit precisely all the small areas on the canopy.
Picture below of a result.
Plus the masks are extremely thin. This stops a build up of thick paint at the edges.
Bed gently at the edges with a a smooth metal edge. Plus the masks remove easily.
After the paint has cured I carefully, with an American Blade score (gently) along the edges.
this gives a precis line & also facilitates removing the masks. No tearing of paint film.
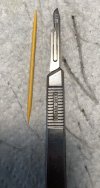
The American Blades have a much finer blade than than Swan Morton. Put a bit of
masking tape on one end of the blade. Saves going through a blood transfusion.
Picture blade below. They have many uses.
Got a window cleaners holder for them. Picture below
Laurie
View attachment 102344
View attachment 102343