BTR-152K

Balki

New Member
Joined
Apr 14, 2011
Messages
43
Here’s my entry into the big spring contest.
062.jpg
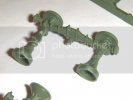
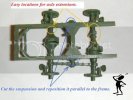
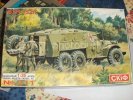
It’s the old SKIF model. I always liked that rough look of this vehicle. The build started nice and easy. A bit of cleanup here and there, but so far so good. Here are the rear axle assemblies.
063.jpg
064.jpg
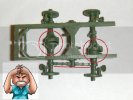
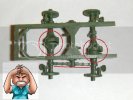
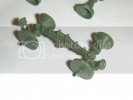
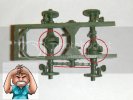
This is when the s*%# hit the fan. I wasn’t expecting that big of a problem this early into the build.
069a.jpg
:mad: :mad: :mad:
Balki
 
And I thought I had issues with the fit on my model. I actually feel quite good now. ;)

I am sure your ingenuity will get the better of this minor setback.

Let us know how you solve this one.
 
reminds me of a little 747 model I just finished up. I am sure you will come up with a solution!
 
Thanks guys!
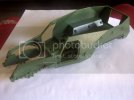
Not much to report. I got very frustrated with the axle alignment and decided to build the main body shell to see if there are any more surprises waiting for me. So far so good. Not a perfect fit, but a little filler here and there should take care of it.
IMG-20110418-00189.jpg

Still haven't figured how I'm going to fix the axles. :mad:
 
The body does look good! Sorry to hear about the axles. Looking like a chop, chop, chop situation.
Balki said:

Maybe chop the little section just at the top of your circle on the right axle and pin it with some brass rod? Just a suggestion ::) Interesting build, looking forward to seeing your progress! Good luck! ;)
 
Wow...Looks like you're in for a ride with this one :eek:, If it was me i would remove everything from the chassis ,line everything up with the body to make sure the wheels sit in the right place ,then fix everything where its meant to be .....Good luck. ;)

Chris.
 
or you can saw a piece on the right axle then put it on left axle, to make it center with the front.

a bit of kit bashing and stretch sprue melted in tamiya extra would do the job to cover some gaps.

just my 2 cents
 
BALKI,

Thud .. right off th bat ! Yeah, break out th saw.... a lil' Plastic Surgery .... Nip & Tuck ... I feel ya' Bro !! It's just a minor set back ... I'm sure you can get it !!
 
I can't tell for sure, but it kinda looks like the axles are too short. Wouldn't take much to lengthen them with a peice of similar size styrene tube if that is the case. It is a cool and unusual subject. Never seen one before.
 
Balki said:

I think if you square off the nub on the straight bar beween the two axles that atches to the frame the conection you marked with the red line as apposed to the circles, it should pull everything back.

it could just be the photo but that part looks like it has been cut at a slight angle and i think thats putting the joints off enough.

Torv.
 
Thanks for all the tips guys. As of right now I’m still not sure how I will fix the axles. I put them aside and started working on different components. I will probably do as suggested, glue the differentials together first and then extend the axles.
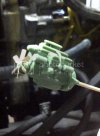
Got the engine assembled. Too bad you won’t be able to see it because it is the only component of this kit that has some details.
IMG-20110420-00205.jpg
SKIF really simplified this model so I decided to add some details here and there to spice it up. Started on the front grill and tomorrow I will attempt fame and glory by fixing the hood.
Before
IMG-20110418-00187.jpg
After
IMG-20110419-00197.jpg
Sorry about the poor picture quality. I have been taking the pictures with my phone.
Balki
 
I have been very busy for the last two days so there is no building progress to report. Just did some research and a bit of dry fitting.
noname said:
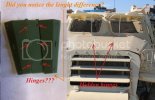
Does the engine hood not open? You could always open it.
I guess I could make the hood in open position to show the engine. I will give it a thought. The hood needs some fixing too, but it’s nothing major.
hood.jpg
I will follow your advice with the axles, but with the holiday weekend don’t expect much work to be done. ;D
069ba.jpg
And speaking of holiday weekend.. Happy Easter everybody!
 

Latest posts

Back
Top