Edbert
Well-Known Member
- Joined
- May 16, 2024
- Messages
- 1,446
I searched and did not see any threads of this kit, but since I am building it I guess I'll start a new one.
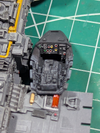
I built both an X-wing model as well as whatever the fighter was from the original Battlestar Galactica way back when, remember very little about them other than the general shape and that I painted the red and what parts with a brush. But this is also my 1st experience with a Bandai kit, whatever those old ones were they were nothing like what I found in this box. The kit is #5063845 if that matters to anyone.
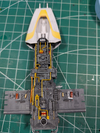
I have used glue here, even though I doubted at first, I do think they can be built without it, just hard to turn that gene off.
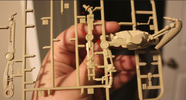
I saw only one flaw so far. One of my laser beams was ruined within the box.
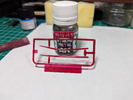
It is no biggie, I was not going to use them anyway. I was AMAZED at the multi-color sprues, what sorcery is this? You can assemble it without glue OR PAINT!?
Regardless, I plan to fully paint this as if it were a traditional kit, I cannot turn that gene off. I was considering heavy weathering, but will lean a bit toward keeping it minimal due to some exquisite details. I do have a question for the fans/experts here.
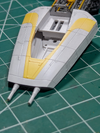
The yellow part around the cockpit, is it a major problem if I use other colors?
I am already taking liberties with historical accuracy (sic) but do not want to take that too far. I remember red and yellow squadrons in the original film, but that too was nearly 50 years ago. Should I keep it yellow-like? I'm thinking not red since I want to add the X-Wing at some point too and it has to be red.
I built both an X-wing model as well as whatever the fighter was from the original Battlestar Galactica way back when, remember very little about them other than the general shape and that I painted the red and what parts with a brush. But this is also my 1st experience with a Bandai kit, whatever those old ones were they were nothing like what I found in this box. The kit is #5063845 if that matters to anyone.
I have used glue here, even though I doubted at first, I do think they can be built without it, just hard to turn that gene off.
I saw only one flaw so far. One of my laser beams was ruined within the box.

It is no biggie, I was not going to use them anyway. I was AMAZED at the multi-color sprues, what sorcery is this? You can assemble it without glue OR PAINT!?
Regardless, I plan to fully paint this as if it were a traditional kit, I cannot turn that gene off. I was considering heavy weathering, but will lean a bit toward keeping it minimal due to some exquisite details. I do have a question for the fans/experts here.
The yellow part around the cockpit, is it a major problem if I use other colors?
I am already taking liberties with historical accuracy (sic) but do not want to take that too far. I remember red and yellow squadrons in the original film, but that too was nearly 50 years ago. Should I keep it yellow-like? I'm thinking not red since I want to add the X-Wing at some point too and it has to be red.

