Amusing Hobby 1/35 T-90A with full interior

Scale Model Addict - Model Tips, Guides, Tools & Tech, Tutorials, and Community

Help Support Scale Model Addict:

49thStateRT

Well-Known Member
Silver Member
Joined
Oct 14, 2024
Messages
182
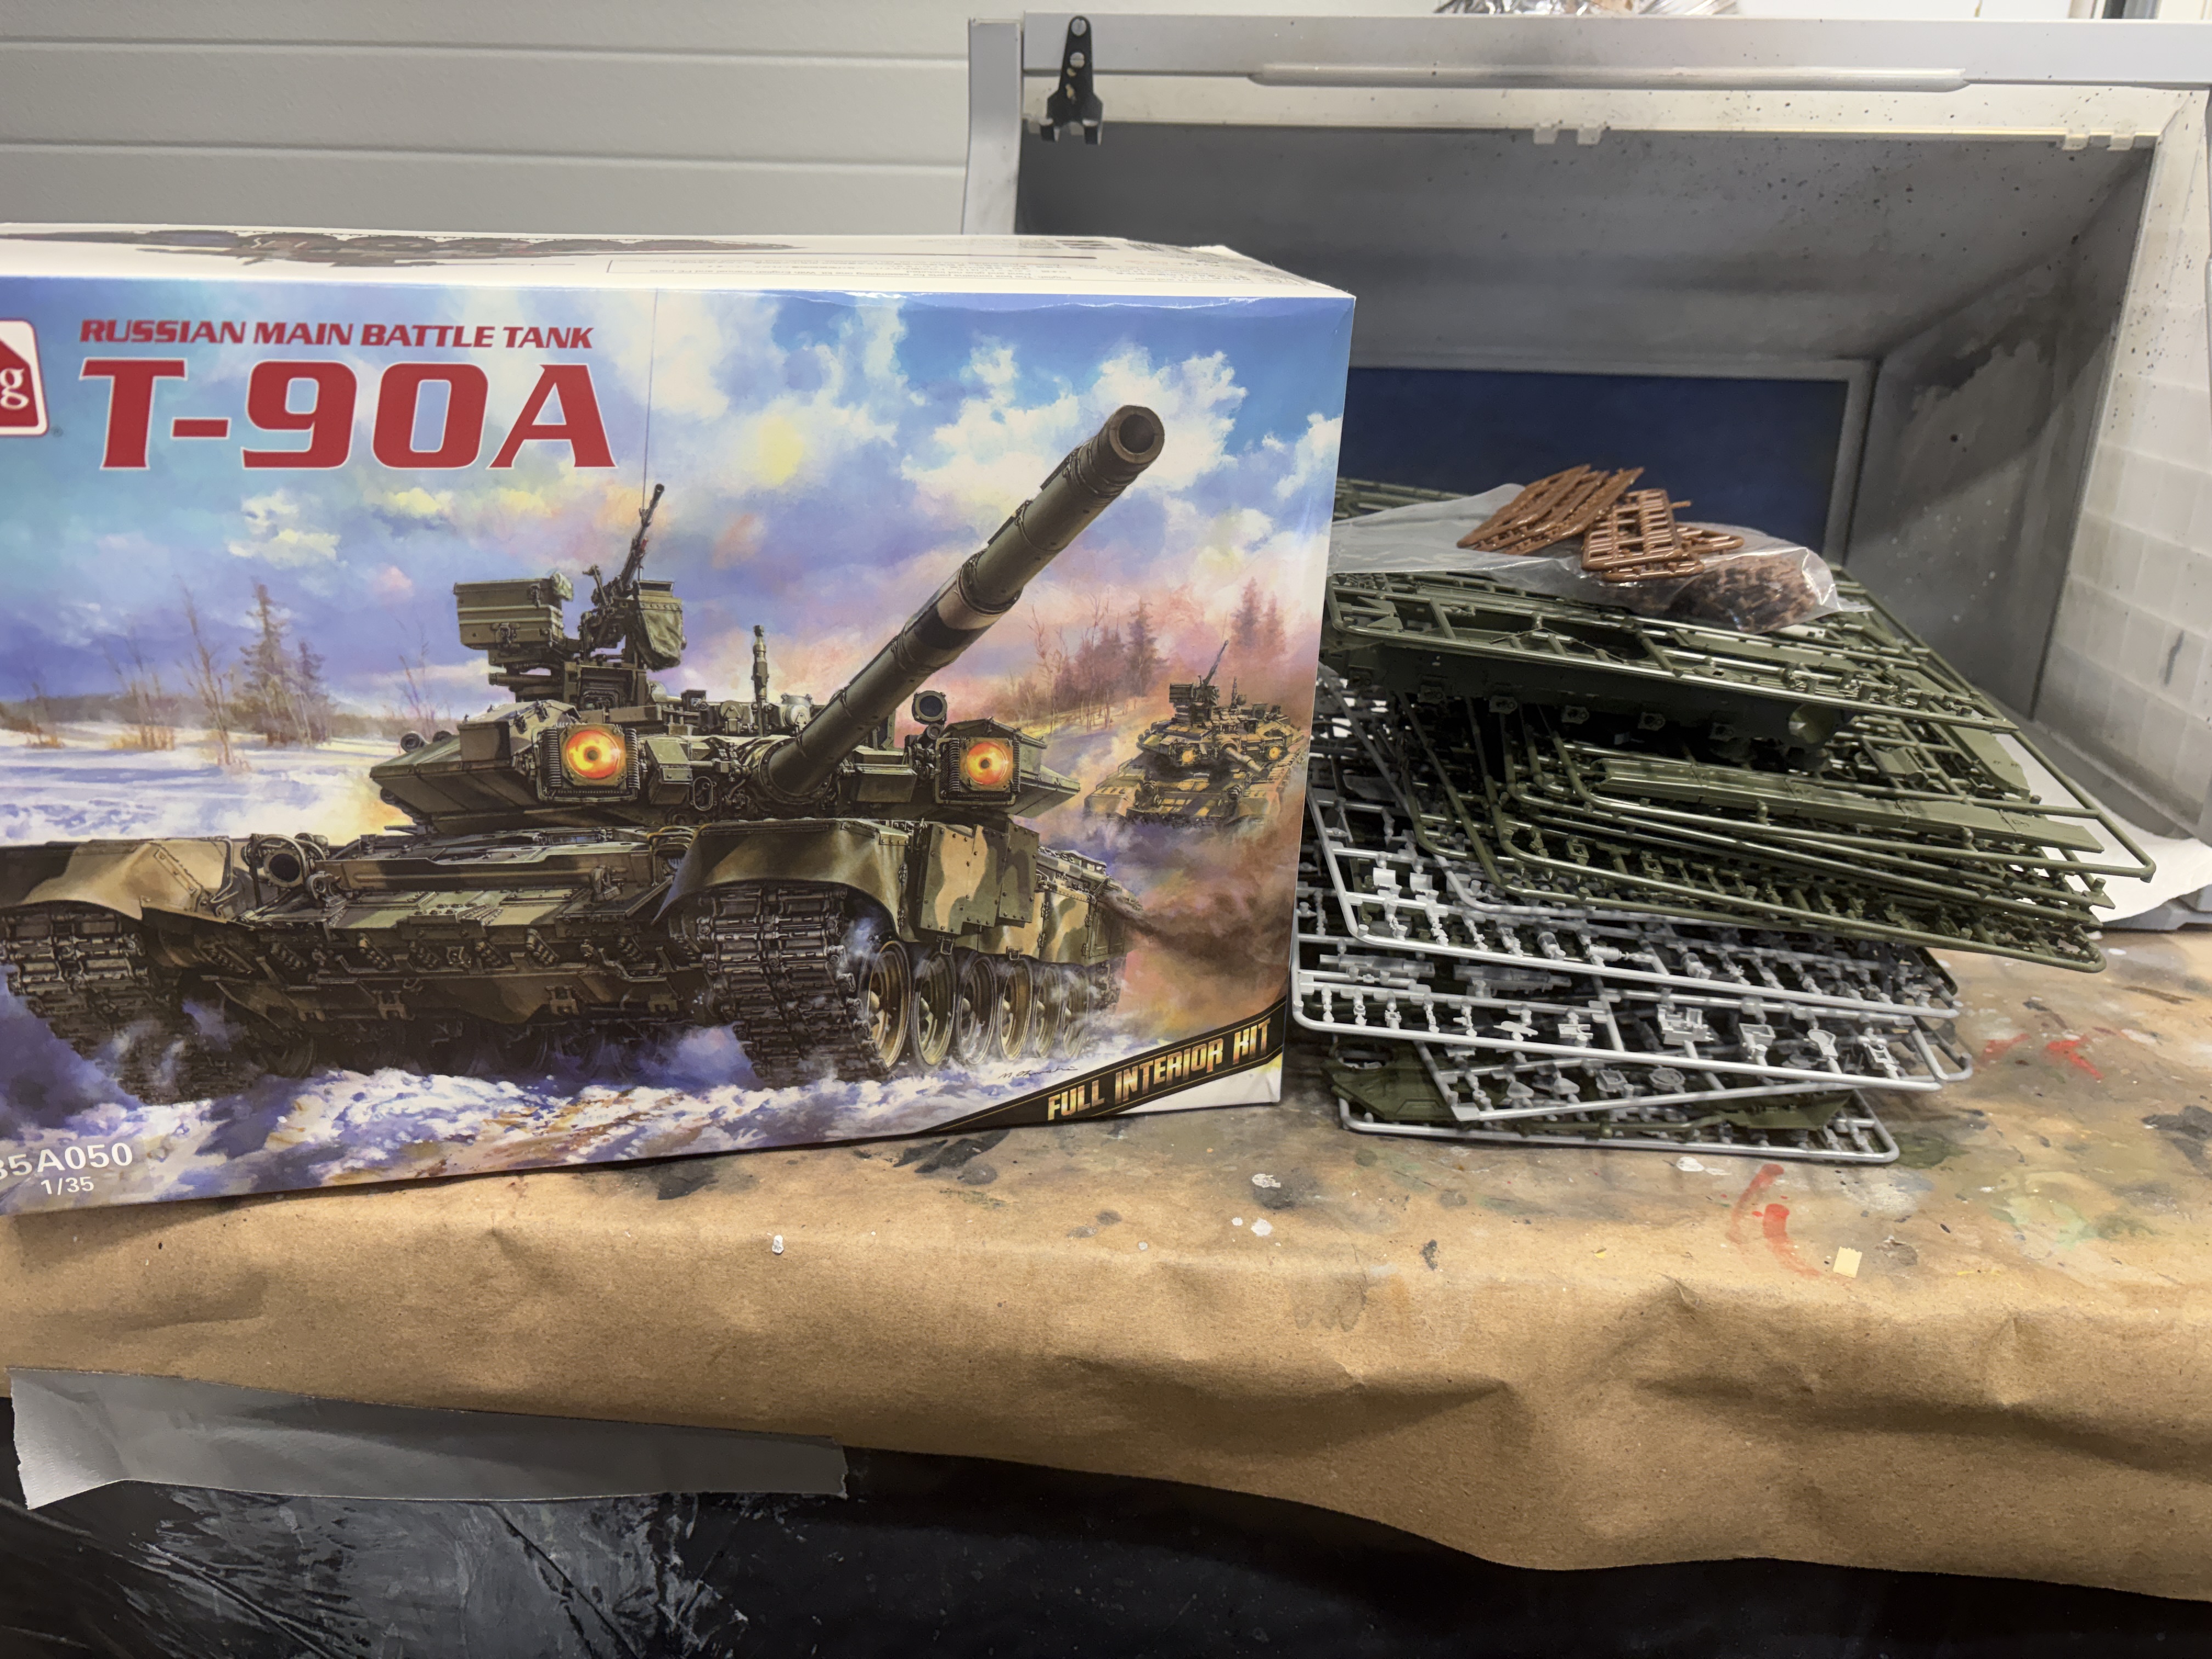
Well I am going to start this beast. I haven't quite figured out if the interior bits are visible if you want them to be or not (like with cut-aways). Big box and lots and lots of pieces.
 

Attachments

  • IMG_4653.jpeg
    IMG_4653.jpeg
    2.4 MB
Given how small a T-90's hatches are, the vast majority of the interior will only be visible if you leave every exterior panel loose that you can without it falling off the model.
 
Given how small a T-90's hatches are, the vast majority of the interior will only be visible if you leave every exterior panel loose that you can without it falling off the model.
from looking at photos of completed models on scalemates, it looks like the intent for showing the interior is leaving the turrent off and the back panels off so you can see the engine. I am surprised how similar the T-90 is to the T-72. The ruskkies love their big external fuel tank drums.
 
from looking at photos of completed models on scalemates, it looks like the intent for showing the interior is leaving the turrent off and the back panels off so you can see the engine.
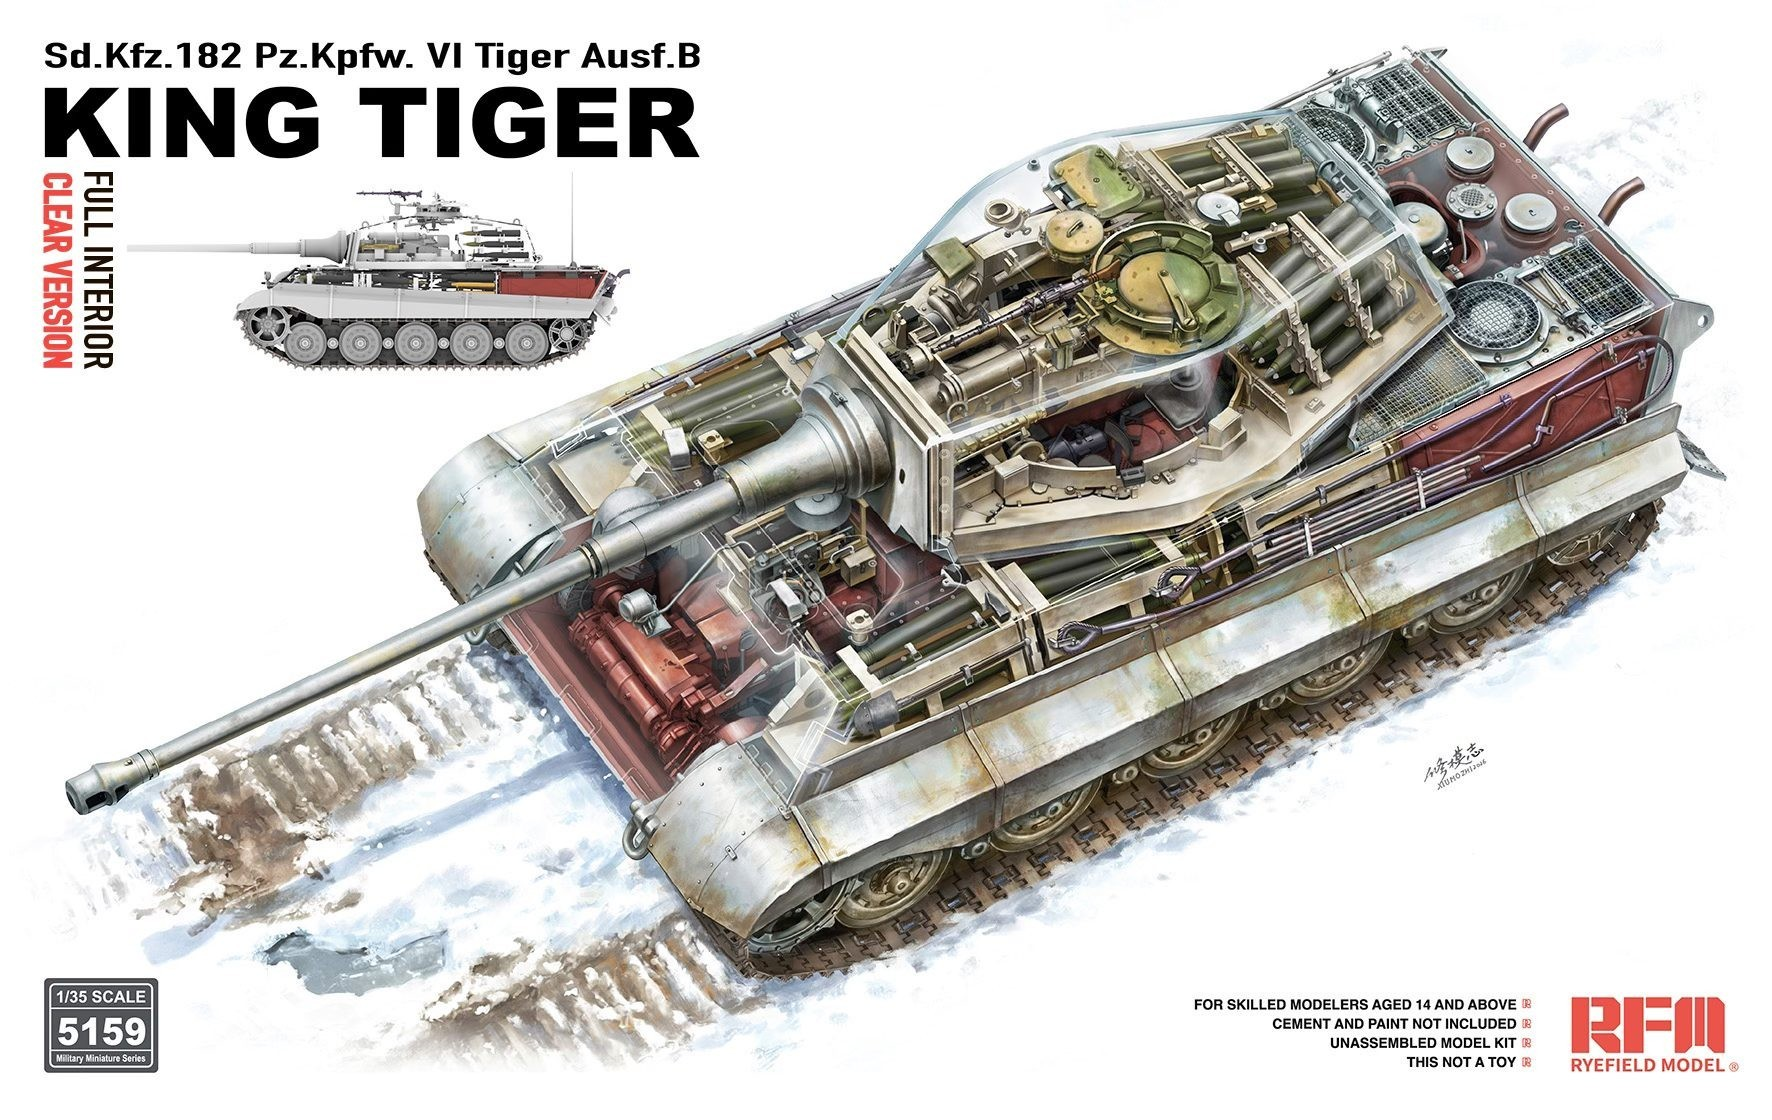
I've seen full interiors presented like an exploded view diagram to great effect. I'm also interested in seeing one of these completed (new release), I think it holds promise.

1773091414451.png
 
As an Amazon Associate we earn from qualifying purchases. Product prices and availability are accurate as of the date/time indicated and are subject to change.
I could be wrong, of course, as it's a bit too modern to hold my interest, but it certainly looks like an upgraded T-72. Wikipedia says:—
The T-90 has its origins in a Soviet-era program aimed at developing a replacement for the T-64, T-72 and T-80 series of main battle tanks (MBT). The T-72 platform was selected as the basis for the new generation of tank owing to its cost-effectiveness, simplicity and automotive qualities. The Kartsev-Venediktov Design Bureau from Nizhny Tagil was responsible for the design work and prepared two parallel proposals—the Object 188, which was a relatively simple upgrade of the existing T-72B tank (Object 184), and the far more advanced Object 187—only vaguely related to the T-72 series and incorporating major improvements to the hull and turret design, armor, powerplant and armament. Development work was approved in 1986 and the first prototypes were completed by 1988. The vehicles resulting from the Object 187 program have not been declassified to this date.[9]

The Object 188 was engineered by a team under V.N. Venediktov. The biggest change was the integration of the T-80U's 1A45 fire-control system. The Object 188 was initially designated as the T-72BM. The first four of these were delivered for trials in January 1989. An improved variant (called Upgraded T-72B[10]) was delivered beginning in June 1990. In March 1991, the Soviet Ministry of Defense recommended that the Army adopt the Object 188. Work on the Object 187 was simultaneously stopped for unknown reasons.[11]
So in short, they began with the T-72B and did an exhaustive and a simple upgrade of it, then picked the simple one to proceed with. It was even known as the T-72BM initially, before being renamed to T-90 …
 
I could be wrong, of course, as it's a bit too modern to hold my interest
I find identifying Russian tanks (post WWII) to be difficult too. T54/T55/T60/T62/T65/T72 all have minor changes between them to layman eyes. A T54 is easy to differentiate from a T72 of course, but within each variant is it hard, I think in some cases the upgrades were powertrain mainly. Also, the more modern ones seem to morph together due to all the accoutrements, reactive armor, sensors, APS, etc. Then factor in all the 3rd party users of Russian tanks (Iran/Iraq/Syria) it is hard to know what is under all that stuff for me.

The names are a bit odd too, the T50 and T70 were WWII tanks :)
 
The hard ones to tell apart are the variants of the T-54 and T-55 — quite why they changed the number is anybody's guess, as they're the same basic tank. You have to look at things like ventilator positions and the shapes of welds to tell a T-54 (other than the first model, which had a different turret) from a T-55.

The others you mention aren't that hard¹ but that does presume decent photos to go by, and enough of them to form a good mental image of the tank. Just look at how much trouble NATO had in the 1970s and '80s telling T-64s from T-72s from T-80s, which was partly due to lack of knowledge about them and partly due to poor photos.


¹ Though I think you mean T-64 instead of T-65, and there was only a T-60 as a Second World War light tank :)[/hr]
 
https://en.wikipedia.org/wiki/T-60_tank :)

The whole T-37/T-38/T-40/T-50/T-60/T-70 class wasn't meant to be fighting other tanks, but for reconnaissance and/or amphibious operations (depending on the exact type). The Soviets and the British had the best concepts for tank use early on in the war, and didn't view their light tanks as intended for heavy combat. Unlike the US Army, for example, whose light tanks were meant to be general-purpose tanks, but the fighting in North Africa already proved that to be unworkable except against the Japanese.
 
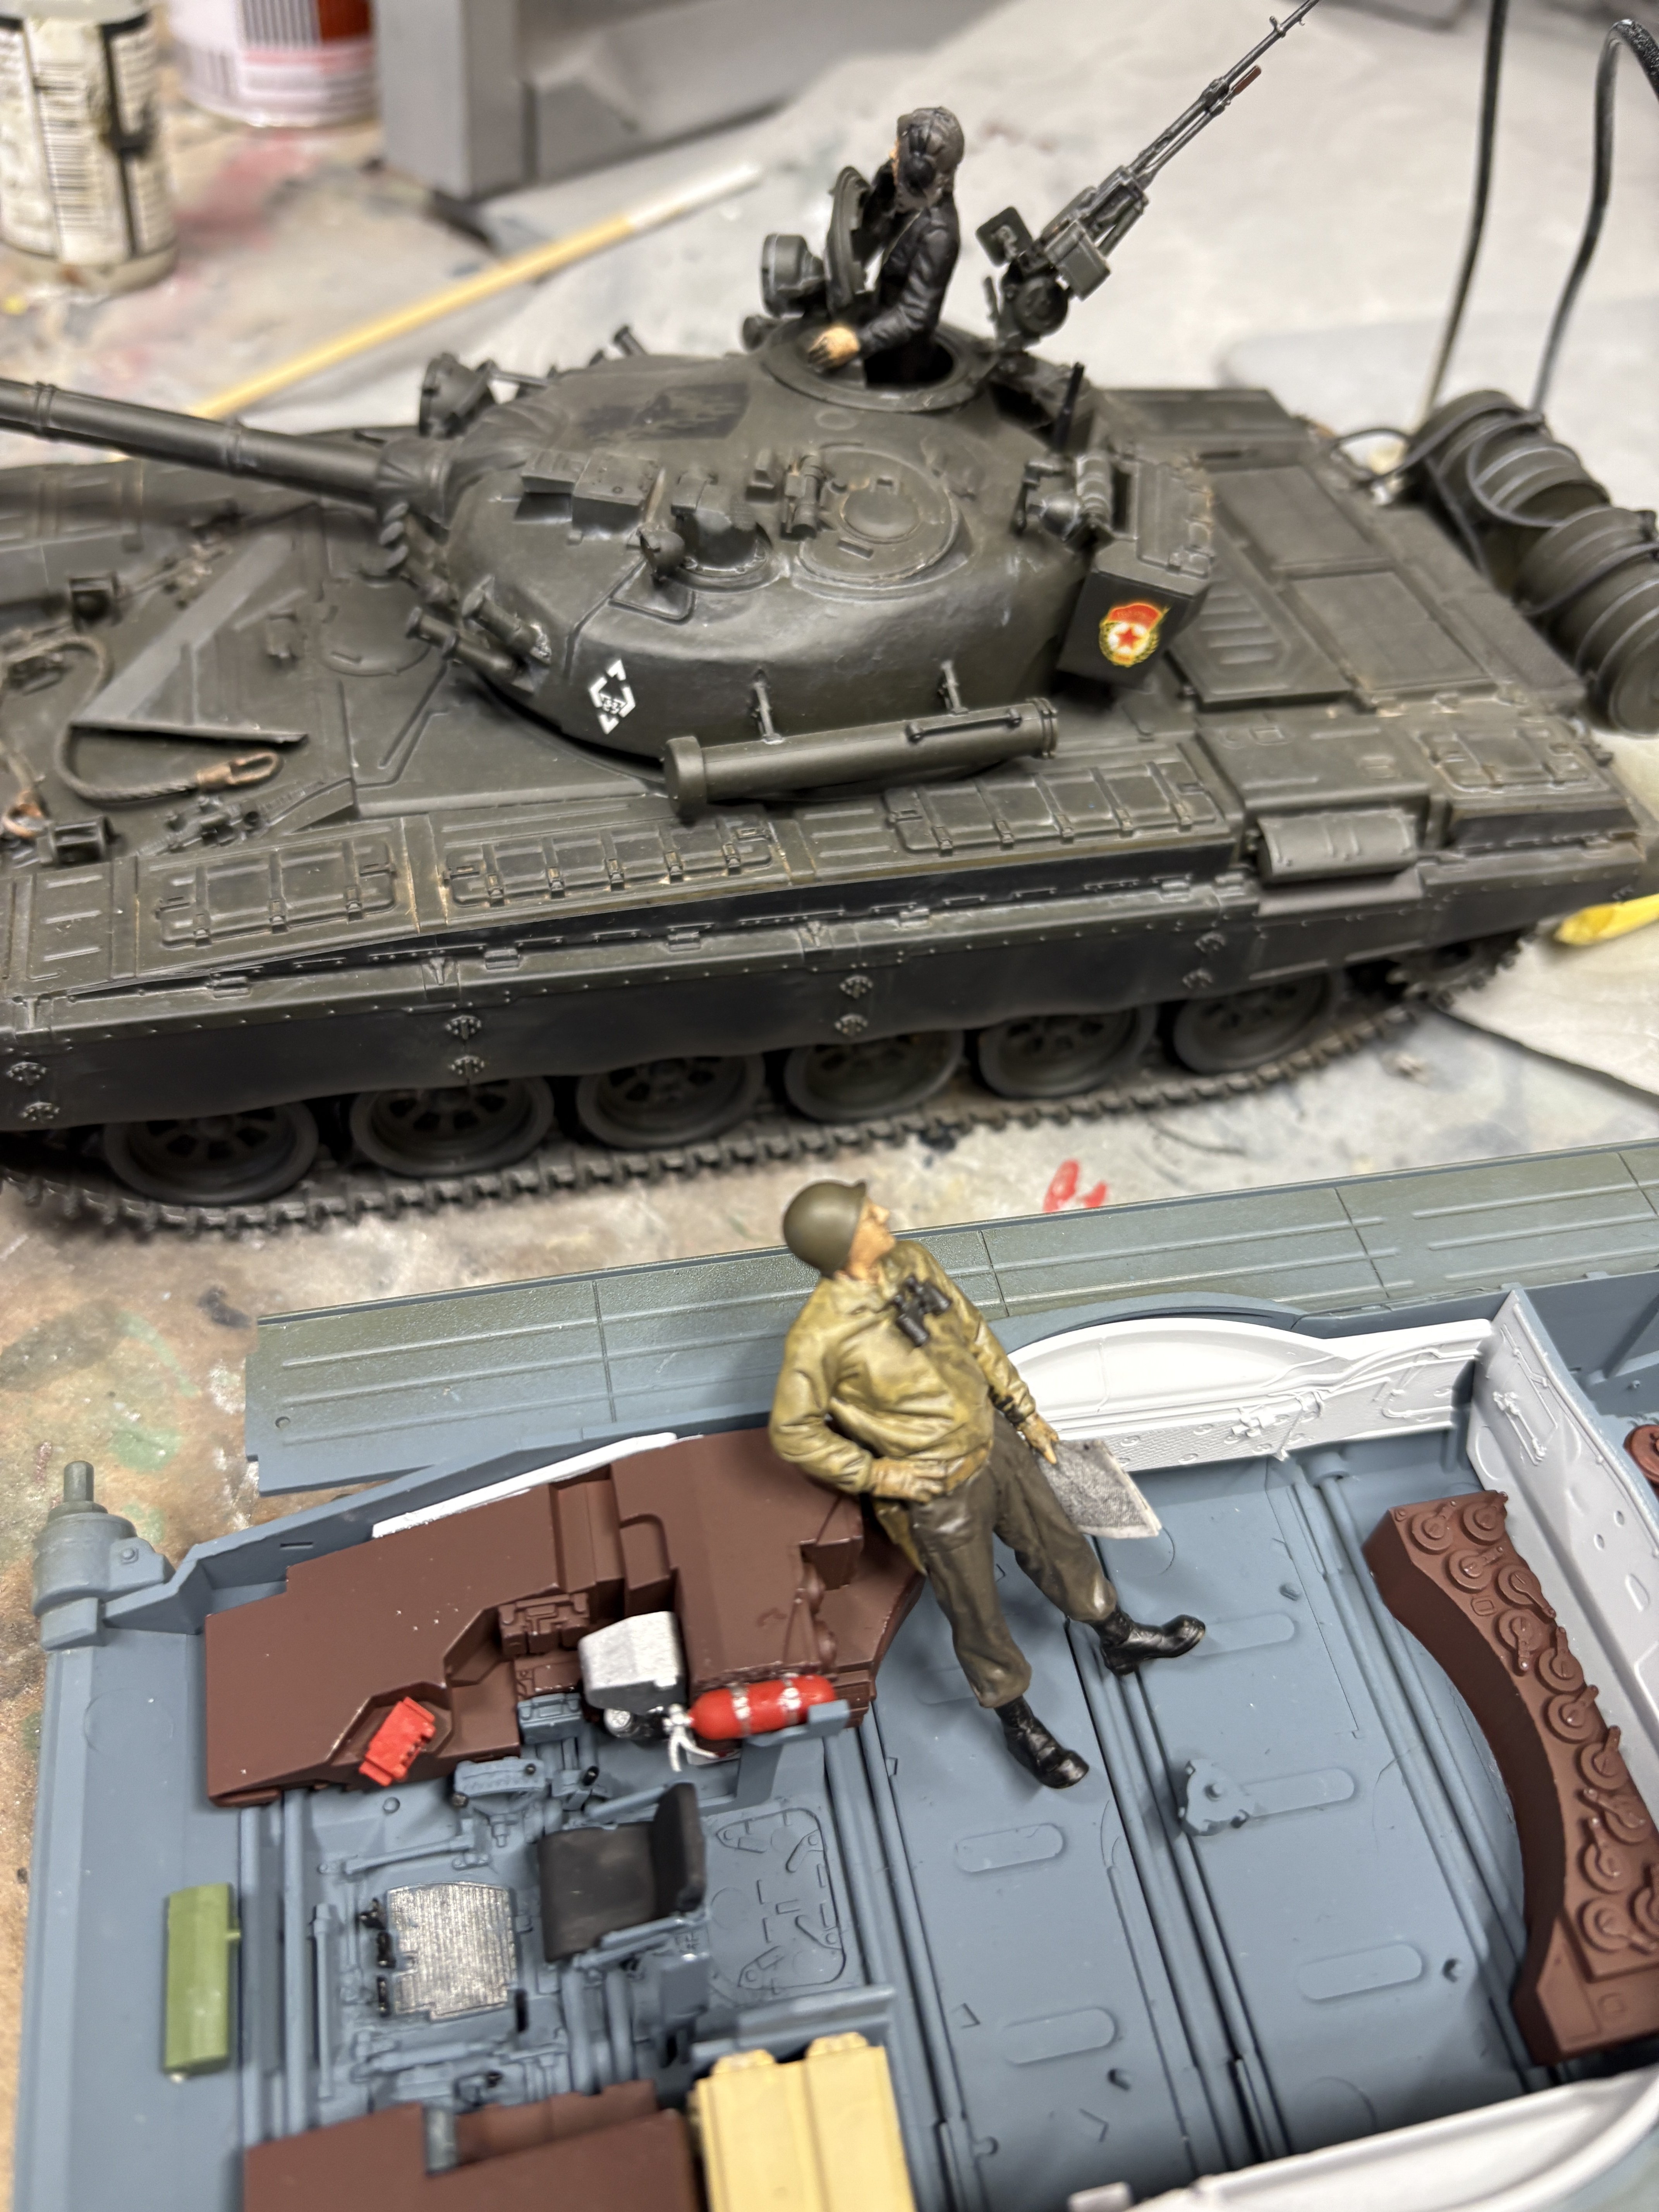
So I have the lower hull and interior lower hull going, but something was bothering me. The drivers seat seemed so tiny. Check out this photo to see the serious scale errors. Both of those guys are Tamiya 1/35 scale. You notice the Tamiya T-72 hull is pretty much exact same size as this T-90. Now look at the drivers seat and fire extinguisher. I know tank drivers are cramped, but try getting those guys butts in that seat. No way that can be right. Other than that, kit so far is not as good as typical Tamiya. Lots of places in instructions where it doesn't show enough, or it says to do something but there is no nice clean way to do it. Some very tiny pieces that are literally impossible to glue or tweezer. Also no paint references for interior although they seem to use Tamiya paint color names, but no numbers, and the exterior paint schemes reference Mig Ammo colors.
 

Attachments

  • IMG_4667.jpeg
    IMG_4667.jpeg
    2.5 MB
Off the top of my head, Soviet tankers were selected only from men not bigger than 1.75 m, exactly because their tanks are relatively small and even more cramped than most. They could do this because of general conscription in a large population, whereas Western tanks are designed for males of above-average size so that the majority of soldiers will fit inside.
 
I believe I read somewhere that the Russian Tankers are limited to 5ft 9 or so, and most are well below that. Maybe the scale is correct?
I think that the figure provided in the Tamiya 1/35 M118 tank destroyer kit may be oversized also, but I still think the drivers seat is way to small compared to other 1/35 scale figures I have. I think you would have to be a very skinny person with very long legs and arms to reach the pedals and control sticks.
 
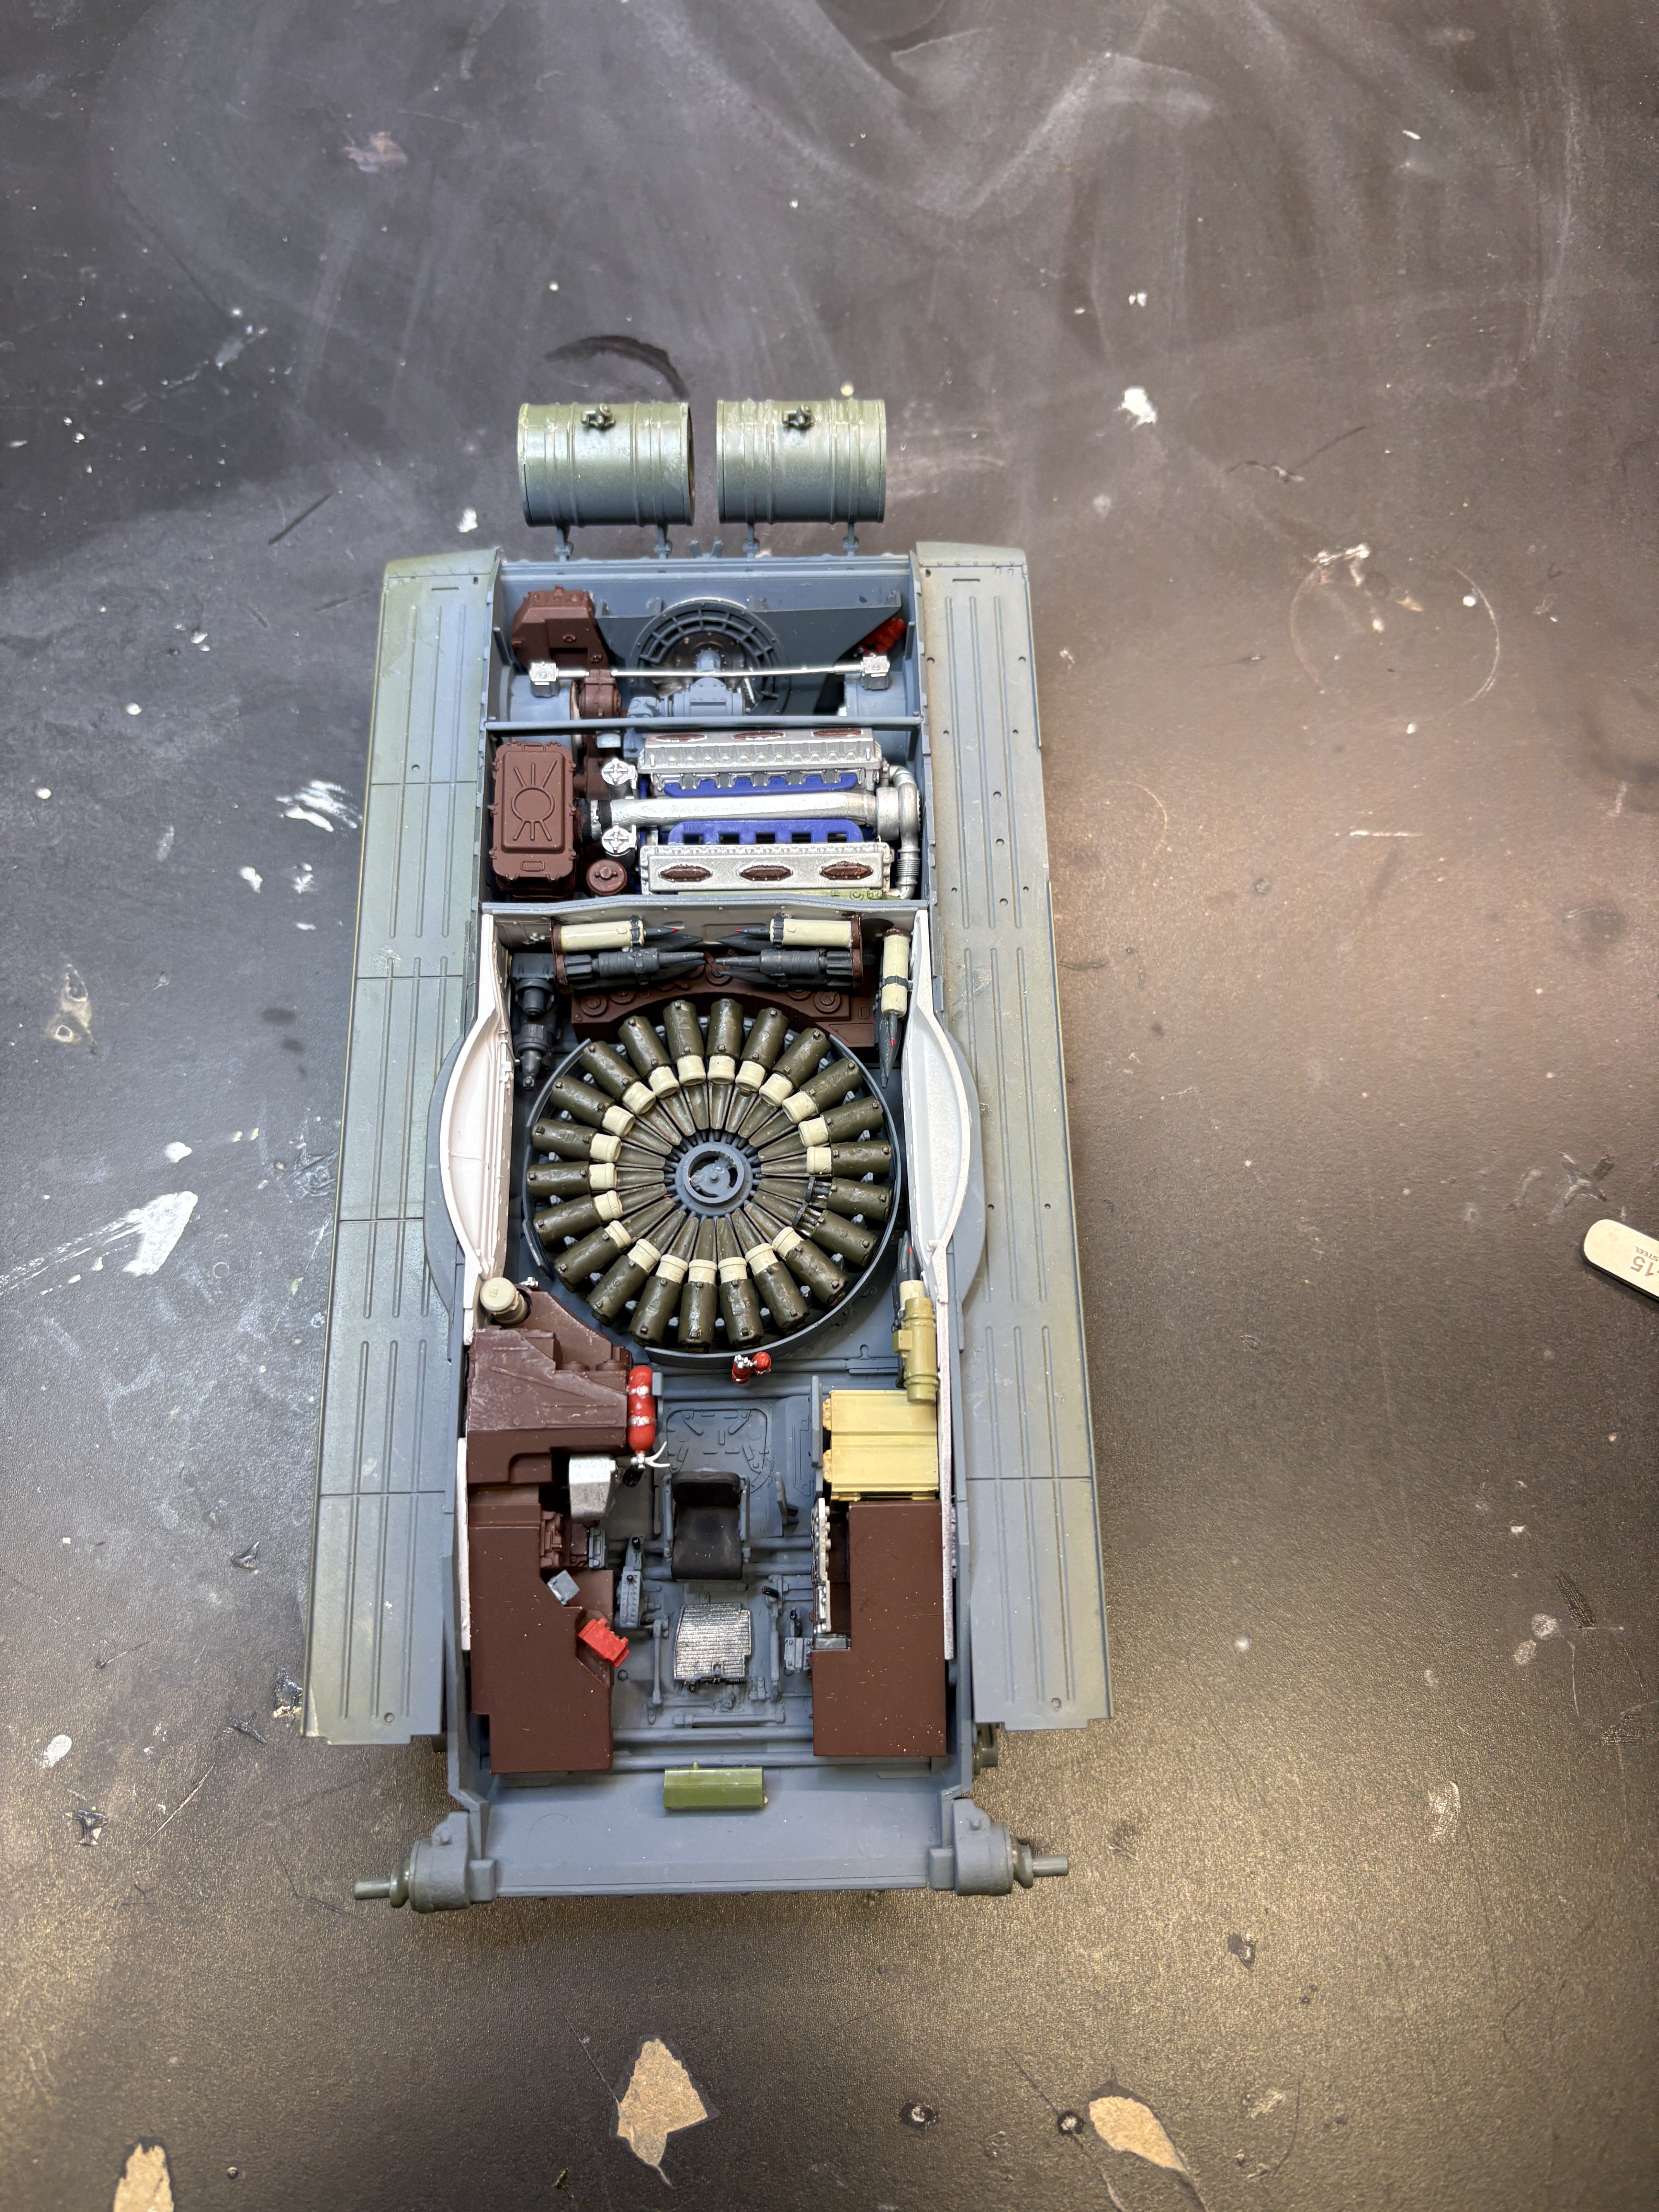
Here is update, with completed lower hull interior. My plan is to display this broken apart into three or four main parts, with certain parts off, like the engine area covers and front sloped hull cover, to show as much as possible of interior. Sadly, as far as I can tell, they did not plan their model around doing that. Some parts like that front hull cover need to be in place for the front track fenders and skirt to work. I think. Will see how it goes.
 

Attachments

  • IMG_4675.jpeg
    IMG_4675.jpeg
    3.6 MB
That's because of ammo explosions, yes. In the 1991 Gulf War, this was nicknamed the "jack-in-the-box effect", IIRC: hit a T-72 in the hull side below the turret, and the turret will likely soon go flying.

The reason is the way the autoloader works: the carousel on the turret floor turns to bring the desired type of ammunition below the gun, after which a lift brings it up to the gun and an automatic rammer inserts first the projectile and then the propellant charge into the breech:


Compare to the autoloader on a Leclerc (similar types are also used on the Type 90 and K2 Black Panther), which has a kind of endless conveyor belt in the back of the turret and loads forward into the gun:


With the autoloader in the turret bustle, it can have blow-out panels to protect the crew. Like on this M1 Abrams:


The huge flames there are from the burning propellant, which is the real killer when main-gun ammunition gets hit.
 
Like on this M1 Abrams:
The driver is in an isolated compartment too? I think I read that somewhere, the main crew can all bail and he can (conceivably) drive the vehicle to saftey assuming a penetration as seen in that video.

A combat ineffective tank > a dead crew.
 
The driver is in an isolated compartment too?
The driver is in the hull, but there's a passage between his compartment and the turret, so that crew can swap places under armour (or pull an injured or dead driver into the turret so someone else can take his place) and also so that everyone can evacuate the tank in an emergency even if some of the hatches are blocked. The blow-out panels of course protect the driver just as much as the turret crew, though :)

A combat ineffective tank > a dead crew.
Very much so. You can always get a new tank to put the crew into, but if you have a bunch of working tanks without any crews for them, they're not going to be doing anything useful.
 
I didn't actually watch it except for the bit where it shows the autoloader, and that without sound :) The first video looks like a Vietnamese (going by the name of the poster) tank crew fooling for the camera a bit while they're on live-fire range or something.
 
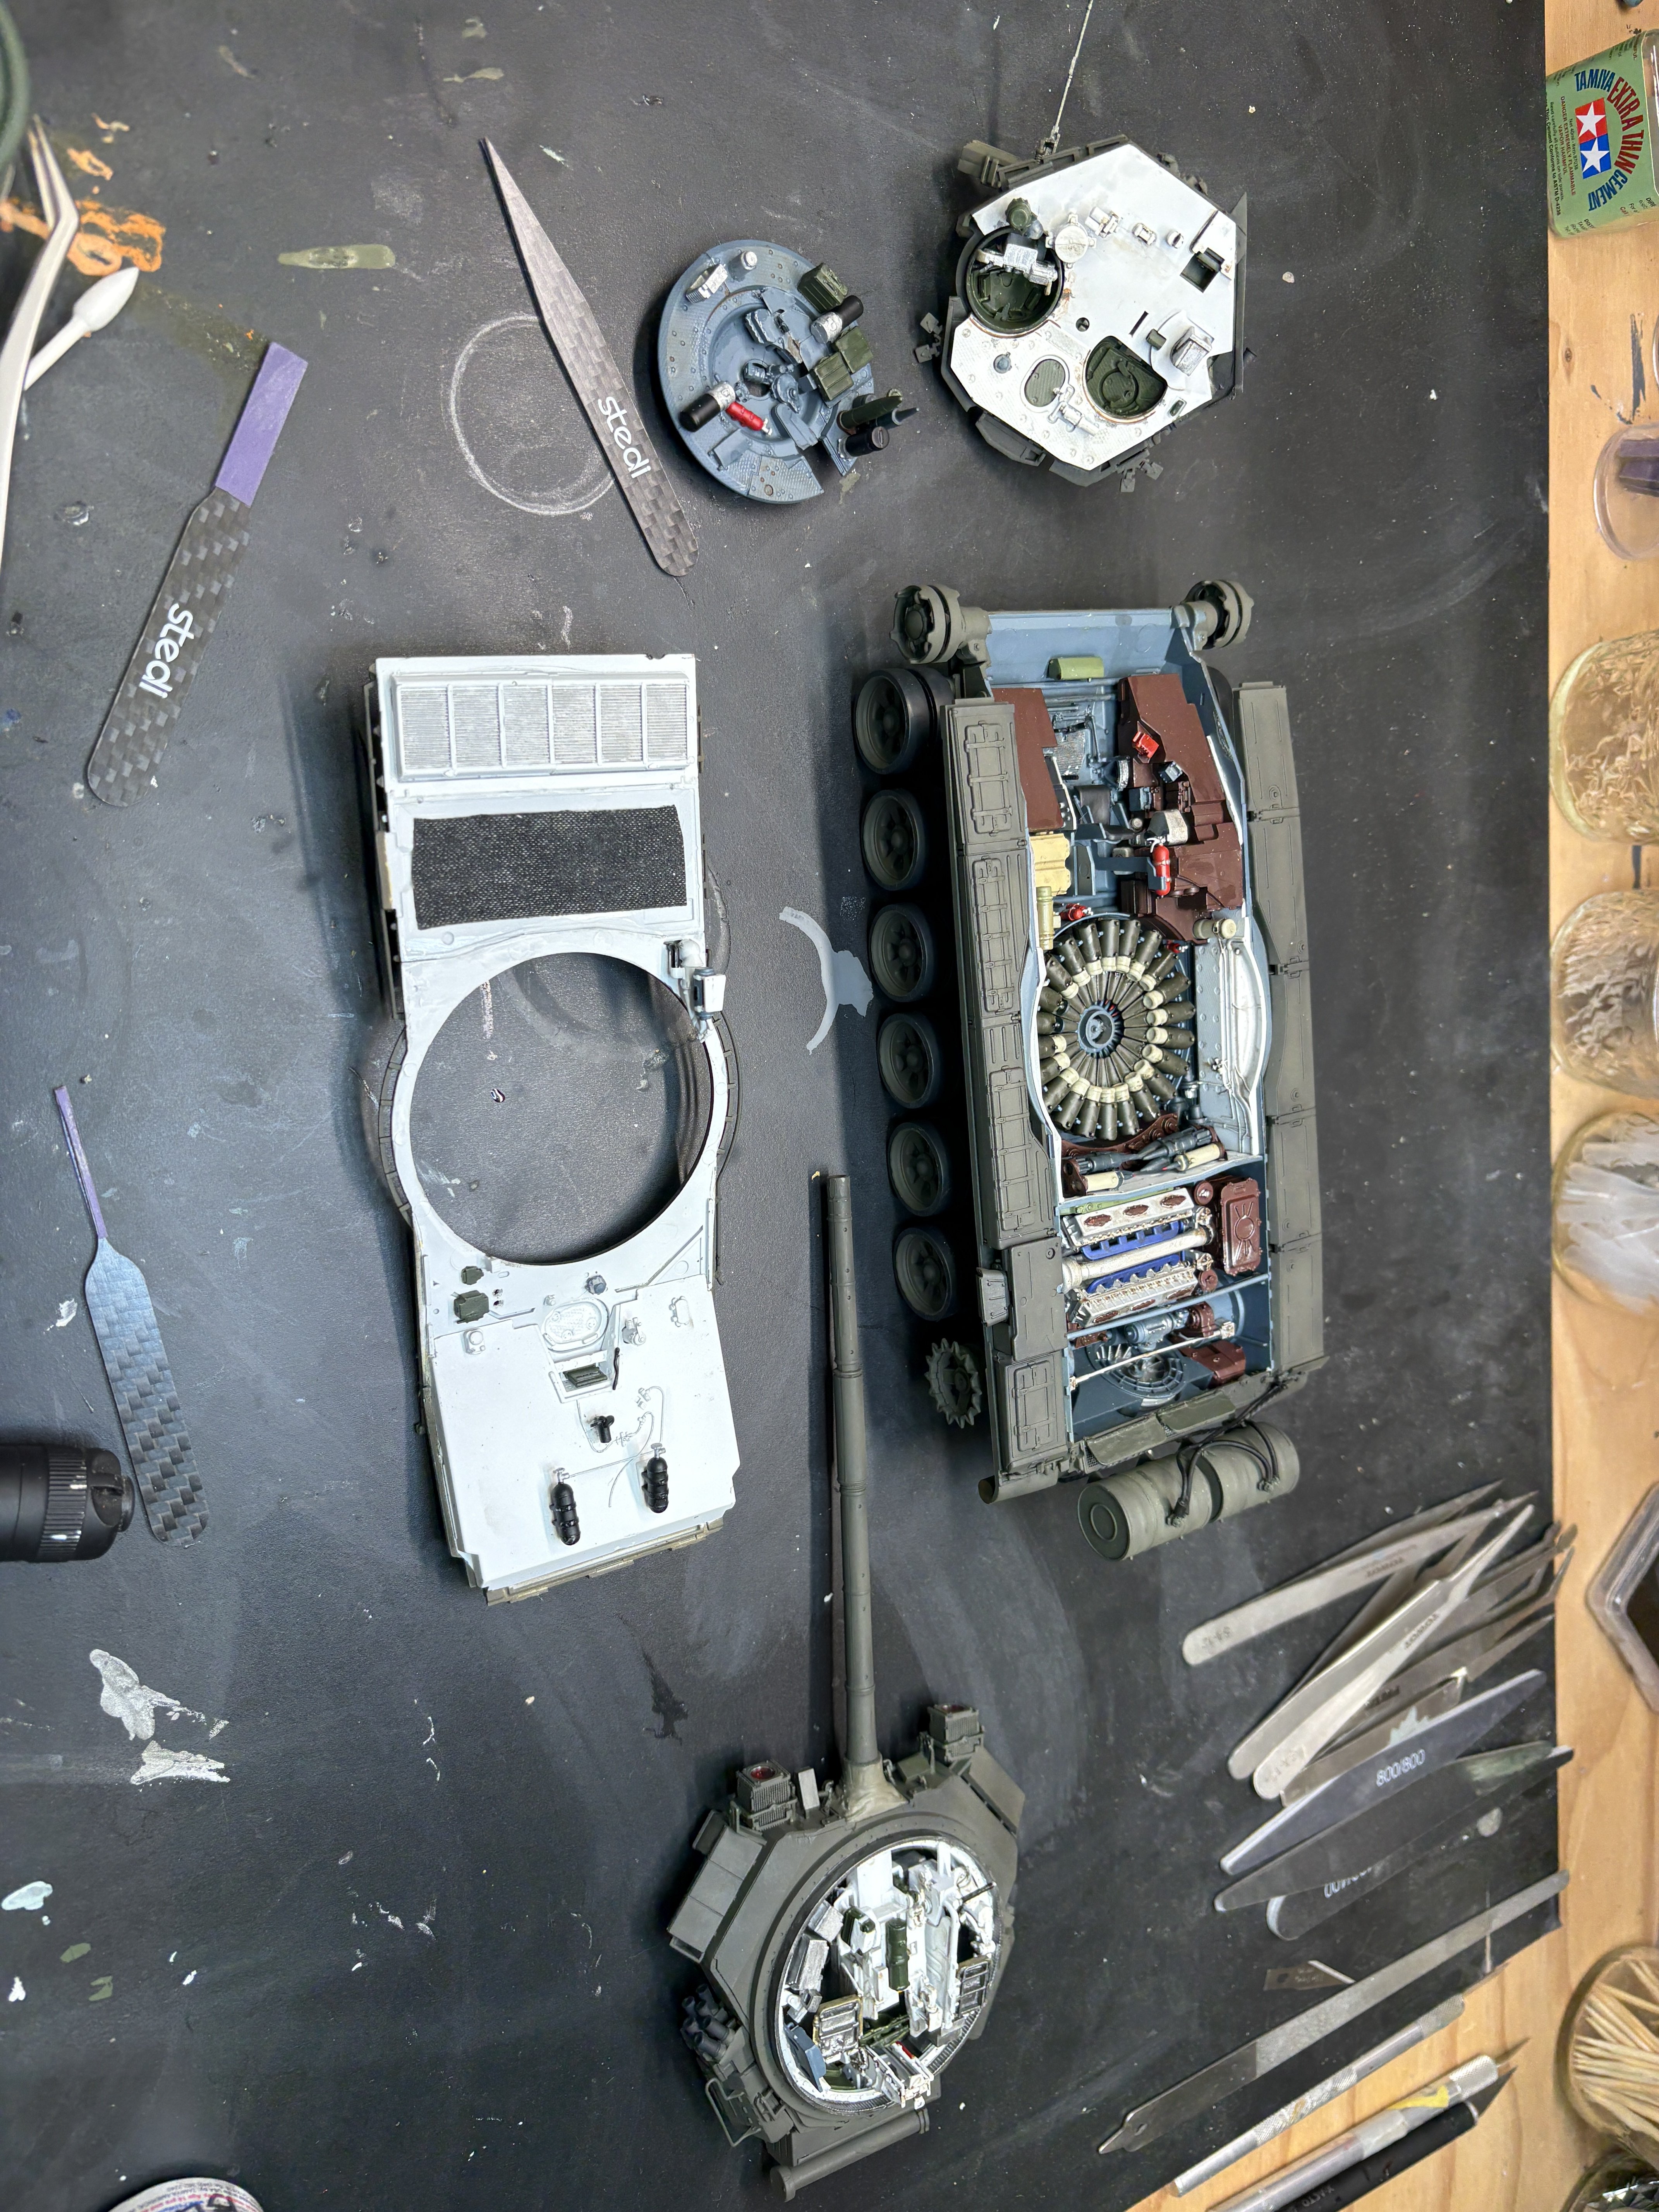
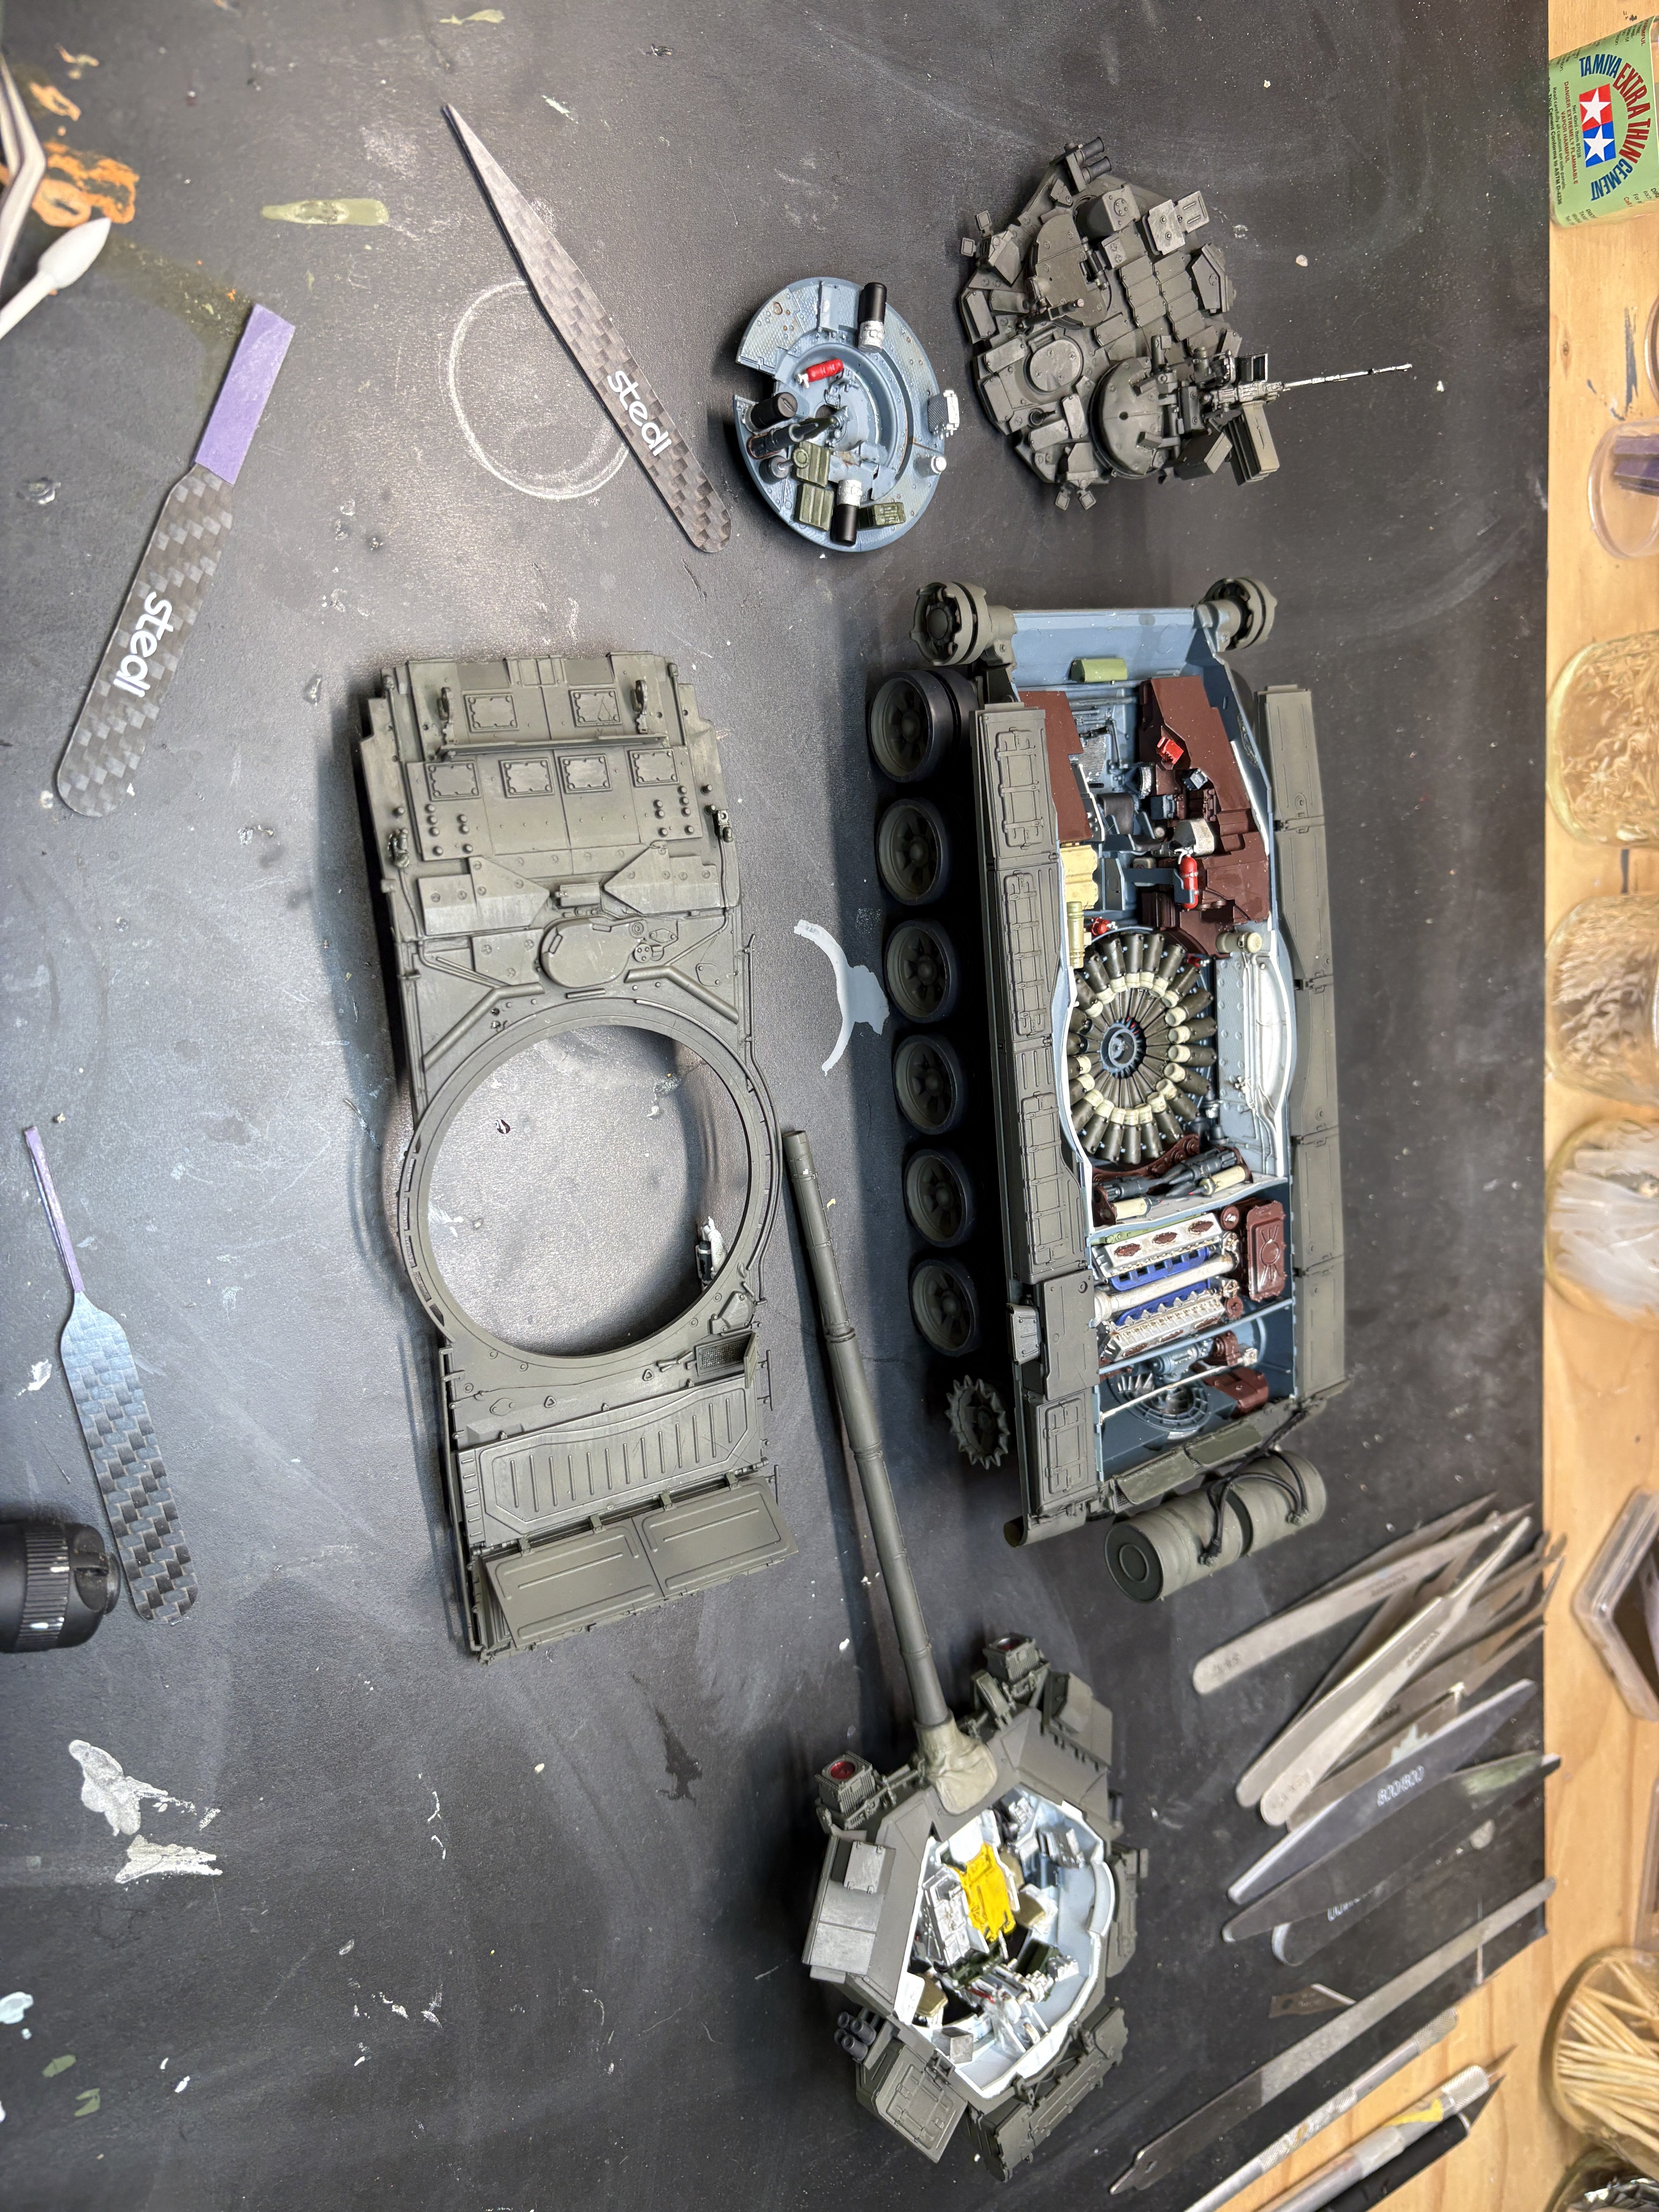
Progress. Done except tracks, which are a pain with the seperate teeth but at least the individual links so far seem to stay together better than others I have built. I will only do what you can see. I am formulating a way to actually display it "exploded" with four vertical stacked levels separated by a few inches each.
A few issues: I gave up on camo scheme using AK masking putty, which great on airplane but was tearing stuff off this. Some stuff they poorly designed, to be near impossible to build out of the box. The light protective cages were one that bit the dust. The pieces of built seperate like I did do not really go all the way together anymore, because they are done not following the instruction's build sequence. So you have to decide early how you will display it. A couple of things they showed reversed or just not right, like wrong holes pointed to, tow cable shown reverse of how they had you install the cable ends. Very odd they did not design it with openable/removable engine cover. They have vent hatches you can glue open or closed, but PE mesh is below them, then solid plastic, so you can't see into the cooling fan/transmission area either.
 

Attachments

  • IMG_4724.jpeg
    IMG_4724.jpeg
    3.5 MB
  • IMG_4723.jpeg
    IMG_4723.jpeg
    3.7 MB
Used my own formulation to get close to their green then did a bit of post shading one lighter and then two shades darker for effect. Then a little dry brushing. No other weathering on turrent top yet. The inside I gloss coated, applied some washes, and sprayed flat.
 
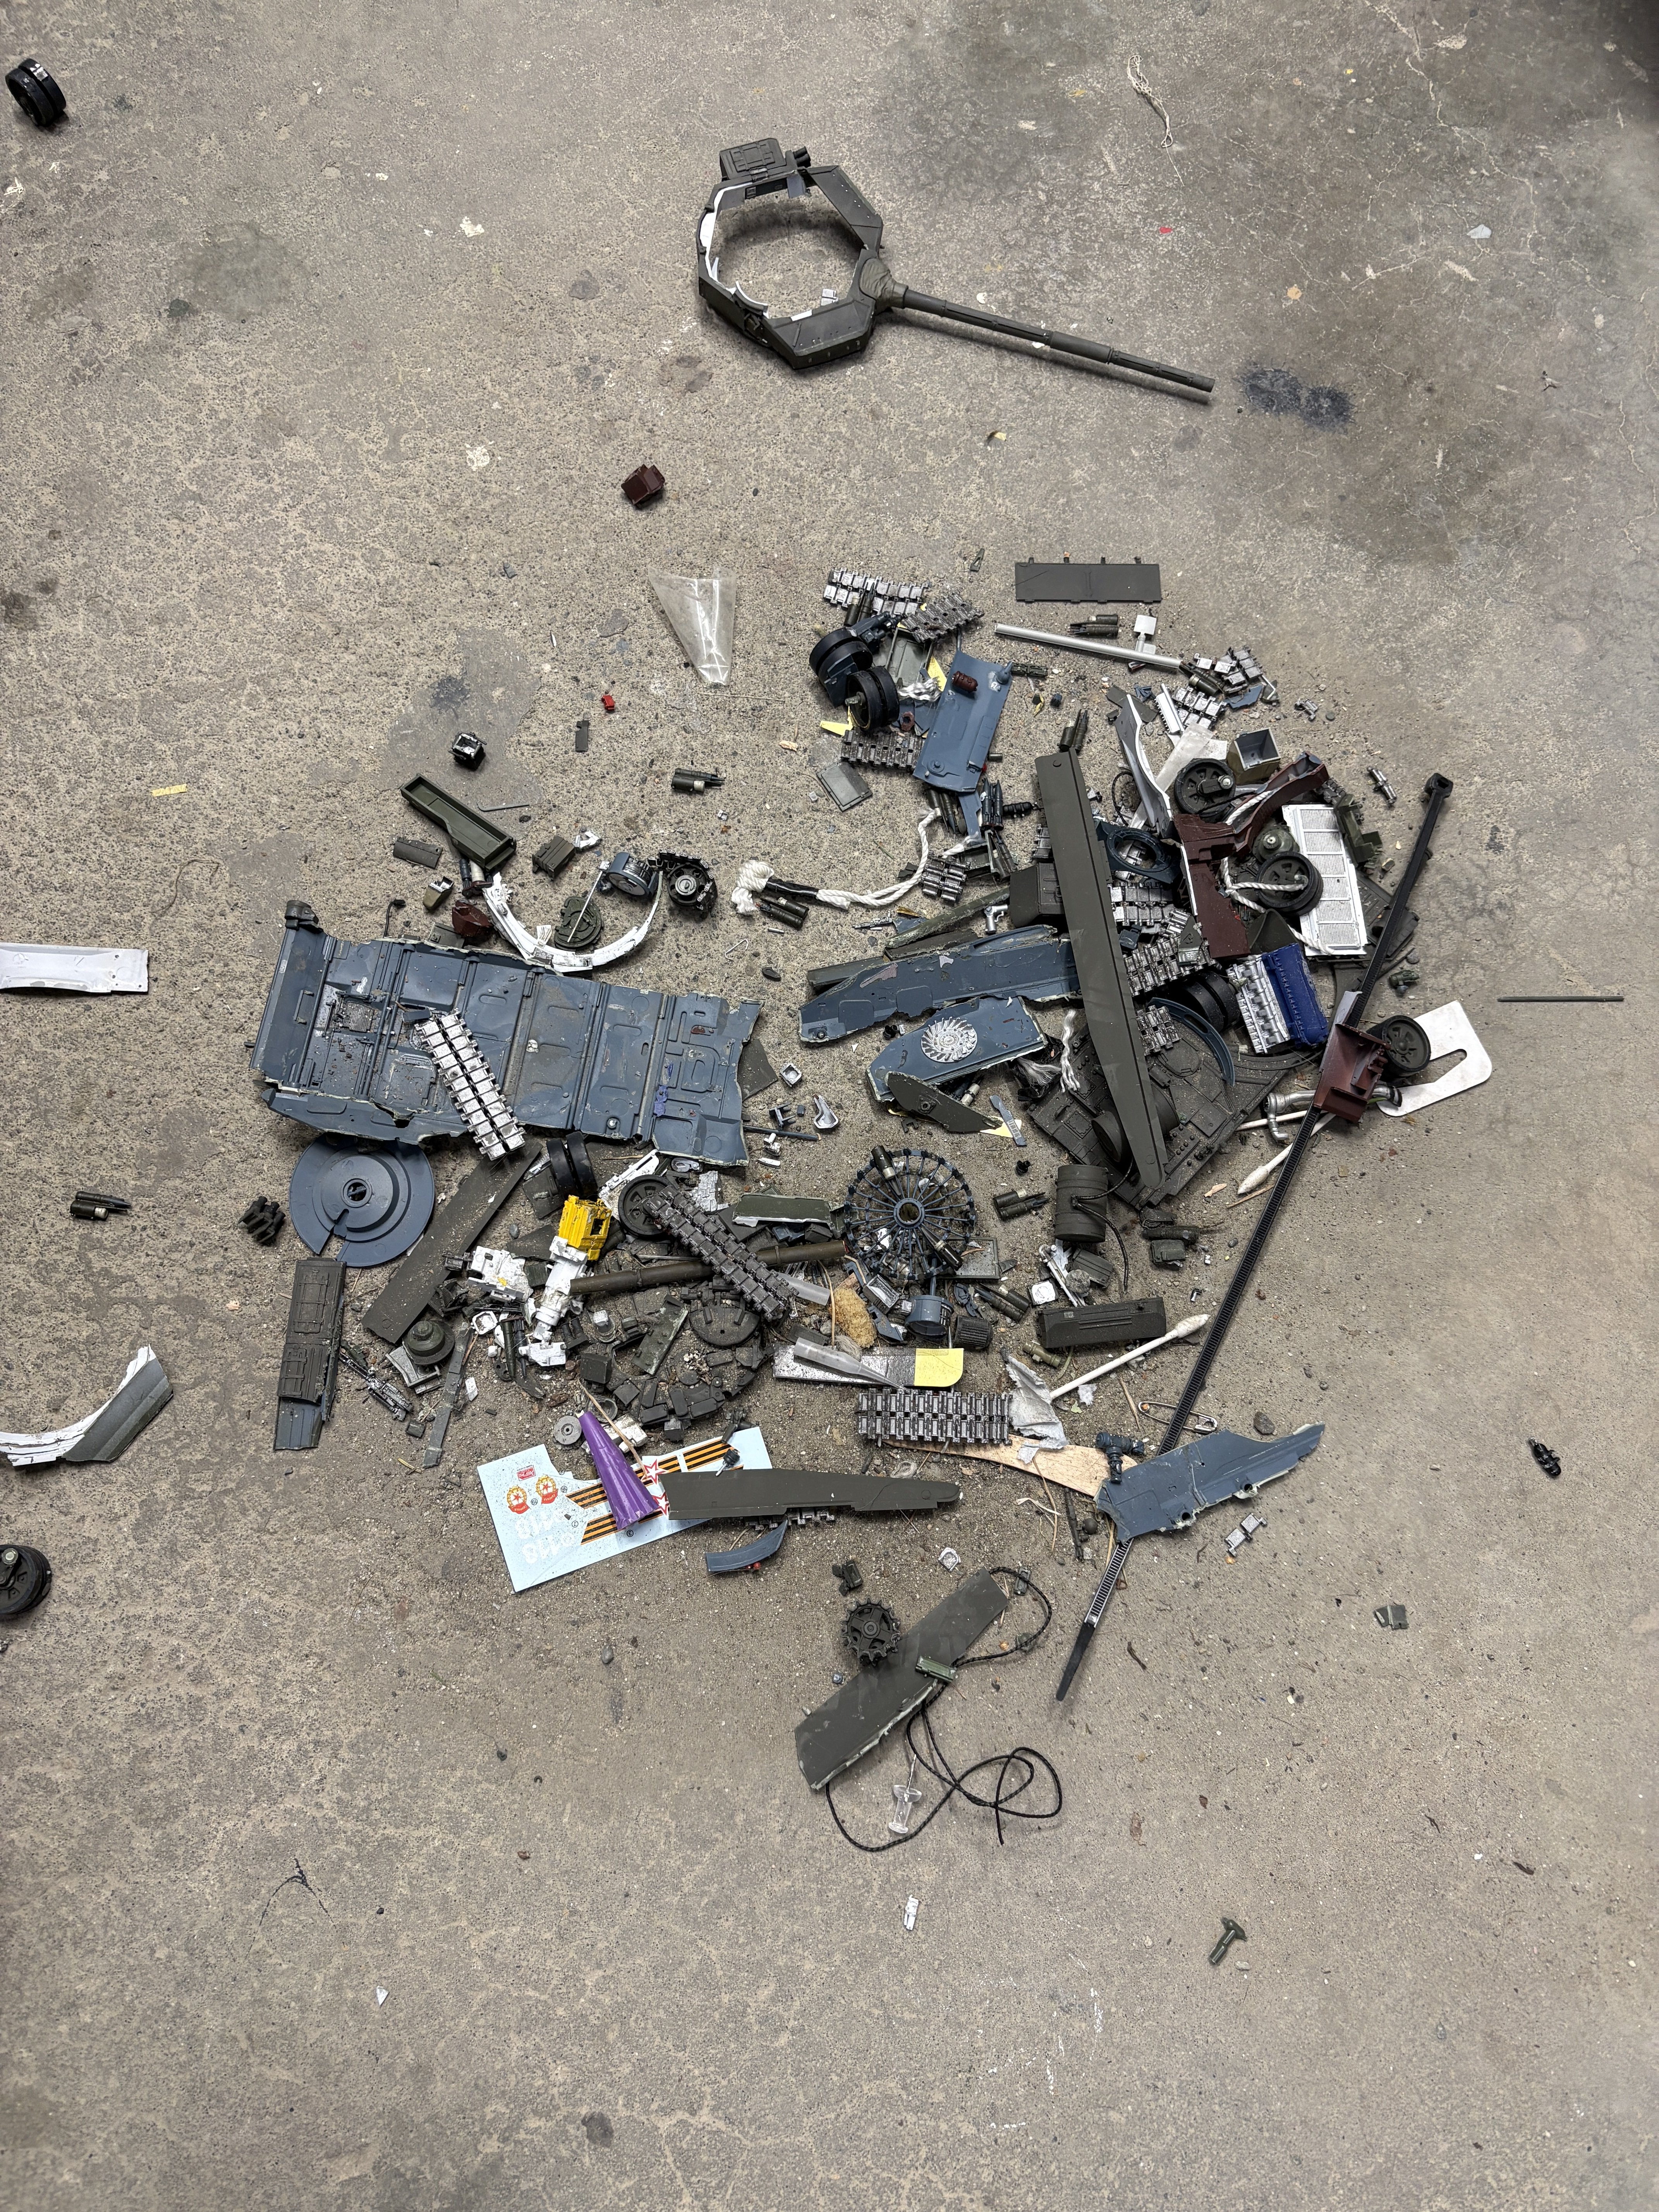
This is the end result. It was a beautiful thing until the tracks. The tracks were a disaster, started ok, they seemed like they would stick together in major lengths while trying install them, but like most of this kind they just constantly broke apart as I tried to install them. In the end, on all four individual link kits I have done so far, any more realistic look gained from individual links is lost by all the super glue needed to keep it together. This kit had multiple issues making installing the tracks a pain. I was doing them last, except for the side skirts. The one I did not catch until a few hours into the track installation is that the kit included two pairs of sprocket wheels that were slightly different in their gear sprockets spacing, with a lot of other parts in this kit they must have been for a different model, maybe a T-72 kit. The tracks the kit provided only fit one type of these sprocket, and I discovered I had one type for one side and the other type for the other side. By this time I had thrown away the extra pieces. So on one side the tracks would not mesh with the sprocket no matter what I did, and what I did was try superglue three or fours times, tried trimming the sprocket teeth, breaking several, etc. They also did not give any layout of the # of links for each major segment, just a total # per side. A road wheel and idler wheel broke off too easily while trying to super glue down the tracks. And I think the worst flaw was that unlike some better kits, they did not show the track install sequence or leave any wheels or the sprockets able to turn, so you could not advance or reverse the lengths of tracks. I had to break of the sprockets and try and super glue on the curved portions of track, then glue the sprockets back on. In the end it and my fingers became a superglue mess and finally I snapped and crushed it. I may be done with armor kits with individual links. I have a Ming Merkava in stash unfortunately with individual links. I am not proud of this end result, but I wanted to share.
 

Attachments

  • IMG_4749.jpeg
    IMG_4749.jpeg
    5.9 MB
Last edited:

Latest posts

Back
Top